

To remove wrinkles from clothes in Photoshop quickly, paint over the creased fabric with the Spot Healing Brush Tool set to Screen blending mode, then sample nearby smooth fabric and let Photoshop rebuild the lighting. Most light and medium creases take under five minutes this way, and deep sharp folds need frequency separation on top.
The part that separates a good retouch from a bad one is texture. Push too hard and the garment turns into smooth plastic, which is why so many online tutorials fail: they erase the crease and everything that made the fabric look like fabric in the process.
Below is the workflow I rely on for apparel and portrait shots. Follow it top to bottom on your first attempt and you will not need to go back and start over.
Table of Contents
- What You Need
- Step-by-Step
- Step 1: Duplicate the Image and Protect the Original
- Step 2: Select the Wrinkled Fabric Area
- Step 3: Remove Wrinkles from Clothes with the Spot Healing Brush Tool
- Step 4: Repair Larger Wrinkles With Content-Aware Fill or Neural Filters
- Step 5: Match Texture, Lighting, and Shadows
- Step 6: Review and Export the Retouched Image
- Common Mistakes When You Remove Wrinkles from Clothes in Photoshop
- Frequently Asked Questions
- What is the best Photoshop tool for removing wrinkles from clothes?
- Can I remove wrinkles from clothes in Photoshop without making the fabric look fake?
- Should I use Content-Aware Fill or Neural Filters for clothing wrinkles?
- How do I keep the shirt’s texture and natural folds after removing wrinkles?
- Does removing wrinkles in Photoshop change the shape of the garment?
- What resolution should I use when retouching clothing wrinkles?
- Conclusion
What You Need
You need Photoshop itself — anything from the Creative Cloud subscription through the current release works, and the steps below are identical on Windows and macOS. Neural Filters and Generative Fill need a current Creative Cloud version plus an active internet connection, since those features call Adobe’s servers when you use them. Older builds without them still handle the first three methods perfectly well.
Before touching anything, open the photo as a Smart Object if you can. Right-click the Background layer in the Layers panel and choose Convert to Smart Object. For wrinkle work the short version is that every filter you apply later stays live in the file and can be reopened and re-tuned instead of baked in permanently.
A graphics tablet makes this job far more pleasant, though a mouse works fine. The one thing that slows everyone down is repeatedly holding Alt to resample the brush source, which is a good argument for memorising the shortcuts in the table below.
Which Tool Handles Which Wrinkle
| Wrinkle type | Best tool | Key setting | Difficulty |
|---|---|---|---|
| Fine soft creases | Spot Healing Brush Tool | Screen blending mode, 50% opacity | Easy |
| Shallow drape folds | Healing Brush Tool | Sample a flat area, 60-70% flow | Easy |
| Deep sharp creases | Frequency separation plus Mixer Brush | Apply Image: Subtract, Scale 2, Offset 128 | Advanced |
| Striped or checkered fabric | Clone Stamp on a mask layer | Shift-click to align lines | Advanced |
| Large damaged areas | Generative Fill | Select area, write a short prompt | Easy |
| Garment shape and drape | Liquify Forward Warp | Small brush, Forward Warp Tool | Medium |
Work from the top of this table downward. Beginners who jump straight to frequency separation on a photo with soft creases usually end up with a blurry mess, because frequency separation solves a problem they do not have.
Keyboard Shortcuts Worth Memorising
| Action | Windows | macOS |
|---|---|---|
| Duplicate layer | Ctrl + J | Cmd + J |
| Merge visible layers | Ctrl + Shift + E | Cmd + Shift + E |
| Sample a source point (Alt-click) | Alt + click | Alt + click |
| Free transform | Ctrl + T | Cmd + T |
| Fill with sampled colour (Alt-click source, Ctrl-click target) | Alt + Ctrl | Alt + Cmd |
| Zoom in and out | Ctrl + + and Ctrl + – | Cmd + + and Cmd + – |
| Add layer mask | Click the rectangle icon | Click the rectangle icon |
Step-by-Step
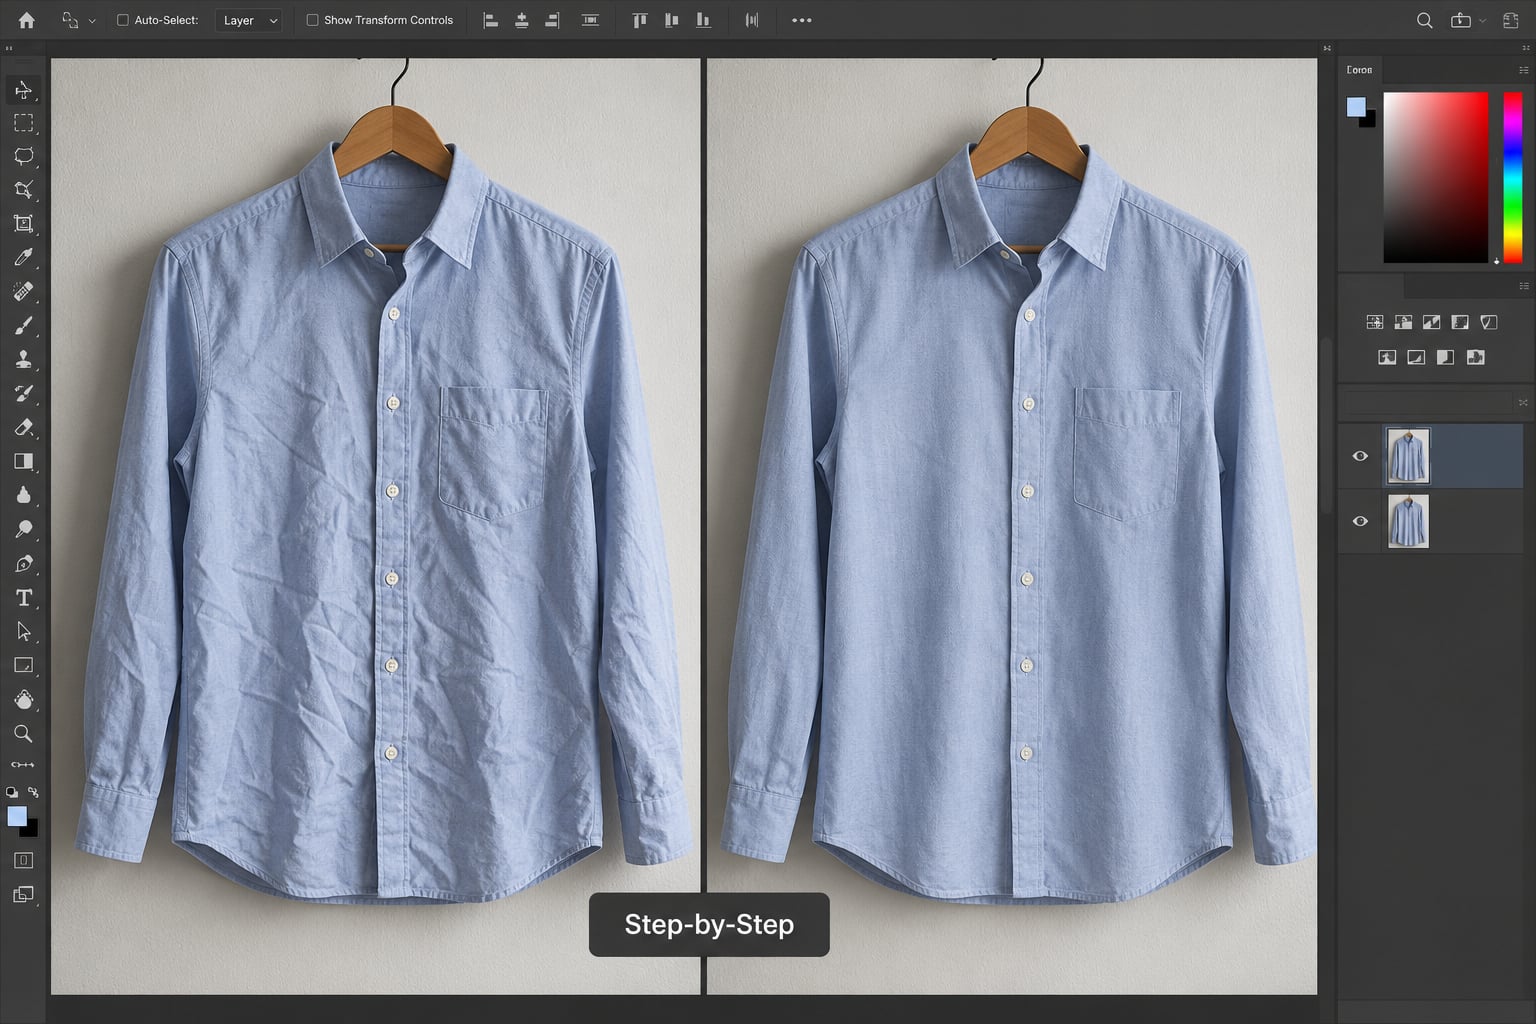
This workflow moves from a protected working copy to a finished, flattened or layered export, and each stage tells you how to tell whether it worked before you move on.
Step 1: Duplicate the Image and Protect the Original
Duplicate the background layer with Ctrl + J (Cmd + J on a Mac) and rename the copy something like Wrinkle Work so you remember which layer is yours. Lock the original layer by clicking the padlock icon in the Layers panel so an errant keystroke cannot move it.
How you know it worked: you now have two identical layers and one of them will not budge. That locked layer is your safety net, and smart objects add a second one.
Step 2: Select the Wrinkled Fabric Area
Select with the Lasso Tool or the Object Selection Tool under Select and Mask. Loosen the edges by 1-2 pixels so your retouch does not leave a hard outline where skin, hair or background meet the garment.
The single most common error happens here: people select the whole garment and then wonder why the fabric looks wrong everywhere. Select only the wrinkled region and add a little breathing room around it.
How you know it worked: a marching-ants outline hugs the creased panel, and no part of a face or the background is inside it.
Step 3: Remove Wrinkles from Clothes with the Spot Healing Brush Tool
Pick the Spot Healing Brush Tool (J) and set the blending mode dropdown at the top of the toolbar to Screen. Screen mode lightens the crease rather than copying pixels, which removes a shadow line without replacing the weave underneath it.
Set size to roughly the width of the wrinkle, hardness around 50-60%, opacity at 50% and spacing near 25%. Hold Alt and click a smooth, unwrinkled patch of the same garment to set the sample point, then paint directly over the crease in short strokes.
Undo the moment the fabric starts looking too clean. Real garments have subtle folds everywhere, and a garment with zero folds reads as digitally plastic. The Clone Stamp Tool is the better choice when you need the pattern to repeat exactly, because the spot healing brush samples colour rather than pattern.
How you know it worked: zoom to 100% and the crease is gone while the fabric weave and the surrounding shadows still sit where they were.
Step 4: Repair Larger Wrinkles With Content-Aware Fill or Neural Filters
Some creases are simply too deep for a healing brush. For those, go to Edit > Content-Aware Fill, confirm the selection, and move the mouse around until the sampled patch looks like clean fabric from the same panel. Blending mode Content-Aware Fill with Adapt to Tone set to High is usually right for garment work, since the sampled patch keeps the surrounding texture rather than replacing it with an average.
For an even faster result on a large area, use Generative Fill: select the region, click Generate Fill in the Properties panel, and describe the fabric you want in a few words such as “smooth grey cotton fabric, soft folds”. The answer is not always right on the first try, so generate a few variants and pick the one whose lighting matches the rest of the garment.
Neural Filters is the other native option. Open Filter > Neural Filters > Skin Smoothing at very low strength and confine it to fabric with a mask; it smooths unevenly across textured cloth, which makes it a last resort rather than a first choice.
How you know it worked: the repaired area matches the light direction of everything around it, and no repeating texture or blotchy patch is visible at 100%.
Step 5: Match Texture, Lighting, and Shadows
Healed areas often sit slightly flatter than their surroundings. Set a new layer above your work and pick the Mixer Brush Tool. Load colour from a smooth area nearby, then scrub gently over the repaired zone at low flow so you rebuild the weave without pushing it around.
For the shadows you removed rather than filled, use dodge and burn instead of healing. On a Soft Light layer with 50% grey painted underneath, dodge with a soft brush to lift the shadow side and burn to deepen it. This reduces how obvious a crease is while keeping real drape, which is the difference between retouching and erasing.
How you know it worked: check at 25%, 50% and 100% zoom. If the edited area draws the eye at 25% because it is brighter or flatter than everything around it, the fix is Curves or Levels on a masked layer, not more healing.
Step 6: Review and Export the Retouched Image
Toggle the visibility of the retouched layer against the locked original with the eye icons in the Layers panel. Side-by-side comparison catches colour drift and halos that working at full opacity never will.
For a layered file, save as PSD with Ctrl + Shift + S and keep every layer intact so the work stays reversible. For a flattened deliverable, merge visible layers with Ctrl + Shift + E, then export with File > Export > Save for Web (Legacy) at JPEG quality 80 or above for marketplace listings, or as PNG when the garment sits on a white background and you need a clean edge.
How you know it worked: open the exported file and check the garment against the untouched original one last time at 100% zoom.
Common Mistakes When You Remove Wrinkles from Clothes in Photoshop
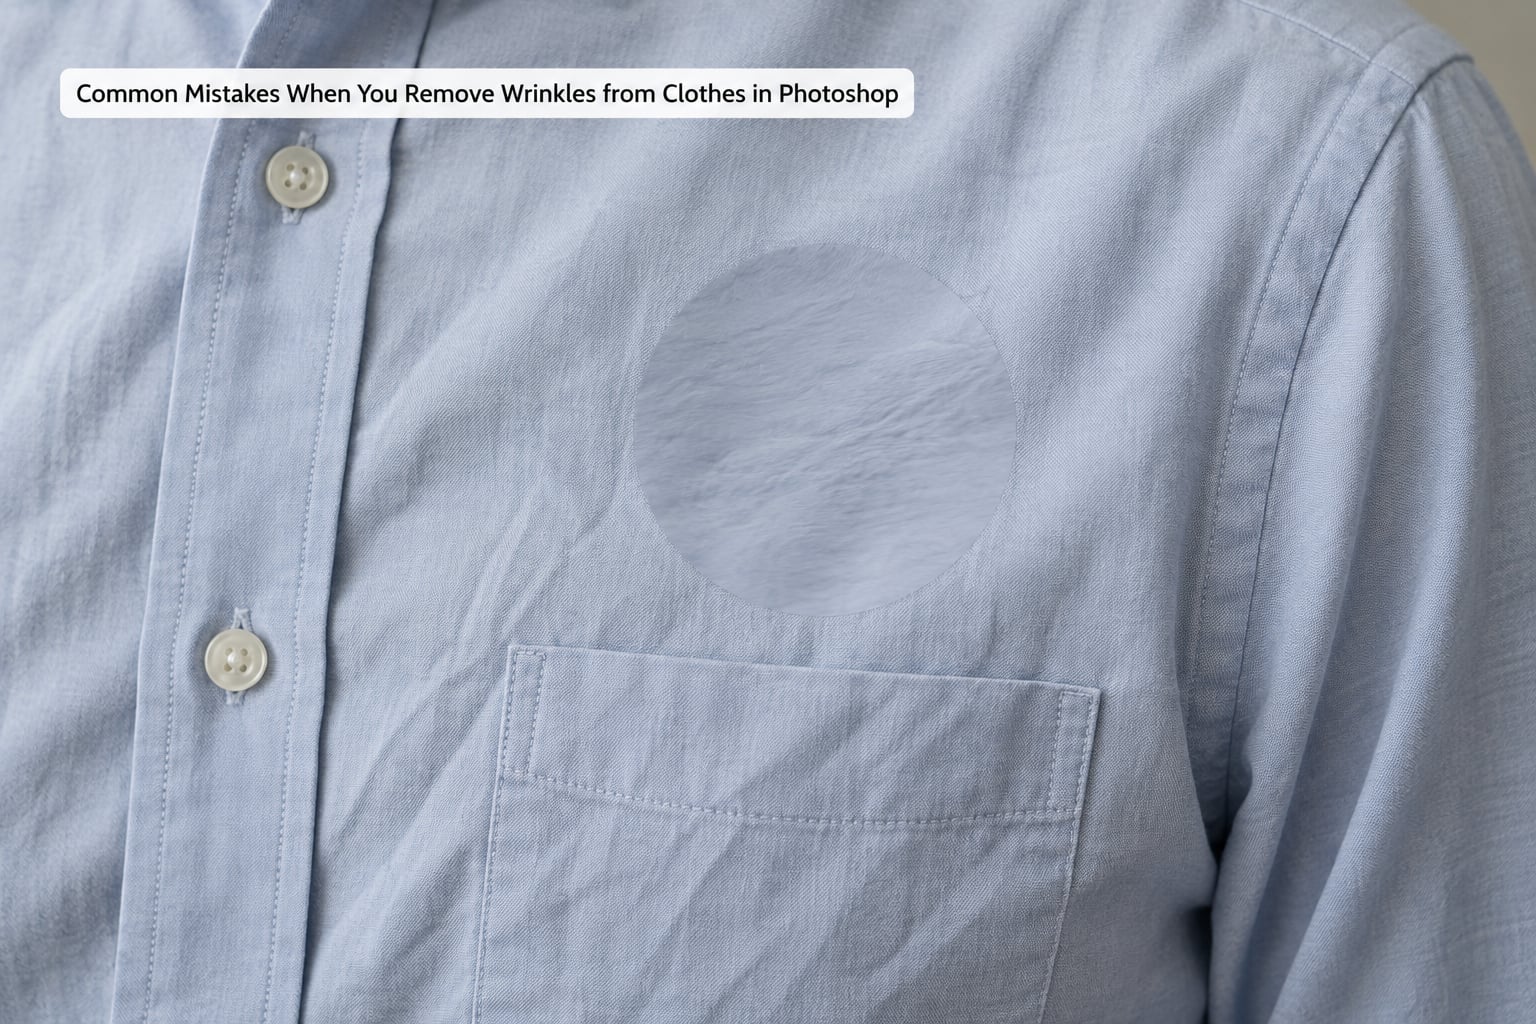
The fabric looks plastic and waxy. The fix is to add texture back rather than heal more: drop a layer filled with the fabric’s own texture, set it to Overlay or Soft Light, mask it to the garment and lower the opacity. Prevention: never take the spot healing brush opacity above 50% on a large area.
Stripes, checks and prints get destroyed. Healing tools sample colour, not pattern, so a healed check disappears into a patch of flat tone. Work on a mask layer, hold Shift while cloning so every stamp aligns to the line above, and then match the tone of the surrounding areas. If frequency separation has already smeared the grid beyond repair, clone a clean block of the pattern back into place instead.
Obvious circular clones. Repeated stamps from the same source create visible repetition. Vary your source point, drop hardness to 30% for soft fabric, and split the area into smaller passes rather than one long stroke.
Dark halos around the garment. You selected too tightly or your selection feather was zero. Re-select with a 2-3 pixel feather and paint slightly beyond the seam onto skin or background.
Shadows point the wrong way. Content-Aware Fill rarely respects the light source. After filling, take a soft brush on a Soft Light 50% grey layer and burn the shadow under the fold back in so the crease reads as a gentle dip instead of a flat plane.
Colour mismatch on dark or low-contrast fabric. Navy, charcoal and burgundy show healing blotches long before cotton does. Sample with the Eyedropper Tool rather than the brush source, and correct any tint with a Hue or Curves adjustment masked to the garment.
The spot healing brush seems to do nothing. Usually three causes: the brush is too small for the crease, the sample point sits on fabric as wrinkled as the target, or the layer is locked. Enlarge the brush to about 130% of the crease width and resample from the flattest area you can find.
Frequently Asked Questions
What is the best Photoshop tool for removing wrinkles from clothes?
The Spot Healing Brush Tool set to Screen blending mode is the fastest and most reliable choice for most creases. Set it to 50% opacity with hardness around 50-60%, Alt-click a smooth area of the same garment to set your sample, and paint over the wrinkle in short strokes. Switch to the Healing Brush for slightly deeper folds, and move to frequency separation only when a crease survives both.
Can I remove wrinkles from clothes in Photoshop without making the fabric look fake?
Yes, and the deciding factor is how little you remove. Heal only the lines that distract, keep a soft brush of the real weave showing through, and use dodge and burn to soften the remaining shadows rather than deleting them entirely. A garment with zero folds looks retouched, so stop while a few natural folds are still visible.
Should I use Content-Aware Fill or Neural Filters for clothing wrinkles?
Use Content-Aware Fill when the wrinkle sits next to clean fabric it can sample from, since the result keeps the surrounding texture and tone. Neural Filters work better for larger damaged areas but smooth unevenly across textured cloth, so confine them with a mask. For deep sharp creases, frequency separation beats both options.
How do I keep the shirt’s texture and natural folds after removing wrinkles?
Duplicate the garment, paint the weave back with the Mixer Brush Tool at low flow, and keep your edits on a layer or mask so you can dial the opacity down when the area looks too clean. Overlay a texture layer set to Soft Light if the weave has gone flat. Never push healing opacity above 50% across a broad section.
Does removing wrinkles in Photoshop change the shape of the garment?
Not by itself. Healing and content-aware fill keep the silhouette because they replace texture inside the existing edges. Shape changes only happen when you deliberately resize or warp, which is what the Liquify Forward Warp Tool is for when a garment drapes oddly and you want to straighten it without losing the fabric.
What resolution should I use when retouching clothing wrinkles?
Work at the resolution you received. If the photo came from a camera, editing the full-size file gives you room to heal small creases without softness. Online generators usually deliver around 2000 pixels on the long edge, which handles visible folds but not fine creasing, so check the zoom level before you start.
Conclusion
Duplicate your layer and lock the original, heal fine creases with the Spot Healing Brush in Screen mode at low opacity, then drop to frequency separation or Content-Aware Fill only for the folds that survive. Stop before the fabric turns glassy and save a layered PSD before flattening for export. That order keeps the weave intact and gives you a fallback whenever a garment fights back.