
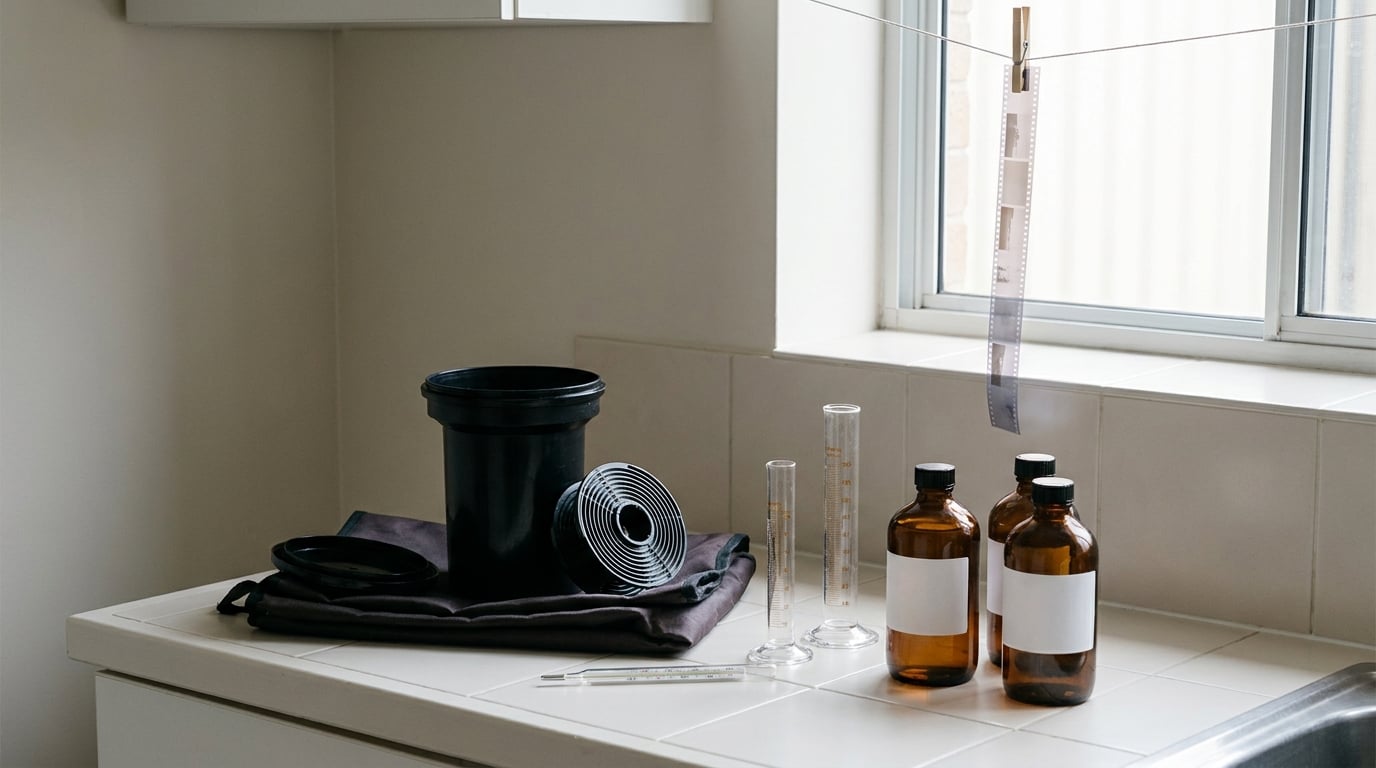
Developing black and white film at home means loading your exposed film onto a reel inside a tank in complete darkness, then running it through four liquid baths in order: developer, stop bath, fixer, and a final wash, before hanging the wet negatives to dry. Once you have the kit, each roll uses a few hundred millilitres of chemistry, which is the only material cost there is.
It is far less fiddly than it looks, mostly because the same recipe repeats every time. The real skill is not the chemistry, it is staying in the published numbers for your film and developer combination and keeping the temperature honest.
Table of Contents
- What You Need to Develop Black and White Film at Home
- Step-by-Step
- Common Mistakes
- Frequently Asked Questions
- Can I develop black-and-white film in a kitchen or bathroom?
- Can I develop film without a developing tank?
- Do I need a thermometer to develop black-and-white film?
- How much water should I use to rinse processed film?
- Why are my negatives foggy, flat, or covered in marks?
- Can I develop different film brands together in one tank?
- Conclusion
What You Need to Develop Black and White Film at Home
Split the kit into two piles. The first is gear you buy once and use for years. The second is consumables you replace, and most of it scales neatly to the number of rolls you shoot.
Reusable gear you buy once
- A developing tank and reel. A plastic tank with a light-tight funnel and lid is the standard choice for home work. Make sure the reel matches your format: 35mm and 120 use different spiral configurations, and 120 reels are noticeably wider.
- A changing bag, or a genuinely windowless room. The bag is a collapsible light-tight sack with a sleeve at the bottom. It costs more than a single roll of film and it removes almost every lighting mistake from the process.
- A thermometer with a degree Celsius scale you can read at a glance.
- Graduated cylinders or marked jugs for measuring concentrate and water, plus a mixing jug for diluting.
- A timer, mechanical or phone-based, that does not sleep mid-cycle.
- Drying clips and a length of string or a clothesline over a sink, plus a measuring syringe for wetting agent.
Nitrile gloves are worth having too, mostly because wet film prints fingerprints that show up in scans later.
Consumables per roll
For a single 35mm roll you need roughly 300ml of working developer, 300ml of stop bath, 300ml of fixer and a few drops of wetting agent, plus water for the washes. Some tank patterns hold more than that, so check your tank’s capacity and buy chemistry in the volume it actually takes. A standard 1-litre tank will comfortably develop two 35mm rolls back to back in one set of chemistry.
The four chemicals and what each one does
| Solution | What it does | Can you skip it? |
|---|---|---|
| Developer | Converts the exposed silver halide crystals into black metallic silver, building density and contrast | No. This is the process. |
| Stop bath | Halt the development reaction so image areas stop getting darker | Technically yes, a plain water rinse works, but a real stop bath costs little and gives you more control on the next roll |
| Fixer | Dissolves away the silver that was never exposed, so the image stops fading in daylight | No. Unfixed film goes milky, brown and permanently damaged. |
| Wetting agent | Lowers the surface tension of water so the film drains without droplet marks | You can skip it, but you will get water spots on the first few rolls |
Mix a working developer solution from concentrate such as Kodak D-76 or Rodinal, or a one-shot liquid such as Kodak HC-110 Dilution B if you would rather not measure concentrate. One-shot chemistry costs more per roll but removes a whole category of error, which is a fair trade for a first session.
Step-by-Step
The workflow below is room temperature throughout, which means roughly 20C / 68F. Every duration, dilution and temperature in the steps comes from the data sheet published for the film and developer you chose, and the digitaltruth Massive Dev Chart is a good free cross-check. Do not take development times from a generic guide, including this one.
1. Prepare the Film, Chemistry, and Workspace
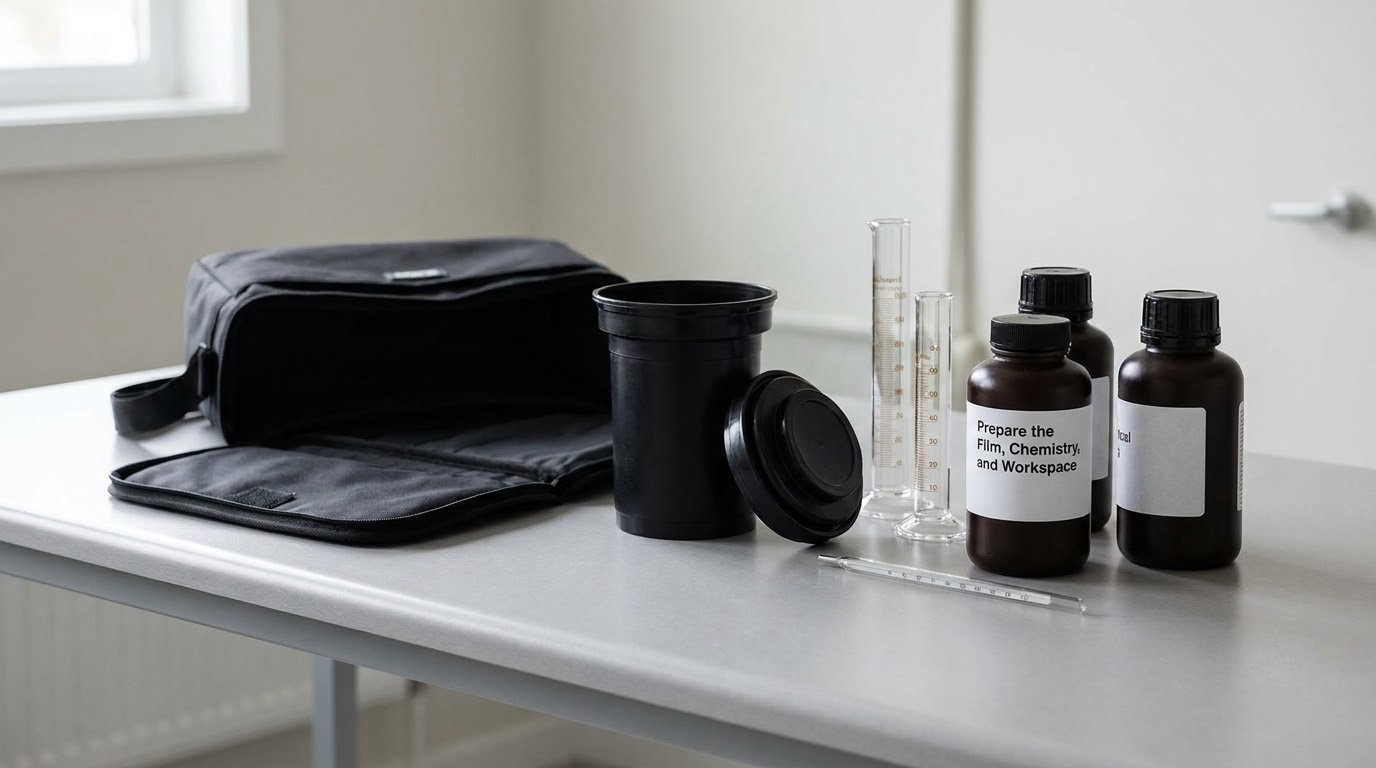
Clear a counter you can wipe down, ideally near a sink, and lay out everything you need before any water is involved. Cover the surface with a plastic sheet or a towel you do not mind staining, because spilled fixer will strip dye out of anything it touches.
Mix each solution to the volume your tank needs, following the dilution on the label or data sheet. Then bring the developer to temperature. Most people measure hot water into a jug, add the concentrate, top up with cold water, and check the thermometer until it lands on the target. A water bath is better if your room swings between cold and hot, because a jug of developer sitting in an open vessel will drift in temperature during a long development.
Confirm the tank is light-tight before you need it to be. Close the funnel and lid without a reel inside and sit in a dark room with your phone camera, or simply run a bright flashlight along the seams in a lit room. If light gets in, the fix is usually a warped lid seal or a funnel that is not seated. A film leader soaked in water and packed around the reel stem blocks light on the way down, which is the belt-and-braces option plenty of photographers use.
2. Mix and Measure the Developer
Dilution is where most first attempts go wrong, so be precise about what the ratio means. A 1+1 dilution means one part concentrate plus one part water, so 150ml of concentrate made up to a final volume of 300ml. It does not mean one part concentrate plus one part water in a tank you then fill twice. Measure the concentrate first, add the concentrate to your mixing vessel, then add water until you reach the final volume on the graduated cylinder.
Use water that is close to the solution temperature, not cold tap straight onto concentrate, and stir from the bottom. Most developers are used at working strength every time for a single roll, or as a one-shot, so you can discard the remainder. If you want to stretch chemistry across several rolls, that is what a replenisher is for, and the manufacturer tells you the ratio to add after each roll.
Check the temperature again after mixing. Diluting hot concentrate with cold water lands somewhere warmer than you expect.
3. Load the Exposed Film into the Tank
Loading is the only genuinely light-sensitive part, and only the loading needs darkness. If you use a changing bag, put the tank, reel and your film in the bag, zip it, then get everything by feel. Practise the motion a few times with a dead roll before you trust yourself with a real one.
You are winding the film onto the spiral so it sits in the channel between the outer wall and the spiral, not tangled in the middle. On a plastic reel, the film enters through a gated slot at the outer end; the little teeth on that gate and the ball bearings in the spiral channel are what keep it tracking. Feed the leader into the gate, pull it through, and turn the reel with one hand while guiding with the other.
Check three things as you go. The sprocket holes should line up with the spiral ribs all the way round. The film should be riding outside the spiral, not peeling off inward. And the reel must end up sitting down at the bottom of the core rather than floating near the top, because film that stops partway up the core gets uneven development. Put the reel in the tank, drop in the light-tight funnel, seat the lid firmly on the collar, and only then bring anything wet to the tank.
4. Develop, Agitate, and Stop the Reaction
Pre-soak in water for the time your data sheet gives, typically a minute or two. This wets the emulsion evenly so developer does not streak the frame during the first few seconds. Pour it off, then pour in your measured developer, seal the tank, and start the timer as the developer goes in.
Your data sheet will specify an agitation pattern. Continuous agitation usually means five or ten firm inversions, with a pause, repeating. Some developers call for four inversions every 30 seconds. Whichever pattern applies, do the number consistently and start counting from the first pour.
At the end of the development time, pour the developer out, fill with stop bath, agitate briefly, and let it sit for the recommended 30 seconds or so. That halts the reaction, and the amount of time spent in stop bath is what determines how sharp the transition into fixing looks. Pour that off, fill with fixer, and give it the full fixing time from the data sheet, agitating the way the manufacturer specifies. Fixer exhaustion is the thing to watch: if the fixing time is for fresh solution and yours has already handled several rolls, extend it rather than risk it.
Now your negatives are safe from light even though they are still wet and milky in the fixer.
5. Rinse, Wash, and Finish the Film
Pour off the fixer and rinse with clean water. The standard community method is Ilford’s fill, agitate, dump: fill the tank, invert five times, pour out, fill again, invert ten times, pour out, fill a third time, invert twenty times, pour out. It costs almost nothing and it clears residual thiosulfate, which is what makes old negatives go yellow and then brown over years.
Add a few drops of wetting agent to a final fill of water, agitate briefly, and pour off. A minute of extra washing will not hurt. Use water that is reasonably free of hardness if you want to avoid marks baked into the emulsion.
6. Open the Film and Inspect the Negatives
Open the tank in normal light now, with gloves on. Pull the film off the reel, unspooling it gently so it does not spring and scratch, and hold it only by the edges and the sprocket holes. If the film resists, wet film is clinging to the reel; a drop of wetting agent on the contact point separates them without force.
You are looking for clear, sharp negatives with visible detail in the shadows and readable, unclipped highlights. A general grey haze across the whole strip means fog from a light leak, a late-closed tank, or contaminated chemistry. Alternating light and dark bands running across the width point at an uneven reel load. Bright, irregular streaks that appear only after drying are almost always water spots or mineral deposits.
Cut the film into strips of a few frames, put them in archival sleeves or a clear sleeve folder, and keep them away from humidity until you scan or print.
7. Dry, Store, and Evaluate the Results
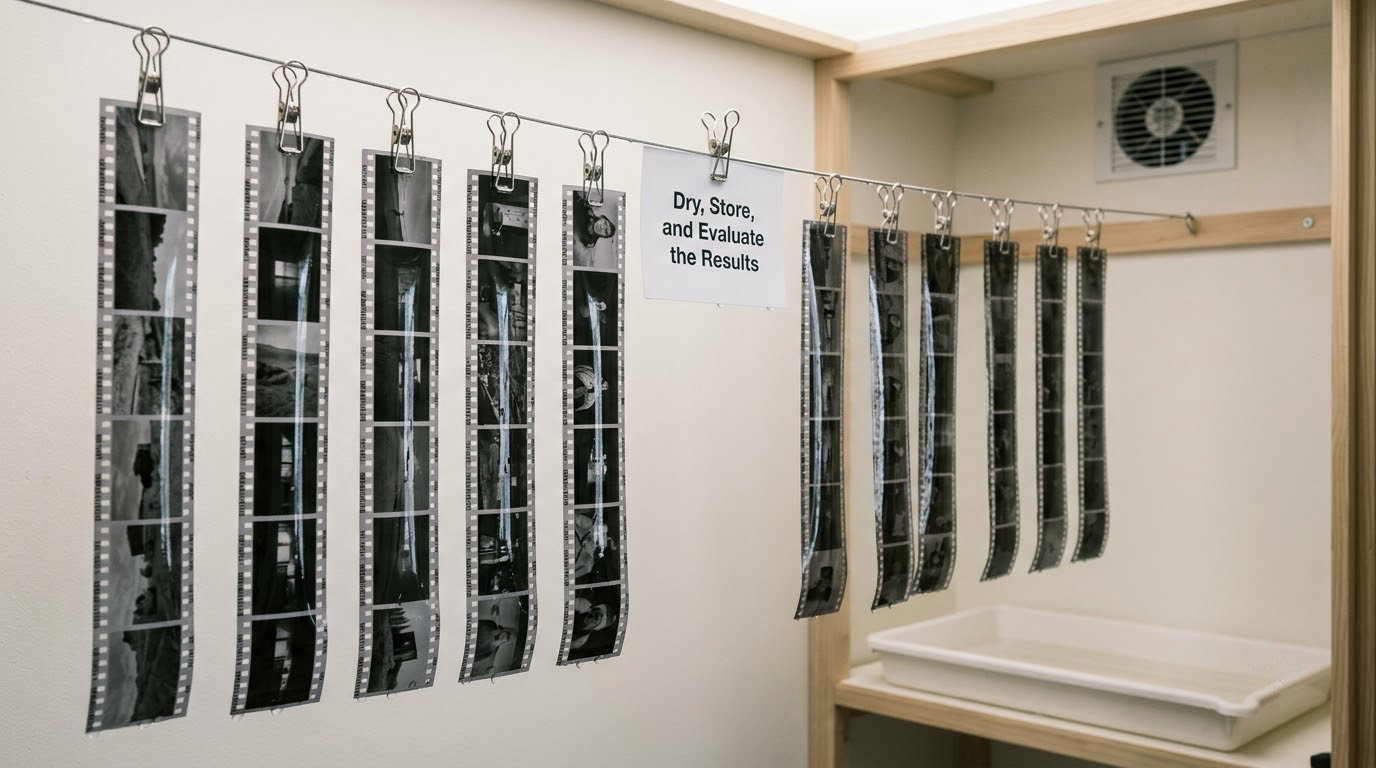
Hang the strips from clips in a bathroom or spare room that is shaded, ventilated and as dust-free as you can manage. Allow a few hours, or overnight if the room is humid. Do not touch the film while it is drying, and do not force it with a hot hair dryer, which will warp the emulsion on thinner stocks.
For storage, roll the developed film emulsion-inward around a core or tube, or keep it flat in sleeves inside a rigid container. Airtight, cool and dry is the whole idea, and in a humid climate that matters more than anything about the film itself.
Write down what you ran: film type, developer, dilution, temperature, development time, agitation and wash. A development log is the fastest way to improve, because the difference between a good roll and a flat one is almost always a single number you can change. Shoot a test roll, change one variable, and compare. Repeat until the negatives on the strips are what you hoped for.
Common Mistakes
Most bad first rolls come down to one of eight things, and each has a clear signature.
| Symptom | Likely cause | Fix |
|---|---|---|
| Whole strip fogged, milky grey, low contrast | Light leak, tank opened before fixing, or chemistry contaminated by an old fixing bath | Test the tank’s light-tight seal, never open it before fixing is complete, and use fresh chemistry for the first roll |
| Thin, flat negatives with weak shadows | Underdevelopment, or developer too cold or too dilute | Confirm the target temperature with the thermometer, check the dilution maths, and match the time to the data sheet |
| Development that stops partway down the strip | Reel not fully seated at the bottom of the core, or film riding outside the spiral | Push the reel down into the core before closing the tank, and check alignment against the spiral ribs |
| Film crumpled or jumped the track, roll lost | Rushing the load, sweaty hands, or very thick film on a plastic reel | Back-curl the leader over a table edge before inserting, use dry hands, and practise with a dead roll |
| Reel jams and skips | Dirt or dried chemistry in the spiral channel | Clean the reel, a denture cleaning tablet in warm water works well, and dry it fully before use |
| Unfixed-looking milky film that keeps darkening | Fixer exhausted or fixing time cut short | Mix fresh fixer, use it for the full stated time, and count rolls per solution |
| Bright spots and blotches after drying | Hard water, insufficient washing, or wetting agent omitted | Wash with the fill, agitate, dump sequence, add wetting agent, and let the final water drain |
| Fine scratches across the film | Dry film rubbing on a rough surface, or handling it while it is still slightly stiff | Keep strips suspended rather than lying flat, and use a smooth rinse before drying |
A few habits do more for consistency than any piece of gear. Write times down rather than trusting your memory between sessions. Keep one dedicated thermometer and check it in fresh water. Develop your first few rolls in a small bathroom where a spill is a wipe rather than a disaster, and resist the urge to try Caffenol, beer or a home-assembled developer until you have a repeatable commercial process under your fingers. Organic DIY recipes are a fun experiment, and they are not something to learn on the only roll of film you care about.
Frequently Asked Questions
Can I develop black-and-white film in a kitchen or bathroom?
Yes, and most people do. A bathroom with a sink is the easiest space because you need to pour a few litres of water down the drain between stages, but a kitchen works too. Cover the counter with something washable, open a window for ventilation, and keep children and pets out of the room while chemistry is out. A bathroom with no window is fine for loading only if you use a changing bag rather than the room itself. Wear gloves, because fixer is the one chemical here that genuinely damages skin and surfaces.
Can I develop film without a developing tank?
You can, using zip bags, a developing tank alternative, or reel-and-hose methods, but all of them leak or let light in more easily than a proper tank. For a first roll, the tank is the piece of kit that pays for itself. A single-leader tank is lighter and cheaper; a 1-litre tank with a spiral reel for 35mm or 120 is what most home developers buy and keep for years. If you want to process a whole session, the tank is also what lets you run developer, stop bath and fixer in sequence without touching the film.
Do I need a thermometer to develop black-and-white film?
Yes. Development chemistry is temperature-sensitive, and being two or three degrees off the recommended figure changes both contrast and effective exposure. A basic glass thermometer costs very little and lasts indefinitely. What matters is reading the temperature of the working solution rather than the room, since hot water added to concentrate will leave the mixed solution warmer than the room suggests. A water bath is a step further than a thermometer alone: it keeps the solution at the target for the whole development, which matters in a warm flat or a cold winter kitchen.
How much water should I use to rinse processed film?
A 35mm roll takes roughly one litre of room-temperature water per tank fill, and you will use a few fills for a proper wash. If your tank holds less than a litre, you can rinse and dump the tank two or three times instead, and the water saved can go down a toilet or into a bucket rather than the sink. Hard water leaves mineral marks on the film, so if you are in a hard-water area, use bottled or filtered water for the final rinse, not the pre-wash. Wetting agent in the last fill stops the marks forming as the film dries.
Why are my negatives foggy, flat, or covered in marks?
Fogged or low-contrast negatives almost always mean light reached the film: a leaking tank, a funnel not seated, or you opened the tank before fixing was finished. Uniform grey haze across the whole strip points to fog, while uneven bands mean the reel was not seated properly in the core. Bright spots that appear only after drying are water spots, usually from a missing wetting agent or hard water. Thin-looking T-Max negatives are not a mistake, though; that film genuinely scans thin, so judge it against a reference rather than a fogged example.
Can I develop different film brands together in one tank?
You can, as long as the films share a development time and temperature from their published data sheets. HP5 Plus, T-Max and Tri-X Pan are close enough in modern published recommendations that many people process them together, but mixing films that need different times gives you a compromise rather than a result. If you are unsure, run one tank per combination for your first few sessions and note the times. You can also use the same chemistry across several rolls in one tank, which is cheaper and far less fiddly than separating everything.
Conclusion
Developing black and white film at home comes down to the same short sequence every time: load in complete darkness, develop at a controlled temperature for the published time, stop, fix, wash with wetting agent, dry, and write down what you did. Nothing in that list changes from roll to roll, which is exactly why it becomes easy.
For a first roll, pick one film and developer combination and follow that combination’s manufacturer data sheet rather than mixing advice from several guides. Ilford HP5 Plus in D-76 is a forgiving place to start, and developers on r/AnalogCommunity keep saying the same: it is hard to ruin. Buy the tank, reel, bag, thermometer and graduates, spend an evening reading the data sheet twice, and process one roll end to end. Get that one right and the rest is just repetition.