
Use 300 DPI (300 PPI) for photos people will look at closely, 150 DPI for large prints viewed from several feet away, and never 72 DPI, which is a screen setting and looks visibly pixelated on paper. The number matters far less than your image’s pixel count, so the real question is how many pixels you have and how big you want to print.
That single idea fixes most of the confusion people run into. A file does not “have” 300 DPI in any meaningful way. It has a certain number of pixels, and once you choose a print size, the resolution follows automatically. Pick the size first, divide your pixel width by the number of inches, and you have your answer.
I have watched people re-save the same photo at 600 DPI three times, upload it, and still receive a soft print. The pixels were never there. Knowing what DPI to use for printing photos starts with unlearning the part you cannot change and measuring the part you can.
Table of Contents
- What DPI to Use for Printing Photos?
- How DPI Affects Photo Print Quality
- Which DPI Is Best for Common Print Sizes?
- What DPI Should You Use for Large Prints and Posters?
- Is 150, 200, or 300 DPI Best for Photo Printing?
- How Do Camera Resolution and Cropping Affect DPI?
- What DPI Do Printing Services Recommend?
- Frequently Asked Questions
- Conclusion
What DPI to Use for Printing Photos?
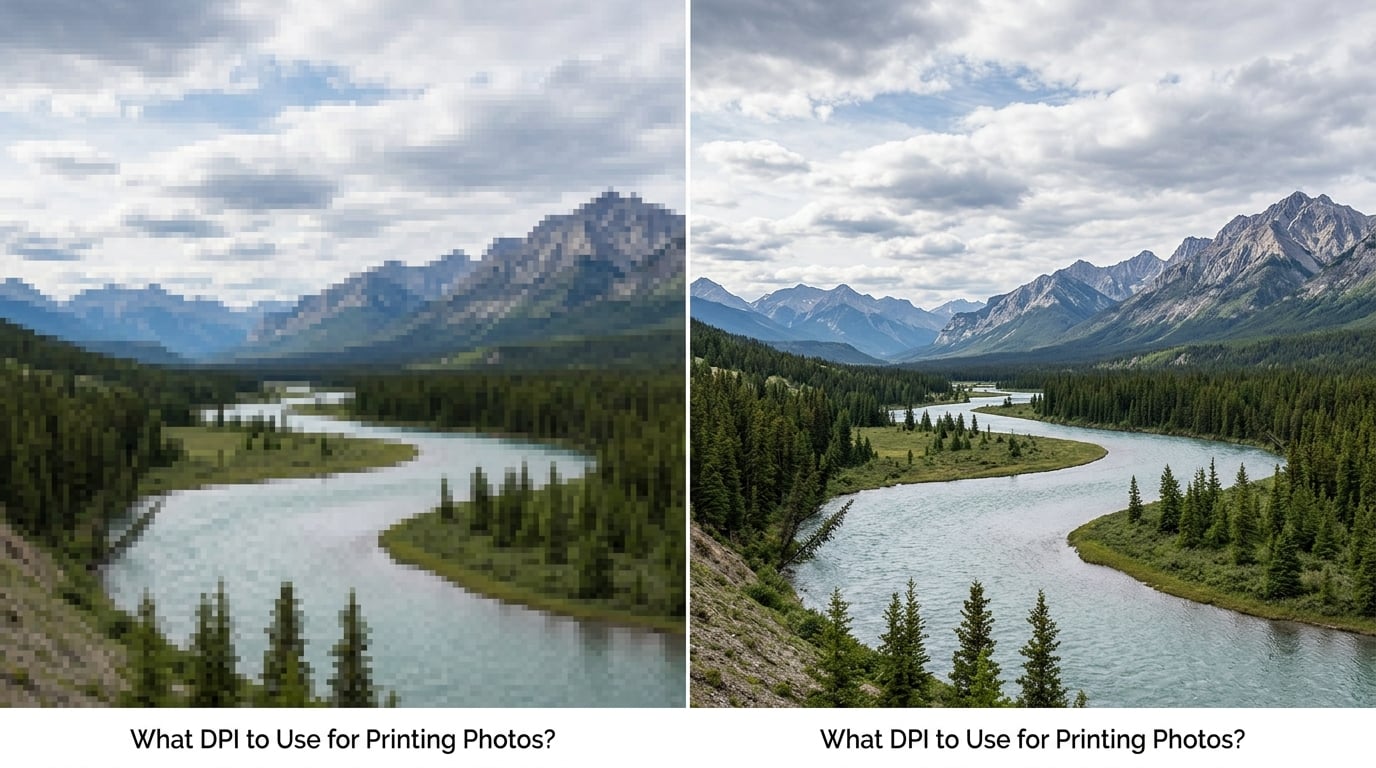
300 PPI is the answer for standard sizes up to about 8×10 inches, for anything framed on a wall and read at arm’s length, and for any photo a professional lab will print for you. At 300 PPI, a pixel is roughly one three-hundredth of an inch, which is smaller than most people can resolve from normal reading distance.
Below that, the picture still works, just with caveats. 150 to 200 PPI is a sensible target for a poster or a canvas you view from across a room, and anything under 100 PPI starts to show its pixels in flat areas like skies and skin. There is no universal correct number, only a number matched to viewing distance and print size.
Here is how the resolution levels differ in practice.
| Resolution | Good for | What you will notice |
|---|---|---|
| 72 PPI | Screens, email thumbnails, small web images | Blocky edges and visible pixel squares on any print larger than about 2×3 inches |
| 96 PPI | Older screen assets, documents | Soft and obviously insufficient above 4×6 inches |
| 150 PPI | Large posters, wall art viewed from 3 feet or more | Slightly soft on close inspection, perfectly acceptable across a room |
| 200 PPI | Mid-size prints like 11×14 and 16×20 | Clean at typical distances, minor softness when you put your nose near it |
| 300 PPI | Standard photo prints, framed art, professional lab work | Sharp to the eye at any normal viewing distance |
| 600 PPI and above | Line art, text, embroidery files, very large formats viewed close | No visible gain for photographs, just bigger files |
One thing worth saying plainly: the resolution listed inside your file is a label. You can change a 72 PPI image to 300 PPI in any editor with a click, and the pixel count stays exactly the same. People search for what DPI to use for printing photos expecting a setting to adjust, and there is no setting worth adjusting.
How DPI Affects Photo Print Quality
Your file has a fixed number of pixels, usually somewhere between 12 and 50 megapixels. Effective resolution is that pixel count divided by the physical size of the print.
Here is the formula in plain words: print size in inches equals pixel width divided by pixels per inch. Written symbolically, Print size (inches) = pixel width / PPI, and the reverse works too: pixels needed = print width (inches) x PPI.
Because the pixel count is fixed, doubling the print size halves your effective PPI. A 6000×4000 file printed at 8 inches wide gives 750 PPI, which is far more than anyone needs. The same file at 30 inches wide drops to 200 PPI, which is a sensible poster. Push it to 60 inches and you are at 100 PPI, and the poster starts to look soft even across the room.
Viewing distance is what makes higher resolution worth having. Human vision resolves detail down to roughly one arcminute, which works out to a practical rule of thumb used in imaging: required PPI = 3438 divided by the viewing distance in inches. Held at 12 inches, that calls for about 286 PPI, so 300 PPI gives you a small margin. Viewed at 24 inches it calls for 143 PPI. Viewed at 36 inches, only about 96.
That is the whole reason 300 PPI became the standard. It is not a magic number; it is roughly what your eye can resolve when you stand about a foot from a wall-hung photo. Push past 300 and you are paying in file size and ink for detail no one will see. Drop well below 150 and the print stops looking like a photograph of something.
Paper changes the perceived result too. Ink spreads slightly into uncoated and matte stocks, a phenomenon printers call dot gain, and that softens fine texture and sharp edges more than a glossy or lustrous surface. Canvas and metal substrates add their own texture on top. A 200 PPI image on matte cotton rag often looks softer than the same image at 200 PPI on a glossy print, which is another reason not to chase PPI numbers blindly.
Which DPI Is Best for Common Print Sizes?
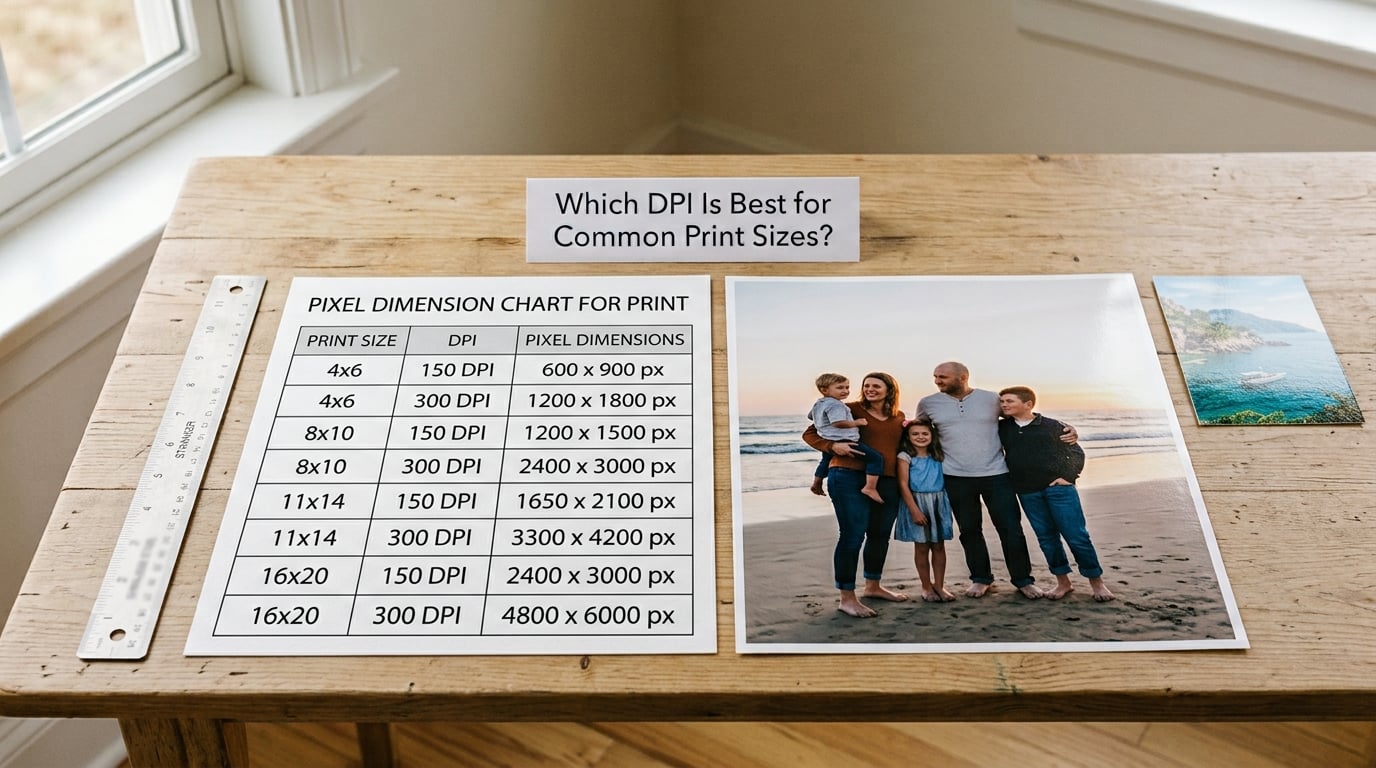
Standard photo sizes have a well-known pixel requirement at 300 PPI, and knowing it saves you from doing the division by hand every time. The table below lists the pixel dimensions you need at three practical resolution targets.
| Print size (inches) | At 300 PPI | At 200 PPI | At 150 PPI |
|---|---|---|---|
| 4×6 | 1200 x 1800 px | 800 x 1200 px | 600 x 900 px |
| 5×7 | 1500 x 2100 px | 1000 x 1400 px | 750 x 1050 px |
| 8×10 | 2400 x 3000 px | 1600 x 2000 px | 1200 x 1500 px |
| 11×14 | 3300 x 4200 px | 2200 x 2800 px | 1650 x 2100 px |
| 16×20 | 4800 x 6000 px | 3200 x 4000 px | 2400 x 3000 px |
| 18×24 | 5400 x 7200 px | 3600 x 4800 px | 2700 x 3600 px |
| 20×30 | 6000 x 9000 px | 4000 x 6000 px | 3000 x 4500 px |
| 24×36 | 7200 x 10800 px | 4800 x 7200 px | 3600 x 5400 px |
| A4 (8.27 x 11.69) | 2480 x 3508 px | 1650 x 2340 px | 1240 x 1750 px |
Read the 300 PPI column as the target for anything you will hold or stand near. Read the 150 PPI column as the floor for a wall piece that nobody will press their nose against. A 24×36 poster at 150 PPI needs 5400 pixels on the long edge, and most modern cameras produce that comfortably.
Cropping eats into these numbers, and so does aspect ratio. A 3:2 camera frame printed at 8×10 will need cropping on two sides to fill the 4:5 shape, and every crop removes pixels from the final image. Crop a 24-megapixel file down to a square and you may fall under the 300 PPI threshold for an 8×10. Photographers on forums repeat the same correction constantly: decide your crop ratio first, then check whether your file still clears the size you want.
How Do You Calculate DPI for a Photo Print?
Divide the image’s pixel width by the intended print width in inches. That gives you the effective PPI directly.
A 3000-pixel-wide image printed at 10 inches wide gives 3000 divided by 10, which is 300 PPI. Now change the print to 20 inches and the same file gives 150 PPI. The file did not change at all, only the print size, which is exactly the point people miss.
Repeat the calculation for height and use whichever number is lower. A 3000×2000 image printed at 10×6.67 inches gives 300 PPI in both directions, but printed at 10×10 inches it gives 300 PPI across and 200 PPI down. The weaker direction is the one that shows up as softness, so check both before you order.
If either result falls short of your target, you have three honest options: print smaller, crop less aggressively, or accept a lower PPI that suits the viewing distance. Enlarging the file in software does not count as a fourth option.
What DPI Should You Use for Large Prints and Posters?
Large prints relax the resolution requirement because the viewer moves away from them. A 24×36 canvas hung above a sofa might be six feet from where most people stand, and at that distance 150 PPI holds up well. If someone walks up and studies it, they will notice softness that 200 or 300 PPI would have avoided.
The trade-off is straightforward. Doubling the physical print size at the same PPI doubles the pixels needed, so a 24×36 at 300 PPI demands 7200×10800 pixels, roughly 78 megapixels. Few cameras produce that natively. Dropping to 150 PPI halves the requirement to 3600×5400 pixels, about 19 megapixels, which any modern camera clears with room to crop.
Fine-art and large-format work is where the higher end earns its keep. Giclée prints on cotton rag, dye-sublimation fabric and metal prints reward 300 PPI even at 24 inches, because the surface holds fine detail and because buyers examine these pieces at close range in galleries and showrooms.
One practical note on printers: many large-format machines physically cap below 300 PPI because the ink dots become larger to cover more area. So a 150 PPI file at 24×36 is frequently already more than the hardware can render, and paying for 300 PPI pixels buys nothing on that particular machine.
Is 150, 200, or 300 DPI Best for Photo Printing?
300 PPI wins for standard sizes and close viewing, 200 PPI handles mid-size and larger work, and 150 PPI is a deliberate choice for viewing distance rather than a compromise. Here is how the three compare on the factors that actually show up in the finished print.
| Factor | 150 PPI | 200 PPI | 300 PPI |
|---|---|---|---|
| Detail retention | Visible pixels in smooth areas up close | Clean at normal distances, mildly soft at 12 inches | Sharp at any ordinary viewing distance |
| Max comfortable viewing distance | About 2 feet | About 1.5 feet | About 1 foot and closer |
| File size for a 16×20, uncompressed RGB | About 22 MB | About 38 MB | About 86 MB |
| Camera needed for a 24×36 | About 19 megapixels | About 35 megapixels | About 78 megapixels |
| Best suited to | Posters, banners, background graphics | 11×14 and 16×20 wall pieces, wall art | 4×6 through 8×10, framed photos, lab prints |
| Risk of visible softness | High on matte and textured stocks | Moderate | Very low |
File size is the practical argument people underestimate. A 16×20 at 300 PPI is roughly four times the data of the same print at 150 PPI, which matters for upload limits on consumer photo sites and for how long a file takes to move around.
My rule when somebody asks without giving me a size: 300 PPI for anything up to 8×10, 200 to 300 PPI for 11×14 through 20×30, and 150 to 200 PPI for 24×36 and above. Then check the result against the viewing distance formula and adjust.
How Do Camera Resolution and Cropping Affect DPI?
Your source image sets the ceiling. A 12-megapixel phone camera produces 4032×3024 pixels, which clears 300 PPI for a 13×10 print and nothing larger. A 45-megapixel body at 8256×5504 gives you 300 PPI out to roughly 27 inches wide. The table maps common camera resolutions to their maximum 300 PPI print size.
| Resolution | Typical pixel dimensions | Max print at 300 PPI | Max print at 150 PPI |
|---|---|---|---|
| 8 MP | 3264 x 2448 | 10 x 8 in | 21 x 16 in |
| 12 MP | 4032 x 3024 | 13 x 10 in | 26 x 20 in |
| 16 MP | 4608 x 3456 | 15 x 11 in | 30 x 23 in |
| 24 MP | 6000 x 4000 | 20 x 13 in | 40 x 26 in |
| 36 MP | 7360 x 4912 | 24 x 16 in | 49 x 32 in |
| 45 MP | 8256 x 5504 | 27 x 18 in | 55 x 36 in |
| 50 MP | 8640 x 5760 | 28 x 19 in | 57 x 38 in |
| 108 MP | 12000 x 8000 | 40 x 26 in | 80 x 53 in |
Cropping subtracts from both dimensions at once, and the subtraction is not linear. A 6000×4000 file cropped to a 1:1 square gives you 4000×4000, so the 20×13 maximum print becomes 13×13 at 300 PPI. Photographers find this out the expensive way, after ordering a 20×30 canvas that came back short.
Interpolation, the mathematical process editors use when you enlarge an image, estimates the values of new pixels from their neighbours. It produces a larger file and a plausible-looking preview, and it adds no detail that was not captured. Designers on community forums put it plainly: a 72 PPI image placed in a 300 PPI document is still a 72 PPI image with a new label.
AI upscalers do better than classic interpolation, especially on edges and fine texture, but they invent plausible structure rather than recover recorded detail. Forum consensus treats 2x as a reasonable ceiling for print work, and 4x as something to look at closely before trusting on a large canvas.
What DPI Do Printing Services Recommend?
Most online labs and professional printers ask for 300 PPI at the final print size, which is the recommendation I would follow for anything going to a lab. The requirement usually arrives as a pixel-dimension minimum rather than a resolution field, because the lab’s software computes your effective PPI from the file and the size you selected.
That system is why a file gets flagged as low resolution at checkout. You selected a 16×20 size, the file was 2000 pixels wide, and the lab’s check returned 100 PPI. A larger print size in the cart means a higher required pixel count, so the same file that passed at 8×10 fails at 16×20. Uploading the original from your camera rather than a compressed copy is usually the whole fix.
Consumer photo sites and print-on-demand marketplaces work similarly, with a difference: many of them ignore the DPI metadata completely and check only the pixel dimensions against the product’s maximum size. Sellers on these platforms report exactly that split, which is why a file that passes one site gets rejected by another for the same print.
Print shops will also tell you which resolutions their equipment can genuinely render. If a lab’s large-format machine tops out near 200 PPI, submitting 300 PPI files just inflates the upload. Ask before you prepare, particularly for canvas and metal.
When you submit, export at the exact final print size, use a good-quality JPEG or a TIFF for large work, and keep the file in the sRGB color space unless the lab has supplied its own ICC profile. Converting to CMYK yourself without a profile from the printer tends to shift colors rather than improve them.
Frequently Asked Questions
Is 300 DPI good enough for printing photos?
Yes, for any standard photo size and anything viewed from about a foot away. 300 PPI is the resolution the printing industry settled on because it is roughly what the human eye can resolve at normal reading distance. Going to 600 or 1200 DPI adds file size without adding visible detail for a photograph, and those higher values matter for line art, text and embroidery files rather than continuous-tone images.
How many pixels do I need to print a photo?
Multiply the print width in inches by 300 for standard work. A 5×7 print needs about 1500 x 2100 pixels, an 8×10 needs 2400 x 3000, and a 16×20 needs 4800 x 6000. If your file falls short of the number in the cheat sheet, either print smaller or accept a lower PPI that suits the distance from which it will be viewed.
Can you make a low resolution photo high resolution before printing?
Not in any real sense. Enlarging a file, whether through traditional interpolation or an AI upscaler, produces more pixels without recording more detail, so the print looks softer rather than sharper. The practical moves are to print a smaller size, find a higher-resolution original, or scan a physical print at 600 DPI if the source is a print rather than a digital file.
What is the difference between 72 DPI and 300 DPI for printing?
72 PPI is a screen resolution. On paper it means one pixel covers about a twelfth of an inch, which becomes obvious on any print bigger than a couple of inches across. 300 PPI packs roughly four times as many pixels into the same space, so edges look smooth instead of stepped. The two numbers describe the same pixels at different physical sizes, not different levels of image quality in the file itself.
How do I check the resolution of a photo before printing?
On Windows, right-click the file, choose Properties, then the Details tab, where Dimensions shows the pixel width and height. On a Mac, select the file in Finder and press Command-I, then expand the More Info section. In Photoshop, open Image and select Image Size. Once you know the pixel width, divide it by your intended print width in inches to get the effective PPI.
Conclusion
Start with the size you intend to print, then divide your image’s pixel width by that width in inches. The result is the only resolution your file actually has, and no setting in any software will improve it.
For most people, that calculation lands on 300 PPI and the answer to what DPI to use for printing photos is simply 300. Drop toward 200 for mid-size wall pieces, toward 150 for posters seen across a room, and stay far away from 72.
When a print comes back soft, the file was almost always too small for the size ordered. Check the pixel dimensions against the cheat sheet before you upload, keep the original rather than a compressed copy, and confirm the lab’s own requirements if you are ordering something large or unusual.