
To frame a photograph, decide what the picture is about, walk to a position that supports it, choose your orientation, place the subject on purpose, check all four edges, then make several variations before you settle on one. Most beginners know the rules and still freeze when the camera comes up, so treat framing as a short sequence of decisions rather than a single instinct.
A note on wording, because it trips people up: here we mean framing inside the camera, deciding what sits at the edges of the shot. Physically mounting a finished print in a mat and a frame is a different job with its own steps, and plenty of searchers mean that one instead. The walkthrough below is about composition.
It takes about fifteen seconds of extra attention per frame, and most of the improvement arrives in the first few weeks once the decisions stop feeling like instructions.
Updated for October 2026.
Table of Contents
What You Need
You need four things, and only the first one costs money.
A camera or a phone. Any camera will do; a phone in portrait or landscape orientation has the same decisions available to it, only without the physical viewfinder.
One subject you can name in a few words. If you cannot say what a picture is about in one sentence, the frame will not know either. That single sentence is the most useful piece of preparation in this whole list.
Enough familiarity with the scene to know where the light is falling and what will be behind your subject. Walking ten paces sideways often changes the background more than any lens change you could make.
Optionally, gridlines. Most cameras have a thirds grid in the menu, and phones have a grid toggle in the camera settings. It is a training aid rather than a target, so switch it off again once it stops being useful.
Nothing else. Lenses, filters and gimbals do not fix framing decisions, they just change what the framing decision costs you.
Step-by-Step: How to Frame a Photograph
Nine steps, and you can reorder some of them freely. What matters is that each decision gets made deliberately rather than by habit, and that you finish with more than one option to choose from.
1. Decide What the Photograph Is About
Start with the sentence, not the camera. “One cyclist against a wall of fog” is a photograph; “the street” is not.
Once you have the sentence, everything that does not support it becomes a candidate for removal or exclusion. That usually means shifting position until a lamp post stops growing out of your subject’s shoulder. Beginners often try to solve this with a tighter lens, when a step sideways solves it for free.
It worked if you can point at the finished frame and say which part carries the story.
2. Choose a Camera Position
Moving forward or back changes scale and how much background you include. Stepping left or right changes what sits behind the subject and which surfaces catch the light.
Your height matters as much as your direction. Standing gives you the viewer’s eye level, crouching puts you closer to the ground plane and often isolates a subject from a busy horizon, and a slightly elevated position can remove overlapping clutter behind a row of people or a line of fence posts.
There is no correct position, only a more or less revealing one. Give yourself three or four attempts at the same subject before you accept the frame.
3. Set the Orientation
Horizontal framing suits width: landscapes, groups, architecture and anything where two things need to sit beside each other and relate.
Vertical framing suits height and depth: a single standing figure, a tree, a doorway, a tall building, or a person walking away down a street. Turning the camera is free, so do it whenever the subject feels squeezed.
Pick the orientation that matches what the subject does, not the one your hands default to.
4. Place the Subject Deliberately
Rule-of-thirds placement means putting the subject near one of the four points where a three-by-three grid crosses, and it works because the off-centre position leaves somewhere for the eye to travel.
Centred placement has its own uses. Symmetrical architecture, reflections in water, and a front-facing portrait against a plain wall all get stronger from the middle, because the symmetry itself is the subject.
Off-centre framing is the general case: subject on a third, space on the opposite side, and the whole arrangement leaning in one direction. Try all three at the same spot and look at them side by side before you choose. That comparison is the fastest teacher most beginners never use.
5. Check Every Edge
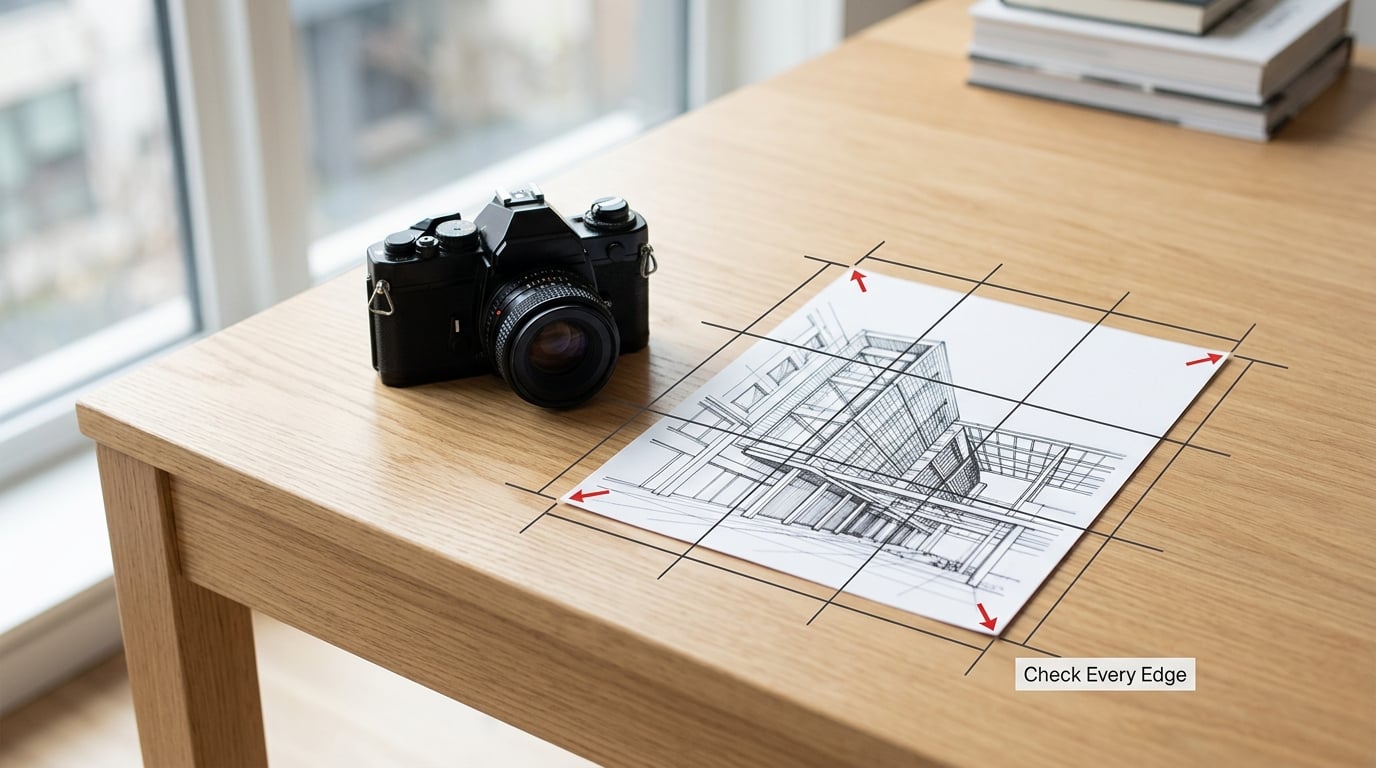
Walk the frame one edge at a time, the way you would check the perimeter of a room before leaving.
Look for clipped feet, a hand half out of shot, two heads merging into one, a pole touching the top of someone’s head, a bright patch of sky that pulls attention, and objects that are only half introduced at the edge. A half-introduced object reads as an accident, because the viewer has to work out whether you meant to include it.
The horizon line deserves its own check. Straighten it unless you have a deliberate reason to tilt, and if you do tilt, make sure no other vertical in the frame leans the other way.
6. Use Space in the Direction of Looking
When a person or a moving subject faces or moves in a direction, leave room on that side. That is lead room, and it stops a subject from appearing to run into the wall of the frame.
Objects get the same treatment, usually called look room. A person glancing off to one side needs space in that direction, otherwise the composition feels like it is resisting them.
Tight framing works too, when the pressure is the point: a face filling the frame, a hand on a tool, a car passing close to camera. Just decide that deliberately. Cramped space reads as pressure; spacious space reads as calm. The mistake is landing in between by accident.
7. Balance Weights and Negative Space
Visual weight is how much attention an element pulls. A face carries a lot of weight, a small bright object carries some, a large empty area carries its own through sheer size.
Negative space is the empty or quiet part of the frame, and it is not leftover. It gives the subject somewhere to sit and lets the eye rest, which is why a single bird in a wide pale sky can read stronger than the same bird filling the frame.
A small subject can be balanced by a large quiet area, by strong colour, by contrast, or by a second point of interest placed opposite it. You do not need two large things to balance a frame, and you do need something on the other side of the subject when the empty side is on the same side.
8. Look for Distractions and Layering
Scan the area directly behind your subject for anything brighter than the subject itself: a patch of sky, a window, a road sign, a reflection. The eye goes to the brightest contrast in the picture, and it will go there instead of your subject.
Branches, aerials, poles and railings cut into heads. Reflections double a head you thought was safely out of shot. Horizons that slice through a subject are the most common one, and they are fixed by changing your height by a foot or two.
Your four options are: move, wait for the clutter to shift out of the way, change depth so the background softens, or add a foreground layer that gives the eye somewhere better to go. A post or a railing in the near foreground can anchor a flat composition in seconds.
9. Make Several Final Frames
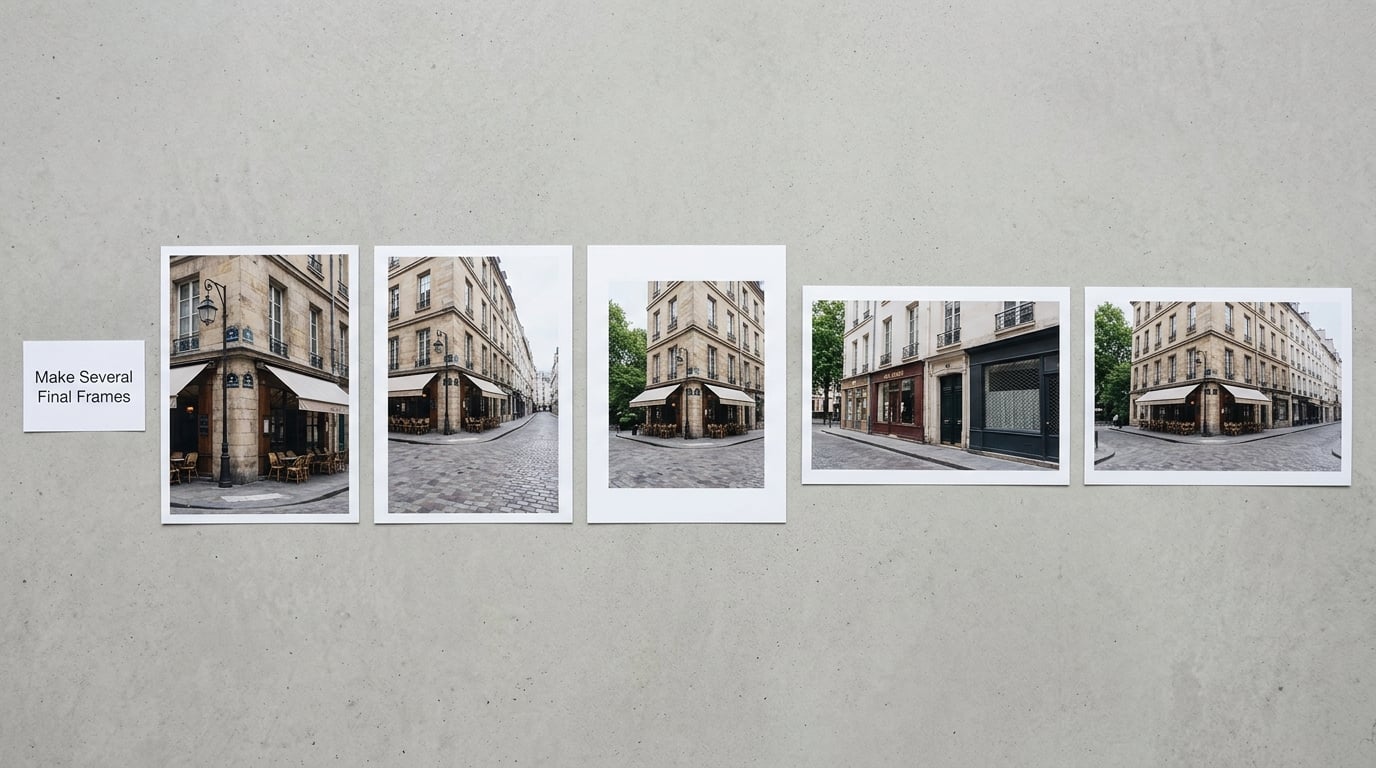
Once the frame is close, stop shooting randomly. Make a test frame, then change one thing at a time: slightly more space above, subject shifted a little left, a step closer.
Three variants of the same composition is the standard number that keeps the process honest. Photograph your subject centred, upper left and upper right, then pick the best one rather than deciding in the moment.
Look at the candidates together, not one at a time. Back to back, the difference between a cramped frame and a generous one is obvious in a way it never is through the viewfinder. Make one last adjustment for clarity, then shoot.
Common Mistakes
Centring everything by default. The middle of the frame is a real choice, but when it happens without thinking it flattens every picture. Fix: place your subject off centre once per session and see what it does.
Cropping with no purpose. A crop that shaves three centimetres off the top to fit a feed changes nothing and throws away resolution. Fix: crop toward a decision, such as removing dead sky or tightening around a gesture.
Ignoring the edges until afterwards. The problems that appear at the borders are the ones you cannot fix without throwing pixels away. Fix: check all four edges before each frame, every time.
Giving the subject the wrong amount of space. Too little and the composition presses, too much and the subject gets lost. Fix: look at the subject’s feet or hands and ask whether they need room to move.
Letting several focal points compete. Two equally bright things in one frame means the viewer has no idea where to start. Fix: decide which one is the subject and give it more size, contrast or sharpness.
Applying rule of thirds mechanically. The grid is a default position, not a law, and it produces a lot of awkward pictures of people standing at an intersection point. Fix: use the grid until it stops being necessary, then put the subject wherever the weight works.
Filling the frame because you walked close. Filling the frame is not the goal; a clear frame with breathing room usually reads faster than a crowded one.
Two habits cover most of it. Turn the gridlines on for a whole session, then off for the next one. And when something is not working, change one variable at a time, because changing three at once tells you nothing.
Frequently Asked Questions
What is the easiest way to frame a photograph?
The easiest method is to name your subject in one sentence, walk two or three steps left or right to clean up the background, then check all four edges before you shoot. That short sequence fixes more beginner pictures than any lens or camera setting. Add a gridline overlay until placement stops needing thought, then leave the grid switched off. Most improvement comes from repeating those four moves, not from buying anything.
Should the main subject always follow the rule of thirds?
No. The rule of thirds is a strong default because it leaves the eye somewhere to travel, but symmetry, reflections and centred architecture often look best dead centre. Try all three positions from the same spot and compare them rather than assuming. If the centred version feels calmer, use it. The rule exists to keep you from centring by habit, not to keep you from centring.
How much empty space should I leave around a subject?
Enough that the subject can breathe and the direction it faces or moves has somewhere to go. In practice, leave roughly a third of the frame on the side a person looks or moves toward, and cut from the side behind them. Very tight framing works when pressure is the point, such as a face filling the frame. Decided deliberately, either amount works.
Is it better to crop during composition or while editing?
Compose it properly in the first place. Cropping in the frame keeps the resolution you paid for, and edge problems such as clipped feet or a distracting object at the border are far easier to prevent than to remove later. Editing a crop is the right tool for rescuing a shot you already love, not for correcting a composition you did not look at.
How can I avoid a distracting background?
Change where you stand before you change anything else. A single step sideways often moves a lamp post, a horizon line or a bright window out from behind your subject. If you cannot move, wait for the clutter to shift, get closer so a shallow depth of field softens it, or fill the lower frame with a foreground element. Raising or lowering your height a foot also removes horizons cutting through heads.
Start With One Deliberate Change
Pick one subject and say what it is about in a single sentence. Walk until the background behind it is clean, check all four edges, then shoot three frames: centred, off to one side, off to the other.
Repeat that on every subject for a couple of weeks. The eye-training only happens because the decisions are made the same way each time, and once the grid, the orientation and the edge check stop feeling like instructions, framing is done.