
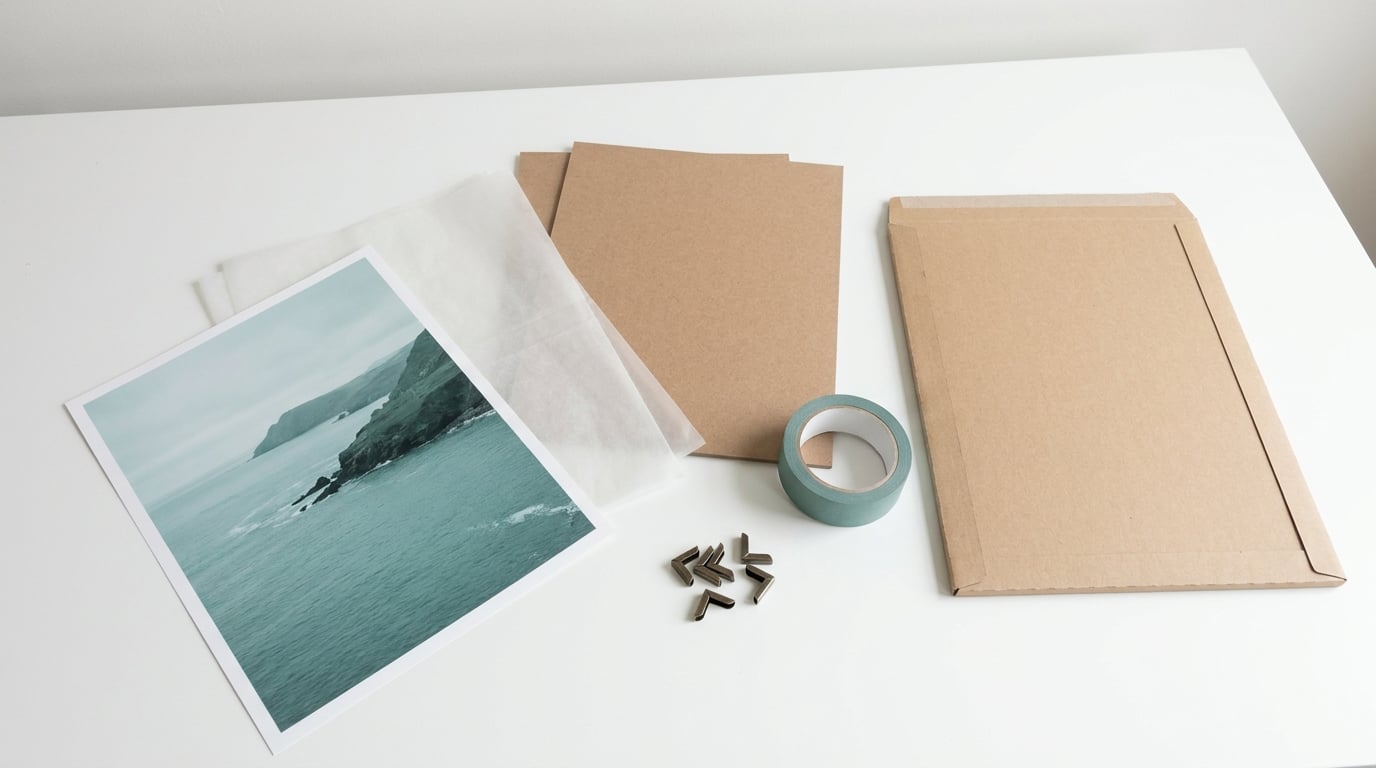
Most prints get damaged in the same three places: the surface scuffs, the corners crease, and the sheet bends under pressure. The fix is a layer system, and how to package prints for shipping comes down to one rule: an unmatted, unrolled print goes flat in a rigid mailer sandwiched between backing boards, and a print that must be rolled goes in a tube with the image side facing out and internal spacers so it cannot slide.
For a standard 8×10 or 11×14, the whole job takes about ten minutes once you have your materials down to a routine. It is a low-difficulty process, but the details matter more than the speed, because a carrier only reimburses what you declared and can prove.
What You Need
You do not need a lot, but you do need the right four things: something to protect the surface, something rigid on both sides, something crush-resistant on the outside, and proof for after the fact.
- Rigid flat mailers. Cardboard or plastic mailers sized so the print has roughly half an inch of clearance on every side. Going up a size matters more than going up a gauge; a tight mailer is where corners bend.
- Glassine paper or acid-free tissue. One sheet in front of the image, ideally two if the paper is glossy or the surface is fragile. Glassine is semi-transparent, so you can still see the image through it and spot a scuff before it ships.
- Backing boards. Two corrugated or foam core sheets per print, cut a quarter inch larger than the artwork. Foam core is stiffer and better at resisting bending, which is why most print sellers keep a stack of it cut to their common sizes.
- Corner protectors. Small cardboard L-shapes or foam wedges. Corners are the first thing to give, and most forum reports of transit damage point to corner and edge damage rather than the image itself.
- Tape. Painter’s tape for anything that might touch the print or board edges, packing tape for closing the mailer. Regular office tape is too thin and too adhesive for art surfaces.
- Poly bag or moisture barrier. A sealed plastic sleeve over the finished sandwich, plus a silica gel packet for routes through humid weather or long transit times.
- Boxes for oversized or framed work. A double-walled box for anything that will not fit a mailer, and a telescopic picture box for framed pieces. Cardboard corner protectors and pipe insulation on the frame edges handle the impact points.
- Tracking, signature confirmation and insurance. Not packaging, but they are part of the workflow. Keep a camera or phone in the packing area; the photos you take before the label goes on are the evidence for a claim.
A quick note for smaller work: printmakers on r/artbusiness and r/printmaking frequently use a poly mailer over two sheets of foam core as a cheap stand-in for a mailer. It works for pieces up to about 8×10, and the corners are the part to watch.
Step-by-Step
Start by matching the packaging to the size, because this is the decision that determines everything else.
| Print size or type | Packaging | Notes |
|---|---|---|
| 8×10, 11×14 | Rigid flat mailer with two backing boards | The default. Half inch of clearance on each side. |
| 16×20 | Double-board sandwich in a rigid mailer or shallow box | Most thin mailers stop feeling rigid here. Test one corner before you commit to a supplier. |
| 18×24 | Flat corrugated box with boards on both sides and corner protection | A box is now cheaper than fighting a mailer that is not rigid enough. |
| 24×36 | Double-walled box, corner protectors on all four corners | No folding, no rolling. Weight and dimensional pricing both climb quickly. |
| Posters, panoramas, long panoramas | Mailing tube with end caps | Roll image side out, never pack a print tighter than the tube diameter. |
| Framed originals and canvas | Telescopic picture box with foam around the frame | Protect the glass corners; that is where frames break. |
How to package prints for shipping securely
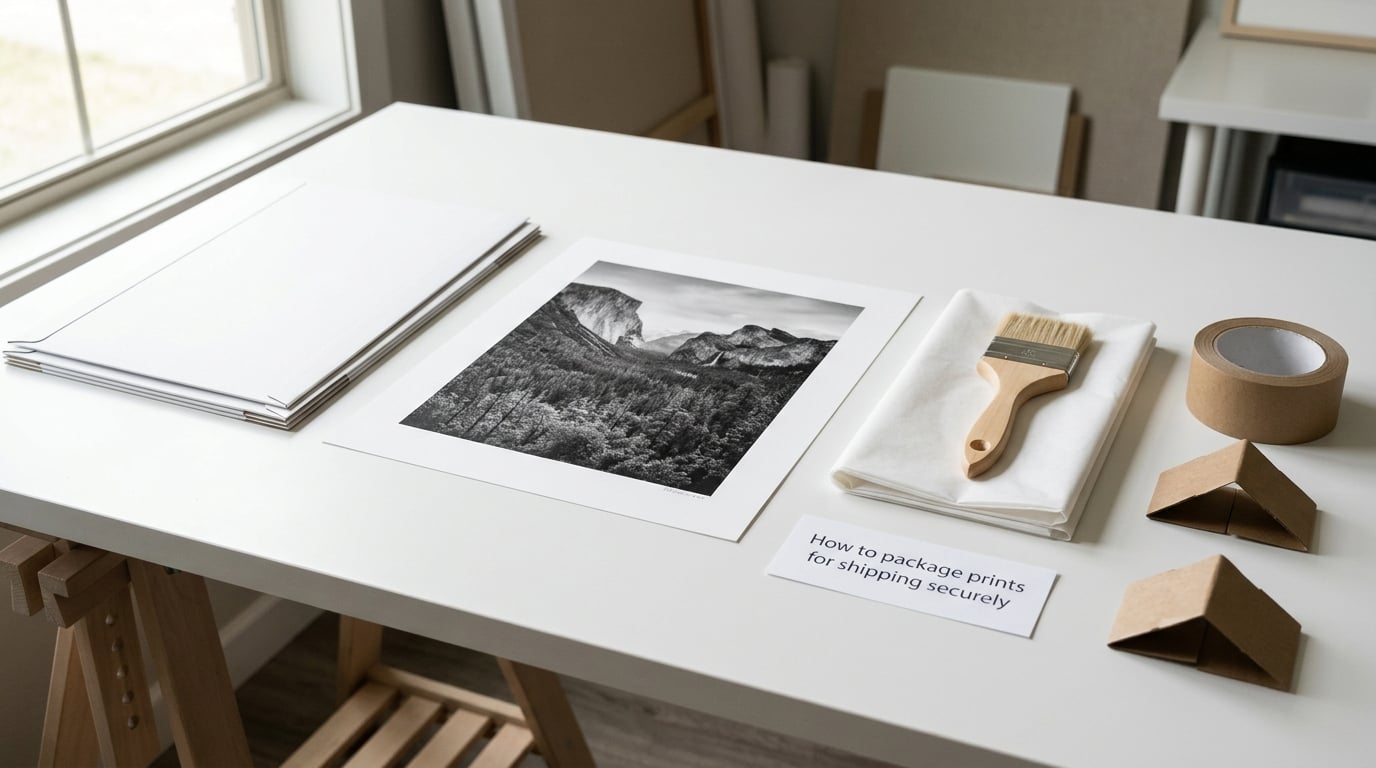
Lay the print image-up on a clean, dry surface and look at it properly before you touch it. Check the corners, the edges and the centre of the image for any existing crease, abrasion or moisture mark.
Clean the surface with a soft brush to lift dust and lint. If the print has a surface sheen, work gently, because a hard cloth can buff the coating.
Photograph the front and back of the piece, and photograph the frame from the corners if it is framed. This takes a minute and it is the only thing that settles a damage dispute later. Write the details down: dimensions, medium, condition, and what you are charging for it.
Wrap the print without touching the image
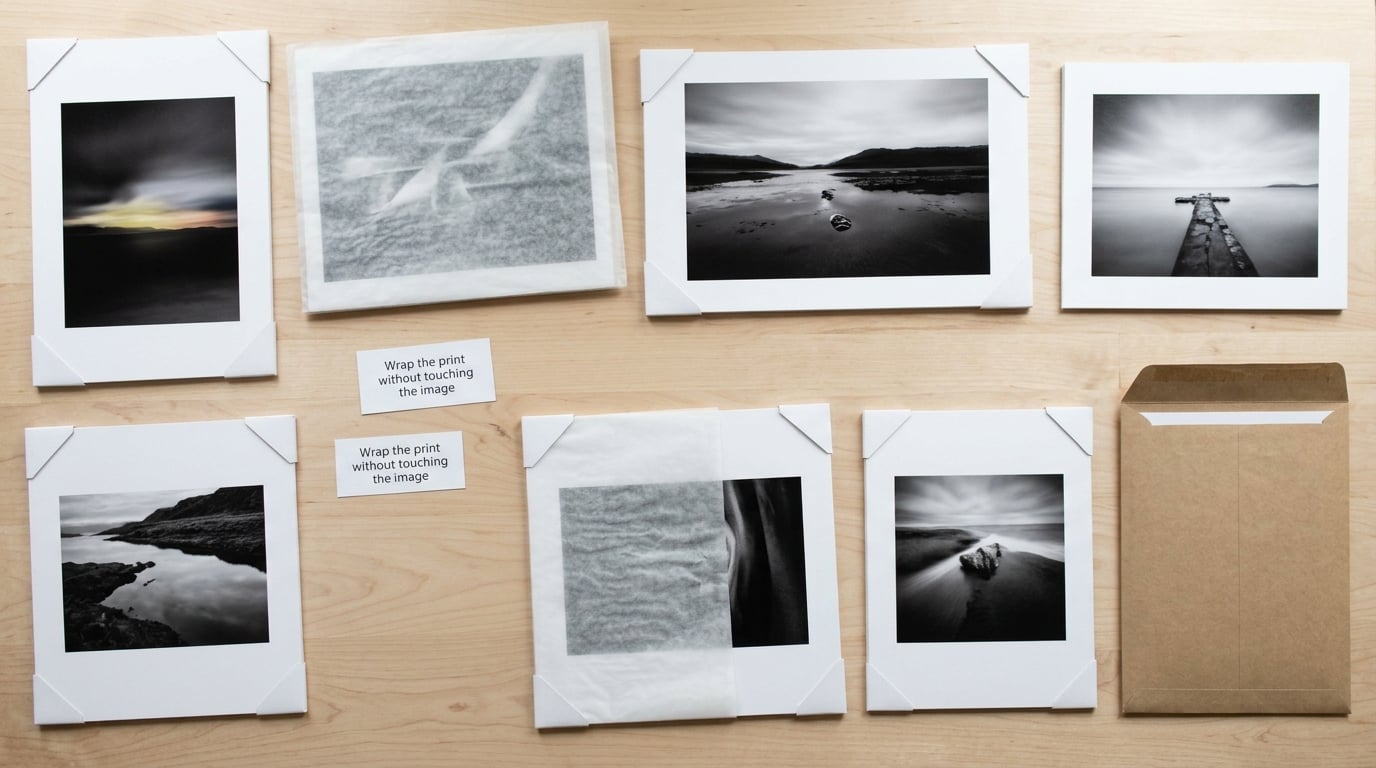
Slide a sheet of glassine or acid-free tissue over the face of the print. Never lay tape, cardboard or another print directly on the emulsion. Adhesive strips and the rough surface of corrugated board both leave marks that do not come off.
Set the first backing board down, add the print face-up on top of it, and lay the second board over the whole thing. The boards should extend about a quarter inch past the print on every side, so the edges of the artwork are not the first thing the parcel hits.
Add a corner protector at each corner, then tape the two boards to each other along their edges only. People in r/printmaking say this over and over: tape the boards together, never the print. The sandwich should move as one solid block with nothing loose inside it.
If you are shipping more than one print, put a fresh sheet of glassine between every layer. Prints stacked face-to-face without an interleaving sheet will stick or transfer in a warm van.
Add rigid and moisture protection
Slide the finished sandwich into the rigid mailer and check the fit by pushing gently on the centre of the front board. If the mailer bows, or if the print can be shifted side to side inside it, it is the wrong size. Go up one.
For a 16×20 or larger, build a double-board sandwich instead: print, boards, then a second layer of boards on the back, all taped edge to edge. That doubles the stiffness and it is the single change that reduces bending claims the most on larger work.
Seal the sandwich in a poly bag to keep moisture out. A print that arrives with a tide line along one edge is almost always a wet or humid transit, and glassine alone will not stop it. Add a silica gel packet for anything going further than a few hundred miles or through warm weather.
Seal the package for handling and moisture
Close the mailer with packing tape along the full length of the flap, then run a second strip across the width. Parcels get dropped on corners and edges constantly in sorting, and a single strip of tape along one seam is the first thing to split.
Reinforce the corners of the mailer with a small piece of tape if the board feels soft there, and check that no corner protector is poking through the outer layer. Nothing should be visible from outside except the label and any markings you choose to add.
Mark the package as fragile and do not bend if you want, then accept that this is a request, not protection. Forum sellers are blunt about it: markers are essentially free insurance that sometimes helps and never replaces a rigid mailer. What you mark should never sit on top of the shipping label area.
Choose the right shipping service and label
Pick the service by value, weight and distance rather than by habit. Tracked ground is the workhorse for most prints. Faster services make sense when the buyer is waiting on a gift, and they are worth it for large work where a week in a depot is another week of exposure to heat and humidity.
Signature confirmation is worth adding for anything the buyer paid real money for. It creates a delivery record with a name on it, which is a lot better than a delivery notice on a porch.
| Carrier | Strength for artwork | Coverage to check |
|---|---|---|
| USPS | Media Mail for eligible heavy art books and prints, Priority Mail for speed and flat-rate options | Insures declared value, which is what most sellers prefer |
| UPS | Ground and 3-day for heavier work, good dimensional handling | Commonly covers material value rather than full sale price, so read the terms |
| FedEx | Ground and Express, convenient for international art shipments | Also commonly tied to material value; declared value options exist |
Declare the value at what the customer actually paid. Sellers who insure far above the sale price report slower, messier claims. The declared figure needs to match the invoice in the box, and it needs to match the photographs you took at packing time.
Use the buyer’s real delivery address and double-check the postcode and apartment number by reading it back. A share of undeliverable packages come from transposed digits, not from carrier failures. Put your return address on the inside too, and a packing slip with the order number, the piece details and your contact details.
One photographer on r/photography described a gallery-packed print that was insured, wrapped and shipped in a very rigid tube and still arrived ruined. It happens. Good packaging raises your odds and supports the claim; it does not make damage impossible.
Inspect, photograph, and hand off the package
Before the label goes on, run this list once. The print is dry, clean and unmarked. The surface is covered by glassine or tissue, with no tape on the image. Both backing boards are larger than the print and taped edge to edge. Corners are protected. There is no empty space inside the package that could let the art shift. The label is flat, unobstructed and matches the order.
Photograph the sealed package next to a ruler or with the dimensions written on a slip of paper, and photograph the label. Keep those images with the order record.
At the counter, weigh it in front of you and check the dimensions. Dimensional weight catches people out with anything in a box, because a large flat package is priced on its size as well as its scale weight. Once the carrier has scanned it, the tracking number is your receipt, so save it with the order.
What to do when a print arrives damaged
If something goes wrong, photograph the packaging as it arrived before you open anything further. Photograph the shipping label, the seal, the corner that is crushed and the damage on the print itself. Then note the date, the tracking status history and the delivery date.
File the claim with the carrier promptly; most have filing windows measured in days, not months. A printmaker on r/artbusiness summed up the approach that works: prove the condition when it left, prove the condition when it arrived, and keep the invoice that ties the two together.
If you are replacing the piece, photograph the replacement before it ships too. Repeat customers forgive a fast, well-documented replacement far more readily than a slow argument.
Common Mistakes
Almost every damage report traces back to one of a short list of habits. These are the ones I would fix first in my own packing area.
Sending a rigid print in a soft envelope. A padded envelope is fine for a postcard, not for an 11×14. If a print has any stiffness to it, the package around it has to be stiff too.
Letting tape touch the image. A single strip of clear tape across the face of a print is the fastest way to ruin its value. Tape the boards, never the work.
Rolling a print too tight, or on the wrong side. Creasing from rolling is the most common packing failure people describe. Roll with the image facing out, keep tension even and gentle, and leave the tube larger than the roll so nothing compresses the sheet.
Shipping with no backing board. A print alone in a mailer will bend, no matter how good the mailer is. One board on the back is the minimum, two is the norm.
Letting the print slide inside a tube. Internal movement is what causes dents and edge abrasion, not the tube itself. Fill the empty length with tissue, kraft paper or a foam core tube, and cap both ends.
Leaving empty space in a box. For framed work, the rule of thumb is at least two to three inches of padding on all sides, and for large pieces more than that. Loose space means a heavy object accelerating inside the box.
Relying on Do Not Bend and Fragile labels. They are a request to the handler. They are not a backer board.
Reusing a box with old labels still on it. Covering old labels with kraft paper is the eco-friendly option people reach for, but a paper-covered label confuses scanners. Use a clean box, or scrub the old label area thoroughly and cover it with a flat sheet of packing tape.
Frequently Asked Questions
Should I ship prints flat or rolled in a tube?
Ship flat whenever the print will fit a rigid mailer. Flat preserves the paper’s original flatness and avoids the crease risk entirely, which makes it the better choice for anything up to 16×20 and most 18×24 work. Roll only when the piece is too long for any mailer or a box. A few people on r/printmaking would disagree, but their complaints about creasing are consistent with tight rolling, not with rolling itself.
Do art prints need a rigid mailer?
For unframed prints, yes, a rigid mailer is the standard. It costs very little more than a padded envelope and it stops the two failure modes that matter: bending across the middle of the sheet and corner creasing. The exception is very small work, where a poly mailer over two sheets of foam core, taped at the edges only, is a well-used alternative that works up to about 8×10.
Do Do Not Bend and Fragile labels actually reduce damage?
They can, slightly, but think of them as a request rather than a layer of protection. Handling staff do sometimes adjust a parcel that is clearly marked, so the labels are free to add. What actually prevents damage is the rigid mailer, the backing boards, the corner protection and the moisture barrier. A marked padded envelope is still a marked padded envelope.
How do I package multiple prints in one order?
Interleave every print with a sheet of glassine or acid-free tissue so no two surfaces touch, then build one board sandwich around the whole stack. Tape the boards together at the edges, add corner protectors on the outer board, and check that the stack is tight enough not to shift but not compressed. Photograph the stack before sealing, since ordering disputes are usually about count and condition.
How do I roll a print so it does not crease?
Roll it image side out, loosely, on a wide core with even tension and no pauses. The print should be a loose cylinder inside the tube, never a tight one, so add tissue or kraft paper to fill the empty length. Matte and cotton papers tolerate rolling better than gloss and baryta, which crack under strain. A print that must be rolled flat is a sign it needs a bigger box instead.
What do I do if a print arrives damaged?
Photograph the packaging before you open it any further: the label, the seal, the crushed corner and the damage on the print. Save the tracking history, the delivery date and the buyer’s invoice, then file the claim with the carrier promptly because filing windows are short. Declared value matched to the amount actually paid, plus your packing photographs, is what makes a claim viable.
Conclusion
Measure the print first, then choose the packaging that fits it with room to spare. Protect the surface with glassine, build a rigid board sandwich with taped edges and protected corners, add the moisture barrier, and seal it so it survives being dropped on its corners.
Then track it, require a signature, and insure it for what the customer actually paid. That sequence takes ten minutes and it is the whole difference between a print that arrives and a refund you did not plan for.