
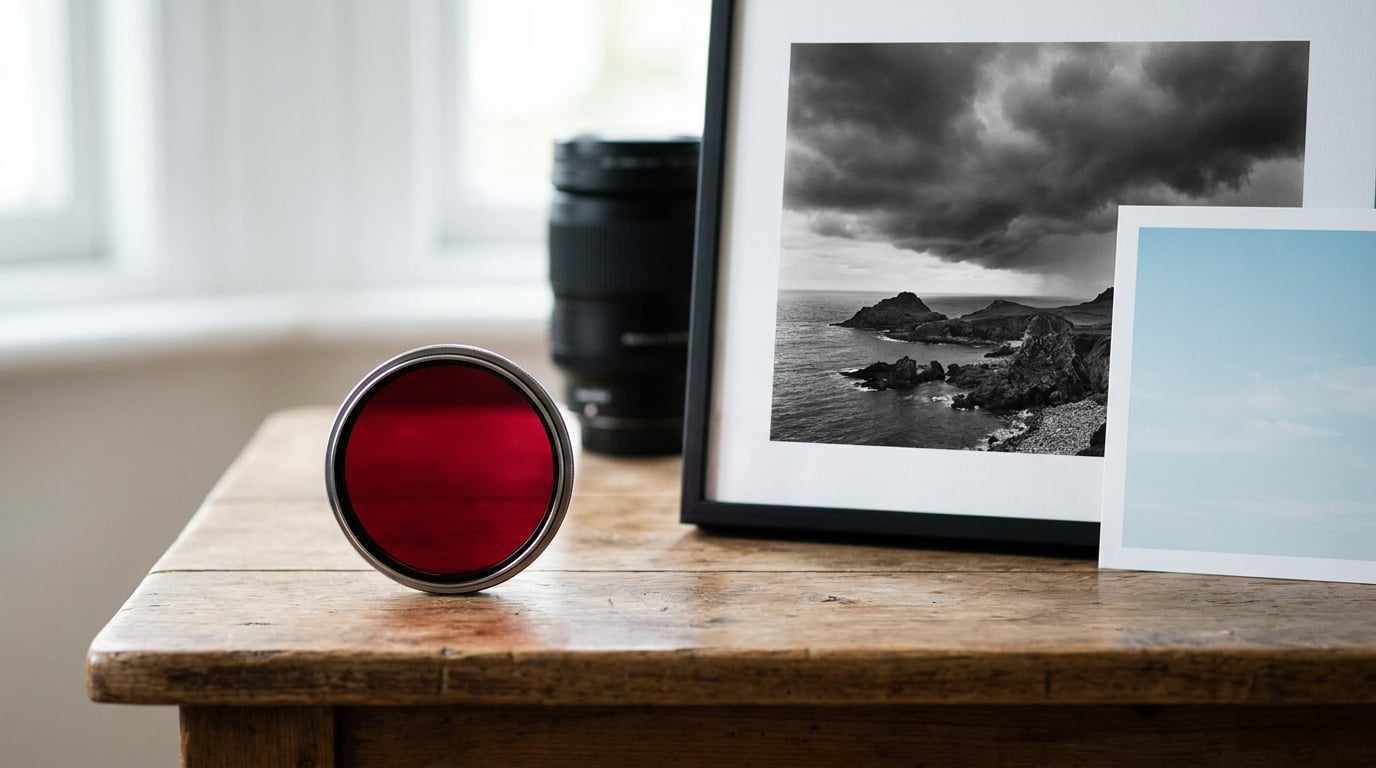
A red filter makes a monochrome photograph dramatic: it turns a pale blue sky almost black, cuts through haze, and pushes red and warm surfaces toward bright highlights. It works because the filter blocks most blue and green light before the scene is converted to grey, so colours that normally sit at the same tone separate cleanly. Two routes get you there — screw a red filter onto the lens, or convert through the red channel in software.
Below is what is actually happening optically, which filter strength to reach for, and how to repeat the look on a digital body. Written for people who shoot, not for a textbook.
Table of Contents
- What Is the Red Filter Effect in Black and White Photography?
- How a Red Filter Changes a Black-and-White Image
- How Wavelengths Control the Red Filter Effect
- Red Filter Effect in Black and White Photography: Choosing the Right Filter
- How to Create the Effect with a Physical Red Filter
- How to Create the Effect in Digital Black-and-White Photography
- What Subjects Benefit Most from a Red Filter?
- How to Control Contrast, Exposure, and Detail
- Creative Photomontage Applications
- Frequently Asked Questions
- What does a red filter do in black and white photography?
- Is a red filter better than a yellow filter for outdoor scenes?
- Can I create a red filter effect without a physical filter?
- Does a red filter make skies look darker?
- Is a red filter suitable for portrait photography?
- How much exposure compensation does a red filter need?
- Conclusion: Start with the Red Channel
What Is the Red Filter Effect in Black and White Photography?
The red filter effect is a change in tonal contrast, not a colour cast. A red filter passes long-wavelength light and blocks most short and medium wavelengths, so when the frame converts to monochrome, blues and greens drop toward black while reds and warm mid-tones rise toward white. Colours that sat at nearly the same grey now separate by several stops.
Without a filter, a green hillside and a grey concrete wall in overcast light often land on almost the same value. That is the core problem of monochrome work, and the red filter is one of the oldest fixes for it. Photographers who shoot black and white film have used red filters since the early 1900s, long before they had any way to adjust a conversion afterwards.
Two different techniques produce a similar-looking result. A physical filter is a coloured piece of glass on the front of the lens, so the blocking happens before the light reaches the film or sensor. A digital approach converts the image through the red channel alone, or mixes the channels with weights in a black and white panel. The digital version is reversible and free to adjust. The physical version commits the decision at the moment of exposure.
Physical and digital do not produce identical results, and the difference is worth knowing before you chase a look with sliders. I have shot the same coastal scene both ways, and the software version kept more shadow detail while the filter version held a slightly harder sky.
How a Red Filter Changes a Black-and-White Image
Contrast is the main event. The filter removes a large part of the light coming from blue and green subjects, so those areas expose lower and record darker. Warm subjects keep most of their brightness and record lighter. Because the scene is measured as brightness rather than colour, that gap becomes the picture’s structure.
Skies change the most. A clear blue sky at midday is the strongest blue in most outdoor scenes, so it can drop several stops and print as near black. A pale or white sky barely moves, because there is little blue to block. This is the point that surprises people who try a red filter on a hazy afternoon and decide nothing happened.
Atmospheric haze sits almost entirely in the blue end of the spectrum, so filtering it removes the grey veil over distant hills. That single change often does more for a distant vista than any amount of contrast added later.
Skin tones generally lighten because red light passes through freely. This is the source of a persistent myth that a red filter turns skin silver. It does not. The tone depends on the light and the conversion, and you can pull it back with a red channel mixer or a graduated mask.
Dark subjects behave predictably. Black clothing, a wet road surface, and shadowed stone already sit near the bottom of the scale, so filtering them produces very little change. The filter separates mid-tones; it does not create detail in the blacks.
How Wavelengths Control the Red Filter Effect
Visible light runs from roughly 380 nanometres at violet to about 700 nanometres at deep red. A red filter is a longpass filter: it transmits everything above a cutoff somewhere near 580 nanometres and absorbs most of what sits below it. Where you place that cutoff decides how aggressive the effect feels.
Film has to be sensitive across that range for a monochrome conversion to record colour as tone at all. Panchromatic film extends red sensitivity well past what orthopanchromatic stock managed, which is why red filters work so dramatically on standard black and white film today. Orthopanchromatic film is nearly blind to deep red, so the same filter produces a weaker effect.
Sensors work differently. A Bayer sensor puts a red, green or blue filter over every photosite, and the camera reconstructs full colour from those three samples. That colour filter array changes the maths: the sensor records broad bands rather than clean wavelengths, so a red gel in front of the lens influences two channels at once instead of one.
This is the practical reason a #22 orange and a #25 red can look nearly identical on a modern Bayer body. Both block the blue channel, and both block much of the green, so the remaining data is dominated by red either way. On film, with a smooth spectral response, the difference between those two filters is obvious. On a Bayer sensor it often is not.
Red Filter Effect in Black and White Photography: Choosing the Right Filter
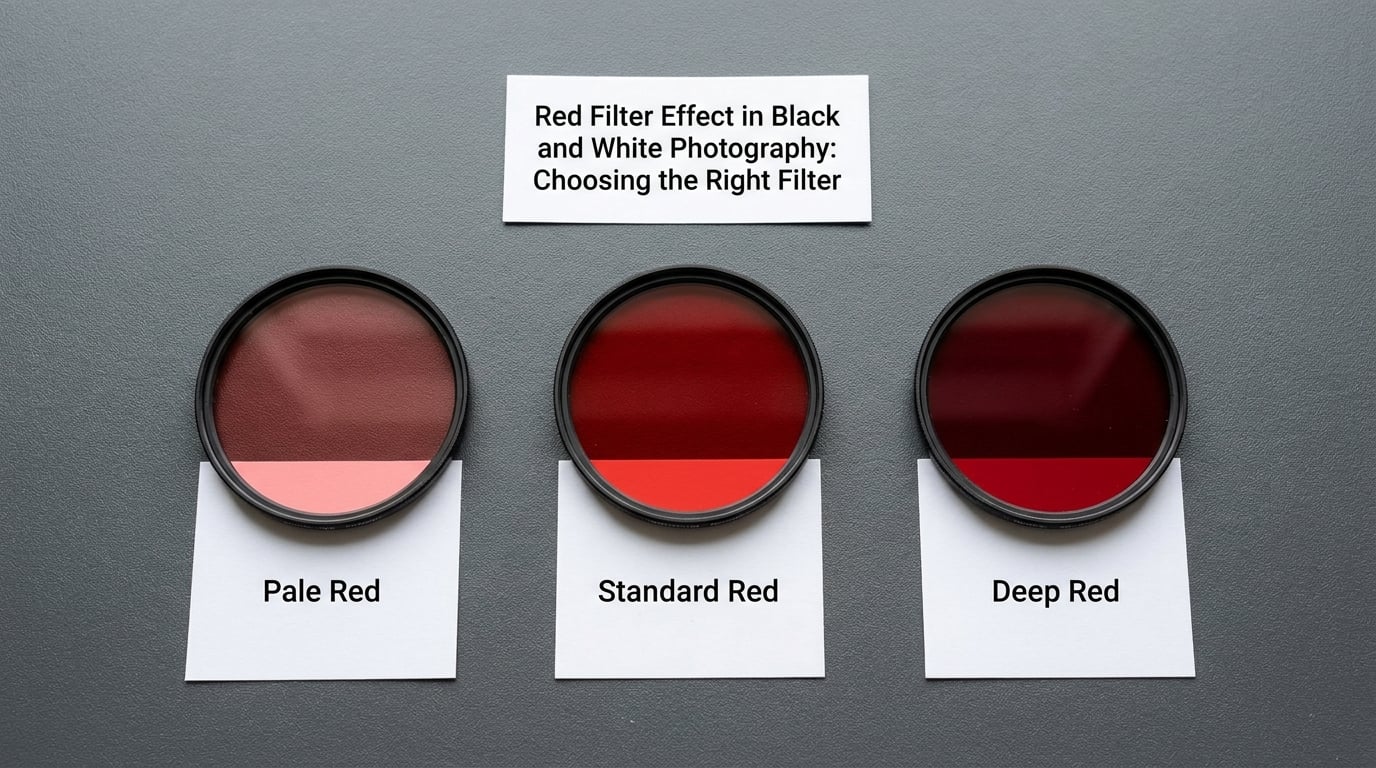
Choose by how blue your skies actually are and how much light you can spare. A pale red softens the effect and costs almost nothing in exposure. A standard red is the all-rounder. A deep red goes further than many people expect, and it is not a subtle step up from standard.
| Filter | Typical numbering | Effect on a blue sky | Effect on foliage | Best suited to |
|---|---|---|---|---|
| Pale red | #23 | Gentle darkening | Slightly brighter and lighter | Overcast scenes, casual walks, digital matching |
| Light red | Light red series | Clearly darker | Bright | General outdoor work in decent light |
| Standard red | #25 | Dark, heavy contrast against clouds | Very light | Coastlines, hills, town views, the classic look |
| Deep red | #29 | Near black | Bright with strong texture | Heavy overcast, dramatic prints, infrared-adjacent looks |
Colour the filter is only the first choice. A yellow filter lifts contrast a little and costs about a stop. An orange sits between yellow and red and is the filter I would grab first if I owned just one and shot mostly coastal scenes.
On digital, filter numbering matters much less. Because the Bayer sensor merges the channels anyway, start by moving the red channel up and the blue channel down in your black and white mix until the sky looks right, then decide whether the result resembles pale or standard red.
How to Create the Effect with a Physical Red Filter
Shooting with a physical filter takes five minutes longer per setup, and almost all of that is metering discipline.
- Check thread size and depth. Match the filter’s thread to the front element and check the rim for any step that might vignette wide open. A thin filter is safer on mirrorless lenses with a narrow front ring.
- Meter before you attach it. Get a correct reading on the unfiltered scene, then add the compensation for your filter. Metering through the filter gives a reading calibrated to a mid-grey subject, which is not what you want when the filter is darkening the sky.
- Compensate the exposure. Add the stops listed in the table below. If you are on aperture priority, the camera will simply pick a slower shutter speed.
- Watch the shutter speed. A filter that costs two stops turns 1/125s into 1/30s. That is fine on a tripod and ruinous on a person walking toward you.
- Judge the frame, not the screen. Colour screens lie about monochrome contrast. Check the histogram and, if you shoot film, make a test frame before committing to a roll.
- Turn off auto white balance if the camera allows it. dpreview forum users hit this repeatedly: the camera sees the warm cast through the filter and compensates it away, which quietly undoes what the filter was doing.
How to Create the Effect in Digital Black-and-White Photography
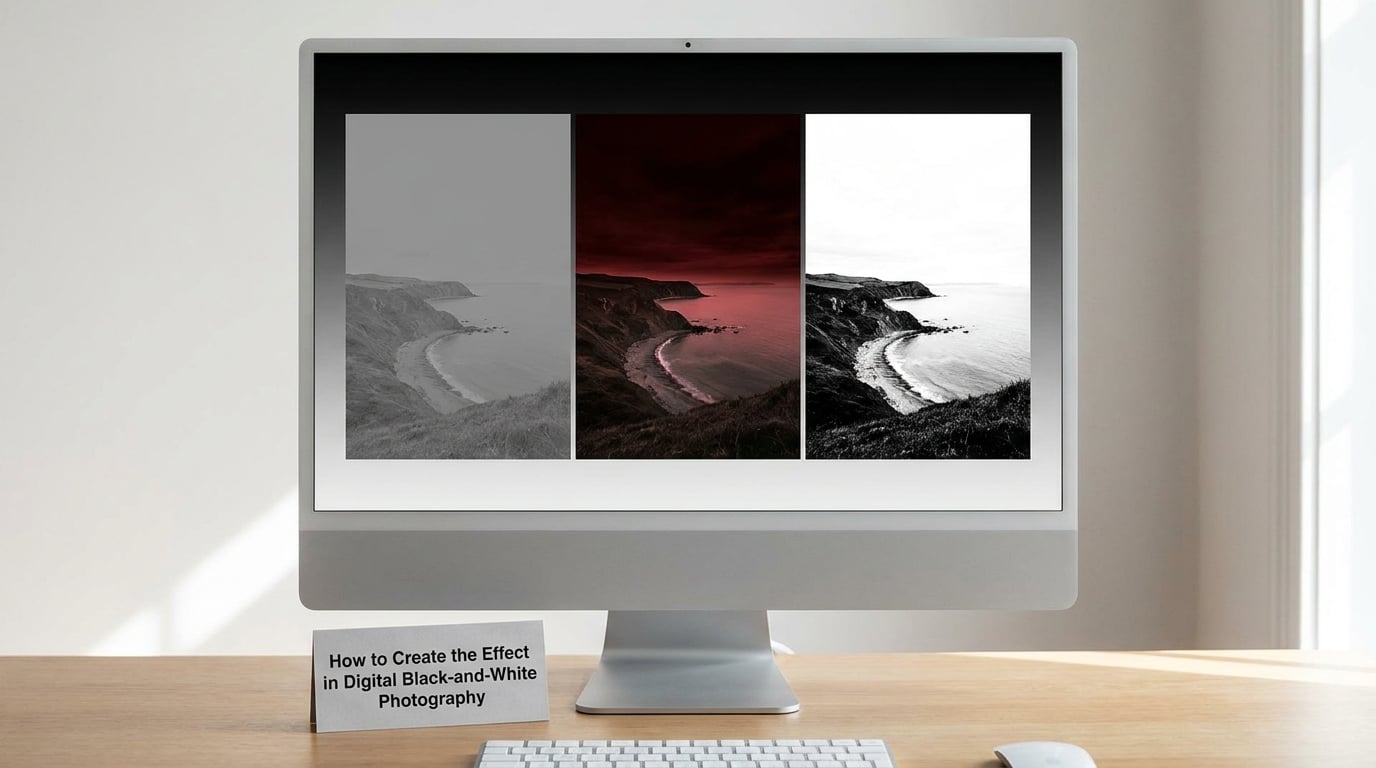
Every major raw converter can do this in a few seconds. The recipe below is written for Adobe Lightroom and Capture One, which share the same black and white panel, but the idea transfers to any editor with channel controls.
- Start from the raw file. Correct exposure and white balance while you still have colour. Setting white balance by eye matters more than usual, because a red cast in the raw file turns into a muddy tone in the conversion.
- Open the black and white mix panel. In Lightroom it sits in the panel to the right of the Basic panel; in Capture One it is under the Colour panel. Tick the box labelled “B&W” or “B&W Mix”.
- Compare the three channels first. Hold down Alt and click the red, green, then blue buttons under the mix sliders. Look at which one gives you the sky you want. Usually it is red for a dark sky and green for softer foliage.
- Push red up and blue down. Moving the red slider toward 50 or higher and blue toward 10 to 20 is a solid starting point for a standard red look. Raise red a little further for a deep red effect.
- Stop before the histogram breaks. Watch the right side of the histogram. If clipping starts appearing in the foliage or a bright building, bring the red back before you add contrast.
- Add contrast last, and gently. Once the channel mix is right, a small contrast adjustment with a black point lifted in the shadows finishes the frame. Overcooked monochrome quickly turns crunchy.
- Mask when you need more than a global mix. A graduated layer mask lets you hold the foreground bright while keeping the sky dark, which gets you further than pushing the global sliders.
If you shoot JPEG only, converting in camera with a monochrome picture style will not give you a raw file to fix later. Pentax forum users testing the digital route report that software filtering ends up noisier than a physical filter at equivalent settings, because the blocked channels leave less data to work with. Shooting colour raw and converting later remains the more flexible choice.
What Subjects Benefit Most from a Red Filter?
Coastlines and open water are the strongest case. A dark sky over a pale sea gives you two clean tonal zones, and waves that were invisible in colour separate out clearly in monochrome.
Architecture with a strong sky behind it works well for the same reason. Pointing up at a roofline against a deep blue sky gives you a near-black background with no detail competition, which flatters the structure.
Foliage improves because greens are filtered down and reflected warmth comes through, so leaves separate from the darker trunks behind them. Dense woodland is harder, since everything green compresses toward the same value.
Clouds get the biggest visual payoff. The filter deepens the blue between cloud edges, and a white cloud against a near black sky is one of the strongest combinations available in monochrome.
Portraits can work, with care. Light skin brightens nicely and hair against a bright sky gains definition, but the effect is aggressive and the sky behind your subject often goes completely black. For most people a graduated mask across the frame does the job more politely.
Street and documentary work is a matter of taste. A red filter in bright sun keeps skin from merging with hot pavement, and cinematographers working in monochrome have long taped red gel to the front of the matte box for exactly this kind of separation.
Abstract and surreal photomontage benefits too, since the effect lets you build tonal logic rather than copy a scene. It is less useful for indoor work with mixed artificial lighting, where a red filter mostly adds a colour cast you did not ask for.
How to Control Contrast, Exposure, and Detail
Exposure compensation is the first thing to get right, because everything else is easier to fix from a correct base exposure. Filter factors vary between manufacturers, so treat the figures below as typical rather than exact.
| Filter type | Typical filter factor | Stops to add | 1/125s becomes | 1/30s becomes |
|---|---|---|---|---|
| Yellow | About 2 | About 1 stop | 1/60s | 1/15s |
| Orange | About 4 | About 2 stops | 1/30s | 1/8s |
| Pale red | About 4 | About 2 stops | 1/30s | 1/8s |
| Standard red | About 8 | About 3 stops | 1/15s | 1/4s |
| Deep red | About 16 | About 4 stops | 1/8s | 1s |
Protect your highlights first. Cloud edges and bright specular reflections are the first thing to clip once a red filter is on, and clipping there is unrecoverable in a raw file. Dial in negative compensation and check the histogram’s right-hand side before you compose.
Dodge and burn work differently here than in colour. Because the filter already stretched the tonal range, gentle local adjustments are usually enough. A burn on the sky and a dodge on foreground texture gives you the drama without turning grain into texture.
Sharpness is the hidden cost of physical filters. Users comparing film and digital report that a red filter costs resolution at any aperture, because the light is being bent slightly by the coated glass as it passes through. Shoot a little wider than you need and crop afterwards.
Stacking with a polariser works and costs more light than people expect, because you are already down two or three stops before the polariser takes its one or two. The combination is a legitimate choice for a still midday frame, but not for anything handheld.
Leave some grain alone. Heavy noise reduction applied after a big channel mix tends to smear fine foliage texture, which is exactly the detail the filter was meant to reveal.
Creative Photomontage Applications
Red-filtered monochrome frames are useful in composite work because they impose a single tonal logic on elements shot under completely different light. If one layer was captured with a red filter and another without, the sky in the second layer will read as a light grey shape with no relationship to the rest.
Convert every layer through the same red channel weighting before you stack them. Once the tonal rules match, a bright subject from one location and a dark background from another can be combined without the eye spotting the mismatch.
The same idea works for surreal pieces. Push one element to near black and another to bright white, then break any rule you like with colour, because colour is now the only thing carrying the surreal element. That is a nice trade: it keeps the strangeness local instead of spread across the whole frame.
One habit I would keep: apply the red channel weighting to the whole composite at the end, rather than layer by layer. It smooths out small inconsistencies in exposure and saves a lot of masking.
Frequently Asked Questions
What does a red filter do in black and white photography?
A red filter passes long-wavelength light and blocks most blue and green light, so blues and greens record dark while reds and warm tones record light. In practice it darkens skies, cuts haze, brightens foliage and skin, and separates colours that a plain desaturation would render as the same grey. Expect to add two to four stops of exposure to compensate.
Is a red filter better than a yellow filter for outdoor scenes?
It depends on the sky. A yellow filter gives a gentle contrast lift and costs about a stop, which suits overcast scenes and casual shooting. A red filter needs a genuinely blue sky to show its effect and costs two to four stops, but it darkens skies dramatically and cuts haze. Pick yellow for softness and speed, red for drama and depth.
Can I create a red filter effect without a physical filter?
Yes, and most photographers do. Open the black and white mix panel in your raw converter, compare the three channel conversions, then raise the red slider and lower the blue one until the sky darkens the way you want. It is reversible and costs no exposure. The difference is that a software mix can leave you noisier because the blocked channels carry less information.
Does a red filter make skies look darker?
That is its main job, but only on skies with real blue in them. A clear midday sky can drop several stops and print almost black. A pale or white overcast sky barely changes, because there is little blue light to block. If your test frames show no difference, the sky colour is the reason, not the filter.
Is a red filter suitable for portrait photography?
It can be, with restraint. Warm skin tones pass through the filter and lighten, which helps faces separate from dark backgrounds. The sky behind your subject will often go completely black, so frame for it rather than against it. In most portrait situations a graduated layer mask on a digital file gives you similar separation without the exposure cost.
How much exposure compensation does a red filter need?
Add about two stops for a pale red filter, around three for a standard red, and four for a deep red. Yellow and orange filters need roughly one to two stops. Check the specific filter’s stated factor, and remember that a slower shutter speed means you may need a tripod or a faster lens.
Conclusion: Start with the Red Channel
The whole idea of the red filter effect in black and white photography is contrast that plain desaturation cannot give you: blues and greens drop, warm tones rise, and the two separate. Make your first test simple. Convert one frame through the red channel, or put a pale red filter on the lens, then adjust exposure and contrast conservatively and decide whether you need more.