
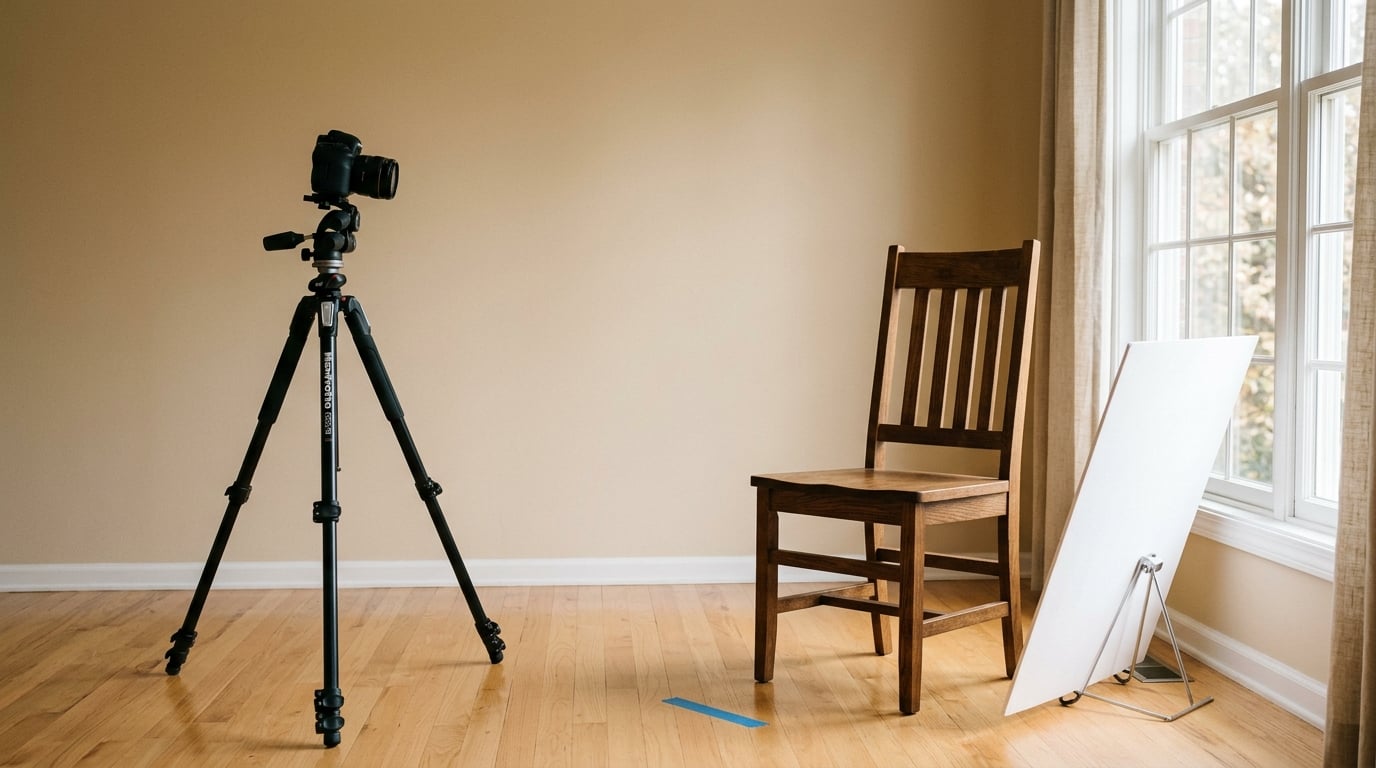
A self-portrait is a photograph you take of yourself, usually by setting the camera on a tripod and firing it with a self-timer, interval timer or remote shutter while you stand in front of it. That is the whole idea, and it is how you shoot self portraits properly: no assistant, no outstretched arm, no mirror, and full control over the light, the lens and the frame. Most people find the first ten frames uncomfortable and the twentieth set genuinely good, so plan on shooting far more than you think you need.
This guide works with a DSLR, a mirrorless body, or a phone on a small tripod. The order below is deliberate. Pick a spot, mount the camera, light one test frame, check the composition, and only then start experimenting with poses and edits. Change the sequence and you will spend the whole session walking back and forth to the camera.
Before you start, one honest warning. The reason most self-portraits fail is not the camera. It is a subject standing in bad light, in the wrong place, holding their arms like they are waiting for a bus. Every stage in this workflow exists to remove one of those problems.
Table of Contents
- What You Need
- Step-by-Step: How to Shoot Self Portraits
- Step 1: Choose a Concept and Location
- Step 2: Set Up the Camera and Support
- Step 3: Shape the Light Before You Pose
- Step 4: Mark the Frame and Find Your Position
- Step 5: Develop Poses That Suit the Image
- Step 6: Shoot a Controlled Test Sequence
- Step 7: Edit, Refine, and Export the Final Portrait
- Common Mistakes When You Shoot Self Portraits
- Frequently Asked Questions
- Conclusion
What You Need
You can shoot a full self-portrait session with five things. Everything beyond that is refinement.
- A camera. Any camera with a self-timer, plus a phone if that is all you have. A phone with a rear-camera timer and a Bluetooth or headphone remote will carry you a long way.
- Something to hold it steady. A tripod is the honest answer, because you will want both hands free to adjust the framing. No tripod? A stack of sturdy books, a wall shelf, or a door wedged open at the right height does the same job. A mini tripod with a clamp works for a phone.
- A way to trigger it. The built-in self-timer is the default choice and it is on every camera ever made. A remote release or an app is a real upgrade once you are comfortable.
- A light source you can move. A window is the cheapest and best. Failing that, a desk lamp with a removable shade gives you more control than people expect.
- A reflector or a flag. A sheet of white card, a piece of foil-backed foam board, or even a white pillow held on a stick fills shadows. Cardboard or a dark towel on the other side subtracts light. One of the two changes the mood more than any setting on the camera.
A marker for your position is worth building into the setup too. Painter’s tape on the floor, a strip of gaffer tape, or a single shoe left where you stood tells you exactly where to return after every adjustment, which removes the single biggest source of frustration in a solo shoot.
Editing software is optional until you have a frame you like. Adobe Lightroom and its free mobile version handle RAW files, exposure and colour. Snapseed and the built-in editor on most phones cover crop, exposure and white balance for anyone not shooting RAW. Buy nothing until you have looked at a dozen raw frames on a screen.
Step-by-Step: How to Shoot Self Portraits
Step 1: Choose a Concept and Location
Decide what the picture is about before you touch the camera, because every later decision gets easier once the mood is fixed. Two or three words are enough: quiet morning, city at night, sunlit and spare. Then pick a location that fits that word and check three things.
Is the space quiet? A fridge cycling on, a television next door, a street with early traffic, and you are fighting the shot the whole time. Is the background visually quiet? Clutter can be a choice, but it is almost never an accident, so scan the frame for hanging cables, door frames cutting through your head, and bright rectangles. Is the space safe? Outdoors, tell someone where you are, keep the camera bag on your body or between your feet rather than in the grass, and keep your back to a wall rather than an open pavement.
Success check: stand in your intended position and read the background behind where your head will be. If something distracting sits there, move the camera, not yourself. Rotating the tripod a few degrees fixes most of it.
Step 2: Set Up the Camera and Support
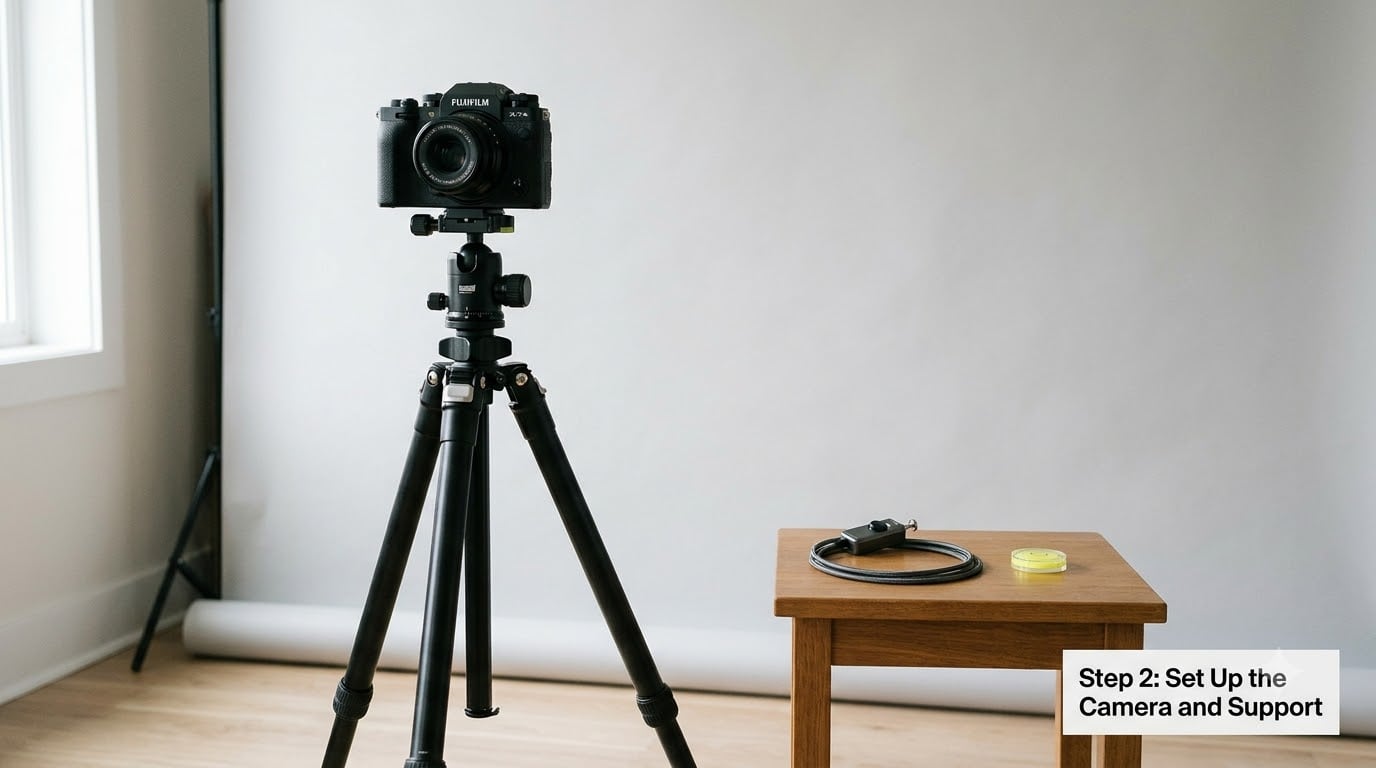
Tripod first, camera second, and get the order right: mount the camera, extend the legs, then re-level it. A camera hanging off one leg looks stable and vibrates for the entire exposure. Lock everything, then push down on the head gently; if the frame moves, tighten a joint before you go any further.
Shoot vertical for a head-and-shoulders portrait and horizontal for anything environmental. The single most useful habit here is to switch to manual exposure and stay there. Automatic exposure re-measures the scene when you step into place, so the background and the light behind you change the brightness of your face, and the shot drifts from frame to frame for no reason you can see.
A solid starting point for a solo shoot in daylight: aperture priority or manual at f/2.0 to f/2.8, shutter speed at 1/125s or faster, ISO 100 to 400, RAW capture. On a tripod the shutter floor drops, so 1/60s is workable indoors. Anything slower than that and your own weight on the tripod start to soften the frame.
For focus, the reliable method is to pre-focus on a stand-in object placed exactly where your head will be, then switch the lens or body to manual focus so nothing hunts when you step in. If your camera has a flip-up or tilting screen, you can also frame and focus yourself; if it does not, the stand-in object is the way. Turn off continuous autofocus, or the camera will hunt for the rest of the shoot.
For the trigger, the built-in timer set to 10 seconds beats the 2-second version every time, because 10 seconds gives you room to walk in, settle, fix your hair and breathe. If your camera offers an interval timer with a multi-frame burst, set it to fire several frames per run; you get usable variations of the same pose without walking back to the camera.
Success check: trigger the camera empty-handed and look at the frame. Is the camera sharp? Is the tripod in the shot? Is the horizon level? Fix all three before you walk into position.
Step 3: Shape the Light Before You Pose
Set the light before you work on the pose, because good light makes an average pose look intentional and bad light makes a great pose look accidental. Put the light about 45 degrees to one side of your face and slightly above eye level. That angle gives you a small shadow on the far side of the face, and a small shadow is what separates a portrait from a snapshot.
Working with a window, place yourself about a metre and a half away with the window to one side, not behind you. A window behind you blows out the background and drops your face into shadow. A window straight in front flattens you completely. Side light gives you shape. Move the light closer for softer, brighter light and further away for harder, more dramatic light.
Now control the shadow side. Hold white card opposite the light to lift it, or a piece of dark cardboard to deepen it. Do not use the on-camera flash directly into the lens: it flattens the face, puts a hard shadow of your nose on the wall behind you, and gives you red or shiny patches on skin that will be difficult to fix later.
Set white balance manually rather than leaving it on auto. A window shifts from cool blue to warm yellow across a single afternoon, and auto white balance will compensate differently in every frame of a sequence. If you shoot RAW you have more latitude here, but a fixed setting still keeps the series consistent.
Success check: shoot one test frame and look at the histogram. If the shadow side is crushed to solid black, add reflector fill. If the highlights on your cheek are clipped, move the light further away or reduce exposure compensation by a third of a stop.
Step 4: Mark the Frame and Find Your Position
Mark where you will stand so every frame after the first is comparable. Tape an X or a strip on the floor at the spot where your chest should be, not your feet-in-place guess, and measure the distance from the camera. Then place a chair, a coat on a hanger, or a stand-in object at your head height on that mark. That object is now your focusing target and your framing reference, and it stays there for the whole session.
Frame it before you attach yourself to it. Put the camera on a low setting and check headroom, which is the space above your head, and leave less above than below if you want the picture to feel settled. Leave leading space in the direction you are facing or moving, since a portrait looking into a wall of empty pixels feels trapped. For a landscape frame, the rule of thirds is a useful default: place your eyes near an upper third line rather than dead centre.
Check proportions too. A camera at chest height makes legs look long and gives a natural standing height. A camera at eye level is neutral. A camera above your head looking down is the classic unflattering self-portrait angle, and it is the one everybody tries first, so avoid it unless you want that look on purpose.
Success check: with the stand-in object in place, take a test frame and look at the headroom and the gap on the side you are facing. Crop test it later on your phone; if you cannot imagine cropping tighter to a square without cutting your elbow, pull in now.
Step 5: Develop Poses That Suit the Image
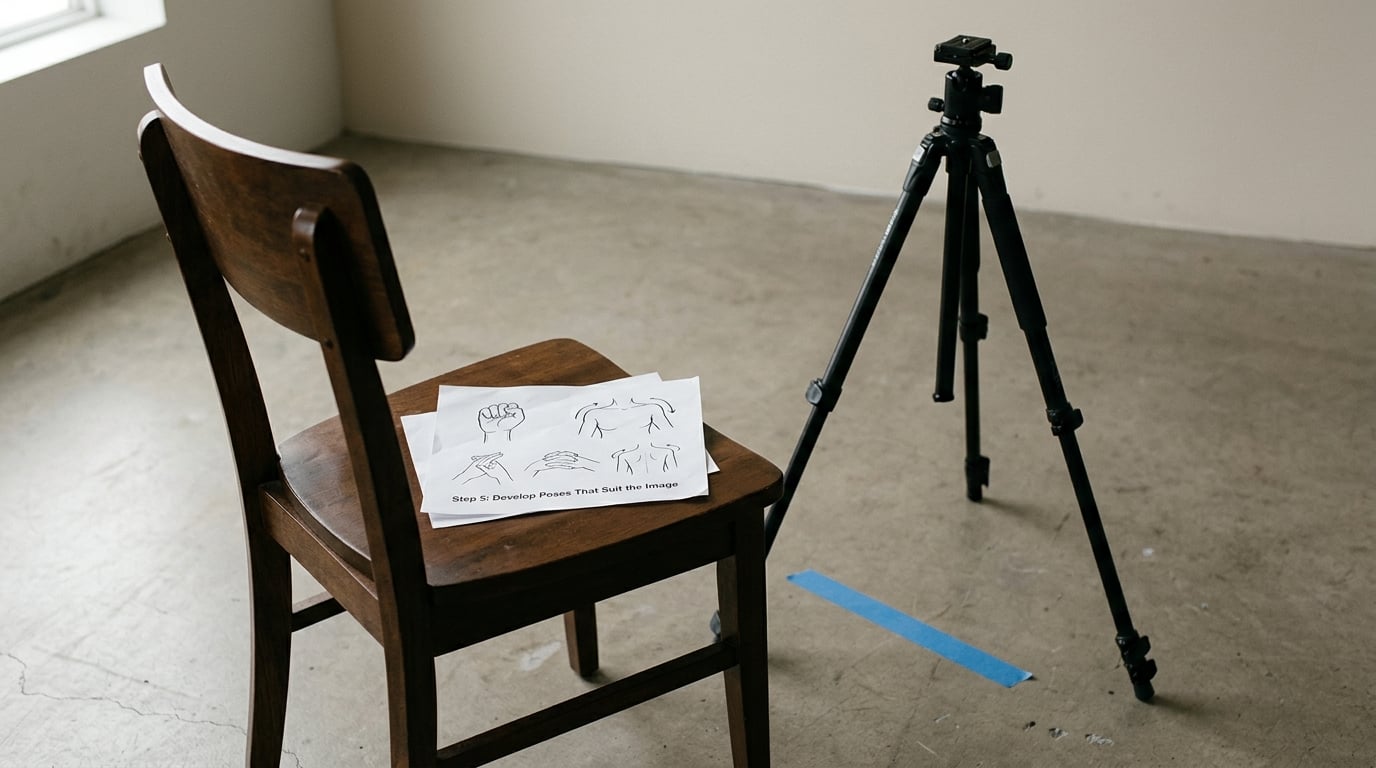
Posing alone is a technical problem with a simple structure: gesture, line, angle, and where the face points. Start with the shoulders. Angle them rather than squaring them to the lens, and shift your weight onto one hip; that single change reads as intentional even when nothing else has changed. Then angle the face back toward the camera, and bring the chin forward and down a fraction before you shoot. Chin down and slightly forward narrows the face and defines the jaw.
Hands are where most solo portraits fail, because hands with nothing to do hang like weights. Give them a job: a hand in a pocket, one hand holding the camera strap, fingers resting on a chair back, or both hands wrapped around a mug. The other classic is to crop just above the wrist, which removes the hand from the question entirely. Avoid resting both hands symmetrically on your hips, which reads as a police photograph.
Build poses by changing one thing at a time. Take a frame, then change only the hands. Another, then change only the angle of the shoulders. That way you learn what actually moves the picture instead of shuffling randomly and blaming the camera.
For a realistic portrait, shoot straight into the lens with a relaxed jaw, breathe out before the shutter, and hold still for two seconds after you think the frame has fired. For something more creative, try a silhouette against a bright window, a cropped frame with no face at all, your back to the lens, a reflection in glass or water, or a long exposure where only your movement shows. The creative versions are easier to shoot, not harder, since nobody is judging your expression.
Success check: look at the last frame at full size. If you cannot say what the pose communicates, shoot four variations and compare them side by side rather than deciding in the moment.
Step 6: Shoot a Controlled Test Sequence
Treat the first frames as a technical check and the rest as the actual session. Shoot a short test run first: three or four frames at your planned settings. Check sharpness on the face, check the histogram, check the background. If focus missed, the stand-in object moved; go back to the mark, re-focus, and re-shoot before you start posing.
Then run a proper sequence. Use the multi-frame interval setting if you have it, or the 10-second timer with a short burst. Move one variable per run: same light, same framing, one changed pose. If a frame is wrong, you know exactly which change caused it. Changing light and pose and lens between every frame is how a good session turns into 200 unusable files.
When light shifts during a session, bracket instead of guessing. Take a frame, then one a third of a stop under, then one a third over, using exposure compensation. Brightening a slightly dark RAW frame is easy; rescuing a blurred or blown frame is not.
Do not delete anything on the camera. Walk back, glance at the screen, shoot again if needed, and cull later on a proper screen. Self-portraits are hard to judge at arm’s length on a small display, and deleting early is the most common way people throw away their only usable frame.
Success check: count your frames. If you have fewer than about 30 for a final image, you have not really started. Shoot more, then sort them later.
Step 7: Edit, Refine, and Export the Final Portrait
Edit in a fixed order so every adjustment stays reversible. Work on a copy, never the original. Start with exposure, then white balance, then contrast, then crop, then any skin work, then a final export setting.
Exposure first, and adjust it by the histogram rather than by how the preview feels. Watch the histogram while you tweak rather than after. White balance next: if skin looks sallow or too pink, nudge the temperature until the skin is right, and judge it against something neutral in the frame. Raise contrast only slightly; a heavy contrast slider is the fastest way to make a portrait look over-processed.
Crop for the frame you actually want. A vertical crop for a profile, a square for social feeds, a wide crop for a header image. Cutting in at the elbows and mid-torso is the reliable rule, and it gives you options from one shoot.
For skin, use a healing or spot-removal tool sparingly on temporary blemishes, and keep skin texture intact. Heavy smoothing makes a portrait look like a wax figure and hides the light work you just did. A light vignette on the edges draws the eye back to the face and costs nothing.
Export in sRGB JPEG at full resolution for anything on screen, and keep a TIFF or the RAW file as your archive. If you are building a consistent look across a series, apply the same adjustments to every frame you keep. Tonal consistency across a set is what makes a body of self-portraits look like one project.
Success check: view the edit at phone size, then at full size. If it holds up at both, the frame is finished.
Common Mistakes When You Shoot Self Portraits
Almost every disappointing self-portrait comes from one of a handful of repeat errors, and each has a quick fix.
- Blurred faces from autofocus hunting. The camera re-acquires focus when you step into place and lands on the stand-in object or the background. Fix: pre-focus on the marker object, switch to manual focus, and turn off continuous autofocus.
- Harsh direct flash. On-camera flash flattens the face and stamps a hard shadow on the wall. Fix: turn the flash off and use a window or a lamp at 45 degrees.
- Backlight with no fill. Standing with the light behind you drops your face several stops into darkness. Fix: turn so the light is beside you, or add reflector fill and lift the exposure.
- Awkward cropping. Cutting through elbows, knees, or the top of the head makes a frame look like an accident. Fix: crop above the elbow or mid-torso, and leave deliberate headroom.
- The same pose in every frame. Thirty near-identical images give you no choice. Fix: change one element per run and shoot small variations in hands and weight.
- A busy background competing with the face. Bright rectangles, door frames, and lines through the head pull the eye away. Fix: move the camera a few degrees rather than moving yourself, and declutter the spot behind your shoulders.
- Deleting too early. Judging sharpness on a camera screen at arm’s length loses good frames. Fix: keep everything, cull later on a bigger screen.
- Over-retouching. Full-smooth skin and heavy contrast make a good light setup look worse. Fix: retouch temporary blemishes only, and leave texture alone.
- Settings drifting between frames. Automatic exposure and automatic white balance mean frame 4 has nothing to do with frame 40. Fix: set exposure and white balance manually once, then stop touching them.
- Digital zoom on a phone. Pinching to zoom crops the sensor and throws away detail. Fix: move the phone or phone tripod closer instead.
One tip ties all of this together. Shoot the first session as practice rather than as a result, and let yourself be bad at it. The people who get good at solo portraits are not the ones with better cameras, they are the ones who made forty awkward frames before they made one good one.
Frequently Asked Questions
Can I take good self portraits with a phone?
Yes, and most people never move past the phone. Use the rear camera rather than the front one, mount the phone on a small tripod or a stack of books, and fire it with the ten-second timer or a Bluetooth or headphone remote. Skip digital zoom and step closer instead. Shoot in portrait mode when you want the background blur, but use regular photo mode and add the blur later, because portrait mode often softens the edges of hair badly.
What is the easiest way to keep a self portrait in focus?
Pre-focus on a stand-in object. Put a chair, a coat on a hanger, or any object at head height exactly where your head will be, focus on it, then switch the lens to manual focus before you step into position. Turn off continuous autofocus, or the camera will hunt again once you move. With a flip-up or tilting screen you can skip all of this and frame yourself directly.
Do I need a mirror to take a self portrait?
No, and a mirror works against you. A mirror image is always reversed, the light you choose is whatever the room already has, and the camera is at arm’s length on a phone, which gives you a wide-angle distortion of your nose. A tripod puts the lens at a distance where you can use a flattering focal length and a chosen light. If you want a mirror look, put the camera on a tripod and shoot a reflection instead.
Should I use natural light or a flash for self portraits?
Natural light, almost every time. A window placed about 45 degrees to one side of your face and a metre and a half away gives soft, directional light with no equipment. Direct on-camera flash flattens the face, creates a hard nose shadow on the wall behind you, and is hard to correct later. If it is dark, use a continuous lamp with a shade and a bounce card rather than a flash.
How can I make a self portrait look less awkward?
Three changes fix most of it. Angle your shoulders instead of squaring them to the lens, bring your chin forward and down slightly, and give your hands a job such as a pocket, a strap, or a mug. Then shoot far more frames than you need and pick from thirty rather than five. A series of small variations looks intentional; a single stiff frame never does.
Conclusion
Learning how to shoot self portraits is mostly about removing decisions. Choose one location, mount the camera once, set one light at 45 degrees, pre-focus on a marker, and then change only your pose. Everything else, focus, exposure, framing, stays fixed so the frames you collect are actually comparable, and the choice becomes obvious.
Start with three actions today. Pick a spot with a quiet background and a window to one side, put the camera on a tripod and fire a test frame from across the room, and read the result before you walk over to look at it. Once one test frame looks right, the rest of the workflow is just repeating that frame with variations. Refine the composition first, then start experimenting with more elaborate poses and edits.