
Fine art photography is the practice of using the camera as an artistic medium to express a personal vision, emotion, or concept, rather than to document a scene, sell a product, or record an event. That single distinction explains almost everything else on this page, because the difference between a snapshot and a fine art image is not the sensor, the lens, or the megapixel count. It is whether a series of deliberate choices served an idea you could state out loud.
So, how to shoot fine art photography in practice? You write down the feeling you are chasing, study how other photographers handled similar material, choose a camera and lens that suit the subject and your working distance, control the light yourself, compose for hierarchy rather than for a record of what was in front of you, shoot a group of related frames instead of one lucky one, develop the files, and sequence the result into a body of work.
None of that needs expensive equipment. Plenty of the strongest work in this field comes from photographers using modest bodies and, honestly, from people shooting on phones. The process below takes more discipline than money.
Table of Contents
- What You Need
- Step-by-Step: How to Shoot Fine Art Photography
- 1. Define the Feeling You Want to Communicate
- 2. Research and Plan the Visual Language
- 3. Choose the Right Camera and Lens Combination
- 4. Control Light for Mood and Structure
- 5. Compose Images That Guide the Viewer
- 6. Shoot a Cohesive Series Instead of One Perfect Frame
- 7. Make Fine Art Photography Work in Black and White
- 8. Edit for Expression, Not Artificial Perfection
- 9. Sequence, Present, and Share the Final Work
- Common Mistakes
- Frequently Asked Questions
- What is the best camera for fine art photography?
- What is the difference between fine art photography and art photography?
- What are the best camera settings for long exposure photography?
- What is the best tripod for long exposure photography?
- How do you create a body of work in photography?
- Should fine art photography be black and white?
- Conclusion
What You Need
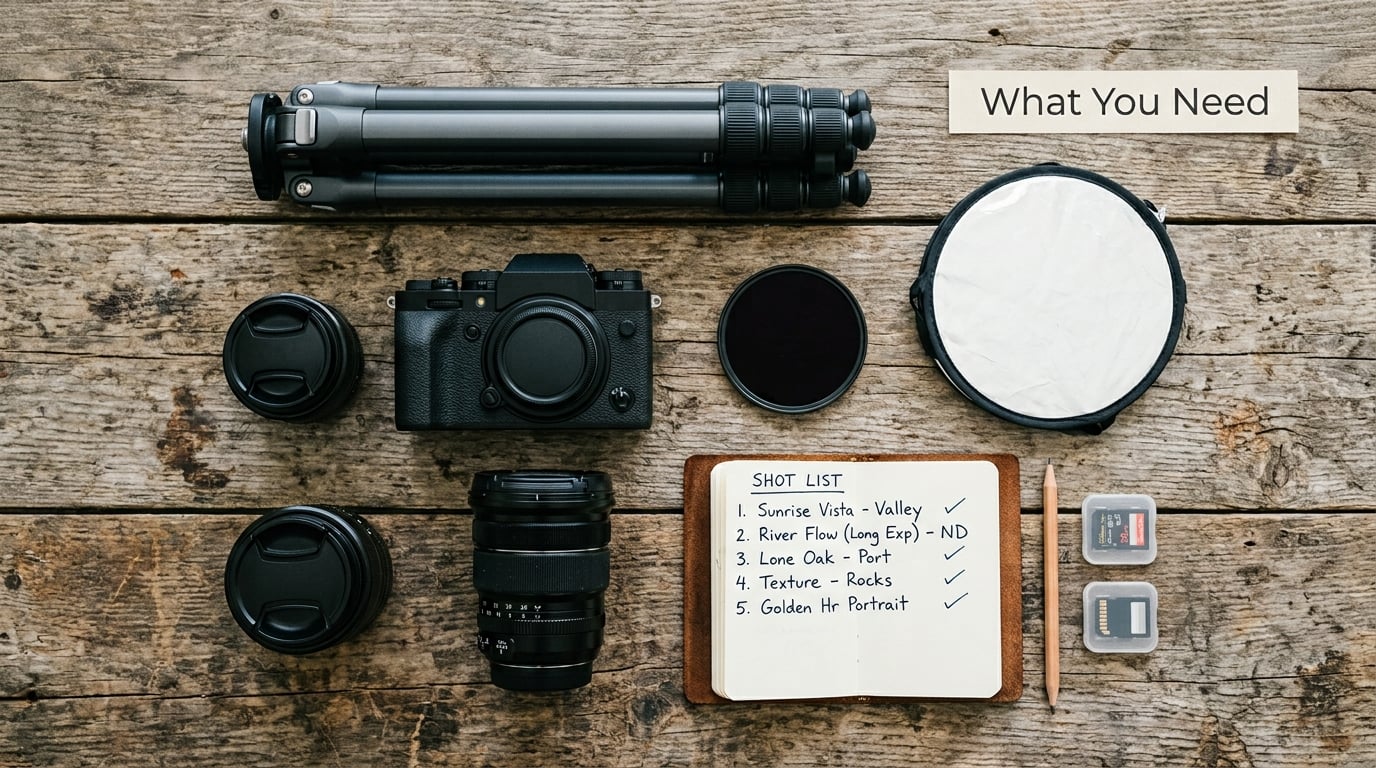
Almost everything on this list you can already own. Treat the camera and lenses as tools you already have, and add the rest only when a specific project asks for it.
A camera with full manual control. That means aperture, shutter speed, and ISO set by hand, RAW capture, and a tripod socket. An older DSLR, a mirrorless body, a fixed-lens compact, or a recent phone all satisfy this. Forum discussion among fine art photographers is full of people producing gallery-worthy work with an entry-level mirrorless body, shooting handheld at f/8 and 1/400 sec. That tells you something about where the value actually sits.
Two focal lengths at most. One wide lens for landscapes, architecture, and interiors, one normal or short telephoto for still life, portraiture, and detail work. A 35mm or 50mm equivalent covers more fine art subjects than any zoom, because it forces you to move instead of crop.
A tripod. Any stable tripod with a ball head. Fine art images live and die on sharpness and on the ability to bracket exposures, so the tripod is the single most useful accessory in this list. Buy the most stable one you can afford, and learn its centre column habits.
Accessories that earn their space. A reflector board or a piece of white foam board for bouncing and flagging, a circular polarizer to cut glare on water, glass, and artwork, and one or two neutral density filters for long exposures. A remote release or the camera’s two-second timer. A lens cloth.
Editing software. Any capable raw converter handles exposure, contrast, and color. A layer-based editor adds cropping, local adjustments, and compositing. Both are standard tools and neither requires a subscription commitment to get started.
Planning materials. A notebook or phone notes app, a shot list, and a contact sheet workflow. Serious fine art work starts on paper, and the cheapest part of this whole list is the one that does the most work.
Step-by-Step: How to Shoot Fine Art Photography
1. Define the Feeling You Want to Communicate
Turn a broad subject into a specific visual statement. Write a one-paragraph brief covering mood, story, tonal or color direction, who the work is for, and the role the finished series plays in your portfolio.
“I want to photograph winter” is not a brief. “I want images of coastal winter that feel cold and quiet, tonally restrained, showing people as small marks against wide grey structure, meant to sit as a six-image series on a gallery wall” is a brief. The second version can be argued with, shot toward, and judged.
You can tell it worked when someone else could read your brief and predict roughly what your photographs look like. If they cannot, the idea is still foggy.
2. Research and Plan the Visual Language
Study how artists working near your subject have solved the same problems. Look at how they frame, what light they choose, how much negative space they leave, whether colour or tone carries the mood, and how many images they include in a series.
Then get practical. Build a location list with the light conditions at each spot and the time of day that suits them, a shot list of frames you actually intend to make, and a rough contact-sheet plan showing which frames belong to the same idea and which form pairs.
Research is not imitation. You are borrowing decisions and reasoning, not copying a finished photograph.
3. Choose the Right Camera and Lens Combination
Pick gear by subject, working distance, depth of field, and portability rather than by brand. Landscapes reward a wide lens and deep focus. Still life rewards a normal lens and a tripod, shot at f/8 to f/11 for even sharpness. Portraiture usually wants a normal or short telephoto at f/2.8 to f/4 so the background falls away.
Anyone working out how to shoot fine art photography hits this section first, so keep the gear list short and let the light do the work. Use the numbers below as starting points, not laws. Every one of them is a place to begin and then move from.
| Scenario | Aperture | Shutter speed | ISO | Tripod | Focus |
|---|---|---|---|---|---|
| Static landscape | f/8 to f/11 | 1/125 sec or faster | ISO 100 | Yes | Manual, focus to infinity with live view magnification |
| Long exposure seascape | f/8 to f/11 | 30 sec to 4 min | ISO 64 to 100 | Yes, required | Manual, set before attaching the filter |
| Portrait | f/2.8 to f/4 | 1/250 sec or faster | ISO 100 to 400 | Optional | Single-point autofocus on the near eye |
| Still life | f/8 to f/11 | 1/4 to 2 sec, or bulb | ISO 64 to 100 | Yes | Manual, focus on the front-most critical plane |
| Street and everyday | f/5.6 | 1/500 sec | ISO 400 to 1600 | No | Continuous autofocus, single frame |
| Moving water or blur | f/11 | 1 to 15 sec | ISO 100 | Yes | Manual, hyperfocal or front-plane focus |
Shoot in manual mode, meter for the highlights, and check the histogram rather than the LCD. Digital files forgive a stop of underexposure far better than a stop of clipping, so protect the bright end.
4. Control Light for Mood and Structure
Light is the one variable that changes the character of an image more than anything else you control. Observe what is already there before adding anything: the direction, hardness, colour, and quality of shadow at different hours tell you which times of day suit the mood in your brief.
Hard light creates sharp edges and high contrast for graphic, tense images. Soft light, from overcast skies or light bounced through a sheet, gives you a gradual tonal range that suits quiet, atmospheric work.
Two tools cover most situations: something to block light with and something to bounce light with. A white board or foam board on the shadow side lifts a face or a wall; black card or foil creates separation and deepens a shadow. When the contrast between light and shadow exceeds what your camera records in one frame, bracket three to five exposures a stop apart and blend them later.
For long exposures, compose and focus first, then attach the neutral density filter. Screw it on afterwards and you cannot focus past the thread. A six-stop ND turns a one-second exposure into about a minute; a ten-stop turns it into roughly seventeen minutes.
5. Compose Images That Guide the Viewer
Ask where you want the eye to land first, second, and third, then arrange the frame to enforce that order. Visual hierarchy, leading lines, framing edges, layering of near and far elements, and deliberate negative space all direct attention more reliably than any geometric grid.
The rule of thirds is a useful default for placing your subject off-centre with breathing room, and it works because asymmetry creates tension that the eye resolves. Negative space does the opposite work: an empty two-thirds of the frame isolates the subject and turns a place into a mood.
Several composition ratios come up constantly in photography communities, and they are really one idea applied at different intensities. The 20/60/20 rule puts the subject or focal element across roughly a fifth of the frame with the rest given to context and open space. The 70/30 rule divides the frame near seventy-thirty between dominant element and supporting area, a useful structure for landscapes with a strong horizon. The 80/20 rule pushes further, letting the main subject occupy close to four-fifths of the frame for bold, simple statements.
Break the rules once you understand what each one does. A symmetrical, dead-centre composition works when the architecture itself is the subject, and a deliberately unbalanced frame works when you want the viewer to feel unsettled.
6. Shoot a Cohesive Series Instead of One Perfect Frame
A single perfect frame is a happy accident and hard to build on. Shoot a set instead: vary the viewpoint, the height, the focal length, and the detail level, while holding constant whatever carries the idea.
That constant might be the tonal range, the colour palette, the weather, or the position of the subject in the frame. Varying everything at once produces a folder of unrelated pictures. Varying almost nothing produces a series that reads as one thought.
For every frame you think works, make three more: one step closer, one from a different height, one as a detail. Then shoot one deliberately awkward frame that plays against the pattern. Fine art photographers often describe their weakness as their strength, and shooting a subject you find unglamorous is a reliable way to develop a personal voice rather than a borrowed one.
Some photographers build in pairs rather than sequences. A diptych, two images that only fully work side by side, is a strong structure for work about contrast, absence, or time. Test it by placing two frames on your screen and asking whether the pair says something neither image says alone.
The slow part of learning how to shoot fine art photography is not the shooting. It is deciding what belongs in the set and being willing to leave frames out.
7. Make Fine Art Photography Work in Black and White
Monochrome strengthens a photograph when shape, gesture, texture, and tonal relationship carry the idea and colour does not. Convert a test when the subject is defined by form or by light rather than by hue.
Keep the conversion honest: raise the contrast curve gently rather than crushing it, dodge and burn to direct the eye to the areas that matter, and watch the midtones. Muddy greys are the most common failure in a converted image. If the whole frame sits in the same middle value with no separation, adjust the black and white points and recheck the histogram.
Keep colour when hue is doing the narrative work, or when a single colour carries the whole image. Trying to make a colour image grey because black and white feels more serious is a loss with no gain.
8. Edit for Expression, Not Artificial Perfection
Work through a repeatable process so you can go back and change your mind later. A sensible order: exposure and white balance, global contrast, color grade, local adjustments on the areas that need attention, crop, then output sharpening.
Save your raw file, work on a copy, and keep a version you can revisit. Judge images at full screen and at actual size, and give a candidate at least a day before deciding it fails. The first edit is usually an argument with the file; the second is where taste starts to show.
Fine art post-processing can include photomanipulation, compositing, and removing distractions that were in the frame. What matters is that the result matches the idea you set out to express rather than the literal scene, and that you are honest with yourself about what you changed.
9. Sequence, Present, and Share the Final Work
A body of work is usually a sequence of somewhere between five and fifteen images that share a visual idea and reward being seen together. Consistency of treatment matters more than a large count: the same colour approach, the same border or none, the same visual weight across the set.
Order the images the way you would read them. Open with the frame that carries the clearest statement, move through variations and quieter frames, and place the strongest single image last so it lands last. Then trim ruthlessly. Most sets improve by losing two frames.
Then edit and caption each one, write a short artist statement explaining what you were after and how the series was made, and prepare output files for the destination: a consistent size and format for a gallery submission, a high-resolution file for print, a properly exported set for a website or social feed.
For prints, archival papers made from cotton or rag with a matte surface are the usual choice for fine art work because they hold deep blacks and do not reflect. Print a small test at the intended size before committing to a run, and keep the file layered so you can reprint later.
One special case worth knowing: reproducing existing artwork is a different job from making fine art photographs. Photograph the piece with a gray card in the first frame for colour reference, shoot the same framing again without it, use a circular polarizer to kill reflections and glare from varnish and glass, light the surface evenly from both sides to avoid keystone distortion, and shoot straight on with the camera parallel to the picture.
Common Mistakes
1. Buying gear instead of making photographs. The fix is to set a rule for yourself: no equipment purchase until a specific project cannot be shot with what you already have. Fine art results come from decisions about light and composition, and those are free.
2. Chasing what is trending. Trends give you someone else’s idea executed at your skill level. Fix this by writing the brief in step one and shooting what it describes, even if it is quiet.
3. Making unrelated photographs. A folder of good pictures is not a body of work. Fix it by choosing one subject and shooting variations of it until you have eight to twelve frames that could hang together.
4. Over-processing to look impressive. Heavy local dodging, crunchy clarity, and heavy vignetting fight the original light. Fix it by flattening the edit and reintroducing only the adjustments that direct the eye.
5. Crushed blacks or blown highlights in conversion. Fix it by checking the histogram after every global change and keeping a full range of tones on show.
6. Showing the series out of order. Fix it by laying the images on a wall, in a slideshow, or in a grid, and letting yourself judge the set as a set rather than image by image.
A few concise habits help more than any of the above. Shoot RAW, keep a written shot list, work from a tripod whenever the subject holds still, check the histogram rather than the screen, and edit a series in one sitting so every frame gets the same treatment.
Frequently Asked Questions
What is the best camera for fine art photography?
Any camera with full manual control, RAW capture, and a tripod socket will do, and many fine art photographers produce gallery-quality work with entry-level bodies or even phones. Choose by the subject instead of by brand: a wide lens for landscapes, a normal lens for still life and portraiture. Focal length, working distance, and how comfortably you can carry the camera matter far more than sensor size or resolution.
What is the difference between fine art photography and art photography?
The difference is intention and how the work was made. Fine art photography is self-directed, made to express a personal vision, and judged on its creative merit rather than on its use. Commercial or editorial art photography is commissioned to communicate something for a client, and its success is measured by how well it delivers that message. The same camera and the same settings can produce either one.
What are the best camera settings for long exposure photography?
Start at f/8 to f/11, ISO 64 to 100, manual focus, and bulb or a timed exposure on a tripod, then add a neutral density filter to reach the time you want. Compose and focus before attaching the filter, because you cannot focus past the filter threads. Shoot at dawn, dusk, or overcast light, and bracket if the highlight range exceeds what a single frame holds.
What is the best tripod for long exposure photography?
Look for stability rather than features: a rigid build, a solid ball head with a smooth pan, and a load rating comfortably above your camera and lens. Any decent tripod can hold a frame for thirty seconds, but cheap legs vibrate during multi-minute exposures, which ruins sharpness at small sensor pixels. Level the camera with the head first, then center the legs for the heaviest loads.
How do you create a body of work in photography?
Pick one subject and one visual idea, then shoot many variations of it while holding constant whatever carries the meaning, such as tonal range, palette, or viewpoint. Review your frames as a set, keep the ones that reinforce the idea, and order them so the clearest statement comes first and the strongest frame comes last. Most useful sets run between five and fifteen images.
Should fine art photography be black and white?
Convert to monochrome when shape, gesture, texture, and tonal relationship carry the idea and colour does not. Keep colour when hue is doing the narrative work or when a single colour holds the image together. Whichever you choose, protect the full tonal range: avoid crushed blacks and clipped highlights by checking the histogram, and dodge and burn gently rather than pushing global contrast hard.
Conclusion
Knowing how to shoot fine art photography comes down to a sequence you can repeat: write the brief, research the visual language, choose gear by subject and working distance, control the light, compose for hierarchy, shoot a series rather than one frame, develop the file, then sequence and present the work.
Start today with one subject and one visual idea. Write three sentences describing the feeling, build a short shot list, and go shoot enough frames that you have a small series rather than a single image. Then run your first edit in one sitting, put the frames in order, and look at them together. That review, repeated honestly over a few months, is where the artistic vision comes from, not from new equipment.