
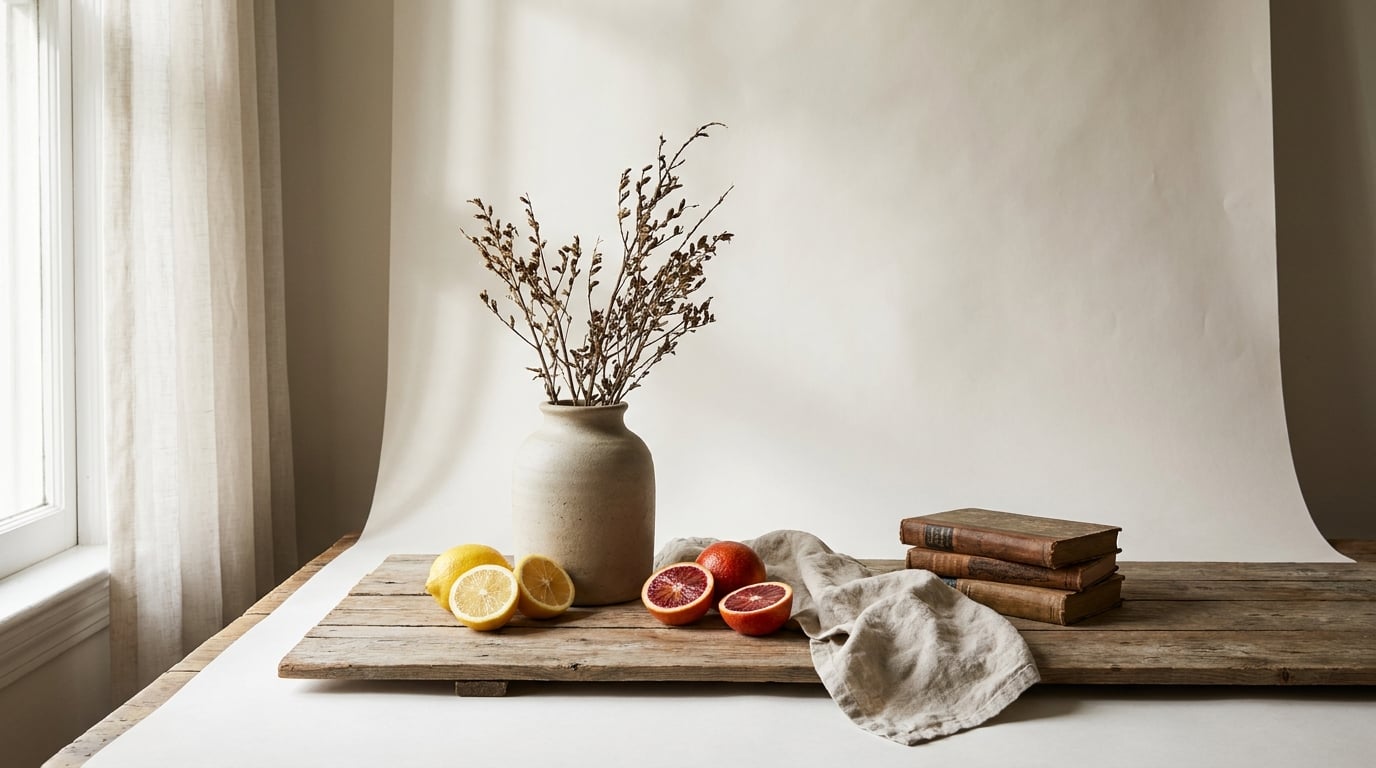
You do not need a studio, a lightbox or a bag of paid props to make a still life worth looking at. A windowsill, one window, and objects you already own are enough. These 10 still life photography ideas at home each use the same three ingredients: one light source, one surface, and a small group of objects arranged with intent.
Most people who stall on still life run out of subjects before they run out of technique. The tired list is fruit in a bowl next to a wine glass, repeated by every beginner list on the internet. Shoot something else instead: torn bread, an enamel tin, a folded sheet of linen, a pair of spectacles.
Below, each idea covers what to gather, where to put the camera, and what the shot is trying to do. Some take ten minutes. Idea 10 takes a dark hallway and a lamp.
Table of Contents
- Still Life Photography Ideas at a Glance
- 1. Moody Ceramic and Citrus Composition
- 2. Rustic Kitchen Ingredients on a Wooden Board
- 3. Black-and-White Texture Study
- 4. Surreal Floating Fruit Arrangement
- 5. Minimal Glassware and Water Reflection
- 6. Vintage Books, Paper and Ink
- 7. Seasonal Flowers in an Unusual Container
- 8. Everyday Objects Arranged by Color
- 9. Coffee Table Morning Ritual
- 10. Dramatic Shadow Art with Plants
- Frequently Asked Questions
- What are some easy still life photography ideas at home for beginners?
- Do I need studio lighting or a tripod to photograph still life at home?
- Why do my still life photos look flat and boring?
- What surfaces and backdrops work best for a home still life?
- How do I stop still life photos looking like fruit in a bowl next to a wine glass?
- Conclusion
Still Life Photography Ideas at a Glance
This table compares all ten concepts by mood, subject matter, light direction and framing so you can pick the one that fits your room and the hour you have free.
| Concept | Suitable objects | Best light source | Composition | Mood |
|---|---|---|---|---|
| 1. Ceramic and citrus | Matte vessel, halved citrus, leaves | Single window at a low side angle | Eye level, tight crop | Moody, high contrast |
| 2. Kitchen ingredients | Flour, spices, herbs, bread, wooden spoon | Soft window light from behind | Straight down flat lay | Warm, tactile |
| 3. Texture study | Fabric, stone, ceramic, paper | Raking light across the surface | Close crop, large negative space | Abstract, quiet |
| 4. Floating fruit | Apples, oranges, twine, clamp supports | Even frontal light | Centred, plain background | Surreal, playful |
| 5. Glass and reflection | Clear glasses, water, coloured card | Backlit window | Low, symmetrical | Clean, graphic |
| 6. Books and ink | Old books, notes, pen, spectacles | Warm desk lamp from one side | Layered, three-quarter view | Intellectual, nostalgic |
| 7. Seasonal flowers | Cut or artificial stems, glass or tin | Bright diffuse window | Asymmetrical, stems off-centre | Fresh, soft |
| 8. Objects by colour | Anything, grouped by hue | Flat even daylight | Flat lay, repeated spacing | Graphic, playful |
| 9. Morning ritual | Cup, beans, cloth, spoon, pastry | Overhead window light | Three-quarter top down | Comforting, lived-in |
| 10. Shadow art | One plant, one plain wall | One hard lamp at a distance | Flat on, wall fills frame | Graphic, dramatic |
1. Moody Ceramic and Citrus Composition
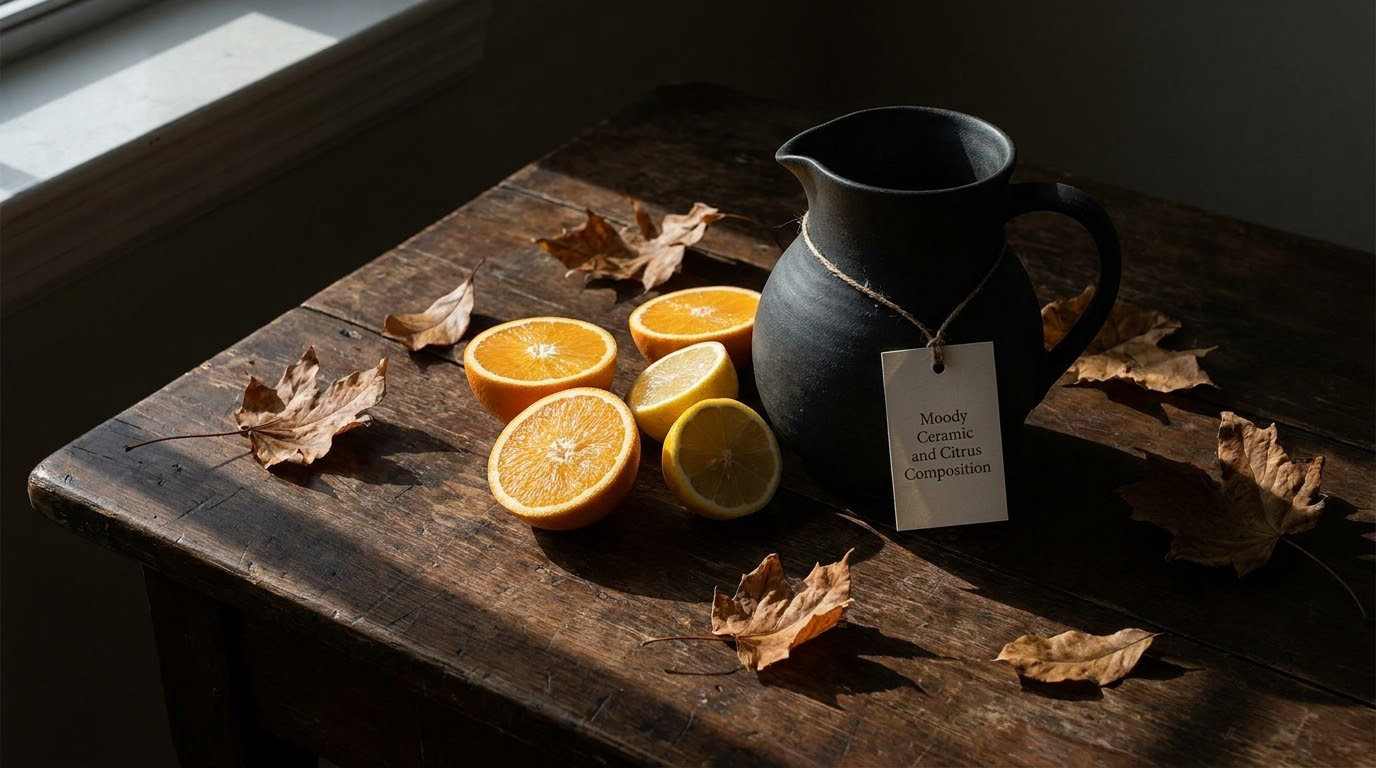
This is the version of the classic fruit shot that still works, because the ceramic does the heavy lifting instead of the fruit. A matte, unglazed pot reads as texture rather than decoration, and the citrus gives you one hit of colour against it.
Put the darkest object nearest the window and let the light fall across it at a low angle. Low side light rakes across the surface and throws long shadows, which fills the empty half of the frame. Set the camera at table height, level with the base of the vessel, so the rim of the pot cuts a clean line across the background.
Stop down around f/8 and focus on the front edge of the vessel so the citrus behind it softens slightly. A few leaves scattered off to one side keep the arrangement from looking symmetrical for the sake of it.
2. Rustic Kitchen Ingredients on a Wooden Board
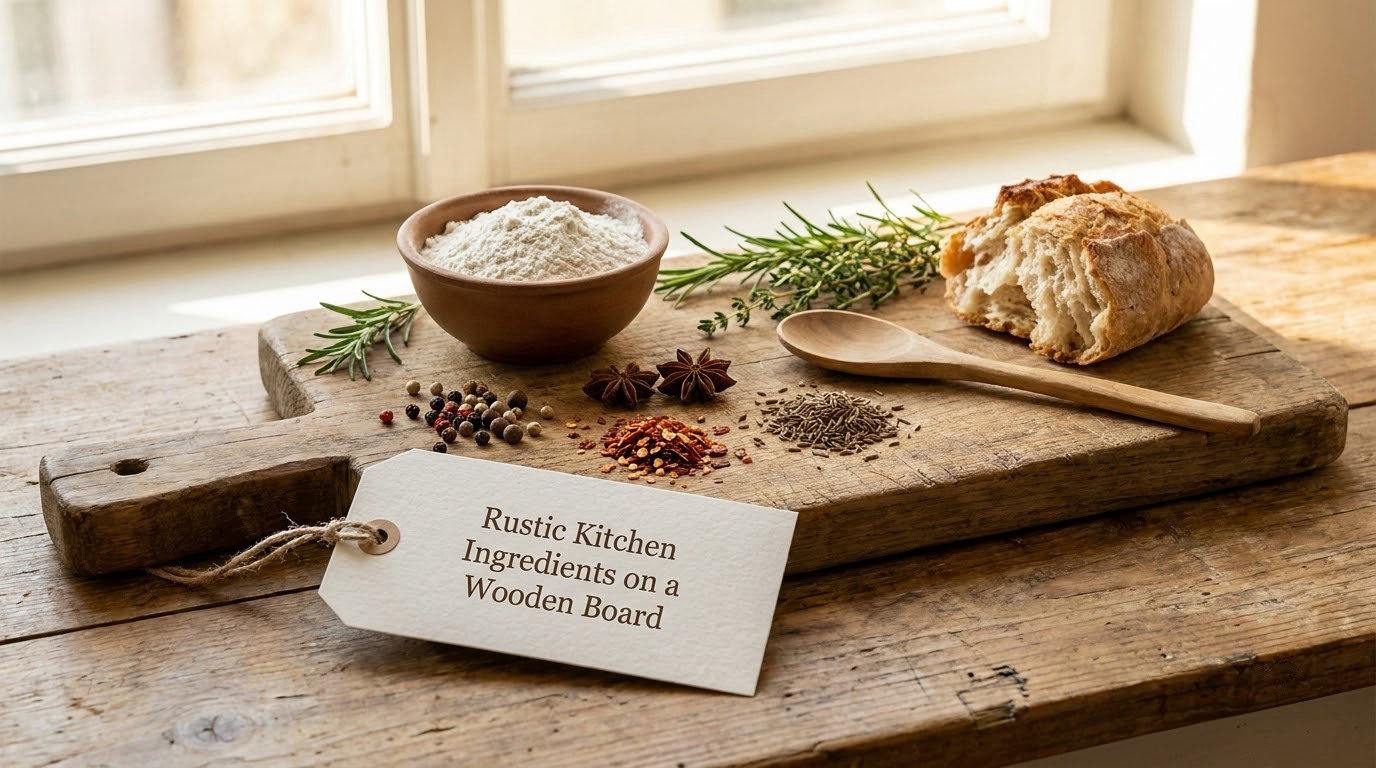
This one needs a chopping board and about ten minutes. Flour in a small bowl, three spices tipped into a line, a few sprigs of whatever herb is alive in the fridge, a wooden spoon, and a piece of bread torn rather than sliced.
Go straight overhead and make it a flat lay. Overhead framing kills the shadow problem that ruins most indoor food shots, because everything sits at the same distance from the light. Turn the board so the grain runs diagonally across the frame rather than parallel to the edges.
Position the window behind and slightly to one side of the board, not above it. Backlight picks out the dust in the flour and the crumb on the cut bread, which is most of what you are after. Practitioners on photography forums consistently reach for textured wood and chopping boards for exactly this reason: the surface is half the photograph.
3. Black-and-White Texture Study
Switch this one to black and white and colour stops mattering. The subject is four or five materials at different heights: a crumpled linen cloth, a smooth river stone, a glazed ceramic fragment, a sheet of crumpled paper, a folded napkin.
Rake a low light across the arrangement so every fold throws a shadow across the material behind it. Shadows are what make texture read, and in black and white you get shape without the distraction of hue.
Leave most of the frame empty. Put your grouping in one lower corner and let the rest go dark, then place your focus point on the boundary between the lit and unlit areas. That edge holds the eye longer than the objects do.
4. Surreal Floating Fruit Arrangement
Fruit suspended in mid-air looks fake unless the evidence of support is completely hidden and the shadow below tells the truth. Clamp a thin clear rod to a table edge behind your backdrop, then hang each piece on fishing line from a boom above the frame. A single support rod per fruit keeps the chaos down.
Shoot against one flat background with no visible floor junction. Put the light dead in front of the setup, slightly above, so every piece gets an even highlight and drops a soft shadow onto the backdrop behind it.
Alignment matters more than anything else here. Place the fruits at different heights so they overlap without colliding, and keep the camera perfectly square to the backdrop. When you edit, aim to remove only what gives the trick away, and check the final crop at thumbnail size before you call it finished.
5. Minimal Glassware and Water Reflection
Two or three clear glasses, a shallow layer of water, and a sheet of coloured card are the whole kit. This idea works because water doubles every line above it, so the frame gets depth without adding objects.
Backlight it. Put the window directly behind the glasses so the light passes through the glass and the water, which is what creates the refraction patterns on the surface. Use a white card on the camera side as a reflector to put a highlight back into the shadow side of each glass.
Watch the specular highlights. Bright white streaks across the glass usually mean the window is reflecting straight into the lens, so shift the setup ten centimetres and reshoot. Keep the coloured card far enough behind or beside the glass that its edge never enters the frame, and you get clean separation against a plain background.
6. Vintage Books, Paper and Ink
Old books, a handwritten page, an open ink bottle, a fountain pen and a pair of spectacles give you a scene with a story already attached. You are not styling objects, you are styling a moment someone left behind.
Layer it. Books flat on the surface, a second book standing slightly open behind them, the note draped across the corner, spectacles resting on the page as if just removed. Every layer should overlap the one behind it slightly, so the eye steps forward through the arrangement.
A warm desk lamp placed low and to one side gives you patina and falloff without a lot of equipment. Mirrors and a piece of foil are the classic low-cost tricks for shaping a small lamp, and both are usually already in a drawer somewhere. Spend the effort on wear and dust rather than expensive editions, since the damage is the appeal.
7. Seasonal Flowers in an Unusual Container
A jam jar, an enamel mug or a deep tin is more interesting than a vase. The wrong container is what makes the photograph look considered, so pick something with a colour that argues slightly with the flowers rather than matching them.
Work on colour harmony. If the stems are warm reds and yellows, put a cool blue-grey card behind them; if the blooms are pale, choose a container in a deeper tone so they do not disappear. Three or five stems read better than a full bunch, and cutting them to noticeably different lengths stops the arrangement looking shop-bought.
Break the symmetry deliberately. Let the tallest stem lean out of frame, keep the container off the centre line, and shoot at a low angle so the background is a clean field. The rule of thirds placement is almost always the safer bet than dead centre here, because the leaning stem has somewhere to go.
8. Everyday Objects Arranged by Color
Choose one palette with three or four colours and refuse to add anything outside it. Red, mustard, teal and cream is a good starting set. Then hunt the flat: keys, a red thread spool, a stone lemon, a folded sock, a paperback, a tin, a shoe.
Build in blocks. Put all the cream objects together, all the mustard together, and let each colour occupy its own zone. Overhead framing flattens the scene into almost a poster, which is exactly what this idea wants.
Spacing does the work. Repeated items in a line create rhythm; leave slightly more gap after each group so the eye reads four objects instead of one pile. Turn everything so the most interesting side faces up. Ten minutes of arranging usually beats an hour of editing.
9. Coffee Table Morning Ritual
Coffee, a few beans scattered on the surface, a folded cloth, a spoon and a small pastry. It is the least ambitious idea here and the one most likely to get used, because the props are already in front of you.
Shoot from a three-quarter angle above the table rather than straight down. Straight down turns it into a diagram; a slight tilt gives the cup presence and lets the background fall away into softness. Place the window overhead and slightly behind so the light falls into the cup and picks up the steam.
Steam needs help. Backlighting it against a darker background helps, and a little movement from someone walking past adds life to a frame that would otherwise be very still. Warm the white balance slightly and resist over-brightening, since the appeal is the softness. A rumpled cloth beats a neat one every time here.
10. Dramatic Shadow Art with Plants
One plant, one blank wall, one hard light source. Put the plant close to the wall, aim the light from the side at roughly the same height, and the wall fills with a giant silhouette. A leaf that measures eight centimetres in the pot can throw a shadow a metre wide.
Getting a crisp shadow needs a small light close to the subject and a wall close to the subject. The closer the wall sits to the plant, the sharper the edge; the further away, the softer and larger it becomes. Flag the rest of the room so the only shadow you get is the one you designed.
Expose for the wall, which is much brighter than the plant, and let the foliage go dark. Shoot square to the wall so the shadow geometry stays readable, and step back until the frame is mostly wall. That is the whole trick, and it costs nothing but patience with a lamp and a plant you already own.
Choosing a Light Source and Camera Position
The right light depends on the hour and the direction your window faces. North light through a single window is the steadiest of all, but any window beats a ceiling fixture for still life work, because a ceiling light drops shadows straight down into your subject and flattens texture.
Choose one source and commit to it. Mixing a warm ceiling bulb with cool window daylight gives you two colour temperatures, two shadow directions, and a colour cast you will spend editing time chasing.
Camera position is the cheapest way to change a shot. Straight overhead flattens everything into a flat lay and hides depth. Eye level puts you in the scene and gives objects presence against a background. A low angle, near the surface, exaggerates texture and lets the background fall away, which is why ideas 1, 5 and 9 all work best that way.
Once the light is behaving, set manual exposure rather than letting the camera decide. ISO 100, an aperture somewhere between f/8 and f/16, and a two-second timer or remote release on a tripod will hold detail in both the highlights and the shadows. On a phone, tap the subject to lock focus and exposure, then step back and shoot, because the automatic version will hunt every time the light changes.
Frequently Asked Questions
What are some easy still life photography ideas at home for beginners?
The easiest at-home still life setups use objects already in your kitchen: a ceramic bowl, a linen cloth, a glass of water, or a stack of old books. Place them near one window, shoot with your phone or camera from a low angle, and keep the arrangement to three or four objects. Simple does not mean careless, though. The difference between a snapshot and a photograph here is almost always the light and the spacing, not the props.
Do I need studio lighting or a tripod to photograph still life at home?
Neither is required, but both make things noticeably easier. A tripod lets you stop down to f/8 or f/16 for full depth of field without camera shake blurring the frame, which matters when nothing in the scene is moving. One desk lamp or a window with a white card reflector will replace a softbox. A stack of books on a table works as a low stand if you have no tripod.
Why do my still life photos look flat and boring?
Flatness usually comes from light coming from directly above or from directly behind the camera, because both directions hide surface texture and cast unhelpful shadows. Move the light to one side at a low angle and the texture appears. Check the background too: cords, bins and furniture in the corner are distracting, so move the whole setup away from the room or cover the background with a plain sheet.
What surfaces and backdrops work best for a home still life?
Anything textured reads better than anything smooth. Photographers mention the same handful of materials repeatedly: wood with visible grain, slate, linen and other natural fabric, chopping boards, and kitchen worktops. A sheet of plain paper or card costs nothing and gives you total control of the colour. Choose a surface that contrasts slightly with your subject so the objects do not merge into it.
How do I stop still life photos looking like fruit in a bowl next to a wine glass?
Stop using the two default subjects and change what carries the image instead. Put a matte ceramic vessel, an enamel tin or a folded piece of cloth at the centre and let the fruit be an accent rather than the hero. Other reliable subjects include torn bread, spectacles, ink and paper, a stone with moss, or tools arranged on a workbench. Texture and a clear point of view matter more than subject choice.
Conclusion
Start with one idea rather than all ten. Pick the single object you like most, put it on the best surface you own, and give it one light from one side. Shoot ten frames from three angles before you change anything at all, because the differences will teach you more than any settings list.
Once that one works, move on. These still life photography ideas at home share a method: a small number of objects, one decided light, and a composition you can explain in a sentence. Change one variable at a time and you will run out of things to shoot in a week.