
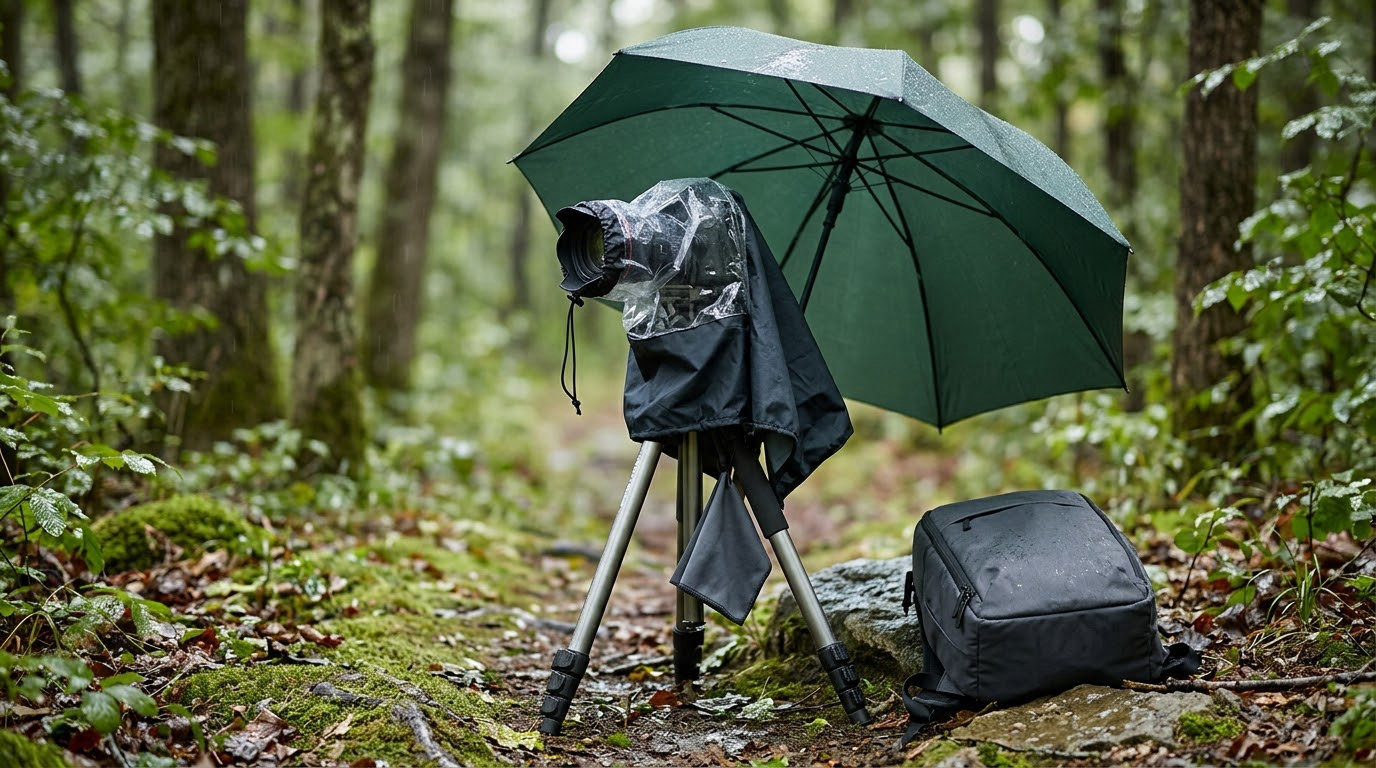
Yes, you can shoot in the rain safely. Rain is one of the best-kept secrets in photography: wet pavement gives you reflections, dark backgrounds make falling droplets glow, and an overcast sky works like a giant softbox. The only real barrier is water, and most of that comes down to three habits: keep the front lens element dry, keep water out of the body seams, and stay smart about lightning. This guide is about cameras, by the way, not firearms.
Below is a nine-step routine I use for wet-weather work, from checking the forecast to drying the bag at home. It takes about 20 minutes of prep and roughly the same discipline you would apply on a dry day, just with more layers. If you only remember one thing: learning how to shoot in the rain safely is mostly about working with shelter and timing, not owning expensive gear.
Table of Contents
- What You Need
- Step-by-Step: How to Shoot in the Rain Safely
- Step 1: Check the Forecast and Choose a Safe Location
- Step 2: Protect Your Camera Before You Leave
- Step 3: Set Up a Weatherproof Shooting Position
- Step 4: Adjust Exposure for Dark, Contrasty Conditions
- Step 5: Focus Reliably on Rainy Scenes
- Step 6: Use Rain as a Creative Element
- Step 7: Monitor Your Equipment and Shooting Conditions
- Step 8: Capture Backup Images and Test Shots
- Step 9: Pack Up and Dry Your Gear Safely
- Common Mistakes
- Field Tips for Rainy Photography
- Frequently Asked Questions
- Can I use my camera in the rain safely?
- Is a rain cover enough to protect a camera?
- Should I use a UV or clear filter when shooting in the rain?
- What should I do if my camera or lens gets wet?
- How do I avoid condensation when moving from cold air into a warm room?
- Is it safe to photograph rain during a thunderstorm?
- Conclusion
What You Need
Start with the camera itself. A weather-sealed mirrorless body with sealed lenses tolerates drizzle far better than an older entry DSLR with no seals at all. Sealing is never total, so treat any body as vulnerable to sustained heavy rain.
Next, protection. A camera rain cover with a right-hand sleeve is the most useful single item, because you can operate the shutter and dials through it. If you have no cover, a heavy-duty plastic bag with a hole cut for the lens and a rubber band around the hood works well enough for a shower, though trimming the flap tips so they do not block the viewfinder takes a few minutes.
Also pack a microfibre lens cloth (three of them, not one), a lens hood, a dry bag or sealed pouch for spare batteries and memory cards, and a towel that you are willing to sacrifice to the gear. A tripod matters more than usual because it frees both hands for covering and wiping.
For power, cold batteries lose charge quickly, so keep spares in a sealed pouch inside your jacket rather than in the bag. For visibility, waterproof gloves are worth more than they look: wet fingertips on a cold shutter button are how cameras get dropped. For storage, plan on one sealed container for everything that has been outside, so a damp body never sits in a closed bag for the drive home.
Step-by-Step: How to Shoot in the Rain Safely
Step 1: Check the Forecast and Choose a Safe Location
Read the forecast for rainfall intensity, wind, and thunderstorm risk before you pack anything. Light drizzle and a steady downpour are very different shooting problems, and a thunderstorm is a completely different safety problem.
Your location matters as much as the timing. Look for a shooting position with a roof edge overhead but far enough back that the camera is not in the drip line, and check where water is running. If you see standing water, mud, or a swollen stream, that spot is out. You will know the location works when you can stand there for twenty minutes without water running down your neck or underfoot.
If lightning is forecast, postpone or move indoors. The widely used 30/30 rule is a reasonable guide: if thunder is within 30 seconds of the flash, or the flash is within 30 kilometres of you, stop and get into a substantial building or a fully enclosed vehicle. Open shelters, isolated trees, and water are all bad places to be during a storm.
Step 2: Protect Your Camera Before You Leave
Do the covering at the car, not at the shooting spot. The bag stays closed and the camera stays inside until the moment you are ready to shoot, which halves your exposure to water.
Check the weather sealing on your body and lens, and look for a worn or peeling rubber seal that a camera repair shop can replace before the season starts. Wipe the front element with a clean cloth as a habit, because existing grime holds water on the glass and creates permanent-looking haze.
You know the camera is ready when the cover is on, the front element is dry, the spare batteries and cards are in the sealed pouch, and you have not yet touched a dial with a wet finger. It takes about two minutes.
Step 3: Set Up a Weatherproof Shooting Position
Set the tripod on stable, level ground. Wet grass, mud, and smooth rock all slip or sink, and a tripod tipping into a puddle usually means a broken front element. Push the legs into solid ground and check the middle brace is tight before you hang anything off it.
Position yourself with your back to the prevailing wind, which keeps rain off the front of the lens, and leave a hand’s width between the camera and any wall so you can reach the controls from behind. If a cover is fitted, make sure the sleeve does not pinch the dials or leave the eyepiece blocked.
The test is simple: set up, press the shutter, and confirm both the viewfinder and the rear screen read clearly through whatever you are using.
Step 4: Adjust Exposure for Dark, Contrasty Conditions
Overcast skies fool the meter in both directions. A bright wet road can push the camera toward a dark, muddy frame, and a dark wall behind a bright sky can blow out the highlights. Checking the histogram after every frame is the fastest way to catch both.
Protect the highlights first. If the brightest parts are clipping, add exposure compensation in small steps rather than opening up for the shadows. If the frame is flat and grey, subtract a little instead. In manual mode, set shutter speed and aperture for the look, then let auto ISO handle the rest, with a sensible ceiling so noise does not get out of hand.
Watch your stabilisation limit. If the camera relies on in-lens or in-body stabilisation, most manufacturers expect a shutter speed of at least 1/60 second to 1/125 second for sharp stills. Below that, either raise the ISO or use a tripod. You will know the exposure is right when the histogram has detail in both ends of the range and a bright jacket in the frame is not pure white.
Step 5: Focus Reliably on Rainy Scenes
Droplets on the front element are the reason autofocus hunts in rain. The camera sees a high-contrast spot on the glass, locks onto it, and everything behind goes soft. Set a single, small autofocus area and place the subject on it rather than trusting a wide tracking mode across a busy scene.
Confirm focus before the rain moves in. Once the framing is set, switch to manual focus and leave it there, or use back-button focus if your camera supports it, which separates focusing from the shutter release and stops the hunt.
The cover-aim-fire technique helps more than any setting. Set focus and composition, turn the camera so your body shields the lens, uncover the front element only at the moment you press the shutter, then re-cover it. A two-second self-timer on a tripod lets you uncover with one hand and uncover again with the other. You will know focus is solid when the subject’s eye or near edge is sharp and the raindrops in the foreground are the only soft things in the frame.
Step 6: Use Rain as a Creative Element
Rain is a subject, not just a hazard. A fast shutter speed of 1/1000 second or so freezes individual drops; a slow shutter of a second or two turns them into streaks; a mid-range speed gives you a soft veil. Reflections in puddles need a low angle, so kneel, lie down, or use the tripod with the legs folded low.
For droplet highlights, put a flash behind or beside the rain and shoot against a dark background, which is the standard trick for making drops read as bright points. An overcast sky behaves like a softbox the size of a building, so portraits look even and flattering without any flash at all.
Mist and spray after a heavy shower often give you the most atmospheric frames, and shooting through a window or from a doorway keeps you dry and still. If you want more on the creative side, how to photograph rain breaks down the specific techniques for droplets, reflections, and long exposures.
Step 7: Monitor Your Equipment and Shooting Conditions
Build a two-minute check into every few minutes of shooting. Look at the front element, the viewfinder window, the sensor window, the battery level, the remaining card space, and the seal around the battery compartment door.
Watch the sky, not just your screen. Light changes fast when a front passes, and a squall that looks harmless from a doorway can be a downpour two minutes later. Set yourself a hard turnaround time, especially if you are on a trail, a rockshore, or anywhere with rising water.
There are clear stop signals: water visible inside the body, a battery door that will not latch, error messages, or shots that come out with a foggy or banded look, which is often moisture on or behind the sensor. If you hit any of these, stop shooting, put the camera in its sealed pouch, and head to shelter. Drying it out properly matters more than the last twenty frames.
Step 8: Capture Backup Images and Test Shots
Before any frame you care about, take one throwaway shot and check focus, exposure, horizon, and the edges of the frame. In rain, the things that go wrong are predictable: a droplet on the front element, a tilted tripod, a person at the edge of the composition.
Shoot a few variations around each key moment rather than one frame, since a wipe between shots can cost you the subject. Do not switch cards or change batteries in the open, because that opens the body to water and costs you the card anyway. If you need more space or a fresh battery, do it in the car.
Step 9: Pack Up and Dry Your Gear Safely
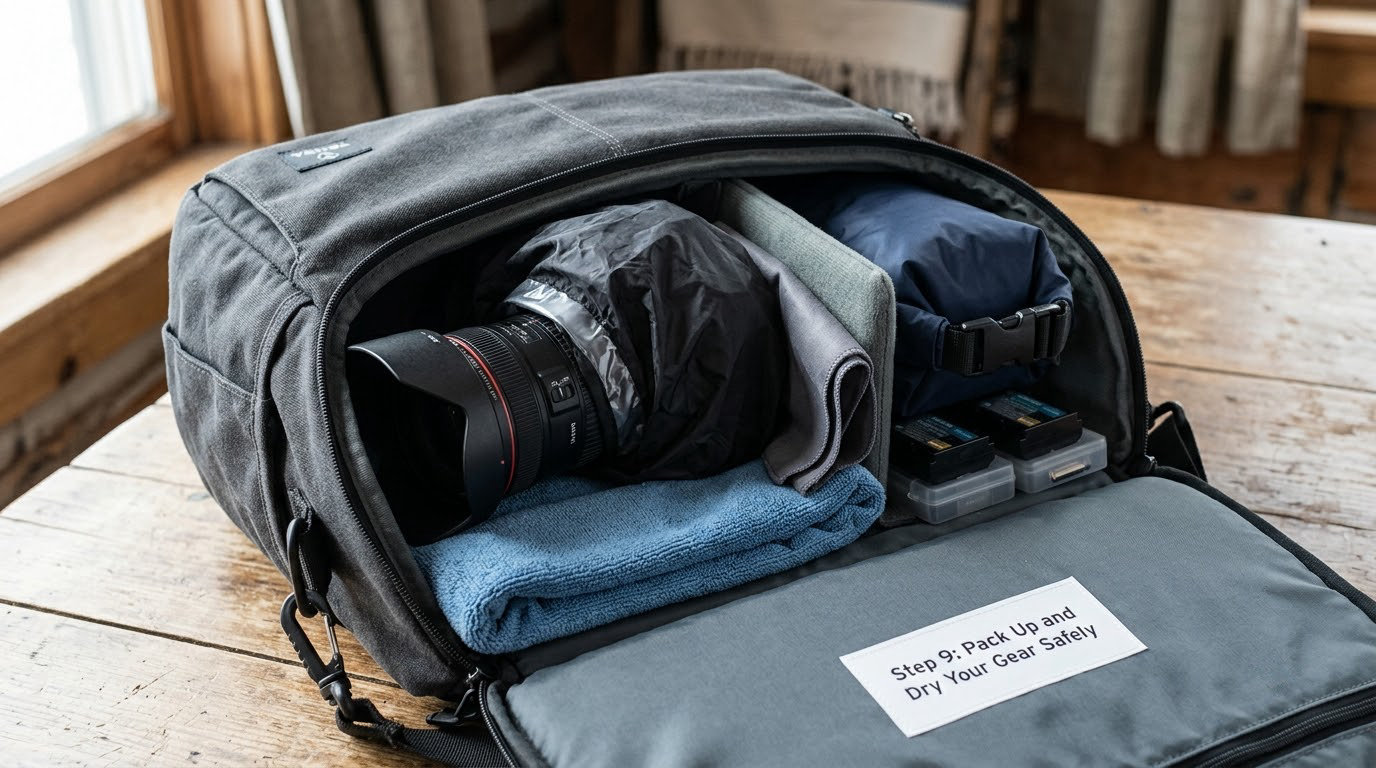
Stop before the camera is soaked solid rather than pushing on. Turn the camera off, remove the battery, and remove the card if you are in a sheltered spot, then put the body in a dry bag or sealed pouch with a towel around it so moisture has somewhere to go.
Never seal damp gear in a closed bag and leave it there. Moisture trapped with no airflow breeds condensation and mould, and a camera bag sitting in a warm car is the perfect incubator. If you are heading home within an hour or two, leave the camera out in a ventilated, room-temperature space with the pouch unsealed.
At home, wipe the body and lens, let everything air out, and keep a silica gel packet in the bag while the gear dries. Do not use a hairdryer, do not put rice inside anything, and do not power the camera on to see if it works. If a body has been genuinely wet, an authorised service centre with ultrasonic cleaning is far cheaper than a corroded sensor. The check that tells you the routine worked: no fogging in the viewfinder, no error messages on power-up, and clean glass on the front element.
Common Mistakes
- Shooting an uncovered body in heavy rain. Weather sealing is a margin, not a guarantee. Put the camera in a cover or bag and work in bursts of a few minutes.
- Sealing wet gear in a bag for the drive home. That is how condensation and mould start. Carry a dry bag and keep the airflow going.
- Leaving a filter on the front element. A filter is a permanent magnet for splashes and, once wet, a permanent haze. Take it off before you go out.
- Standing under a tree or near water in a thunderstorm. Move to a building or a fully enclosed vehicle, and wait the storm out.
- Leaving batteries in a wet camera. Remove them as soon as you are indoors and dry. Keep spares in a sealed, warm pocket.
- Trusting autofocus blindly. It will lock onto the raindrop on the glass. Set the area, confirm, then switch to manual.
- Wiping a wet front element with a dry cloth. Grit and dried salt can scratch coatings. Rinse with clean water first, or keep wiping until the lens is clear.
- Standing on wet rock to get a reflection. Kneel, use a low tripod, or skip the angle. No photo is worth a broken ankle.
Field Tips for Rainy Photography
- Shoot from a doorway or a car. A doorframe gives you a hard shelter edge, a clean background, and a dry place to change batteries.
- Fit a lens hood and use it. It stops splash from hitting the front element at angles, though the far tip can still catch drops, so tilt down and wipe before shooting.
- Keep spare gear in sealed pouches. Zip bags work. So does a small dry bag with a roll-top that stays shut one-handed.
- Use reflections deliberately. Get low, flip the camera if you need to, and expose for the reflection, not the sky.
- Plan the tripod for wet ground. Short legs for puddles, spikes or rubber feet for mud, and wrap the centre column so it does not slide.
- Warm layers matter. Layering a long-sleeve top, fleece, and a shell keeps you shooting longer than any gadget, and dry gloves save the camera twice.
- Re-check the seal on the battery door. It is the most common route water takes into a body.
- Decide your limit before you go. A set number of minutes, or a set light level, beats a judgement call made while soaked.
If your interest is in the light rather than the weather, the simple ideas behind minimalist shots and shooting black and white with a digital camera both adapt well to a grey, rainy palette.
Frequently Asked Questions
Can I use my camera in the rain safely?
Yes, in drizzle and moderate rain, as long as you cover the body and keep the front element clear. A weather-sealed mirrorless body with sealed lenses handles light rain well; an older unsealed DSLR should never be exposed to sustained rain without a cover. Never power a wet camera on, and remove the battery as soon as you are dry indoors.
Is a rain cover enough to protect a camera?
A dedicated rain cover with a right-hand sleeve is the most complete option, because it shields the body, viewfinder, and your hands while leaving the dials usable. A plastic bag with a hole cut for the lens and a rubber band around the hood is a good budget substitute for showers, but the flap can block controls. Trim the flap tips and test it at the car first.
Should I use a UV or clear filter when shooting in the rain?
No. Take any filter off before you go out. A filter face collects splash, holds water, and turns into a hazy, soft patch across the frame. You will spend the shoot wiping glass instead of composing. If you need protection, use a hood, and if you do get water on a coated element, rinse with clean water rather than dragging a dry cloth over grit.
What should I do if my camera or lens gets wet?
Switch it off, remove the battery and card if you are sheltered, and put the body in a dry bag or sealed pouch with a towel so moisture can escape. At home, let it air out at room temperature with airflow and silica gel nearby, and do not use heat, rice, or a hairdryer. If water got inside, send it to an authorised service centre for ultrasonic cleaning instead of powering it on.
How do I avoid condensation when moving from cold air into a warm room?
Condensation is water vapour condensing on a cold surface, so the fix is to slow the temperature change. Keep the camera sealed in its bag, closed, for 30 to 60 minutes after coming inside so the gear warms gradually. Leaving the body powered on inside a sealed bag is the worst option, because the heat and moisture stay trapped. A silica gel packet in the bag helps further.
Is it safe to photograph rain during a thunderstorm?
Only from a safe place. If you can hear thunder within about 30 seconds of a flash, or the flash is close, stop and get into a substantial building or a fully enclosed vehicle. Avoid open shelters, isolated tall trees, hilltops, and water. Shooting through a window from indoors is fine and often produces beautiful results, with a cloth on the glass to reduce reflections.
Conclusion
The safest sequence is simple: check the forecast, pick a sheltered spot with solid footing, cover the gear before you leave the car, confirm exposure and focus with a test shot, and monitor the sky and your equipment on a timer. Pack up before lightning or rising water turns the shoot dangerous, then let the gear air out at home rather than sealing it damp. Rain rewards the photographer who planned for it, and it is far less forgiving of the one who hoped for it.