
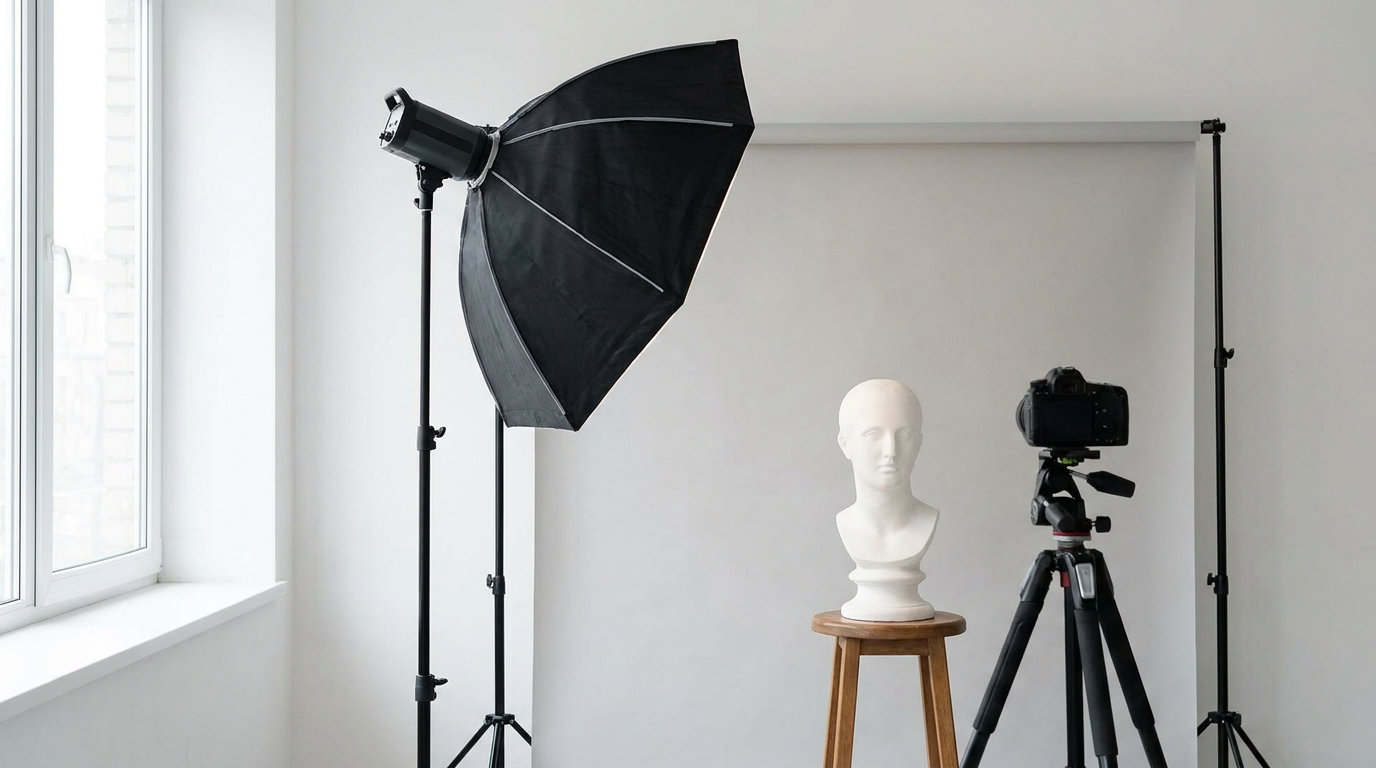
You can shoot portraits with one light and get results that look professionally lit, because most of the “professional” look in a portrait comes from direction, softness and contrast, not from the number of lights in the room. A single source with a modifier, plus a white reflector for fill, gives you shape on the face, a catchlight in the eyes and a background that separates cleanly from the subject.
This guide takes about twenty minutes to set up and works with a flash, a continuous LED panel, or nothing more than a window and a piece of white card. I’ll walk through the exact sequence I use: control the room first, then choose the modifier, then place the light, then set the camera.
If you want the setup in one breath: kill the ambient, put a modifier on the light, place it about one modifier-width away from the subject and about 45 degrees to one side, bounce white card into the shadow side, and shoot at 1/200 second, f/5.6, ISO 200.
Table of Contents
- What You Need
- Step-by-Step
- Common Mistakes
- Frequently Asked Questions
- What is a good headshot setup with only one light?
- What are some good one-light portrait setups?
- Do I need a reflector with one light?
- How far should the light be from the subject in a portrait?
- Is a continuous LED better than a flash for one-light portraits?
- Is one light enough for a professional headshot?
What You Need
The short answer is one light, one modifier, one white reflector and a camera. Everything else is optional, and the entire list works with gear you may already own at home.
- A single light source. A strobe with a stand, an off-camera flash, a speedlight on a stand, or a continuous LED panel. Any of these produces a usable portrait.
- One modifier. A softbox is the most versatile, but a silver or white umbrella, a beauty dish, or even a piece of diffusion fabric held in front of the flash all work.
- A reflector. A white 5-in-1 reflector, a sheet of foam board, a white wall, or a bedsheet on a door. This replaces the fill light entirely.
- A stand and sandbag. Needed for a strobe or LED. A folding light stand with a weight on the legs is enough for a softbox.
- A camera and a moderate focal length. An 85mm equivalent gives flattering headshots with the camera a comfortable distance away. A 50mm works if you shoot further back.
- Something to block light. Black foam board, a dark flag, or black cloth. Negative fill is the cheapest contrast control in photography.
You do not need a trigger system if you are shooting tethered or using a manual flash with an on-camera or hot shoe flash that fires manually. The whole setup is doable in a spare bedroom.
What can be swapped out: the reflector can be a wall, the modifier can be a window with a sheer curtain, and the stand can be a stack of books with a piece of tape. Gear cost is not the barrier here. The setup translates almost unchanged across light types, because what you are really adjusting is size, distance and angle.
Step-by-Step
Six steps get you from an empty room to a finished frame. The order matters: if you try to place the light before you understand the room, you will end up adding a second light to fix a problem the first one was creating.
Step 1: Choose a Light and Modifier
Pick the source first, then the modifier. Your light source only determines how much light you have; the modifier determines what that light looks like on the face.
The rule that governs everything is simple: the bigger the apparent size of the source compared to the subject, the softer the light. A 3-foot softbox close to the subject is enormously soft. The same softbox across the room is closer to hard. This is why beginners so often end up with crunchy shadows on a softbox setup: distance, not the modifier, is stealing their softness.
| Modifier | Typical size | Shadow quality | Best suited to | Caveat |
|---|---|---|---|---|
| Rectangular softbox | 2×3 ft or 3×3 ft | Very soft, wide wrap | Beauty, commercial headshots, forgiving skin | Large boxes need a boom or a light stand rated for the weight |
| Silver umbrella | 36 to 43 inch | Semi-hard, focused | Dramatic and editorial contrast | Spills past the subject unless flagged, and bounces off the back wall |
| White umbrella | 36 to 43 inch | Soft, spread out | Easy wrap, beginner-friendly portraits | Less punchy than silver, needs more power to match |
| Beauty dish with diffusion | 12 to 18 inch | Semi-soft, snappy catchlight | Fashion, glowing skin, video-adjacent looks | Shoots small in the frame, so it needs careful framing |
| Bare flash with standard reflector | 4 to 6 inch | Hard, defined edges | Moody portraits, shadow patterns, sculpting | Very unforgiving of positioning errors |
| Bounce off ceiling or wall | Room surface | Very soft, natural | Low-budget setups, on-location work | You inherit the room’s colour, and ceiling height limits placement |
One photographer on the DPReview forum described the setup behind almost all of their studio work as a single large circular softbox, four to five feet across, positioned fairly close to the frame. That is a good default if you own nothing else.
Step 2: Position the Light and Subject
Put the light about one modifier-width away from the subject and start it 45 degrees to one side, slightly above eye level. That single position is the workhorse of nearly every portrait you will shoot.
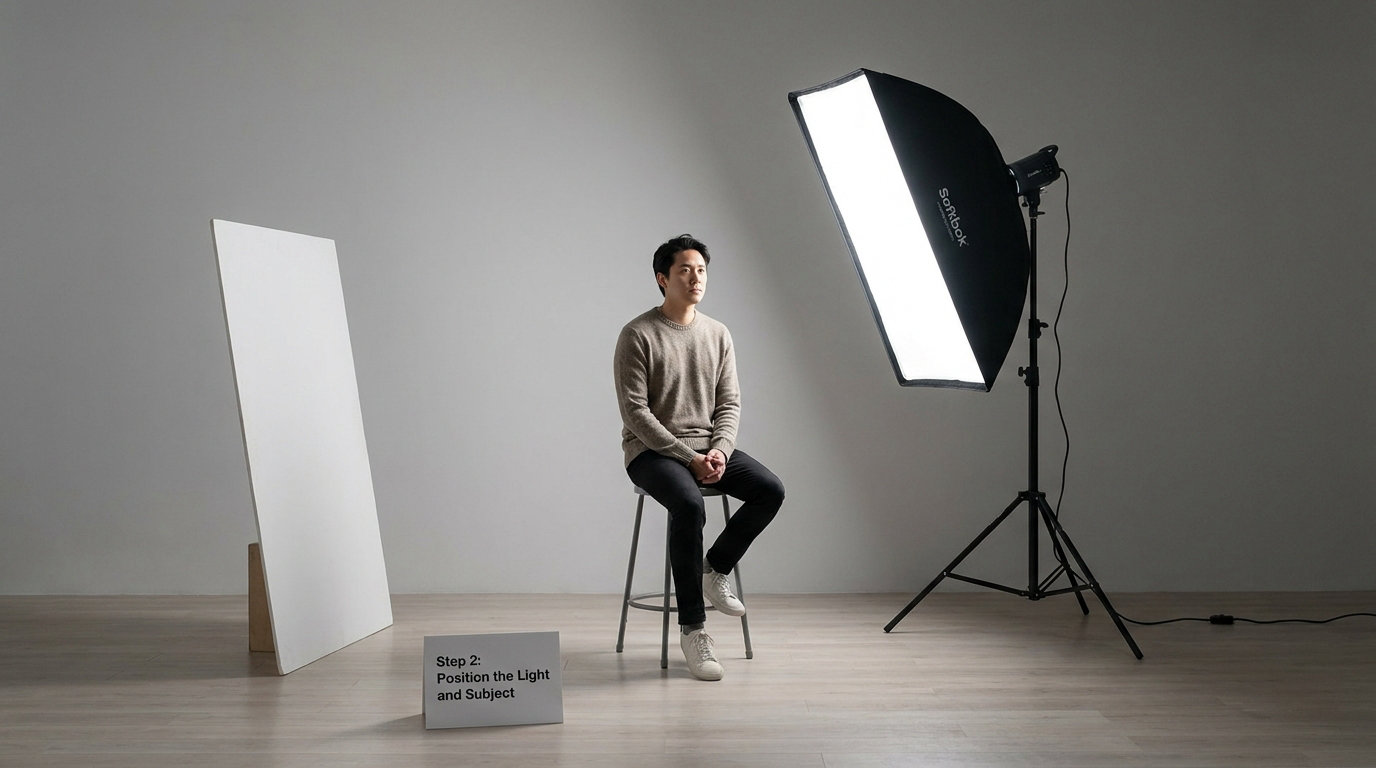
Distance is the control most beginners skip. If your softbox is three feet wide, park it roughly three feet from the subject’s face. Move it closer and the light wraps around the head; move it away and the same softbox starts throwing harder shadow edges and much stronger falloff down a full body.
Falloff follows the inverse square law, which in plain English means: double the distance and you get a quarter of the light. For head and shoulders this barely matters. For a full-body frame where the light sits above and to the side, your subject’s feet receive a fraction of what the face does, and you end up cranking power to fix it. One workaround described on the same forum thread is to raise the light three to four feet above the head and pull it a few feet closer to camera to offset the falloff, using a thin source such as a silver umbrella with diffusion.
Height changes the shadow shape more than people expect. A long photographer on that thread puts the top of the softbox at the subject’s head height rather than above it, which keeps the underside of the jaw from dropping into shadow. As a general rule, raise the light above head height for a more heroic read, and keep it at head height for a more natural one.
These six patterns all come from moving the same single light:
| Pattern | Where the light sits | Shadow shape | Mood |
|---|---|---|---|
| Butterfly / Paramount | High and centred, above and slightly in front | Small shadow directly under the nose | Glamour, beauty, symmetrical |
| Loop | 30 to 40 degrees off axis, slightly above eye level | Small loop of shadow beside the nose | Natural, flattering, safe default |
| Rembrandt | 45 to 60 degrees off axis, above eye level | Triangle of light on the shadow cheek | Moody, cinematic, classic |
| Short lighting | 45 degrees toward the side the subject turns away from | Shadow side toward camera | Slimming, dramatic |
| Broad lighting | 45 degrees toward the side the subject turns toward | Lit side toward camera | Soft, approachable |
| Split lighting | 90 degrees, straight to the side | Half the face lit, half in shadow | Strong character, edgy |
Angle also changes whether the face is broad or short lit. Turn the subject’s head away from the light and the lit cheek is the far one; turn it toward the light and you have broad lighting. Both are one-light looks, and switching between them takes seconds.
How to tell it worked: you should see a catchlight in the eye nearest the light, shaped like your modifier. A square catchlight means a softbox, a round one means an umbrella. If the eyes are black, move the light forward and down slightly.
Step 3: Set the Background and Manage Contrast
A one-light portrait separates from the background through distance, not through a second light. Move the subject several feet away from the backdrop and the backdrop falls off naturally, because the subject is much closer to the light than the wall is.
That falloff is your strongest background tool. If the wall is eight feet behind the subject and the softbox is three feet in front, the wall receives roughly one twentieth of the light the face does. On a dark or mid-grey paper backdrop that gives a clean gradient without any extra equipment.
Three background outcomes and how to get each:
- Darker than the subject. Add distance, flag the light with black foam board so its spill misses the wall, or put a grid on the modifier. A grid is the most surgical option because it cuts the beam angle so no direct light reaches the backdrop.
- Brighter than the subject. Bring the subject closer to the backdrop, let the subject wear something darker, or move the light so it spills past them. Slightly brighter backgrounds suit high-key portraits and pale clothing.
- Evenly blended. Add a second white surface behind the subject as bounce, or move them closer to the wall. This is the least common choice and the least flattering, because it flattens separation.
Flagging also solves another problem. Photographers in the same forum thread note that a smaller gridded softbox keeps light off the back wall, which is why a compact source often reads more dramatic than a big one. Control and contrast are two sides of the same decision.
Step 4: Direct the Pose and Find Facial Angles
With one light, posing does the work that a second light would otherwise hide. A few degrees of head turn changes the shadow pattern completely, so give directions in angles rather than adjectives.
- Turn the head slightly off axis. Facing the camera straight on flattens everything under a single light. Turn 20 to 30 degrees and the light rakes across the face, revealing shape.
- Move the shoulders. Square shoulders to the camera read formal and corporate. Turn them 30 degrees toward the light and the frame gains depth.
- Find the cheek. Ask the subject to bring their chin forward and down slightly. This tightens the jawline and stops the underside of the chin catching light.
- Use the hands. Hands at chest height or resting on the hip create a second line in the frame and keep the portrait from looking like a passport photo.
- Watch the near shoulder. If the shoulder closest to camera points straight at the lens, it looks wide. Rotate it back until it narrows.
Build each frame in small increments and take a test shot between changes. On a tethered setup or with the rear screen flipped toward you, this takes two minutes instead of twenty.
Step 5: Set Camera and Light Settings
Start manual and stay there while you learn. In manual, exposure does not shift between frames, so the only variable left is your lighting and posing, which is the part you actually need to practise.
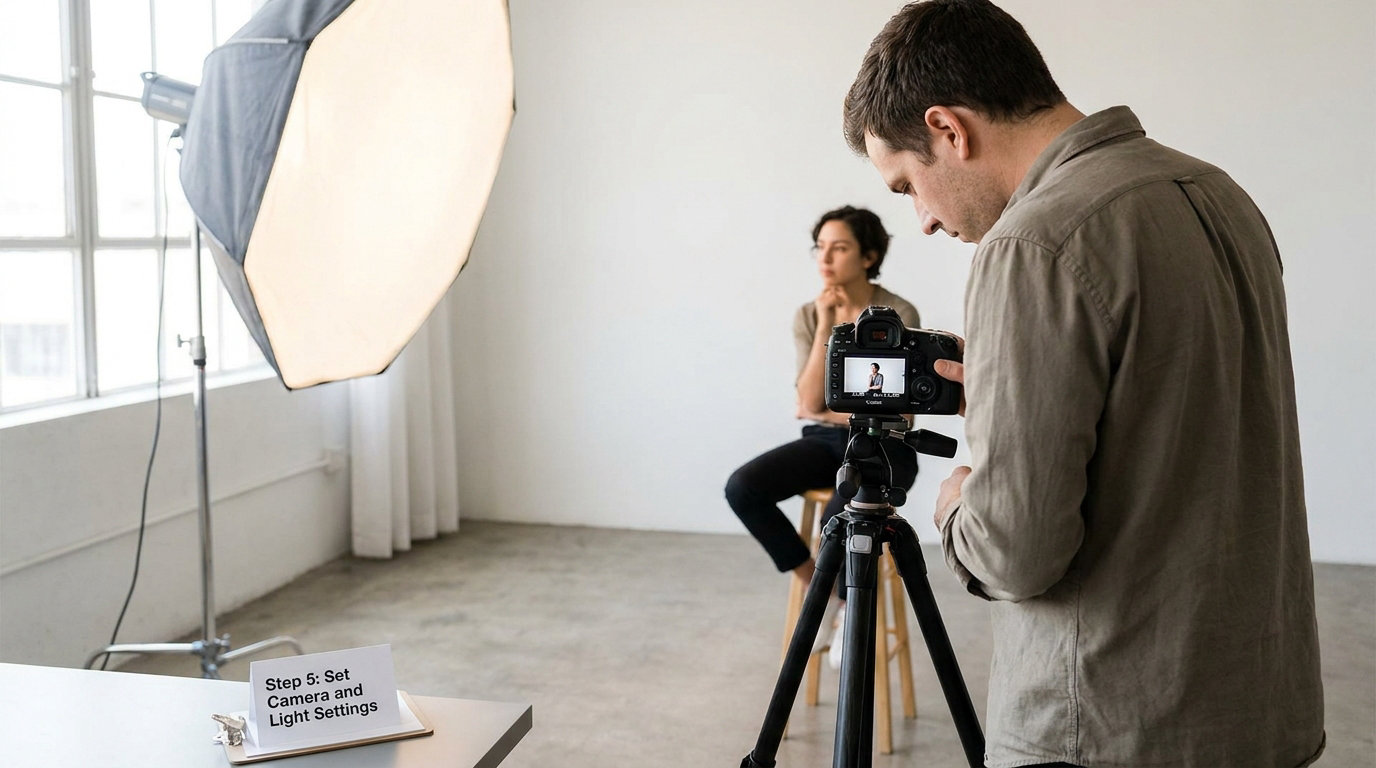
A dependable flash starting point: 1/200 second, f/5.6, ISO 200. Set those three, take a test frame, then move the light rather than the dial. If you are on a camera that will not sync above 1/200, that becomes your ceiling shutter speed and you compensate with the aperture.
For a continuous LED, you need a different approach because the light is ambient by definition. Stay at or above the camera’s native sync speed, which on most bodies is 1/125 or 1/200, open the aperture to f/2 or f/2.8 for the shallow depth of field portraits are built on, and raise ISO to 400 or 800 as needed. Check your panel for flicker at shutter speeds below 1/100 before you start a series.
Watch your depth of field. At f/2.8 with an 85mm at a metre away, an ear can drift out of focus as the subject turns their head. Stop down to f/4 or f/5.6 when you are shooting a three-quarter view, or move back a step and shoot at f/2.8.
Check the histogram rather than the screen brightness, and watch for specular highlights on the forehead. If the skin looks shiny, the light is too high or too hot. Lower it, add a diffuser, or move the subject away from the brightest part of the modifier.
Colour temperature is the other half. Set the strobe or LED to match your white balance, or accept a slightly warm or cool shift deliberately rather than fighting it in the edit. Mixing an uncorrected strobe with daylight leaking through a window produces the grey, muddy shadows beginners complain about most.
Step 6: Make Small Adjustments and Capture Variations
The last ten percent of a portrait comes from changing one thing at a time. Move the light height, shoot three frames, then change the reflector angle, shoot three more. Change two variables at once and you will not know which one fixed the problem.
The adjustments worth knowing:
- Rotate the reflector. Tilting it up toward the underside of the jaw lifts facial shadows without flattening the key. Tilting it down keeps contrast.
- Add negative fill. A black card on the dark side of the face deepens the shadow and makes the lit side look brighter without changing the light. If your portraits look grey, you probably need this rather than a smaller aperture.
- Move in for wrap. Closer means softer edges and less shadow density. Farther means harder edges and more sculpting.
- Change expressions, not just positions. Neutral, then smile, then a real laugh. Portrait sessions usually produce their best frame right after someone stops trying.
Capture wider than you think you need. A head-and-shoulders frame is easy; the same session can produce a half-body and a full-body by stepping back, because you already know the light works at that height.
Common Mistakes
Almost every flat one-light portrait comes from one of seven mistakes. Each has a fix that takes under a minute.
- Putting the light directly in front of the subject. You get shadows under the chin and nose, the background lights up, and the face looks flat. Move the light 45 degrees to one side and slightly above eye level.
- Leaving the ambient light on. Room light fills the shadows and washes out your ratio, and mixing it with flash produces grey shadows. Turn off every lamp, close the curtains, and shoot with the key as the only source.
- Parking the light too far away. A huge modifier at four metres is a small light in practice. Bring it in to roughly one modifier-width and everything softens.
- Overfilling with the reflector. A reflector held right under the chin kills the shadow and you get the passport-photo look. Keep it just out of frame, angle it at the face, and pull it back until you see shadow again.
- Losing the catchlight. Dead eyes are the fastest way to make a good portrait forgettable. Move the light forward and slightly down until you see the modifier’s shape reflected in the eye nearest the lens.
- Leaving the subject against the background. Push them a few feet forward so the backdrop sits deeper in the falloff. If spill is still hitting it, flag the light or add a grid.
- Changing everything at once. Move the light, the reflector, the camera and the power before each frame and you learn nothing. One variable, three frames, then the next.
Quick symptom-to-fix reference:
| Symptom | Likely cause | Fix |
|---|---|---|
| Face looks flat and grey | Too much reflector fill or ambient light | Pull the reflector back, add negative fill on the shadow side |
| No sparkle in the eyes | Light too high, too far behind, or too small | Move forward and down until the modifier shape appears in the eye |
| Background brighter than the face | Light too close to the backdrop, no flag | Move the subject forward, flag the light, add a grid |
| Softbox looks harsh | Modifier too far from the subject | Close the gap to about one modifier-width |
| Full body is too dark at the feet | Inverse square falloff from a distant, high light | Raise the light, pull it closer to camera, add a second white bounce near the legs |
| Skin looks hot or shiny | Light too hot or too specular | Add diffusion, lower the light, or step the subject back |
| Images inconsistent across the set | Auto flash or auto white balance drifting | Shoot manual flash power and fixed white balance |
One last finishing habit: shoot a reference frame before editing, then compare your edit to it. Turning up clarity and contrast to compensate for a bad setup is how a soft portrait ends up looking over-processed. Fix the light and the skin tone takes care of itself.
Frequently Asked Questions
What is a good headshot setup with only one light?
Put a softbox or silver umbrella about 45 degrees to one side of the subject and slightly above eye level, roughly one modifier-width away. Place a white reflector just out of frame on the opposite side to lift the shadows, and keep the subject several feet in front of the background so it falls off. Shoot manual flash at 1/200, f/5.6, ISO 200 and adjust the light rather than the settings.
What are some good one-light portrait setups?
The six reliable positions are butterfly, loop, Rembrandt, short, broad and split. Butterfly puts the light high and centred, loop sits 30 to 40 degrees off axis, Rembrandt goes to 45 to 60 degrees and slightly higher, short and broad are the same 45-degree position with the subject’s head turned toward or away from the light, and split is straight to the side at 90 degrees. Each one is a different placement of a single light.
Do I need a reflector with one light?
A reflector is not required, but it is the cheapest way to control contrast. Without one, the shadow side of the face goes as dark as the light allows, which suits moody and dramatic looks. With one, you lift the shadows to about a 2:1 or 3:1 ratio for a flatter commercial or headshot look. A white wall, a sheet of foam board or a bedsheet works as well as a purpose-made reflector.
How far should the light be from the subject in a portrait?
Start at about one modifier-width, so a three-foot softbox sits roughly three feet from the subject’s face. Closer gives softer edges and more wrap; farther gives harder shadows and much stronger falloff down the body. If you are shooting full length, raise the light above the head and pull it a few feet closer to camera to compensate for inverse square falloff at the feet.
Is a continuous LED better than a flash for one-light portraits?
A flash gives you more power in a smaller package, freezes motion and makes exposure consistent frame to frame. A continuous LED shows you exactly what you are getting before you press the shutter, works with any camera without triggers, and costs nothing extra to fire continuously, but it is dimmer, warmer, and produces visible flicker below roughly 1/100 second. For learning, an LED is more forgiving; for fast work and full-body frames, flash wins.
Is one light enough for a professional headshot?
Yes. A single large soft source close to the subject, positioned about 45 degrees to one side with a white reflector filling the shadows, is a standard professional one-light headshot setup used well beyond beginners. The light that makes a headshot look professional is a clean catchlight, smooth skin tones and separation from the background, and none of those require more than one source.
Keep the first session simple: one light, nothing fancier than a bounce or a softbox, subject turned 45 degrees off axis, camera manual at 1/200, f/5.6, ISO 200. Get comfortable with how to shoot portraits with one light before you add anything else, and you will be able to change the look by moving the one light you have.