
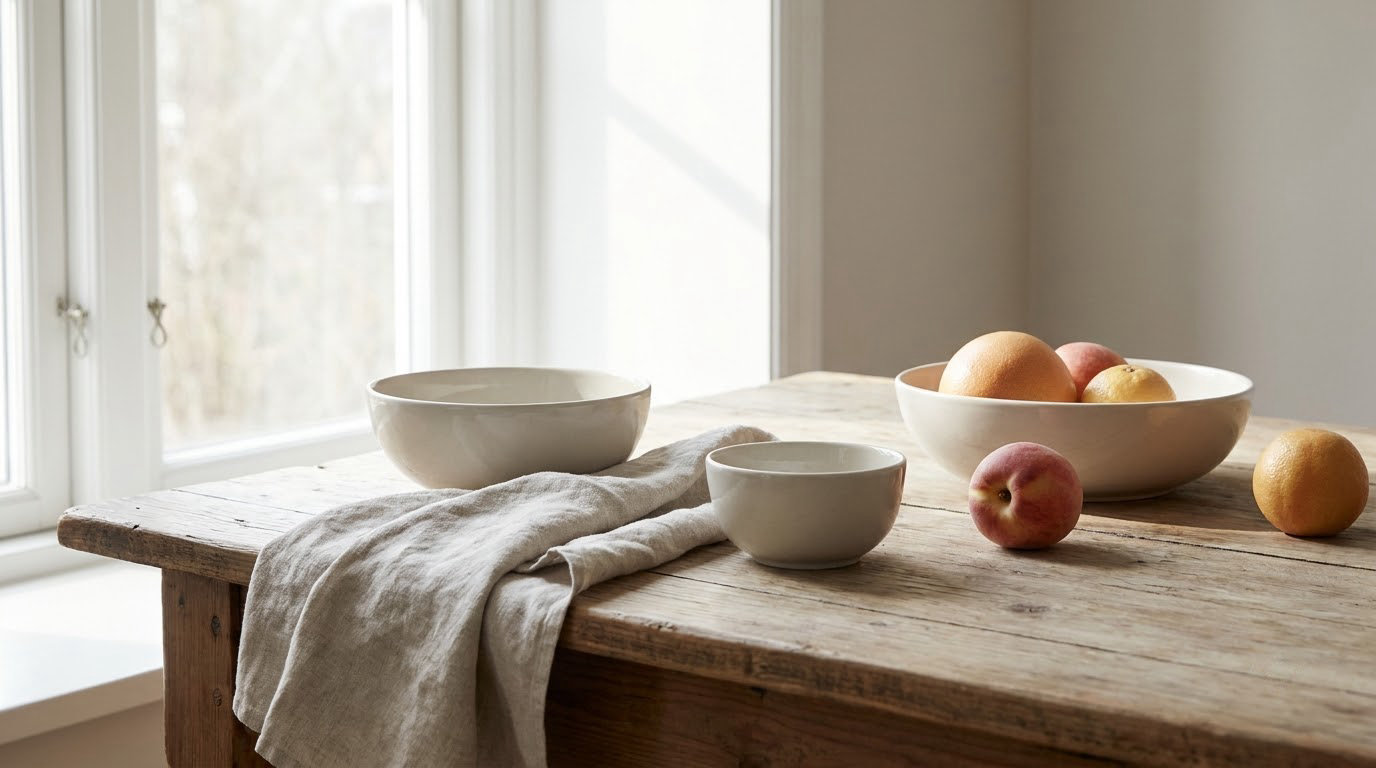
Learning how to light a still life photo comes down to four controls: how big the light source looks from the subject, how far away it sits, what angle it comes from, and how much fill you bounce back into the shadows. Get those four right and a cheap window and a sheet of white card can produce most of the images a studio rig would. The whole process for a single setup takes about twenty minutes once the surfaces are ready, and the first month is mostly learning to see what the light is doing before you press the shutter.
The mistake almost every beginner makes is putting the light too close. A small source a few inches from a ceramic bowl throws a hard black shadow straight across the table and hides the texture they wanted to show. The same source a metre back, or diffused, does something completely different to the same object in the same spot.
This guide walks through the process I use for tabletop work, from planning the shot to the final capture, including the problem that causes more frustration than any other in this genre: shiny surfaces reflecting the light itself.
Table of Contents
- What You Need
- Step-by-Step: The Core Still Life Lighting Setup
- Common Mistakes
- Frequently Asked Questions
- What is the best lighting setup for a still-life photo?
- Can I use just one light for a still-life photograph?
- Should the shadows in a still life be completely black?
- How do I light a reflective glass or metal object?
- Is window light good enough for still-life photography?
- How do I make a small still life look more dimensional?
What You Need
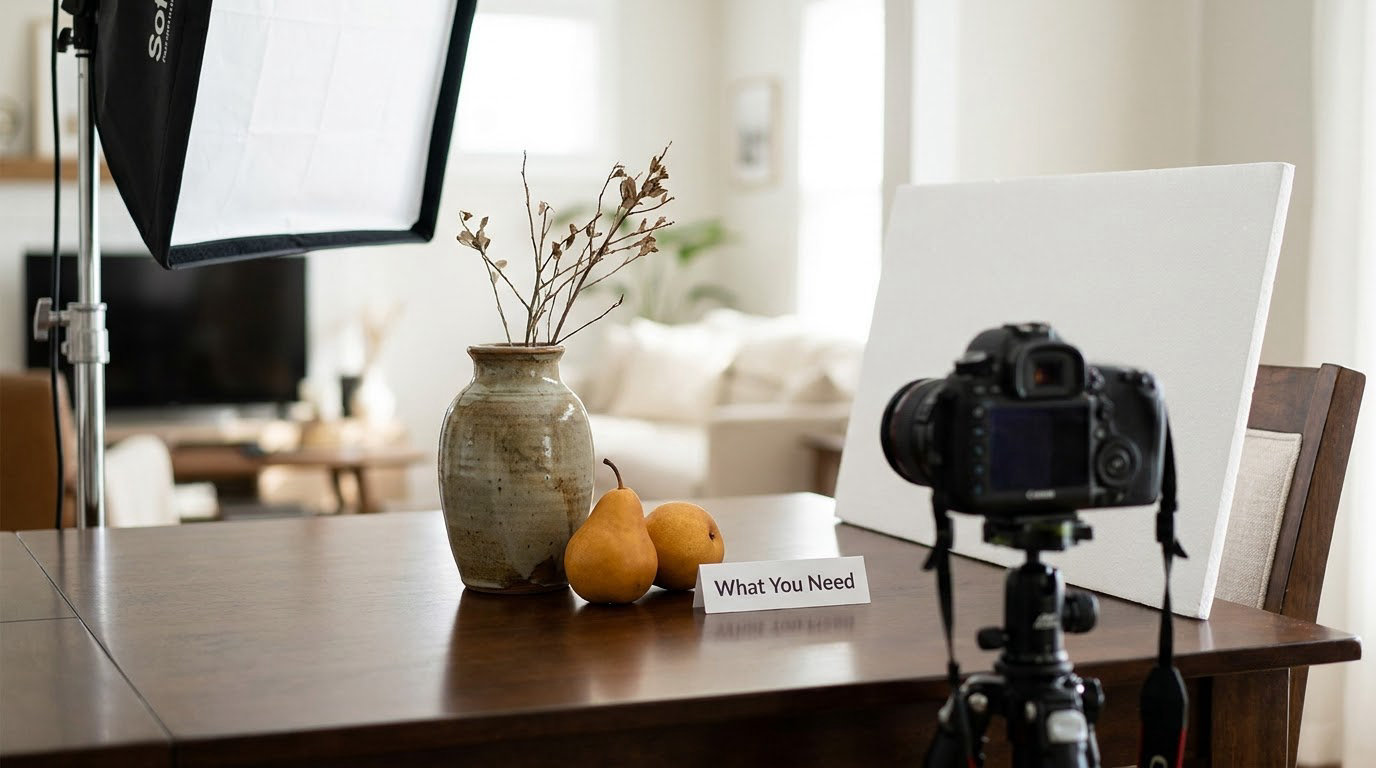
Almost nothing here is mandatory. What matters is having one controllable light source and one surface you can bounce light off with. Everything else is a refinement, and you can add it when a specific problem appears rather than buying it all in advance.
The genuinely necessary list:
- A camera with manual exposure. Any interchangeable-lens camera or a good phone in manual mode. The subject never moves, so there is no excuse for leaving exposure on automatic.
- One light source. A window, a desk lamp, an LED panel, a speedlight, or a monolight. A daylight-balanced LED panel is the most forgiving starting point because you can see what it is doing without waiting for a recharge.
- A tripod or a solid support. Because the light and camera are now fixed, and the exposure will be wrong at least twice before it is right.
- A white bounce surface. White foam board, a sheet of card, or a reflective white poster board. This is your fill light, and it costs almost nothing.
- A black card or dark fabric. The same foam core painted matte black, or a piece of black foam board. This is negative fill and it is the tool that stops a setup looking flat.
- A surface and a backdrop. Matte, textured surfaces photograph better than gloss. Matte black foam board, a painted board, or a paper sweep all work.
Helpful additions, in the order they tend to earn their place:
- A diffuser. A 5-in-1 reflector, a large white sheet, or a shoot-through umbrella softens the source and can be the single biggest jump in image quality from a beginner kit.
- A strip softbox or a small octabox. A strip box is the classic choice for glass and bottles because its narrow reflection reads as a clean vertical line instead of a blob.
- A honeycomb grid or a flag. Grids stop light spilling onto the background. Flags block it entirely and are cheaper.
- A grey card or a colour checker. Needed for a custom white balance and for judging exposure by eye.
- A small light meter. Optional. Since the subject is static, you can meter once, write the setting down, and reuse it for an entire series of shots on the same setup.
- Black wrap or gaffer tape. For flagging the underside of a table to stop bounce from the floor filling your shadows.
On modifier choice for a small subject, the common question is whether a softbox or an umbrella is better. Neither is inherently superior. A shoot-through umbrella gives a broad, even, soft source with a slightly commercial look, while a softbox gives you more control because you can put a grid or diffusion panel in front and shape the falloff. For a small subject, judge them on apparent size rather than physical size, which is the next section.
Step-by-Step: The Core Still Life Lighting Setup
The six stages below are the core still life lighting setup. They run in order because each one depends on the last, and reordering them is what makes a session take twice as long. The camera stays put throughout. All the adjustments happen at the light end, and that habit is worth building from the beginning.
1. Plan the Still Life and Its Mood
Decide what the photograph is supposed to feel like before you touch any equipment, because the mood picks the lighting, not the other way round. A bright white background with even light and short shadows reads as clean and commercial, usually for food, cosmetics, and catalogue work. A single source falling off into darkness on one side reads as quiet and contemplative, which suits fruit, ceramics, and objects with texture worth examining. Deep shadows with a bright edge separating the subject from a dark background reads as dramatic.
Choose the subject and the surface together. Matte surfaces such as unglazed clay, stoneware, bread, and fabric reward side light because the texture throws tiny shadows across itself. Glossy and translucent surfaces do the opposite: they mirror whatever is in front of them, which is a problem you will handle in stage four.
Before the light goes on, do a quick tidy of the frame itself. Photographing a still life with a distracting background, a crooked object, or a stray cable is a lighting failure that no amount of good light will fix.
2. Position the Key Light
Place the key light at roughly 45 degrees to the side of the subject and slightly above it, with the camera at 90 degrees. This is the starting position for a reason: it puts light across the surface of the object rather than straight into the lens, so form, texture, and the curve of a rim all read at once.
Now the rule that decides everything else. The softness of your shadows is set by the apparent size of the light source as seen from the subject, not by the physical size of the modifier or its wattage. A source that appears larger than your subject from where the subject stands produces soft shadows with a wide penumbra. A source that appears smaller than the subject produces hard shadows with a crisp edge. This is the single most useful thing to internalise, because it tells you which of two levers to pull.
Those two levers are size and distance, and they are linked. The inverse square law means that doubling the distance from the subject halves the light reaching it, which is a two-stop change. So moving a light closer makes it brighter and softer at the same time, and moving it further away makes it dimmer and harder. Most beginners reach for the first lever, carrying a bigger modifier, when the second one, walking the light back two metres, would have done more for them. It also gives you the control you want later, since brightness and softness move together rather than fighting each other.
For most tabletop subjects I start about 60 to 90 cm from the subject with the light slightly higher than the top of the object, then adjust. If shadows have edges you could cut yourself on, move the light back. If the object has lost all its texture, either the source is too small or the angle is too frontal. Move it back, raise it, or swing it wider toward 70 or 80 degrees so the light rakes across the surface.
Hard or soft is a choice about mood, not quality. Hard light gives graphic, high-contrast results with crisp edges and works well for glass, chrome, and hard-edged geometric subjects. Soft light gives a gentler, more commercial and more forgiving result on food, flowers, and skin-like textures. The same object photographed with each looks like two different objects, which is exactly the point.
3. Shape the Shadows with a Reflector
Put the white bounce surface opposite the key light, angled to catch the key and throw it back at the shadow side of the subject. It is not a second light source, it redirects light that already exists, and that distinction matters because the quality of what comes back is tied to the quality of the key. Soft key gives soft fill automatically.
Then control how much comes back, because the common failure here is not a missing reflector, it is a reflector that is too effective. Bring the fill up until the shadow side matches the lit side and the object goes flat. You want the shadow side roughly one stop under the lit side as a starting point, which is measurable with a light meter or judged by eye against a grey card. At one stop under, the shadow holds detail and reads as shadow, and the object still looks round.
If the shadows are already lighter than you want, do not remove the white card. Put a black card in its place. Negative fill absorbs light instead of returning it, deepening the shadow side and giving the object more volume than an additional light ever could. On a rounded subject, a narrow black card placed close on the shadow side produces a crisp dark edge along the silhouette that separates it beautifully from a mid-tone background.
Two practical details matter here. Keep the reflector slightly closer to the subject than the key light is, since reflected light falls off quickly and a card that matches the key’s distance will underperform. And watch for colour: a card that has picked up warm room light or a coloured wall will tint the shadows visibly.
4. Add Separation and Texture
Look at the frame with the histogram or the screen of your camera and decide what still reads wrong. Usually it is that the subject and the background sit at a similar brightness, so the object has no clear edge and the image looks pasted together. There are four moves for this, and which one you pick depends on the look you planned in step one.
A rim or back light separates a subject from a dark background. Put it behind and above the subject, aimed at the far edge, and raise it only until a thin bright line appears along the contour. A rim that is too strong pulls the eye to the outline instead of the object, so this is a light you add by small amounts.
A background light controls the backdrop independently. On a white sweep it needs to be even and set about one stop brighter than the subject, which keeps the background white without tipping the subject into a silhouette. On a dark setup you want the opposite: put the subject well forward of the backdrop, roughly 30 cm or more behind, so the key light falls off before it reaches the paper. Increase the gap rather than trying to flag out the spill, because distance does the work more reliably than cutting the light.
A hard raking side light is the simplest way to emphasise texture. Move the key to 70 to 90 degrees, low and close to the surface, and every bump in the surface throws a small shadow. Bread crust, linen, stone and wood all come alive under it, and the same light makes a smooth subject look almost clinical by comparison.
Backlight for glass, liquids, and flowers inverts the usual logic. A glass bottle lit from the front shows you the front of the bottle, a bright reflection of the light, and little else. Place the light behind or below the subject, shining up and through it, and the glass fills with light while the front stays comparatively dark. Put a white card behind the subject to catch the transmitted light, or a black card behind it to define the edges of the glass sharply against the light. The same backlight makes flower petals and leaves glow with visible veins.
For shiny but opaque objects such as glazed ceramic, chrome, or lacquered metal, the problem is a specular highlight: a mirror image of the light source itself sitting on the surface. You cannot remove it, but you can place it. Before shooting, turn the object under a modelling lamp or with the light at low power and look for the bright shape it creates. Then rotate the object a few degrees, or move the light, until that highlight lands where you want it, as a narrow vertical line, an edge, or a controlled curve, instead of a white blob across the middle. Once it is where you want it, a white card opposite the key fills that shape with a softer gradient and stops it reading as a hole.
5. Check the Composition Before Shooting
Switch off the light and walk back from the camera a metre, then look at the arrangement rather than through the viewfinder. Framing errors that a zoomed-in viewfinder hides are obvious at normal viewing distance. Move the camera up or down slightly, shift the subject to a third, and check that the shadow shapes lead somewhere rather than running off the nearest edge of the frame.
Then do a final lighting scan, looking for five specific things:
- A blown white shape sitting on the subject, which is either the light source reflecting off a glossy surface or a specular highlight in the wrong place.
- Two shadow edges touching or merging, which makes separate objects read as one lump.
- A visible seam or fold in the backdrop, or a background brighter on one side than the other.
- Edges that lack contrast against the background, so the object appears to fade out where it ends.
- Any uncontrolled reflection, including your own face or camera in a mirror or polished surface. If it shows up, change your position or angle the object before you change the light.
Each of those has a direct fix: reposition the object for the first and last, separate the objects further for the second, extend or re-sweep the backdrop for the third, and add a rim or negative fill for the fourth.
6. Focus, Meter, and Capture
Focus manually every time. Autofocus will hunt on low-contrast edges and on glass, and it can shift when you nudge a single object by two degrees to move a highlight. Set the aperture first. Around f/8 to f/11 on a full-frame lens gives enough depth of field for a typical tabletop arrangement shot from a slight angle, and a tripod makes the smaller aperture free.
If the subject is deep, for example a bottle in front of a tall glass with the camera at a low angle, close the aperture further or shoot a focus stack: one frame per depth plane, moving the focus in fixed small increments, then blend them in editing. Manual focus with a magnifier makes the increments repeatable.
Set ISO to its base value, usually 100, and leave the shutter at or below your camera’s sync speed, commonly 1/200 or 1/160 for a strobe. If you need more light for a narrower aperture, raise the light’s power rather than the ISO, and remember the inverse square law: the same light moved half as close delivers four times the light, which is a cheaper and cleaner way to stop down than dragging ISO to 3200 and hoping.
Turn off every other light in the room before you meter, including the kitchen downlights and the lamp behind you. Mixing a warm household lamp with a daylight-balanced flash is the most common cause of colour casts that people try to correct later and cannot. If you must shoot in a room you cannot darken, block the window with a blackout cloth or shoot at a consistent hour.
Set a custom white balance. Fill the frame with a grey card under the lights, take one frame, and use that as the custom setting for the whole session. The result is that every photograph from this setup has the same colour, which matters enormously for food and product work where the surface colour is the point.
Once you have the exposure, shoot a bracket of three or five frames. Still life is the ideal subject for exposure bracketing because nothing changes between frames, so you get several usable images from one setup and can pick the one where the highlight on the ceramic sits where you wanted it.
Write down or remember the three numbers that define the setup: light power, light distance, and f-stop. When you change the subject and want the same look, you reproduce those numbers rather than starting over.
Common Mistakes
These six account for most of the badly lit still lifes I see, and each has a specific correction rather than a general instruction to use softer light.
The light is too close. A small source a short distance from a small subject gives hard shadows that swallow the object, and beginners compensate by adding more fill, which makes it worse. Move the light back until the source appears larger than the subject from the subject’s position. Brightness is handled separately with the light’s power control, not with distance.
The fill is too strong, so everything looks flat. This is the single most common complaint about still life, and it comes from treating the shadow side as something to fix rather than something to shape. Bring the fill down to roughly one stop under the key, and put a black card on the shadow side if the image still reads as two-dimensional. Plenty of the best still lifes are lit with a single source and no fill at all.
Household light is mixed with the key. Warm ceiling light plus cool flash produces a cast you can see in the shadows and a white balance you can never quite set. Turn off every other source. If the room cannot be darkened, work with it deliberately: use a warm LED panel and match the room, rather than fighting it with a mismatched flash.
The light source is reflected in the subject. A softbox mirrored in a glazed mug or a photographer reflected in a chrome sphere are the most complained-about results in this genre. Do not try to light a mirror out of existence. Move the subject or the light until the reflection lands where it reads as a deliberate shape, then soften that shape with a white card opposite the key.
The subject sits too close to the backdrop. You wanted black and got grey, or you wanted an even background and got a hot patch behind the subject. Push the subject forward so there is a clear gap behind it and let falloff do the darkening. Only reach for flags and grids once the distance is generous.
Judging softness by the modifier rather than by the result. A 90 cm softbox is soft for a person and hard for a thimble. Judge the shadow edge in the frame, not the size of the box. Edge quality is the only measurement that matters, and it changes as you move the light, the camera, and the object.
Two more worth naming. Shooting with the fill card behind the camera flattens everything, because the bounce arrives from the same direction as the lens; put it opposite the key instead. And using a strong frontal light with no flags makes the background as bright as the subject, so control the background light independently rather than hoping the key will miss it.
Frequently Asked Questions
What is the best lighting setup for a still-life photo?
Start with one key light at roughly 45 degrees to the side and slightly above the subject, a white bounce card opposite it to lift the shadow side by about one stop, and a background you control separately. That single-source-plus-reflector setup handles most tabletop subjects, from fruit to product. Add a rim or backlight only once the shape of the object needs separating from the background.
Can I use just one light for a still-life photograph?
Yes, and plenty of photographers never use more. One source plus a white card gives you a key and a controlled fill, which covers round forms, texture, and most moods. The one thing you lose is shadow detail on the darkest side, and a black card on that side fixes it by absorbing light instead of returning it. A second light only becomes necessary for rim separation or backlit glass.
Should the shadows in a still life be completely black?
Rarely. A shadow with no detail at all tells the viewer nothing about the surface behind it, and it usually means the subject is smaller than the shadow, so the object loses its edge. Aim for the shadow side to sit roughly one stop under the lit side, which keeps texture and volume readable. Go harder and darker for a dramatic, single-source look, but check that the object still separates from the background.
How do I light a reflective glass or metal object?
You cannot remove a specular reflection, so place it. Turn the object under a low-power light and watch where the reflection lands, then rotate the object or move the light until it forms a narrow vertical line, a clean edge, or a deliberate curve rather than a white blob across the middle. A white card opposite the key fills that shape with a gradient, and a black card behind the object defines the glass edges against a lighter background.
Is window light good enough for still-life photography?
Yes, and it is the best way to learn. Diffuse the window with a sheer curtain or a large white sheet, put the subject 30 to 60 cm away so the shadows stay manageable, and use a white card on the shadow side as your fill. Window light changes through the day, so work out your position and white balance at the hour you plan to shoot rather than moving the table every morning.
How do I make a small still life look more dimensional?
Make the source appear large relative to the subject by moving it back, and rake it across the surface at 60 to 90 degrees so texture throws small shadows. Keep the shadow side about one stop under the lit side, then add a black card on the shadow side to deepen the edge where the object curves away. For a dark background, push the subject 30 cm or more in front of the backdrop so the key falls off before it reaches the paper.
Start with one light, one white card, and one black card, and get a single subject looking right before you add anything. The whole process comes down to making the light source look large from where the subject sits, keeping the shadow side about a stop under the lit side, and giving the object a clear edge against its background. Everything else in this guide is a variation on those three ideas. Photograph the same object under each of the four moods described in step one and you will have learned more about still life lighting than from a month of reading about it.