
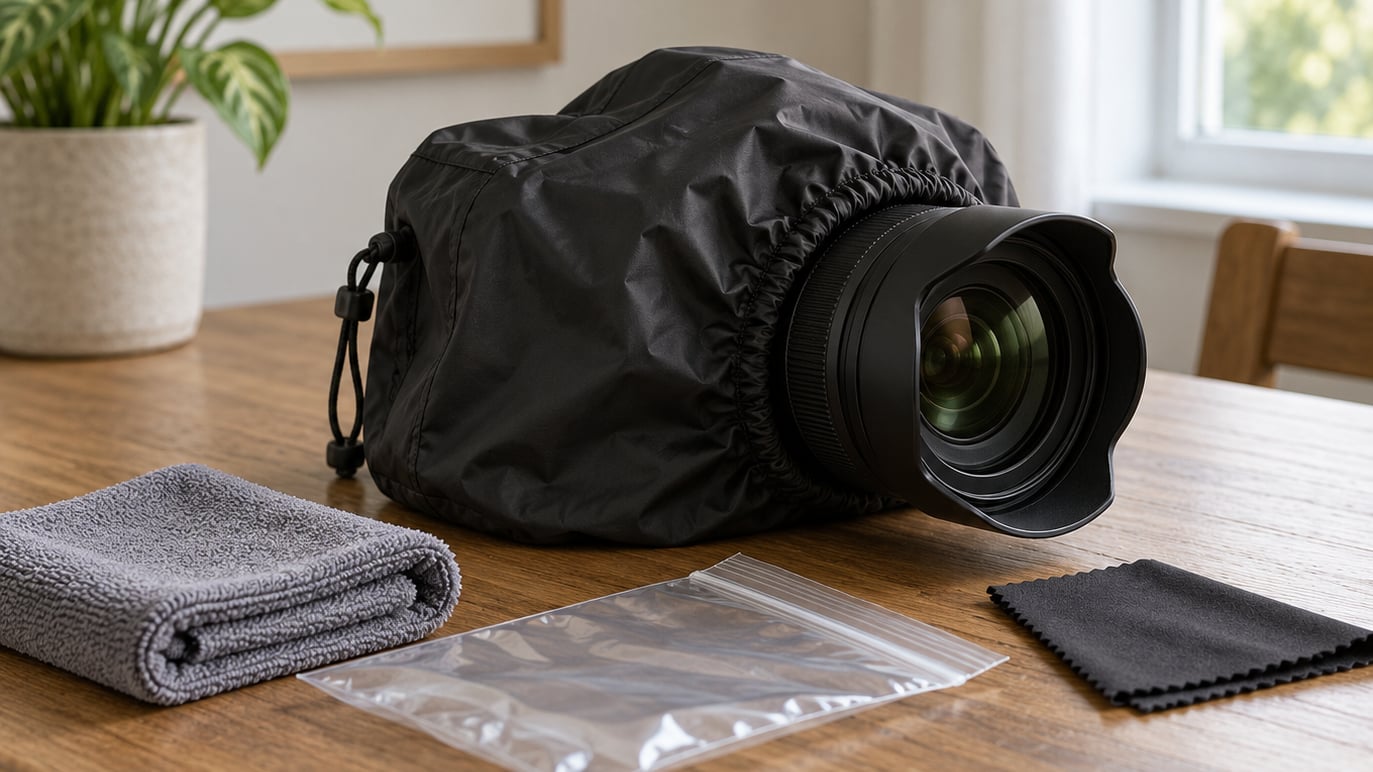
Learning how to protect a camera from rain comes down to two things: a barrier over the body and lens while you are outside, and a dry, ventilated place to put the gear when you come back in. A fitted rain cover is the good option. A heavy-duty plastic bag with a hole cut for the lens is the free one, and it works.
Weather sealing is worth having, but it is a gasket, not a submarine. It handles spray, splash and the kind of light drizzle you get walking from the car. It is not a licence to stand in a downpour with an unprotected body and wonder why the viewfinder fogged.
Here is the part most guides skip: the actual killer is rarely a single droplet on the front element. It is moisture trapped inside a sealed bag, or warm humid air meeting a cold lens barrel, or a wet camera powered on to check whether it still works. Get the barrier right outdoors and the drying right indoors, and rain stops being an event.
Table of Contents
- What You Need
- Step-by-Step: How to Protect a Camera from Rain
- 1. Check the Forecast and Weather Conditions
- 2. Prepare the Camera Before Going Outdoors
- 3. Use a Rain Cover or Waterproof Camera Bag
- 4. Protect the Lens and Front Element
- 5. How to Protect a Camera from Rain While You Keep Shooting
- 6. Change Lenses Only in a Dry, Sheltered Place
- 7. Move to Shelter if Water Reaches the Camera
- 8. Dry the Camera and Accessories Immediately
- 9. Inspect and Store the Camera Safely
- Common Mistakes
- Frequently Asked Questions
- The Short Checklist Before You Walk Out
What You Need
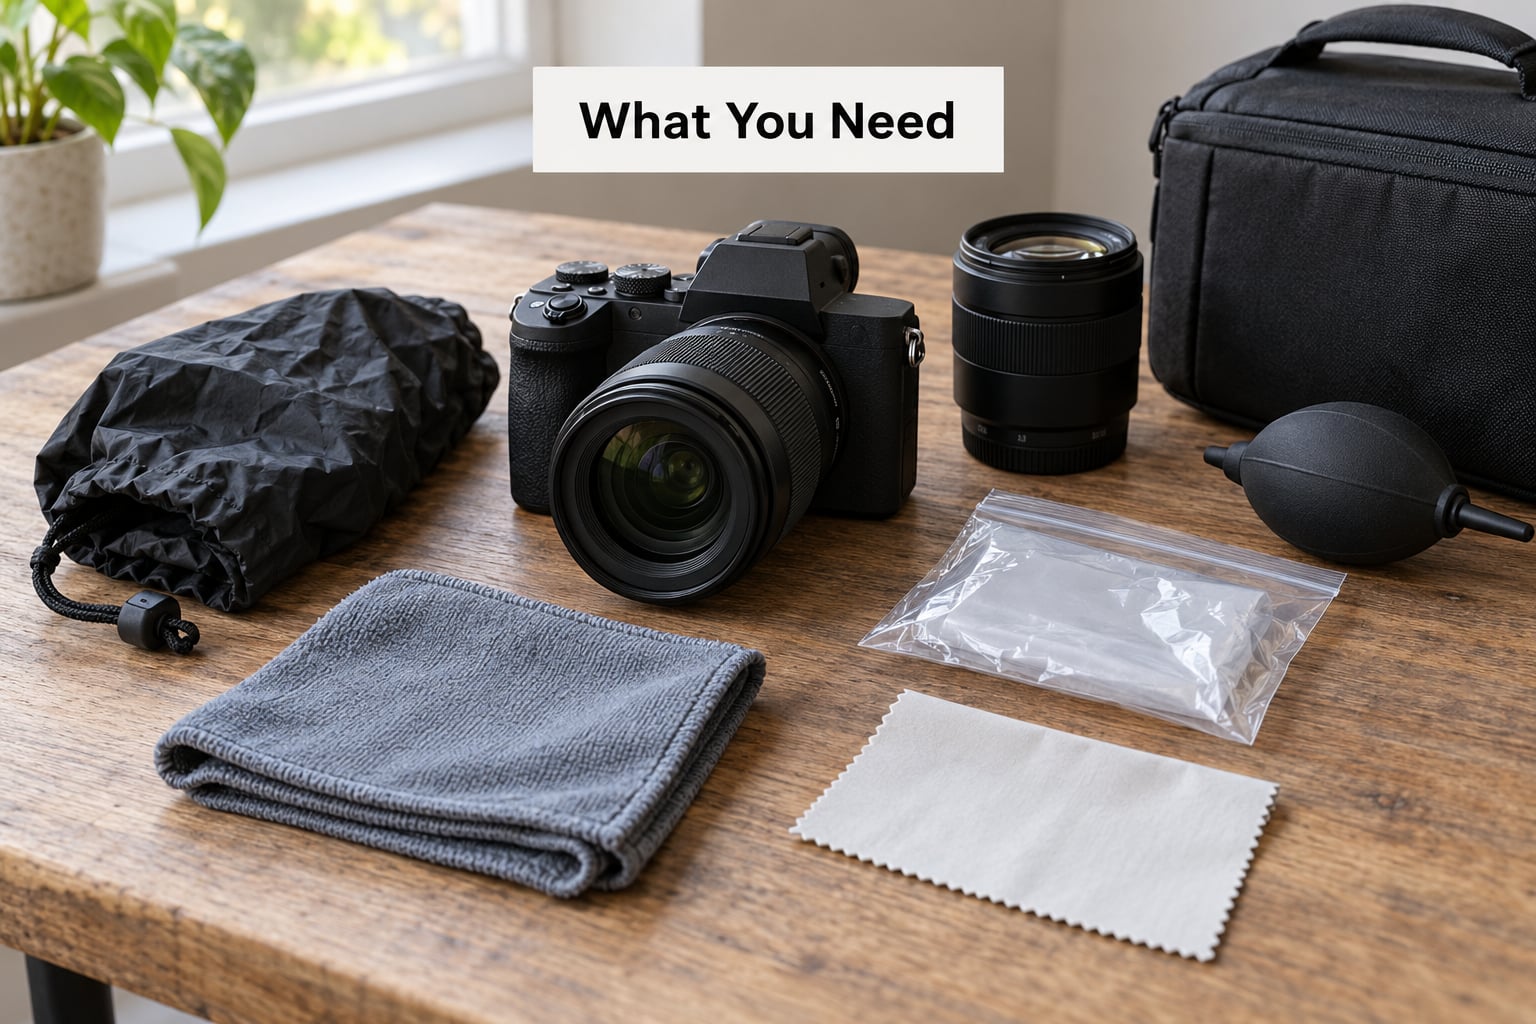
The list is short and mostly cheap. The expensive item is the one people skip, and it is usually not a cover at all.
- A rain cover or rain sleeve sized to your setup. Match it to the lens you actually use. A cover for a 70-200 zoom will swallow a small mirrorless body whole.
- A heavy-duty plastic bag or large ziplock. An extra-large kitchen bag works in a pinch. Thin supermarket bags tear the moment the zoom extends.
- Rubber bands. Two or three sizes, because one big band on a stepped lens barrel never seals.
- Duct tape or gaffer tape. Gaffer tape peels off cleanly and leaves no residue on a lens barrel.
- Two or three microfiber cloths. One for the body and one dedicated to glass. Grit dragged across a coated front element causes real scratches.
- A chamois leather for steady drizzle. A good one handles light rain beautifully. Cheap ones go stiff and useless in a downpour.
- Silica gel packets. Tucked in the bag, they pull humidity down and slow fogging.
- A dry bag or waterproof backpack. Most camera bags soak through from the bottom in sustained rain, so the bag itself needs a layer.
- A spare battery.Working in the cold and in the wet drains batteries faster, and the dead battery is the worst possible time to discover it.
Pack all of it in the main compartment rather than in side pockets, so you can grab it in one movement. Our guide to what to pack in a camera bag covers the rest of the kit list, including the items people only wish they had once they needed them.
Step-by-Step: How to Protect a Camera from Rain
1. Check the Forecast and Weather Conditions
Look at intensity, wind, duration and temperature before you decide what to carry. A steady drizzle needs a cloth and a bag. A downpour with wind needs a proper cover and a plan for where you will stand.
Wind matters more than people expect. Rain at a 15-degree angle reaches the side of the camera, the card door and the connector ports, none of which a front-facing hood protects. If the forecast shows gusts, that is the cue to pick a shooting position with a wall behind you rather than to rely on gear.
Temperature matters too. A cold camera moved into warm humid air will fog from the inside, and no cover prevents that. If the forecast says a 15 degree swing, read how to protect gear in cold weather before you leave.
2. Prepare the Camera Before Going Outdoors
Do the boring things now, because none of them work once you are already wet. Charge the battery, format and clear the memory card, and check that the card door and every port cover are properly closed and latched.
Remove anything you will not use. A battery grip, a filter ring and a stacked adapter are all places water can sit. Mount only the lens you plan to shoot with, and put the rear cap and front cap back on anything that stays in the bag.
Attach the strap before you leave the house. Hunting for a strap with numb hands while rain hits is how cameras end up on the ground.
3. Use a Rain Cover or Waterproof Camera Bag
A fitted rain cover goes over the body and lens together, usually from the top down, and it seals at the lens hood or the front element cap. Leave the viewfinder, the shutter button and the zoom ring accessible. If you have to fight the fabric to change a setting, the cover is too tight or the wrong shape.
Close every opening you are not actively using, and that includes the eyepiece. A black cover over an electronic viewfinder eye sensor will keep the screen awake and drain a battery while you are not looking at it. A simple eyepiece cover solves it, and it costs very little.
Check the bottom. Covers with a tripod opening need the plate aligned before you deploy, otherwise you end up reseating the whole camera in the rain.
4. Protect the Lens and Front Element
Keep a lens hood fitted. It does not stop rain, but it does shed the majority of direct hits on the front element, and it costs nothing to carry.
A UV or protective filter is worth having when you are working close to spray or salt water, because a damaged filter is replaceable and a damaged front element is not. Be clear about what it is not: a filter is not waterproof and it is not a substitute for a cover. It buys you one more minute of abuse.
Between shots, cap the lens or leave it pointed slightly downward so the element stays shielded. Wiping a wet element is what causes most scratches. Pat the water off with a damp cloth, then dry it rather than scrubbing.
5. How to Protect a Camera from Rain While You Keep Shooting
Slow down. Wet hands and rushed movements are how cameras get dropped, and a lens hitting wet pavement is a much worse outcome than a missed frame.
Stand with your back to the wind and keep the camera close to your body so your jacket blocks the worst of the spray. Work from a sheltered position whenever the light allows it, since a wall on the windward side does more for you than any cover.
Keep the cover closed between shots rather than flipping it open and shut for every frame. If you need constant access, deploy it once and shoot through the openings, or accept short unprotected bursts in light rain. Our guide to how to shoot in the rain safely goes deeper on exposure and technique once the gear is dry.
Two habits worth building. Never wipe grit across glass with a dry cloth, and never point the lens straight down into a puddle where a splash lands straight on the coating.
6. Change Lenses Only in a Dry, Sheltered Place
Do not change lenses in rain or in damp conditions, even briefly. Opening the mount exposes the sensor and the internal electronics, and the water in the air is enough. It is a small opening held open at exactly the wrong moment.
If you genuinely must change, get inside first. A car is fine, a doorway is fine, a pop-up shelter is fine. Sit down if you can, turn the camera away from your body so you do not drip on it, and have the new lens capped and in your hand before you open the mount.
Do not leave the sensor exposed while you hunt for the lens. Cap the body the moment it is open, because a bare sensor attracts dust, drizzle and fingers.
7. Move to Shelter if Water Reaches the Camera
Watch for the warning signs rather than waiting for the evidence. Droplets around the lens mount, moisture beading under a port cover, a bag that has started to feel heavier than it should, or a faint fog creeping into the bottom of the viewfinder all mean the same thing: stop and move.
Retreat in stages rather than sprinting. Put the camera in the bag or under the cover first so the rest of your kit is protected, then pack up. Wiping down and repacking in a downpour is how one wet camera becomes three.
If you are several kilometres from a vehicle, shelter beats finishing the shot. You can reshoot almost anything.
8. Dry the Camera and Accessories Immediately
Work in this order, indoors and out of the rain:
- Power the camera off. If it is already on, switch it off rather than leaving it in standby.
- Remove the battery and the memory card.
- Shake out loose water, then blot the exterior with a dry microfiber cloth. Do not rub hard on any textured grip or coated surface.
- Wipe the front and rear elements separately, using a cloth damp with distilled or plain water, then dry them with a clean section.
- Leave the body uncovered in a ventilated, dry room. Air movement does far more good than heat.
- Do not reseal a damp camera into a closed bag or a dry bag. Trapped moisture is how you turn water damage into fungus.
Silica gel packets in an open container nearby will pull humidity out of the air around the gear. They need airflow to work, so spread them around the camera rather than burying it.
9. Inspect and Store the Camera Safely
Once everything is dry, check the body, the mount, the battery compartment and the card slot with a light. Look for water sitting in the recesses around the dials and the strap lugs, since that is where it hides longest.
Turn the camera on only after it has had time to dry fully. If it behaves normally, test every button, both card slots and each lens mount in turn. A lens that mounts stiffly or a control that hesitates is worth watching for a few days.
Do not separate the lens from the body while either is still cold and damp. Leaving them together keeps the interior volume small and slows condensation inside the lens.
If you see errors, a card slot that will not read, or a viewfinder that stays fogged, stop trying to fix it yourself and get the body serviced. Fog that persists after a full day of drying usually means water got past the seals.
Common Mistakes
Using a plastic bag that is not sealed. A loose bag traps humidity and then condenses on the inside, which is the problem you were trying to avoid. Seal it around the lens barrel with two rubber bands and tape the collar if the seal looks doubtful.
Changing lenses in the rain. There is no safe version of this. Wait, or accept the loss of the shot. Forum advice on this point is completely unanimous.
Wiping grit across the lens. Dry-cloth wiping pushes particles into the coating. Rinse or dab first with a damp cloth, then dry.
Reaching for a hairdryer or heat gun. Heat drives moisture deeper into the body and can damage adhesives, coatings and internal coatings. Air at room temperature, moving, does the job.
Filling the camera with rice. Starch dust ends up on the sensor and in the mechanism, and rice is not a desiccant. Air drying plus loose silica gel packets around the body is the right approach.
Baking silica gel in a hot oven to regenerate it. Most packets melt at far lower temperatures than manufacturers suggest. Buy fresh packets instead of cooking them.
Sealing a warm, wet camera into a closed bag. This is the mistake that causes most condensation damage. If the gear is warm and damp, it needs airflow first.
Powering on a wet camera to see if it still works. Turning it on is how a survivable splash becomes a dead motherboard. Leave it off until it is genuinely dry.
Frequently Asked Questions
Can I use my camera in light rain if it has weather sealing?
Yes, for light rain and splash, provided the gasket is undamaged and every door and port cover is properly closed. Weather sealing resists moisture but it is not waterproof. Sustained rain, spray hitting the camera side-on, and any camera that has been dropped or opened carelessly should still wear a cover.
What is the best way to protect a camera from rain?
A fitted rain cover or rain sleeve that matches your body and lens combination, deployed before the rain starts rather than after the first drop. Keep a plastic bag method in the bag as a backup. The second best method is a dry bag or waterproof backpack, because most camera bags soak through from the bottom first.
What should I do if my camera gets wet?
Switch it off, remove the battery and card, then blot the exterior with a dry microfiber cloth instead of rubbing. Leave the body uncovered in a dry, ventilated room and resist the urge to seal it in a bag. Wait until it is fully dry before powering on, and separate the lens from the body only once both have warmed through.
Is a plastic bag safe for protecting a camera from rain?
A heavy-duty bag or large ziplock is the most useful emergency method there is, and photographers on the ground rely on it constantly. Use a heavy bag rather than a thin one, cut a hole smaller than the lens barrel, and seal the collar with rubber bands. Expect condensation inside if the camera goes in warm and comes out in cold air.
Should I change lenses in the rain?
No. Opening the mount in rain or damp air exposes the sensor and internal electronics to water that is already in the air, and the opening is exactly where it collects. Wait until you are inside or under solid shelter, sit down, have the new lens capped in your hand, and cap the body the moment the mount is open.
Can I use a hairdryer to dry a wet camera?
No. Heat and forced air drive moisture deeper into the body and can damage adhesives and coatings, and the warmth can fog the sensor worse than the water did. Leave the camera powered off with the battery removed in a dry, ventilated room, with loose silica gel packets around it, and give it as long as it takes.
The Short Checklist Before You Walk Out
Decide before you leave, not after the first drop. Check the forecast and pick your shooting position. Charge the battery, clear the card, mount one lens, pack the cover and a spare bag in the top compartment. That covers most of the risk, and it takes about five minutes.
When you get home, give the gear airflow and time. Most rain damage I have seen came from rushing the drying, not from the rain itself. If you take one habit from this guide, make it not powering on a wet camera to check whether it survived.