
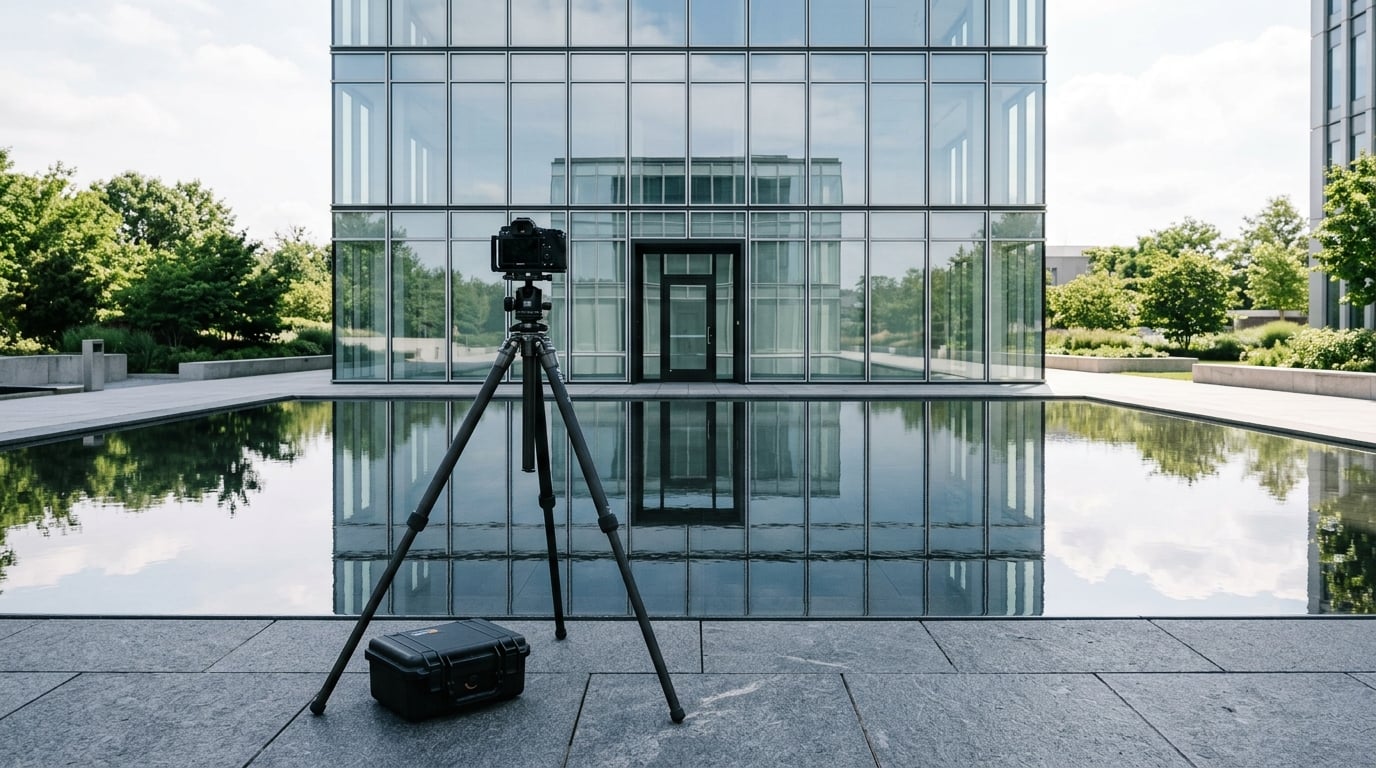
To use symmetry in photography, you put the camera square to an axis in the scene — a doorway’s center line, a horizon, the middle of a spiral staircase — and frame so both halves carry matching weight. That is the whole trick. Alignment decides the shot, not the price of your glass, and any camera or phone with a grid overlay is enough to start. Most people learn it in an afternoon once they know which axis to hunt for.
I still check grid lines before every centered frame, even after years of shooting. It takes two seconds and it is the difference between a photo that looks deliberate and one that looks like an accident.
Table of Contents
- What You Need
- Step-by-Step: How to Use Symmetry in Photography
- Frequently Asked Questions
- What is symmetry in photography?
- What type of symmetry is easiest for beginners to photograph?
- Should symmetry always be placed in the center of a photograph?
- How do you fix a symmetrical composition when perspective distortion ruins it?
- Can reflections create symmetry in photography?
- How do you make a symmetrical photo more interesting?
- Conclusion
What You Need
The kit list is short because symmetry is a thinking problem before it is a gear problem.
- A camera with a grid overlay. Every DSLR and mirrorless body has one, and so does every phone camera. On Canon it is in the shooting menu, on Nikon it sits near the ISO button, on a phone look for grid lines in the camera settings or use the rule-of-thirds guides built into most editing apps.
- Any lens you already own. A 24-70mm handles doorways and shopfronts. A 70-200mm flattens distant detail into neat rows. Do not go shopping for this.
- A tripod or something stable. A tripod for architecture, a fence post or a stack of books for the street. On a phone, rest your elbows on something solid and use the two-second timer.
- A level. A cheap bubble level on the hot shoe, or the digital level in your camera menu. This is what stops verticals from leaning.
- Optional extras: a polarizing filter to cut glare on water so the reflection survives, and a clean microfibre cloth for glass facades.
You also need to be comfortable with three settings: aperture, shutter speed and ISO. That is the exposure triangle, and step five uses it.
Step-by-Step: How to Use Symmetry in Photography
Eight steps, in the order that actually works. Most failures happen between steps one and three, when people try to fix a crooked frame by cropping instead of moving.
1. Identify the Main Axis of Symmetry

Symmetry has four axes you will meet in daily life: vertical, horizontal, radial and reflective. Vertical runs down the middle of a door or a tree trunk. Horizontal runs along a waterline or a horizon. Radial radiates from a single point, like a spiral stair or a flower. Reflective duplicates the scene across glass or water.
Find the axis first, then decide where it sits in the frame. Dead center gives a formal, stable result. Pushing the axis to a third of the frame keeps the structure but adds energy.
Strong symmetry starts with geometry, not equipment. Scan a scene for the line that divides it evenly, and your eye gets faster at it within a week.
2. Choose a Subject With Repeating Forms
Repetition is what makes an axis hold up. A single door is a shape; four doors in a row is a pattern, and patterns survive small alignment errors.
Look for staircases, window grids, railings, doorways, archways, road markings, fences, headstones, bridge trusses and shop awnings. In still life, three objects at even spacing beat one object floating in the middle.
Shadows count. A row of balusters throwing even shadows across a wall gives you an axis the architecture did not provide. My rule: if I can describe the pattern in one sentence, it will photograph well.
3. Position the Camera on the Axis
Move the camera. Do not crop your way out of a crooked frame, because cropping throws away pixels you needed and never fixes the perspective error underneath.
Step sideways until the axis sits under the middle of your frame, then step forward or back until the frame is filled. Camera height matters as much as position: shoot a doorway from waist height and it reads as a person standing there, while chest height flattens it into a pattern.
A longer focal length compresses depth, so distant windows line up more regularly. A wide angle exaggerates convergence, which makes near verticals splay outward. For facades, longer is calmer.
On the tripod, level the camera before you fine-tune position. That two-second habit removes most of the leaning-building complaints in critique threads.
4. Compose With Visual Balance
Central symmetry is the safest version. Both halves carry the same size, tone and detail, so the eye settles immediately and the photo reads as calm and formal.
Near-symmetry is the more interesting version. Shift the subject a few degrees off the axis, let one side fall into shadow, or leave extra negative space on one side, and the frame keeps its structure while gaining tension.
Reflections are the classic tool here. A calm puddle doubles a streetlamp, a wet road doubles a skyline, a polished floor doubles a crowd. Half the frame is free detail, and that is why symmetrical reflections forgive sloppy exposure.
5. Control Exposure and Focus
Here is the repeatable camera routine. Start in manual or aperture priority.
- Set the aperture for the depth of field you need. For a flat facade, stop down to f/8 or f/11 so near and far stay sharp. For a single subject with a symmetrical background, a wide aperture blurs the pattern into soft shapes and keeps the center crisp.
- Check the histogram for clipping. Bright skies and windows blow out easily in a high-contrast frame, and a clipped white patch destroys the near-perfect pairing that symmetry depends on.
- Choose a shutter speed that defeats movement. On a tripod, two seconds is plenty. In the street, match the shutter speed to the slowest thing moving through your symmetrical background.
- Focus on the axis itself, using live view magnification when your camera has it. Manual focus at high magnification beats autofocus for a dead-on frame.
- Bracket only when the scene’s contrast is wider than the sensor can hold. A single exposure is cleaner than a merge that leaves ghost edges along the axis.
6. Refine the Symmetry in Editing
Edit conservatively. Symmetry is unforgiving of heavy-handed corrections because any error shows up twice, mirrored.
Crop slightly to remove an edge intrusion, correct the tilt with the straighten tool, then lift or drop shadows with the highlights and shadows sliders. A touch of local contrast on the axis helps the center read as the focal point.
Perspective correction in Lightroom or Photoshop will straighten converging verticals, and the tilt and keystone sliders fix a camera that was not level. Use them to rescue a frame, not to invent geometry the scene never had. Once you start building lines that were not there, the photograph stops being evidence of anything.
For a cleaner result, convert to black and white. Without color competing for attention, the pattern carries the frame on its own.
7. Decide Whether to Preserve or Break It

Perfect symmetry is the setup, not always the payoff. A single interruption makes the eye move, and moving is what keeps a viewer looking.
Ways to break it on purpose: shift the subject slightly off axis, put one unexpected color in a field of neutral tones, remove one element from a repeating row, disturb the reflection with a ripple or a footstep, or crop one side tighter than the other.
Break it once and only once. Two interruptions cancel each other out and you are back to a flat, static frame.
The point of learning how to use symmetry in photography is control: build the balance first so you know exactly what you are disturbing, then break it with intent rather than accident.
8. Make Several Controlled Variations
One scene, many frames. Shoot it horizontal and vertical, centered and off-center, in color and monochrome. Change one variable at a time and leave the rest alone.
Comparing the set tells you which device is carrying the picture. Usually it is the lens choice, the height, or the decision about where the axis sits, not the color treatment.
Keep the variations you would actually print. A repeatable drill beats theory: the same scene, six frames, one axis, six different decisions.
Common Mistakes
Almost every failed symmetry frame comes down to one of seven problems.
- Off-axis framing. The camera drifted a fraction after you set it. Fix it live: switch to live view, magnify to 10x, put the axis against the frame center, and shoot on the timer.
- Perspective distortion. Wide angle plus a tilted camera produces splayed verticals. Level the camera first, correct second.
- Clipped highlights. White patches break the pairing. Watch the histogram, or expose for the shadows and lift them later.
- Shallow focus. If only the center is sharp and the pattern dissolves, stop down two thirds of a stop and try again.
- Edge intrusions. A sliver of background at the frame edge breaks the mirror instantly. Shift slightly or crop in.
- Mechanical correction. Sliders used to force a structure that was not there. Correct the tilt, then stop.
- Overworked edits. Heavy clarity, sharpening and vignetting on a symmetrical frame create two different problems on two different sides. Dial back before you export.
In photography critique threads, the most repeated fix for a slightly-off frame is the tilt and keystone sliders in Lightroom, not a reshoot. In the field, the equivalent fix is to check the level before the shutter, not after.
Two habits worth keeping: check the axis before you press the shutter, and walk one pace left and one pace right before you leave a good frame. The comparison tells you which one you meant.
Frequently Asked Questions
What is symmetry in photography?
Symmetry in photography is a composition technique where elements mirror each other across a central axis, so both halves of the frame carry equal visual weight. The axis can be vertical, horizontal, radial or reflective. Balanced halves give the eye an instant resting point, which is why symmetrical frames feel orderly and calm even when the subject itself is complicated.
What type of symmetry is easiest for beginners to photograph?
Vertical symmetry is the easiest starting point. Doorways, archways, road markings and single trees give you a straight line to align with, and the feedback loop is fast. Horizontal symmetry over water is a close second once you have a place to stand still. Radial symmetry takes more positioning, so most beginners land on it a few months later.
Should symmetry always be placed in the center of a photograph?
No. Centering is the clearest expression, but placing the axis on a vertical or horizontal third keeps the structure and adds tension. Many photographers shoot the same subject twice, once centered and once on a third, and compare. Centered suits architecture and still life; offset works better when you want the frame to feel active rather than settled.
How do you fix a symmetrical composition when perspective distortion ruins it?
Level the camera first, because no correction fully rescues a tilted frame. Then crop to remove the tilted edges, apply the straighten tool, and use the vertical and keystone sliders in Lightroom or Photoshop to bring converging lines back together. Make small moves and check both halves after each one, because any error appears twice in a mirrored frame.
Can reflections create symmetry in photography?
Yes, and reflections are the cheapest symmetry you will find. Still water, puddles, wet roads, glass facades and polished floors all duplicate the subject across a horizontal axis. Shoot low so the reflection gets more of the frame, wait for the surface to settle, and a polarizing filter cuts surface glare so the mirrored half survives the exposure.
How do you make a symmetrical photo more interesting?
Build the balance first, then interrupt it once. Shift the subject slightly off axis, introduce one unexpected color, remove a single element from a repeating row, disturb the reflection, or crop one side tighter. One break creates movement through the frame. Two breaks cancel each other out and the image goes flat again.
Conclusion
Start here: pick a scene with one obvious axis, stand square to it, switch on the grid lines, level the camera and make one centered frame. That is the entire workflow, and it takes under five minutes once the axis is visible.
Then make a second frame that breaks the pattern on purpose, and a third with the axis pushed to a third of the frame. Comparing those three tells you more about composition than any rule you can memorize. The people who get good at this are not the ones with the best cameras; they are the ones who stopped cropping and started moving.