
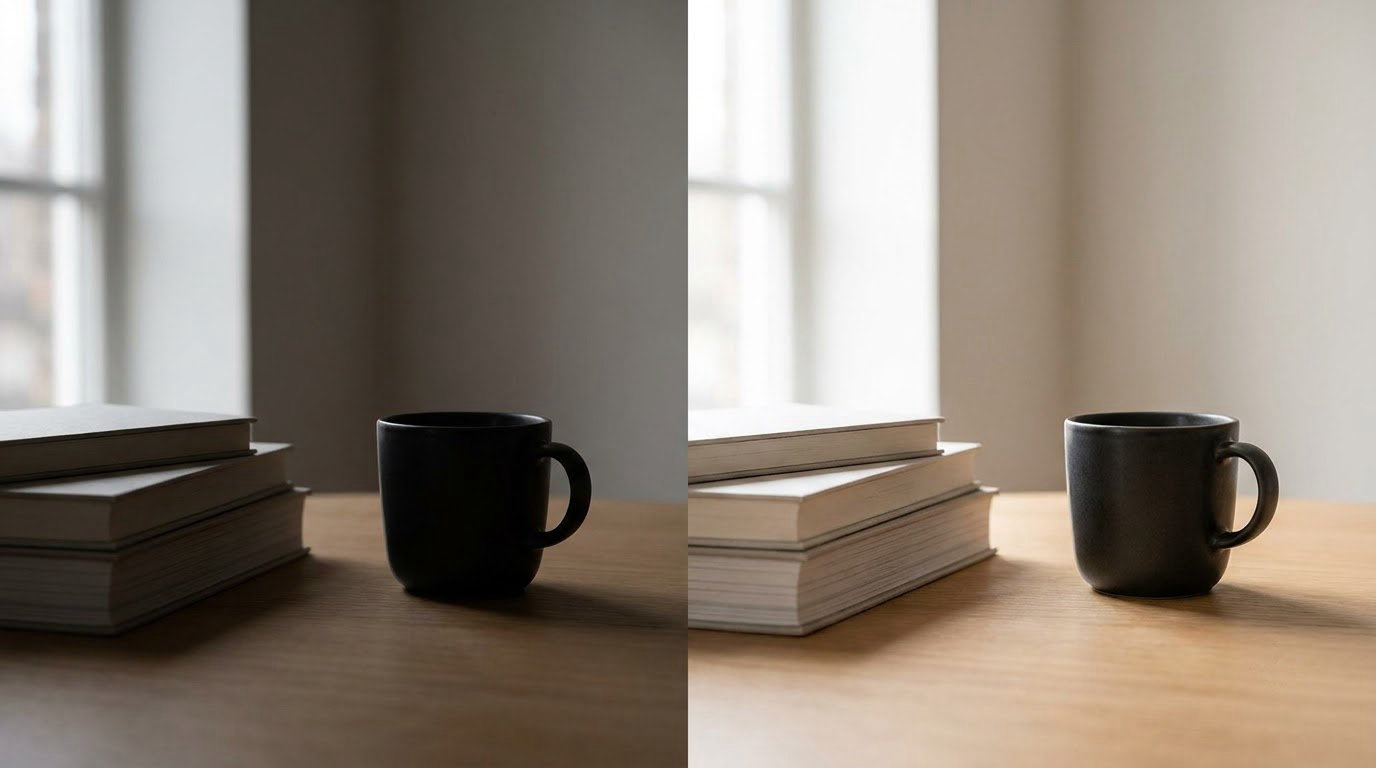
If you have ever wondered how to recover shadows in editing, the honest answer is that the order matters far more than the amounts. Start by checking whether the detail exists in the file, then make your broad tonal corrections, lower the black point to open up room, and lift the Shadows slider plus Texture in small increments. Where a single area still refuses to open, mask it and brighten it with a clipped adjustment layer.
Most flat, washed-out results come from someone dragging Shadows to +80 before setting exposure, then trying to re-add the contrast afterwards.
Everything below assumes you have an unedited original. If you shot the frame yourself and the shadow handling bothered you, it is often easier to fix at capture — how to photograph shadows covers the exposure side. If you are rescuing a photo you do not have control over, this guide is for you.
Table of Contents
What You Need
You need the original file, not a version you already exported and re-saved. Opening a compressed JPEG of a JPEG and trying to pull shadows out of it is like inflating a deflated tyre.
You also need an editor with real tonal controls. Lightroom Classic or Adobe Camera Raw covers the global work; Photoshop handles masking and anything that needs a hand. Both are non-destructive, so you can always back the sliders out.
One more thing worth having: a way to see the histogram. In Lightroom it sits at the top right of the Develop module, and clicking it lets you expand the view with the clipping indicators on each end. Those two small triangles are the single most useful tool in this whole process.
The workflow differs depending on what you have. A 12-bit or 14-bit RAW file has headroom in both directions, so you can pull bright areas down and dark areas up. A JPEG, HEIC or scanned print has almost none. The shadow data was discarded when the file was written, and no slider can bring it back.
Step-by-Step: How to Recover Shadows Without Flattening the Image
1. Check Whether the Shadow Detail Exists
Before touching a slider, find out if you are lifting shadow detail or just lifting empty blackness. Open the histogram and look at the left edge. If the data runs flat against the left wall in a solid block, those pixels are clipped to zero and nothing in the file can restore them.
Zoom to 100% with the dark area filling the screen. What you are looking for is texture, not just brightness: a faint suggestion of grain, fabric weave or foliage edges means data is there. A completely featureless field means it is not.
Also check the clipping indicators. Hovering over a triangle shows which areas are being clipped, which saves you hunting. This step takes ninety seconds and it is the one people skip, then spend an hour dragging a slider to prove nothing to themselves.
2. Make Global Adjustments First
Set the white point before anything else. Hold Alt (Windows) or Option (Mac) and drag the Exposure slider right. Everything above the top of the histogram goes pure white, and in this step that is what you want, because those are the pixels that should be white.
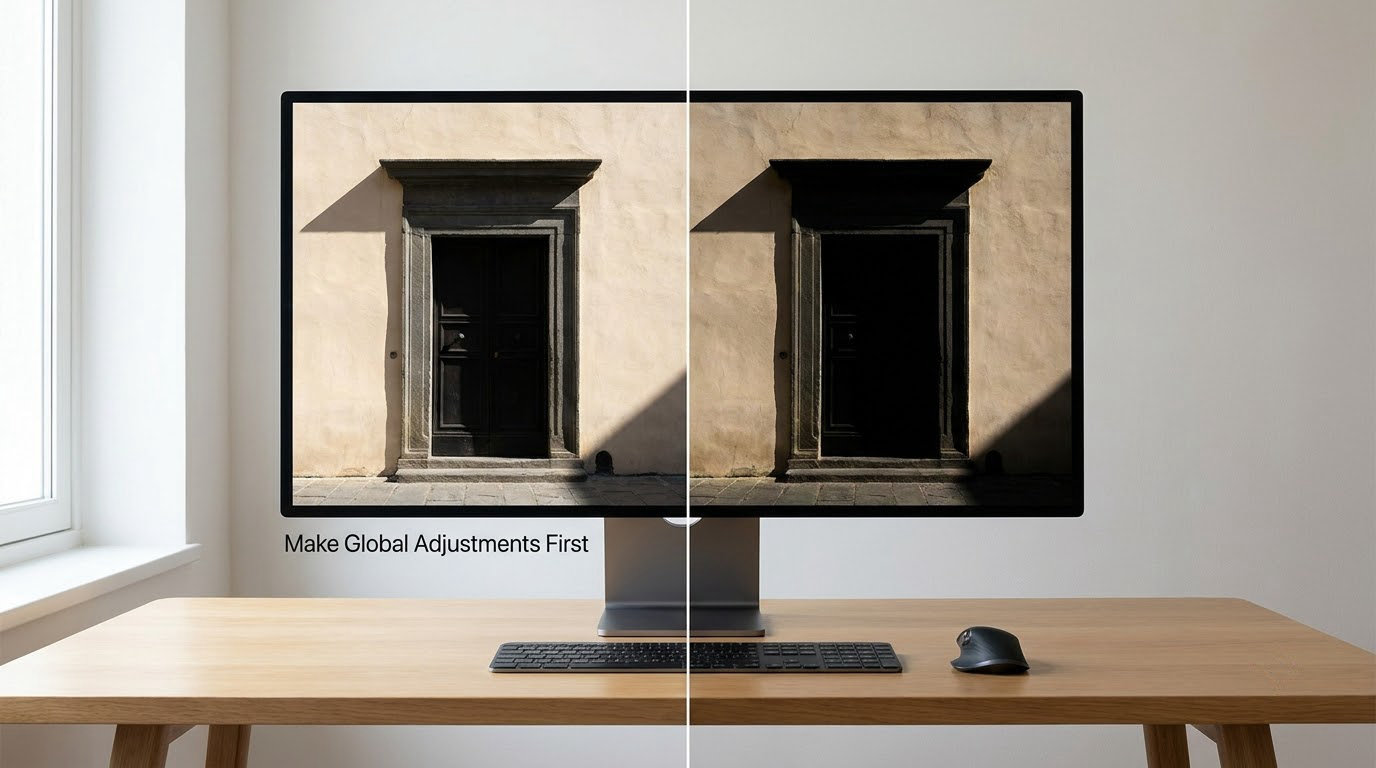
Release the modifier, then set the black point the same way with a left-drag. You now have a properly framed image. Correct exposure next, then set a neutral white balance using the eyedropper. A warm cast in the shadows reads as a colour problem rather than a brightness problem, and no amount of lifting fixes it.
Check the histogram after each of these. If the shape of the distribution looks reasonable now, you have room to work in the steps that follow.
3. Lower the Blacks Before You Recover Shadows
Lowering the Blacks control creates the space that shadow recovery then fills. Drag it left, toward Shadows, and watch the deepest areas of the frame rise slightly. Stop the moment the image starts to look hazy or veiled. That haze is lifted noise, and it is the reason so many recovered shadows look grey.
There is a second approach here that experienced photographers use, and it confuses people when they first see it: raise the Blacks slider slightly at the same time as you raise Shadows. The two work together. Shadows opens detail inside the dark range, and Blacks lifts the floor of that range so the newly visible detail does not immediately fall back into near-black.
You do not need much. A black point around -20 with Shadows up in the 30s is a reasonable starting combination. Compare with the histogram rather than guessing: you want the left edge of the data pulled away from the wall and spread, not a tall solid spike.
4. Apply Selective Shadows and Texture
The three controls do different jobs. Shadows moves specific tones, roughly the quarter tones of the range, and is protected so you cannot wreck the deep blacks with it. Texture is a midtone control; it adds local contrast to flat, slightly mushy areas and leaves the deep shadows alone. Clarity is the aggressive version, and it hits everything including shadows and highlights.
A reasonable first pass on a difficult frame is Shadows in the 30 to 50 range, Texture up to about 20, and Clarity left at zero. Add Clarity only where you have checked the noise level at 100% first, because it amplifies blotchy colour in lifted shadows faster than it adds bite.
Now zoom to 100% and look at the recovered areas specifically. You are hunting for three things: colour speckle, texture that looks like skin rather than sandpaper, and halos where the lifted area meets a brighter edge. If you see any of them, pull Shadows back by five and try masking instead.
5. Mask the Difficult Shadow Areas
Masking is how you recover a shadow without flattening the rest of the image. If a doorway or a face is stuck dark while everything around it looks right, opening the Shadows slider globally is the wrong tool. You are lifting a large area to fix a small one.
In Photoshop, use Select Subject or Select Sky to get a starting mask, Color Range to grab a colour-defined region, or draw by hand with a quick selection and refine it. For a person against a background, our cut a person out in Photoshop guide covers the edge work in detail.
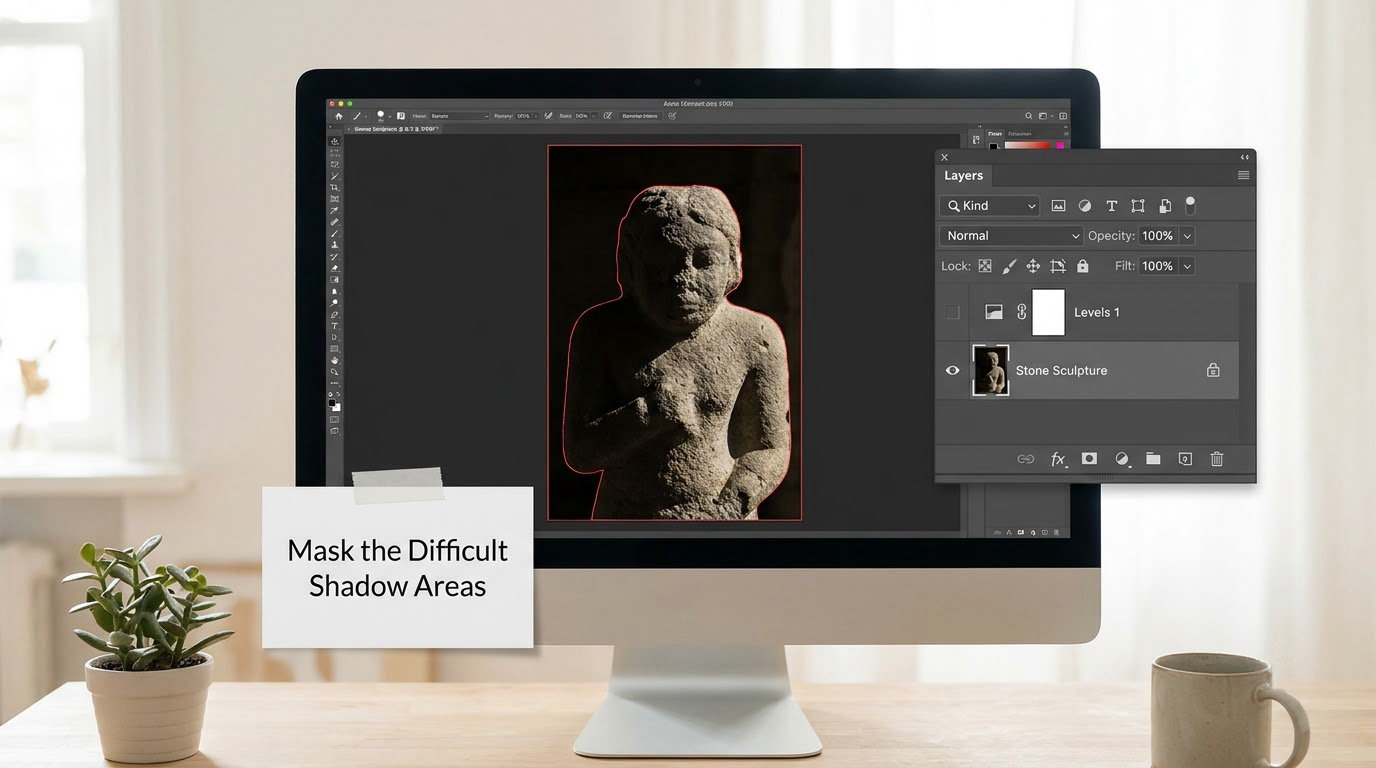
Add a Curves adjustment layer and clip it to the mask, using the clipping mask icon at the bottom of the layers panel. Then pull the lower part of the curve up. Add a second Curves layer for fine colour correction, and mask a third if you need to soften the mask edge, because a hard mask edge is what creates a visible halo.
If the shadow you are fixing belongs to something you composited rather than photographed, making cast shadows look real in a composite goes into matching the darkness of an added shadow to its surroundings, which is the same problem in reverse.
6. Control Noise and Color Shifts
Lifting shadows amplifies whatever was there, including sensor noise and, in JPEG files, compression blocks. In Lightroom, set the Luminance slider to roughly 30 and push Detail down toward 25. That keeps edges from smearing while pulling the speckle out. Color noise at around 25 on the Detail view fixes the coloured blotches that show up in deep blue and green shadow areas.
For colour casts, the HSL panel’s Saturation slider on the offending hue works better than global vibrance. If shadows have gone cyan, drop the cyan saturation and add a little warmth back. You may also need a selective colour adjustment on the mask from step 5 rather than a global one.
Leave sharpening alone until the end. Sharpening a recovered shadow makes every bit of noise look twice as obvious, and it is the most common reason a rescued image still looks bad after all that work.
7. Compare Before and After at Several Sizes
Use the Before/After view in Lightroom (the Y key) or View mode in Photoshop and toggle between them. Check at fit-to-screen first: if the recovered shadow reads correctly at small size, the tonal work is probably sound. Then zoom to 100% and confirm the subject in the shadow is actually readable rather than merely less dark.
Save a comparison at two more sizes, a large print and a phone screen, because both exaggerate problems differently. Once you are satisfied, do your sharpening for output resolution and export as a 16-bit file if the destination accepts one.
Common Mistakes
Dragging Shadows before setting exposure. Fix: always set white point, black point, exposure and white balance first. Everything after that is refinement.
Pushing Shadows past about 60. Past that point you are amplifying noise rather than revealing detail, and the result looks grey and lifeless. Reset to zero and work in smaller increments, checking at 100% between each.
Leaving Clarity at zero on a soft, hazy frame. This is the opposite failure: a global slider applied where a local mask was needed. Add 10 to 15 of Texture with a brush on the specific area instead.
Lifting blacks and leaving the whites where they are. The image ends up milky with no clean point anywhere. After shadow work, revisit Highlights and Whites and pull them down to restore separation.
Ignoring a colour cast. Recovered shadows that look brown, blue or green are usually a white balance problem from earlier in the process, not a shadow problem. Go back and fix the cast before touching Shadows again.
Underexposing on purpose to protect shadows. This is a genuine trade-off, not a rule. Underexposing does keep shadow data, but it also softens contrast and raises noise in those same shadows. More often the protection is unnecessary because RAW files have more room than the histogram suggests. Photographers argue about this one constantly, and the honest answer is that it depends on how much the scene exceeds the sensor.
Editing a JPEG that was already compressed twice. Work from the original export. If that is all you have, do the recovery gently in small steps and expect less.
Applying the same numbers to every image. Starting values like Shadows +40 are a reference point, not a recipe. A dim interior and a bright backlit outdoor scene sit at completely different points and need different amounts.
Frequently Asked Questions
Can you recover shadows that are completely black?
No. If the shadow pixels are clipped to pure black in the file, there is no data to reveal. Shadow recovery raises the brightness of information the camera captured; it cannot invent information that was never recorded. Check the histogram first: if the data runs flat against the left wall, the shadows are unrecoverable and no slider, curve or mask will change that.
What is the best way to recover shadows in a RAW file?
Set the white and black points, correct exposure and white balance, then lower the Blacks slider slightly before raising Shadows. Finish with Texture rather than Clarity, and check the result at 100% for noise and colour blotching. Mask any single stubborn area instead of pushing the global slider further. Work non-destructively so you can back any step out.
Should I recover shadows in Lightroom or Photoshop?
Use Lightroom Classic or Adobe Camera Raw for the global tonal work: white and black points, exposure, white balance and the Shadows slider are fast and reversible there. Switch to Photoshop when you need to isolate one area with Select Subject, Color Range or a hand-drawn mask, and brighten it using a clipped Curves adjustment layer. Most workflows use both, global first and local second.
How much should I move the Shadows slider?
Start around 30 and add in increments of five, checking at 100% magnification between each. A difficult frame may need 50 or 60. Beyond that you are usually amplifying noise instead of revealing detail, and the shadows will look grey and hazy. If you need more than that in one area, mask it and work locally rather than moving the global slider further.
When should I use a mask instead of a global shadow adjustment?
Use a mask when one specific area is too dark while the rest of the image is already correct, or when the shadow sits next to a bright edge and a global lift would create a visible halo. Masks also let you correct colour in a specific area instead of shifting the whole image. If two or three areas in the frame are dark, the global Shadows slider is faster and cleaner.
Short Conclusion
Start at the histogram. If the shadow data runs flat against the left wall, no amount of editing will save it; if it is bunched but present, you have something to work with.
From there the sequence is: white point, black point, exposure and white balance, then a modest Blacks adjustment, then Shadows in small increments with Texture for local bite, then masking for whatever a single area still needs. Add noise reduction before sharpening, and keep everything non-destructive so you can undo a step that turns out to be too much.
How to recover shadows in editing is less about the amount you lift than about the order you do it in. Work through the sequence on one image this week and the flat, grey results usually disappear on their own. Updated for 2026.