
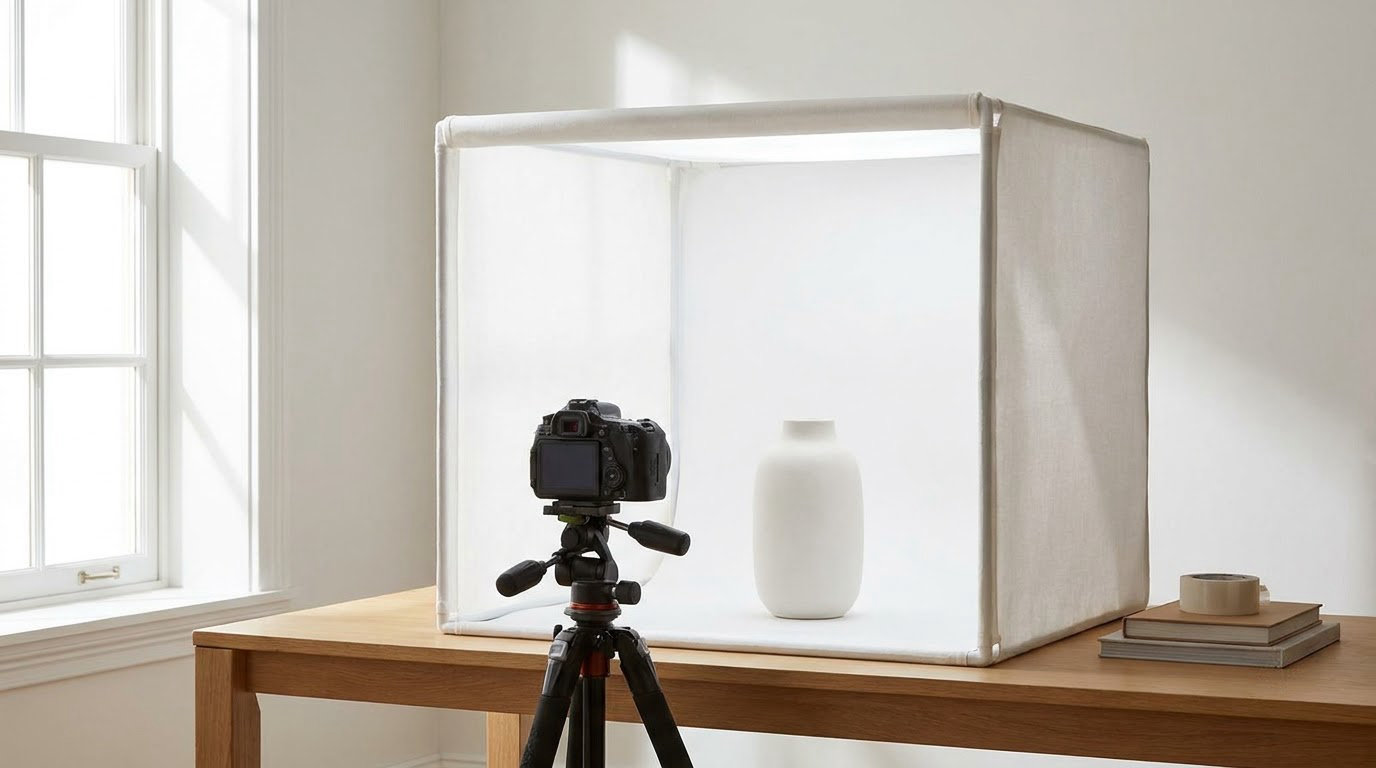
A photography lightbox is a small enclosed studio — usually a collapsible tent, or a cardboard box lined with translucent white paper — that wraps your subject in soft, even, near shadow-free light. Learning how to use a lightbox for photography is mostly about three things: even light from both sides, a backdrop with no visible seams, and manual camera settings. Set one up and a decent product shot takes about five minutes.
That repeatability is why sellers keep them. No window glare, no mixed colour temperatures, no neighbour’s shadow crossing the table at four in the afternoon. You get the same picture on Tuesday and on Saturday, which is exactly what marketplace listings and small catalogues need.
This guide covers how to set one up, how to light it, and when to skip it entirely, because a lightbox is not the right tool for every product.
Table of Contents
- What You Need
- Step-by-Step: How to Use a Lightbox for Photography
- Common Mistakes
- Frequently Asked Questions
- Are LED lights suitable for a photography lightbox?
- Can a lightbox photograph reflective or shiny objects?
- How do I avoid shadows when using a lightbox?
- Can a phone camera produce good lightbox photographs?
- Should I use a lightbox for product photography at all?
- What are the common problems with lightboxes?
- Your First Lightbox Session: Where to Start
What You Need
You can spend almost nothing here, or you can buy the whole thing ready-made. Both routes land in the same place.
- A lightbox. A pop-up tent with diffusion fabric on two or three sides, or a large cardboard box with parchment paper taped over window cutouts. Add side windows so light comes from both directions.
- A light source. Two continuous LED panels or desk lamps work well for beginners because you can see what they are doing in real time. Two speedlights give you more control but need trial and error.
- A shooting surface. A flat, matte, non-reflective board inside the box. Glossy white plastic bounces the light back and doubles your contrast problems.
- A backdrop sweep. One piece of matte paper or card, curved up at the back so the surface runs into the wall with no horizon line. For e-commerce listings, use pure white and curve it wide.
- A camera and tripod. Any camera with manual exposure works. A tripod matters more than a better lens, because it lets you stop down for depth of field without worrying about shake.
- A white reflector card and a black card. White foam board fills and softens shadows. Black poster board gives you negative fill — it darkens one side of the subject and kills reflections on shiny surfaces.
- A colour reference. A small grey or colour card in the first frame of each batch tells you later whether the white balance shifted.
A 100mm macro lens helps for jewellery, coins and nails, but it is not the priority. Most lightbox mistakes come from lighting and settings, not glass.
Step-by-Step: How to Use a Lightbox for Photography
Here is the whole process in order. Expect five minutes per product once the box is built, and about twenty minutes the very first time you set it up.
1. Choose the Right Light Source
Continuous LEDs are the easiest starting point because the light stays on and you can judge it without taking a test shot. Daylight-balanced lamps around 5000 to 5500K keep colour accurate and prevent the yellow-green cast that cheap household bulbs produce.
Two lamps at 45 degrees beat one lamp in the middle. A single source creates a visible shadow on the far side, and no amount of editing fixes that cleanly. Mixed sources are worse than one weak source, so turn off every other lamp in the room and close the door to block window light.
Heat is the underrated problem. Cheap lamps inside a closed tent can soften vinyl backdrops or melt glue in an afternoon of shooting. LED panels run cool and stay consistent, which is why most working setups moved to them. If you shoot with speedlights, meter them rather than trusting a fixed power number.
2. Prepare the Lightbox and Background
Wipe the diffusion panels and the interior surfaces with a microfibre cloth first. Dust shows up instantly on a high-key background, and it is the most common reason a good shot gets rejected by a marketplace.
Set the sweep in before you turn on the lights. Curve it up at the back with a wide, gradual transition — a tight crease creates a visible line and a shadow band right where you do not want one. Tape or clip the top edge to the side panels so it cannot wrinkle, and let the surface run a few centimetres past the front edge of the shooting board.
Match the surface to the subject. Matte card for jewellery and crafts, gloss-free white for catalogue work, and grey or tinted paper for dark objects that would otherwise sit on an empty-looking white field. If your background has a texture, the subject will pick up that texture.
3. Position the Subject Inside the Box
Leave a few centimetres between the object and the diffusion panel. Push a bottle right up against the wall and it goes flat and evenly dull, with no depth at all. The same bottle set slightly forward keeps a gradient on its curved side.
For a wristwatch, tilt the strap at a slight angle so the face catches the light rather than reflecting the box straight back. For a bottle, place it a little off-centre and turn it a few degrees so the label sits flat to camera. For a small artwork, keep it parallel to the front panel and leave a finger’s width of empty space around it.
Use putty or a small acrylic stand to hold items upright. Bottles and cans roll, artwork leans, and a subject resting on its own base usually looks like an afterthought.
4. Control Reflections and Shadows
Shiny surfaces reflect whatever is in front of them, including you and your phone. The fix is not more light — it is removing bright shapes from the reflection.
Slide a black card beside the subject on the side facing the lens. It absorbs the reflection instead of bouncing it back, and the highlight on a metal or glossy edge becomes a controlled streak rather than a white blob. Slap a circular polariser on the lens and turn it slowly for glass or lacquer; it costs nothing and cuts most surface glare.
For softer shadows, close the gap between subject and background, or bring in a white reflector card opposite the strongest shadow side to fill it. You want shadows soft, not absent — a small contact shadow under a product tells the viewer the object is sitting on something real.
White products on a white background are the hardest case. Separate them with a thin grey or silver edge card behind the subject, or drop the background a half stop by moving the lights back. Never rely on the screen to tell you whether you have clipped; check the histogram instead.
5. Set the Camera for Consistent Lightbox Results
Switch to manual everything: manual focus, manual exposure, manual white balance, RAW capture. Auto white balance will drift between products in the same batch, which is exactly the inconsistency a lightbox is supposed to remove.
Start at ISO 100, f/8 and 1/60s with the lights set to the brightness that looks right to your eye, then adjust exposure from there. Shoot a grey card first and set white balance from it. Once focus is locked on the front of the subject, leave it alone for the whole session.
| Subject | ISO | Aperture | Shutter | Key adjustment |
|---|---|---|---|---|
| Matte object (fabric, wood, card) | 100 | f/8 | 1/60s | Fill with a white reflector card |
| Glossy or metallic | 100 | f/11 | 1/60s | Black card as negative fill |
| Dark product | 400 | f/8 | 1/60s | Deliberately overexpose by up to a stop to open shadows |
| Transparent glass | 100 | f/11 | 1/40s | White card behind the glass as a bright background |
| Jewellery and macro | 200 | f/11 | 1/125s | Stack two diffusion layers to shrink specular hotspots |
Treat those as a starting point, not a rule. Every combination of lamp brightness, box size and subject moves the exposure somewhere else. If you are working from a phone, use the rear camera, tap the subject to focus and exposure, then lock exposure and white balance before shooting. Phones inside a lightbox usually need about a stop more exposure than the box looks like it needs.
6. Take Test Shots and Refine the Image
Shoot one test frame, then look at it properly rather than at the camera’s rear screen. Check the histogram first: nothing should be touching the right-hand edge, or you have clipped highlights you cannot recover later. Then check that shadows are open, the subject is sharp, and no panel seam is cutting across the frame.
Two smaller adjustments fix most disappointing lightbox shots. Move the subject a few centimetres and take another frame — a change of angle changes the reflection pattern more than any other single move. If the whole frame still reads dull, add negative fill on one side and repeat.
Once you are happy, edit each frame to the same target rather than to taste: neutral white balance, a background pushed to pure white where the platform requires it, shadows lifted a touch, and a shared crop. Exporting a consistent batch matters more than making any single image perfect. Our guide to using histograms in photography covers how to read the graph before you commit.
If you want the background to hold detail instead of going pure white, camera dynamic range becomes the limiting factor, and that is a different lighting decision.
Common Mistakes
The honest part: a lightbox is one tool among several, and it is the wrong one for plenty of work. Pros on photography forums describe its results as flat and lifeless, and they are not wrong — a tent removes all directional light by design, so form and texture have to come back through negative fill and reflector cards. It also underperforms badly for food, where real texture sells the dish, and for anything larger than the box, which is why small tents frustrate people photographing framed prints.
| Problem | Cause | Fix |
|---|---|---|
| Image looks flat and lifeless | Even light from all sides leaves no modelling | Add a black card on one side as negative fill, and angle the subject slightly |
| Yellow or green colour cast | Mixed household bulbs, window light or auto white balance | Use one LED type, block all daylight, shoot a grey card and set manual white balance |
| Harsh white glare on shiny surfaces | Bright panels reflecting into the lens axis | Reposition the subject, add a black flag beside it, and rotate a circular polariser |
| Clipped highlights and blown-out backgrounds | Metering for the subject instead of the background | Expose for the brightest area, check the histogram, and stop down by a third |
| Visible seam or horizon line behind the product | Backdrop too short or creased too sharply | Use a longer sweep with a gradual curve and fix the top edge flat |
| Subject disappears into the background | White product, white background, similar values | Drop the background a half stop, or place a thin grey edge card behind the subject |
Two habits prevent most of these. Wipe the box before every session, and shoot a grey card in the first frame of every batch. One extra frame at the start saves retaking forty products later because the colour shifted halfway through.
And keep the composition simple. If you are shooting a single object against a plain sweep, the frame is already close to minimalist photography, which means one subject, one clear shape, no props competing for attention.
Frequently Asked Questions
Are LED lights suitable for a photography lightbox?
Yes, and they are usually the best starting point for a beginner. LED panels run cool, stay at a steady brightness and need no metering, so you can see the effect of every adjustment immediately. Choose daylight-balanced panels around 5000 to 5500K for accurate colour, and never mix them with household bulbs or daylight from a window. Two lamps at 45 degrees give you softer, more even light than one lamp centred above the subject.
Can a lightbox photograph reflective or shiny objects?
It can, but it needs deliberate shaping. Black poster board placed beside the subject absorbs reflections instead of bouncing them back, and a circular polariser cuts most surface glare on glass and lacquer. Angle the object so the bright panel does not sit directly in its mirror path, and stack two layers of diffusion to shrink specular highlights. Add a white card to fill the dark side, or the product will look like a cut-out.
How do I avoid shadows when using a lightbox?
Light from two sides rather than one, keep the subject a few centimetres forward from the backdrop, and let the diffusion fabric do the softening. Close gaps between object and background so contact shadows stay tight. Where you still want to lift a shadow, slide a white foam board reflector opposite the darkest side. Avoid going completely shadow-free, because a small soft contact shadow is what tells a viewer the product is resting on a surface.
Can a phone camera produce good lightbox photographs?
For small marketplace listings, yes. Use the rear camera rather than the widest lens, shoot in RAW if your phone offers it, and prop the phone on a small tripod or stack of books so it stays still. Tap the subject to set focus, then lock exposure and white balance so a whole batch matches. Phones usually render a lightbox a stop darker than the eye expects, so check the histogram rather than trusting the screen.
Should I use a lightbox for product photography at all?
For small, self-contained items like jewellery, cosmetics, prints, stickers and packaged goods, it is one of the cheapest quality upgrades available and gives you repeatable results. Skip it for food, where texture and steam carry the image, for large framed pieces that will not fit, and for anything that needs directional light and real shadow to look three-dimensional. Sellers consistently report better listings once images stop looking accidental.
What are the common problems with lightboxes?
Flat, unmodelled images, colour casts from mixed light sources, harsh glare on reflective surfaces, clipped highlights, visible backdrop seams and shadows are the usual six. Each has a straightforward fix: negative fill for flatness, one consistent LED type and manual white balance for colour, a black flag and a polariser for glare, histogram checks for exposure, a longer curved sweep for seams, and two-sided lighting for shadows. Cleaning the interior before each session removes most dust and flare complaints.
Your First Lightbox Session: Where to Start
Build or unpack the box, install one continuous curved sweep, put a daylight-balanced lamp on each side, and set your camera to ISO 100, f/8 and 1/60s in manual. Shoot one grey card, one test frame and one product, then fix what the histogram shows you.
That is the whole method. Once you know how to use a lightbox for photography, everything else is repetition, and repetition is precisely what makes the images look professional.