
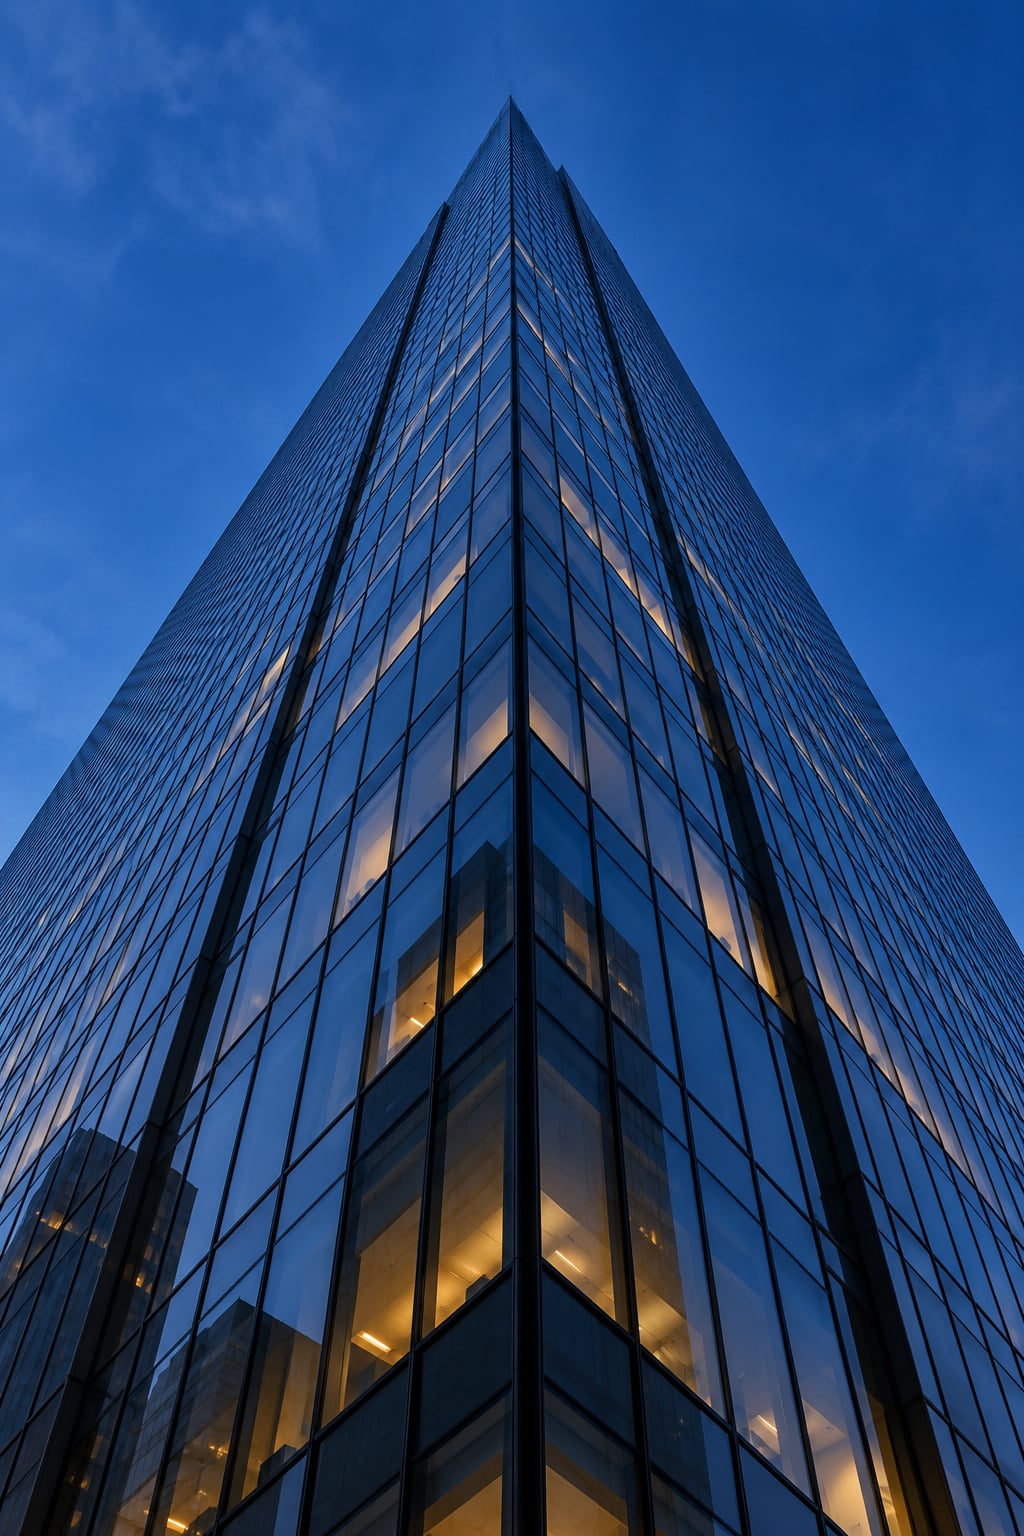
If you want to know how to photograph tall buildings, the answer is distance and a level camera. Walk back until the whole tower fits in a portrait frame, keep the sensor parallel to the facade, and shoot when the light gives the building shape. That is most of it. The rest is small decisions about focal length, exposure and editing that separate a photo of a tower from a flat grey rectangle.
This guide covers all of them, from scouting the location to the final crop. It works with a mirrorless camera, a DSLR, or a phone, though the phone version has to lean harder on software correction.
Table of Contents
- What You Need Before You Go
- Step-by-Step: How to Photograph Tall Buildings
- 1. Scout the building and background
- 2. Choose portrait orientation and the right composition
- 3. Control converging lines
- 4. Select a suitable focal length
- 5. Set exposure for bright and dark facades
- 6. Use light to emphasize height and texture
- 7. Stabilize the camera and capture multiple frames
- 8. Refine the image in editing
- 9. Review the final photograph for balance
- What to do when you cannot back up
- Common Mistakes
- Frequently Asked Questions
- How do I photograph tall buildings without them leaning backward?
- What lens is best for photographing skyscrapers and tall buildings?
- Should I use a tripod when photographing tall buildings?
- How do I photograph buildings at night without overexposing the lights?
- Can I straighten converging vertical lines in Photoshop?
- Is it legal to photograph buildings from public sidewalks?
- Conclusion
What You Need Before You Go
None of this is expensive, and the three items that matter most are the ones that solve a problem you cannot fix later.
- A camera with manual exposure. Any interchangeable lens camera qualifies. Aperture priority gets you most of the way, but manual mode is easier when the facade and the sky are five stops apart.
- A lens between about 24mm and 70mm on full frame. Anything wider than 18mm makes convergence brutal. On a crop sensor, treat 18mm as the equivalent of about 27mm.
- A tripod with a bubble level. The bubble matters more than the price. A level head you can trust saves twenty minutes of guessing.
- A two-second self-timer or a remote release. This is how you get off the camera without shaking it.
- A circular polarizer, optional but useful. It cuts glare on glass facades, though it costs you roughly a stop of light and it darkens skies unevenly at wide angles.
- RAW capture. JPEGs from a phone or a camera lock in the blown highlights on a bright sky. RAW gives you room to recover them later.
That is the whole kit. A tilt-shift lens is genuinely excellent for this work, and it is also the single most expensive item on the list. For most people the software route in step 3 does the same job for nothing, which is why the tilt-shift debate comes up so often in photography forums. The technically correct method is to aim the camera level and use a perspective control lens. True, and unnecessary for everyone who is not being paid for the picture.
If you are shooting on a phone, skip the tripod and the lens list. Use the stock wide camera rather than the ultra-wide, clean the lens, tap the building to lock focus and exposure, and shoot RAW or the highest-resolution ProRAW format your phone offers. Everything after that is editing, because a phone sensor is small and phones always struggle with the top of a bright facade against a darker street.
Step-by-Step: How to Photograph Tall Buildings
Work through these nine steps in order at one location before moving on. The order matters more than it sounds, because most failed tower shots fail at steps one and three and get discovered only in the edit.
1. Scout the building and background
Walk the full perimeter before you unpack anything. Look up from four corners and note where the roofline crosses power lines, aerials, cranes or a neighbouring tower. A clean silhouette matters more than a dramatic one, because the roofline is the line your eye follows first.
Then find your background. Walk far enough back that the tower separates from the buildings around it rather than merging into them. Look for the position where the facade is offset from the sky, not where the street is widest.
2. Choose portrait orientation and the right composition
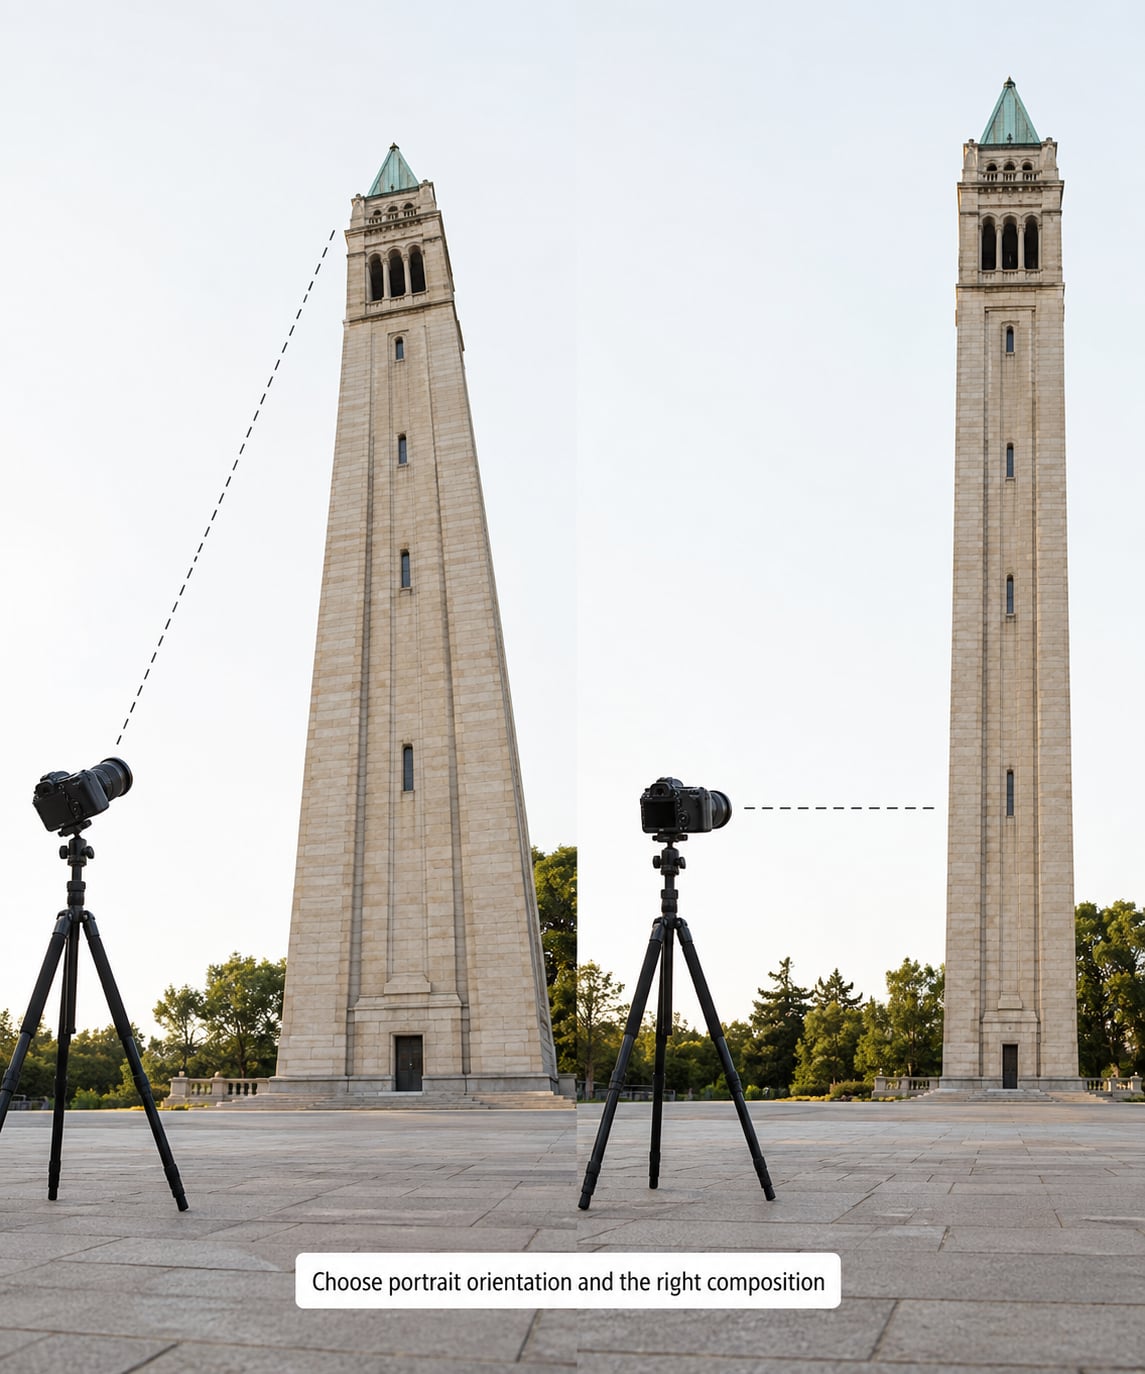
Rotate the camera to portrait. A tower is a vertical object, and a landscape frame either crops the top or wastes half the image on empty sky. Portrait also lets you leave headroom above the roofline instead of butting it against the frame edge.
For composition, put the base of the building near the bottom of the frame and let it rise. Leading lines from railings, road markings and window bands all point upward if the frame is vertical. Add people at the base for scale. A person beside a tower does more work than any amount of cropping.
3. Control converging lines
Converging vertical lines, or keystoning, happen because of geometry, not a bad lens. Your sensor is flat. When you tilt it upward to fit a tall building in frame, the sensor cuts the scene at an angle, and two lines that are genuinely parallel in the world meet at the horizon, so they meet in your picture too. The tower looks like it is falling backwards away from you.
Fix it in one of four ways, in order of preference:
- Move back. The further you stand from a tall subject, the less the tilt angle and the smaller the convergence. This solves the problem and needs no correction, which is why it is first.
- Raise the camera. Level the camera at roughly the mid-height of the building, using a balcony, a step or the top of a wall if you have to. Shooting near the middle of the subject keeps the angle symmetrical top and bottom.
- Use a tilt-shift lens. The lens shifts the optical axis so you can frame the top of a tower without tilting. Nothing else produces this result optically.
- Correct it in software. Stretch one edge of the frame after capture.
| Method | What it fixes | Cost and effort | Best for |
|---|---|---|---|
| Move back and level the camera | Nearly all of it, if the building fits | Free, just walking | Street-level work with space behind you |
| Raise the camera to mid-height | Symmetry from the middle up | Free, needs a vantage point | Buildings beside a plaza or an open square |
| Tilt-shift lens | All of it, optically | Highest cost, no extra time | Professional architecture and real estate work |
| Software correction | Most of it, if you shot RAW | Free, two minutes in the edit | Everything else, including tight streets |
One warning deserves repeating: levelling the tripod does not fix convergence. You need the camera’s sensor plane parallel to the facade. A perfectly level tripod with a camera tilted up on it still produces a leaning building, which is a genuinely common surprise.
And sometimes the convergence is the point. A straight-up worm’s eye view with the tower narrowing dramatically into the sky reads as drama rather than error, and no viewer reads it as a mistake. Decide which version you are making before you shoot, because you cannot fully straighten a deliberate worm’s eye shot afterwards without losing the effect.
4. Select a suitable focal length
Focal length and distance work together, and only the two of them together determine how distorted the result looks. A 70mm lens from a hill across a river can produce cleaner verticals than a 24mm lens from the pavement, because the camera is further away and the angle is smaller.
- 16mm to 24mm. Maximum drama, maximum convergence. Good for a worm’s eye view you intend to correct later or keep deliberately.
- 24mm to 35mm. The everyday architecture range. Fits most towers from a reasonable distance with correction needed.
- 50mm to 85mm. Cleaner verticals, compressed look, taller buildings get cropped out of the frame. This is the documentary range, the one that makes a building look like a person might recognise it.
- 135mm and up. For isolating a facade detail or a single spire against the sky from a distance.
5. Set exposure for bright and dark facades
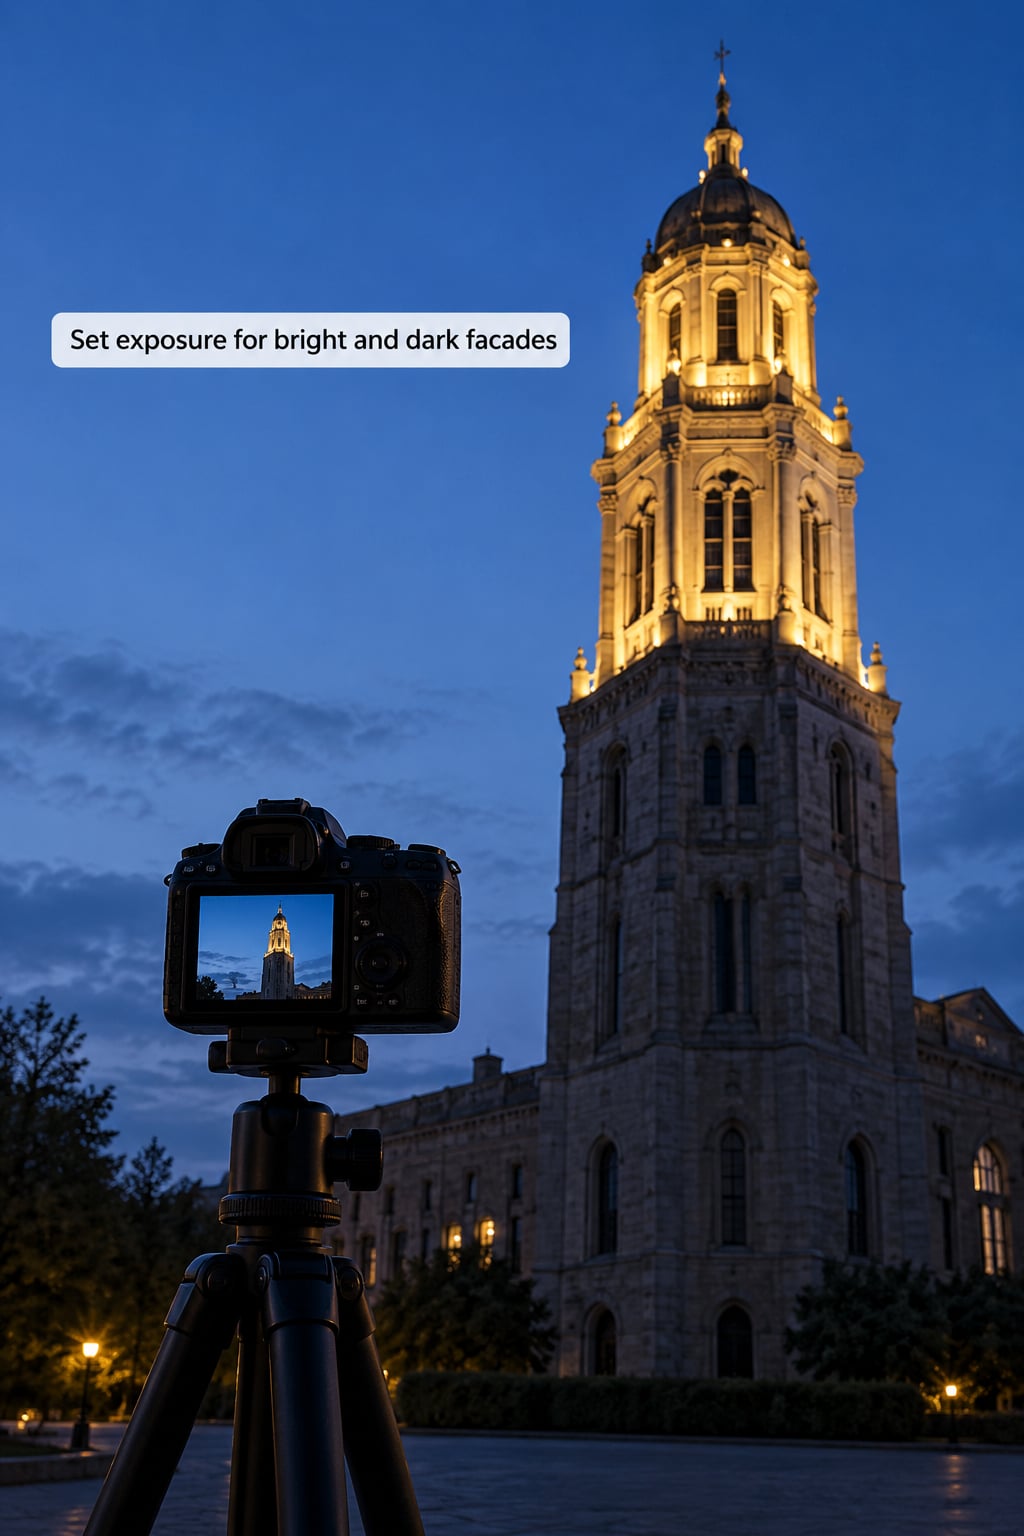
A tower is nearly always a hard exposure problem, because the sunlit glass at the top and the shaded street at the bottom can differ by five or six stops. That is more than most sensors record in one frame. Shoot RAW so you have room, and protect the highlights.
Start with these values and adjust for your light:
| Light condition | Aperture | Shutter | ISO | Focal length | Tripod |
|---|---|---|---|---|---|
| Golden hour, sun on the facade | f/8 | 1/125s | ISO 100 | 35-70mm | Recommended |
| Blue hour, interior lights on | f/8 | 2s | ISO 200 | 35-70mm | Required |
| Overcast midday, flat light | f/11 | 1/60s | ISO 100 | 24-50mm | Recommended |
| Bright sun, harsh contrast | f/11 | 1/250s | ISO 100 | 24-35mm | Recommended |
| Night, lit windows | f/5.6 | 10-30s | ISO 400 | 24-50mm | Required |
| Bracket for high dynamic range | f/8 | 1/60s, -2/0/+2 | ISO 100 | 24-50mm | Required |
Small apertures of f/8 to f/11 keep the near facade and the top of the tower both acceptably sharp. Diffraction softens detail beyond about f/16 on most sensors, so there is nothing to gain by stopping down further.
Bracket when the contrast defeats a single frame: three shots at minus two, zero and plus two exposure compensation, shot within a few seconds of each other. Blend them in Camera Raw or Lightroom with the HDR merge tool. It takes a minute and it turns an unusable frame into a usable one.
6. Use light to emphasize height and texture
Side light describes form. Light raking across the facade from one side throws shadows off every window band, every ledge and every column, and the eye reads that shadow pattern as texture and as height. Flat midday light removes all of it and leaves you with a bright rectangle.
Golden hour, the hour after sunrise and before sunset, is the community favourite for good reason. Low angle light warms one side of the building and cools the other in open shade. Our guide to how to photograph shadows covers the same ideas in more depth: look for the line where direct light ends on the facade and work from that boundary.
Blue hour, the twenty minutes after sunset when the sky is still bright but the interior lights have come on, is the best window for a lit tower. The sky keeps a gradient behind the roofline and the windows register as bright points instead of merging into one glowing mass. Expose for the sky and lift the shadows in the edit, rather than the other way around.
Watch the sky and the glass separately. A clear graded sky does more for a tower than any amount of editing, and a circular polarizer helps on older glass facades. Our guide to how to photograph reflections covers puddles and glass plaza work, which is the fastest way to double a plain shot.
7. Stabilize the camera and capture multiple frames
Use the tripod, the two-second self-timer or a remote release. Hand-holding a vertical frame of a tower at f/8 and 1/60s will show, and small shakes read as softness across the whole facade rather than at the edges.
Then shoot more than one frame of the same composition. At least three. This gives you options for the person who stepped into frame, the bird that crossed the sky and the slightly better light that arrived twenty seconds later. Vary the height by a few steps and vary the focal length between shots. Two vertical framings differ by more than most people expect.
8. Refine the image in editing
Work in this order, because each step depends on the one before it.
- Correct the lens profile first. In Camera Raw or Lightroom, apply the profile that matches your lens under the Optics panel. This fixes barrel distortion and chromatic aberration at the frame edges before you judge the geometry.
- Then perspective. In the Optics panel, set Upright Mode to Guided, draw guides along two vertical edges of the building, and tick Vertical. Apply it as a profile copy so the adjustment is not baked into your original.
- Or use the dedicated controls. In Lightroom Classic, the Geometry section gives you Vertical and Horizontal sliders plus a guide overlay. In Photoshop, Filter, Camera Raw Filter gives you the same panel plus the Full Image button. Use roughly 15 to 25 percent on Vertical for a typical tilted-up shot; add more only while the building’s edges stay parallel.
- Recover the exposure. Pull the highlights down first, then lift the shadows on the lower floors. Watch the sky, not the building, when judging highlights.
- Finish with tone and cleanup. Add a little dehaze or clarity for the facade, adjust contrast gently, and remove the odd dust spot or cable in the sky.
- Crop to vertical. Trim dead sky above the roofline and the empty road below, but keep the base of the building in frame if you want the height to read.
9. Review the final photograph for balance
Before you file it, look at four things. Check that the building’s verticals run parallel from top to bottom and that the horizontal floor lines do not curve. Check the edges of the frame for half-cut poles, aerials or a stranger’s elbow. Check that the building occupies enough of the frame to feel large, without so little space that the scale is lost.
Then zoom to one hundred percent at the top of the tower and the base. Sharpness is where it is hardest to get right, and the top of a tower is usually the first thing to go soft on a f/8 frame at a wide angle. If it is soft, the fix is a longer focal length next time, not more editing.
What to do when you cannot back up
Some streets are simply too narrow. A canyon of towers with 30 feet of road between you and the facade is the most common real constraint in dense cities, and no amount of technique fixes it.
- Shoot in sections and stitch. Use your camera’s panorama mode in portrait orientation, overlapping each frame by around a third. This is the classic technique for fitting a tower taller than the frame.
- Correct a wider frame instead. Shoot landscape at a very wide angle, then crop to vertical. You get more to work with, but the convergence is stronger and the correction eats more pixels.
- Accept a detail shot. Frame the top third of the tower with the sky behind it. Detail photographs of facade geometry are a valid architectural image, not a consolation prize.
- Find a vantage point. A bridge, an upper-deck bus or a rooftop cafe twenty floors up solves the problem entirely, and the shooting position at mid-height was always the ideal one anyway.
Common Mistakes
These six account for almost every bad tower photo. Each one has a straightforward fix.
- Leaning back and tilting the camera up with a wide lens. This produces the falling-building effect. Fix: level the camera and correct vertically, or move back until you no longer need the tilt.
- Leaving too little room above the roofline. A roofline jammed against the top edge makes the building look cropped and accidental. Fix: leave five to ten percent headroom and let the sky work.
- Mixing light sources. Fluorescent office light, sodium street light and blue sky produce colours no white balance can reconcile cleanly. Fix: pick one moment, shoot after the interior lights settle, or desaturate deliberately and own it.
- Clipping the highlights. A white sky above a dark tower is unrecoverable if you exposed for the facade. Fix: expose for the sky, lift the shadows in the edit, and shoot RAW.
- Overcorrecting the perspective. Dragging the Vertical slider until the frame edges stretch into visible curves looks worse than the original error. Fix: increase Vertical only while the building’s edges stay parallel to each other.
- Filling the frame dead centre. A tower placed in the middle with equal empty space on every side reads as flat. Fix: move it off centre, or fill one edge and let it exit the frame.
A few field habits that save the shoot: arrive forty minutes before sunset and stay twenty after, because the light changes faster than you expect. Bring a lens cloth, since glass facades attract fingerprints from the crowd. If it rained, shoot the wet ground and the reflections before the puddles dry. For how to handle that, our piece on how to photograph rain has the settings.
Stay on public pavement. Rooftops need permission, and leaning over a barrier to get the angle is not worth the risk.
Frequently Asked Questions
How do I photograph tall buildings without them leaning backward?
Back away from the building until it fits in a portrait frame, then keep the camera level so the sensor sits parallel to the facade rather than tilted upward. Raise the camera to about half the building’s height if you can. Any convergence that remains gets corrected afterward in Camera Raw or Lightroom using the Optics panel with Upright Mode set to Guided, which is enough for almost every shot.
What lens is best for photographing skyscrapers and tall buildings?
For most people, a standard wide zoom in the 24mm to 70mm range on full frame. Anything wider than about 18mm exaggerates convergence so heavily that correction becomes heavy-handed. A 50mm or 85mm gives the cleanest verticals but only works from a distance. A tilt-shift lens is the specialist answer because it corrects the geometry optically rather than in software.
Should I use a tripod when photographing tall buildings?
Yes, almost always. Small apertures of f/8 to f/11, a vertical frame and blue hour exposures of several seconds all need a stable camera, and the tripod also frees you to step back far enough to fix convergence. Use a two-second self-timer or a remote release so your hand is not on the shutter. A tripod with a working bubble level is the useful part.
How do I photograph buildings at night without overexposing the lights?
Expose for the sky, not the windows, and let the interior lights clip a little. In manual mode start around ISO 400, f/5.6 and a shutter of ten to thirty seconds on a tripod, then check the histogram. Raising the exposure stops only brightens the glow and loses detail inside the windows, while raising the exposure compensation darkens the whole scene and adds noise in the shadows.
Can I straighten converging vertical lines in Photoshop?
Yes. Open the RAW file, choose Filter, Camera Raw Filter, set Upright Mode to Guided, draw guides along two vertical edges of the building and tick Vertical, then click Full Image. Roughly 15 to 25 percent on the Vertical slider fixes a typical tilted-up shot. Work on a duplicate layer so the correction stays adjustable, and stop increasing the value once the edges stop running parallel.
Is it legal to photograph buildings from public sidewalks?
In the United States, photographing a building exterior from a public sidewalk is generally fine because the building has no reasonable expectation of privacy from that view. Private property, interiors and identifiable people are different matters, and rules vary by country. Stay on public pavement, do not block the pavement, and check local rules when shooting from a tripod on a busy street.
Conclusion
Start with four actions the next time you stand in front of a tower. Walk back until the whole building fits in a portrait frame. Level the camera so the sensor is parallel to the facade. Shoot RAW at ISO 100 and f/8, and check the histogram so the sky is not blown. Then correct the remaining verticals in Camera Raw and crop the sky back to something calm.
Everything else in this guide is a refinement of those four moves.