
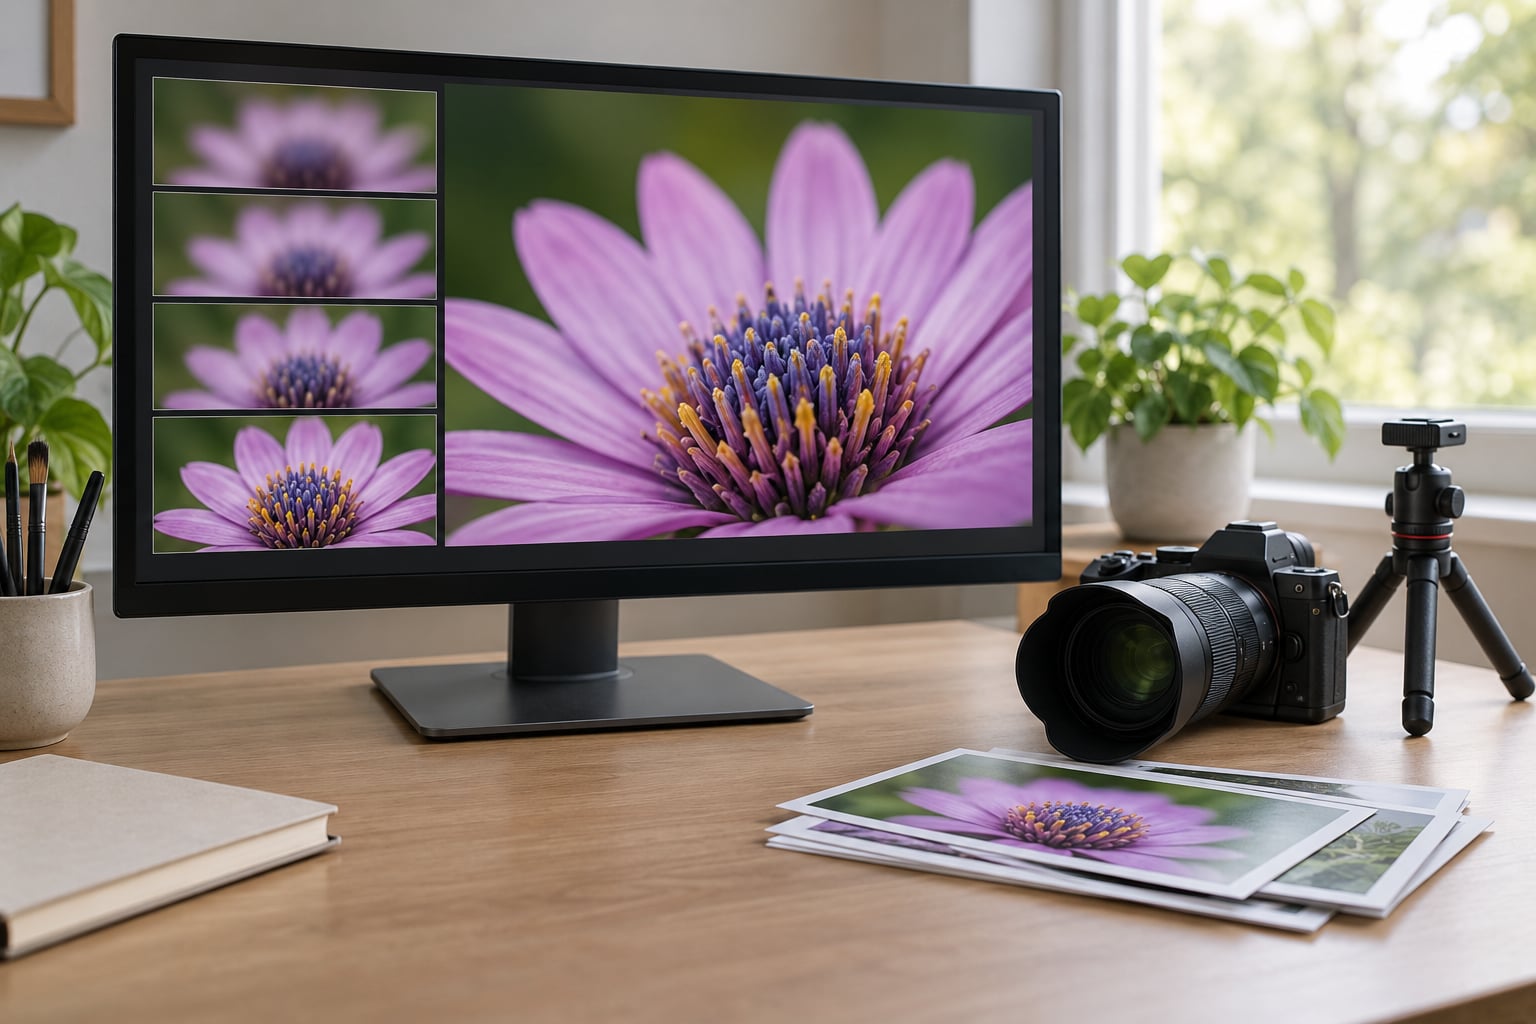
Focus stacking in Photoshop takes three commands: load your bracketed frames as layers, align them with Edit > Auto-Align Layers, then blend them with Edit > Auto-Blend Layers using the Stack Images blend method. Photoshop keeps the sharpest pixels from each frame and throws the rest away, so you get one image that is sharp from foreground to background.
The merge itself is about two minutes of work. Nearly all the difficulty sits in how you take the pictures, which is where this guide spends its time.
If you have never set focus by hand before, work through how to focus manually in seven simple steps first. It takes ten minutes and removes most of the wobble from a focus stack.
Table of Contents
- What You Need
- Step-by-Step: How to Do Focus Stacking in Photoshop
- Common Mistakes
- Frequently Asked Questions
- Can I focus stack in Photoshop if my photos were taken handheld?
- How many photos do I need for a focus stack?
- Why does my focus stack have halos or blurred areas?
- Is focus stacking better than using a smaller aperture?
- Should I convert focus-stacked photos to Smart Objects?
- Can I create a focus stack in Lightroom instead of Photoshop?
- Conclusion
What You Need
You need very little. The requirements below are the difference between a clean stack and an afternoon of chasing halos.
- A camera with manual focus, either a dedicated switch or a live view screen you can tap to pull focus.
- A tripod. Bracing the camera against a fence works in a pinch, but a tripod makes repeatability far easier.
- A subject that holds still. Wind, water, leaves and people all move between frames and get duplicated into the composite.
- RAW capture, or the largest JPEG your camera makes if you have no RAW option.
- A shutter release or two-second timer, so you never shake the frame by pressing the button.
- Photoshop with the File > Scripts menu available. The menu paths below match the current release in 2026.
On frame count, shoot more than you think you need. Six to ten frames covers most close work, and wide scenes with a near foreground and a distant background can take twenty or more. Adding a frame costs you processing time; a missing frame costs you a blurry patch.
On overlap, aim for each frame to contain roughly a third to a half of the sharp zone of the frame before it. That way every area of the subject is genuinely sharp in at least one frame, which is the whole basis of the merge. Shoot a test frame, note how far the sharp zone reaches into the frame, and use that distance as your focus step.
Step-by-Step: How to Do Focus Stacking in Photoshop
Capture Bracketed Frames with Enough Overlap
Lock the camera on the tripod, frame the shot, and confirm your first focus position before you switch anything off. Once autofocus is live it will hunt the moment the subject moves and you will lose the reference frame.
Switch to manual focus and step through the subject from the nearest point to the farthest. Use a cable release, the two-second timer, or live view magnification to move focus without touching the camera body.
Keep exposure constant. Set a fixed aperture, shutter speed, ISO and white balance in manual mode and leave them alone across every frame, because Auto-Blend Layers matches tone and colour between frames only when the frames actually agree.
Leave roughly 10 to 15 percent empty margin around the frame. Alignment shifts each frame to register with its neighbour, so the corners end up overlapping. Without that margin you will have nothing to crop back to.
How do you know the frames worked? Play back two frames side by side at 100 percent. There should be a wide band where both are sharp, and that band is your overlap check.
Open and Organize the Focus Stack
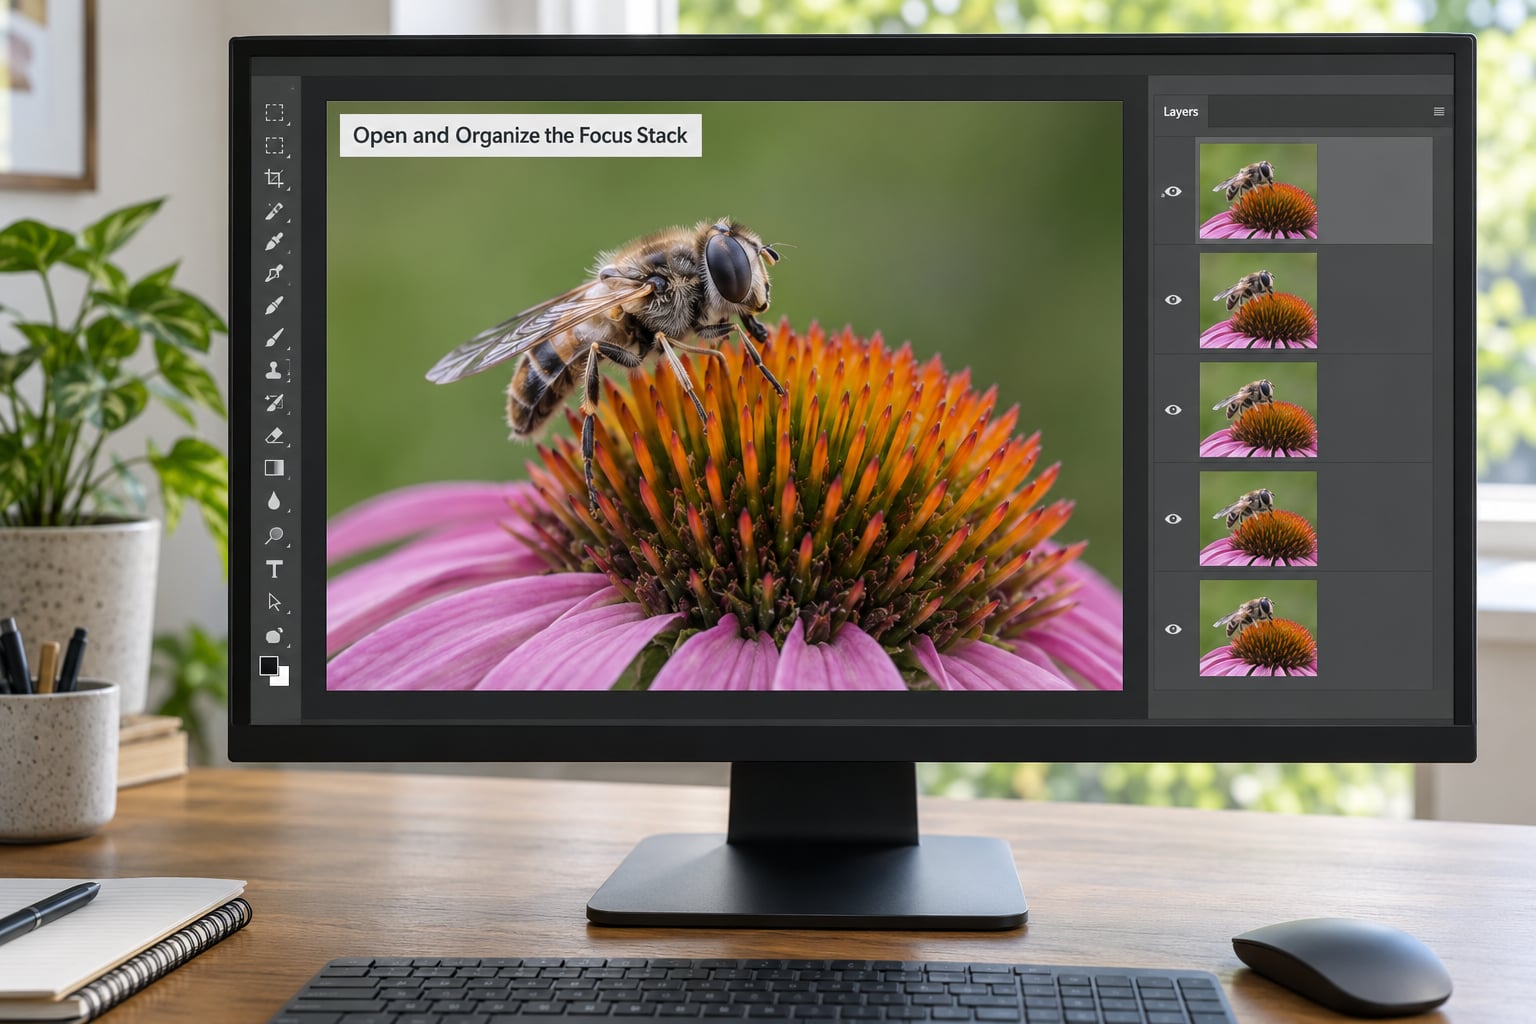
In Photoshop, go to File > Scripts > Load Files into Stack. Click Browse, select every frame in shooting order, and click Open. Tick Attempt to Automatically Align Source Images if the camera was on a tripod with a locked lens, and click OK.
Leave that box unchecked if you moved the camera at all between frames or shot through a wide or fisheye lens. Photoshop will do a better job when you align the layers yourself in the next step.
Sort the frames front to back in the Layers panel and name the top layer Base. You want that reference frame at the bottom so you always blend onto it. Renaming layers is worth the ten seconds; hunting through twenty untitled frame numbers later is not.
If a single frame needs heavy retouching, convert it to a Smart Object first. Filters behave predictably on Smart Objects and unpredictably on plain pixels.
Verify the stack by clicking through the layers with the eye icons. Every frame should show the same composition in the same place, differing only in which part is sharp. Anything that shifts position is a camera move, not a focus step.
Align the Layers with Auto-Align Layers
Select every layer in the Layers panel, then choose Edit > Auto-Align Layers. In the dialog, set Projection to Auto and click OK.
Projection controls how Photoshop decides where each frame sits. Auto picks the best method per layer, which is the right choice for almost every focus stack. Pick a specific projection only when you know the movement pattern, for example Perspective for a frame that clearly rotated on the tripod head.
Leave Geometric Distortion and Vignette Removal unchecked. You will see advice in both directions online, and the reason comes down to your files. Geometric Distortion is for stacks where the frames genuinely contain lens distortion that needs warping to match, which is rare on a locked tripod. If you have already straightened and corrected the lens profile in Camera Raw, checking it forces Photoshop to warp your corrected frames toward a distorted one and you lose edges you cannot get back. Vignette Removal is for stacks with different lens positions or zooms, so it is usually wrong here too.
Check the result before blending. Look at the top layer at 200 percent in a few places, including the corners. If the detail sits on top of itself, realign that one layer with Edit > Transform or nudge it with the arrow keys while watching the preview.
Blend the Focus Points into One Image
With all layers still selected, open Edit > Auto-Blend Layers. Choose Stack Images from the Blend Method dropdown, tick Seamless Tones and Colors and Content Aware Fill Transparent Areas, then click OK.
Seamless Tones and Colors evens out small brightness and colour differences between frames, which is what stops visible bands at the boundaries between merged areas. Content Aware Fill Transparent Areas fills the small gaps that alignment leaves at the borders of each frame.
If you want to know what Photoshop is doing to the pixels underneath the masks, how to use blend modes in Photoshop covers the maths behind the modes you meet while cleaning up a stack.
The Blend If: Smoothness slider controls how hard the transition is between the sharp area of one frame and the next. Raise it when you see a hard outline around a subject, lower it when fine repeating detail such as feathers or foliage disappears at the join.
After the blend, every layer except the base collapses to a layer mask. That is the sign it worked. Zoom to 100 percent and scan the whole frame for anything soft; a successful stack has no soft band anywhere, including the transition zones.
Refine the Result with Adjustment Layers
Stack the result as a new Smart Object before you touch tone. Adjustments then apply non-destructively, so nothing you do later can soften the merged pixels.
Add a Camera Raw Filter adjustment layer for the bulk of the work: exposure, contrast, highlights, shadows, whites, blacks and colour. Do the global corrections on one layer rather than painting on several, because matching edits across layers is how seams come back.
For black-and-white work, add a Black and White adjustment layer and use its eyedropper on the layers beneath it. The filter samples the merged image, so it will not crush the fine detail you just gained.
Local fixes go on their own layers with soft masks. A 2 to 3 pixel radius on a 24 megapixel file is usually enough; a hard-edged dodge on a fine subject edge is how you bring the halos back.
Crop, Sharpen, and Export the Final Image
Crop away the ragged border left by alignment. Straighten first if the stack drifted, then crop to the region where all frames overlap, which is usually a little smaller than a single frame.
Sharpen last and lightly. Merged edges already look sharp and take more bite than a normal single frame, so start with a small radius, around 0.5 to 1 pixel, and raise it only if the result looks soft on screen. Output sharpening for print happens at export.
Flatten a copy for delivery and save the layered version as a working file. Export a 16-bit TIFF for print and archive work, and a quality 90 or higher sRGB JPEG for the web. A 16-bit file avoids banding in skies and other smooth gradients, which a stack can make worse because each merged area came from a different frame.
Common Mistakes
Nearly every failed stack comes from one of five causes. Here they are by symptom, with the fix first.
- Halos or bright fringes around subjects. The sharp foreground bled over a soft background because Photoshop could not tell which pixels belong in front. Raise Blend If: Smoothness slightly and re-blend, or paint the offending edge onto the base layer with a soft mask. Fixing it at the source means stepping focus more finely at that distance.
- Gaps or unfilled strips at the frame borders. Alignment shifted the frames and left empty pixels behind. Tick Content Aware Fill Transparent Areas, and make sure you left that 10 to 15 percent margin at capture time. There is no way to invent detail that was never captured.
- Doubled subjects or ghost copies. Something moved between frames, so a leaf, a ripple or a person got baked into two layers. Stack water and foliage with a shorter interval and a wind break, or mask the moving element in by hand on the frame where it looks right.
- The whole result looks soft. Alignment resamples every frame and costs resolution, which is normal but noticeable when you crop hard. Blend from the largest original you have, avoid unnecessary zooming during alignment, and check that you were not working from resized JPEGs.
- Visible seams or colour bands. The frames differ in exposure or white balance. Shoot in manual exposure, match white balance across frames, and tick Seamless Tones and Colors. If the seams are in a sky, blend in 32-bit before converting to 16-bit.
Dust on the sensor shows up as sharp black specks that appear in exactly the same place in every layer. Clone them out on the base layer after blending, while the mask still lets you target the area precisely.
Two habits prevent most of this. Take the frames in one session without touching anything but the focus ring, and keep the light identical. If the frames disagree in any way other than focus, Photoshop will blend the disagreement in too.
Frequently Asked Questions
Can I focus stack in Photoshop if my photos were taken handheld?
You can try, and Photoshop will align small shifts. Handheld frames move enough that detail lands in slightly different places in each shot, so you usually get soft edges, doubled subjects and halos instead of a clean merge. The fix is not in Photoshop: rest the camera against a solid surface, use the timer, and keep the lens from twisting as you turn the focus ring.
How many photos do I need for a focus stack?
Six to ten frames covers most close work, and wide scenes with a near foreground and a distant background can take twenty. The right number depends on how far you step focus between shots: shoot more whenever the step is large. A useful check is to confirm every frame overlaps the next by at least a third of the sharp zone before you head home.
Why does my focus stack have halos or blurred areas?
Halos mean a sharp foreground bled over a soft background, which happens when the focus step is too coarse at that distance or Blend If: Smoothness is too low. Blurred areas almost always mean the frames did not overlap enough. Add frames closer together in the soft zone, raise Smoothness a little, and re-blend before you start cloning anything by hand.
Is focus stacking better than using a smaller aperture?
For anything deeper than about a centimetre of subject, yes. Stopping down to f/16 or f/22 shrinks the sharp zone but adds diffraction softness and often costs light, so sharpness can get worse before it gets better. Stacking lets you shoot wide open, keep creamy background separation, and still have the whole subject sharp.
Should I convert focus-stacked photos to Smart Objects?
Convert the merged result, not every frame in the stack. A Smart Object around the final image lets you apply Camera Raw, sharpening and resizing non-destructively, so filters behave predictably. Converting the individual frames before blending adds processing time without improving the merge, since Auto-Blend reads the pixels either way.
Can I create a focus stack in Lightroom instead of Photoshop?
Lightroom can hand the frames off to Photoshop, but it has no stacking tool of its own. Select your frames in the Library module and choose Photo u0026gt; Edit In u0026gt; Open as Layers in Photoshop, which applies your develop settings on the way across. That path is useful for sync, but if you only need the stack, File u0026gt; Scripts u0026gt; Load Files into Stack inside Photoshop does the whole job on its own.
Conclusion
Start where the result is actually decided: shoot more frames than you need, step the focus by a third of the sharp zone, keep exposure identical and leave margin around the frame. Then, in Photoshop, run File > Scripts > Load Files into Stack, Edit > Auto-Align Layers with Projection set to Auto, and Edit > Auto-Blend Layers with Stack Images.
That is how to do focus stacking in Photoshop without chasing artifacts all afternoon: adjust the merged result only after the blend, and keep the work non-destructive so you can always go back and re-blend.