
Three point lighting uses three separate sources: a key light that sets the exposure and mood, a fill light that softens the shadows the key throws, and a back light that separates your subject from the background. Once you know where those three go, knowing how to set up three point lighting takes about twenty minutes with stands and ten with clamps on a window and a shelf.
Most people get it wrong in the same two ways. They aim the key light dead-on from the camera, which flattens the face, and they stop with the front lights, which leaves the subject stuck to the background. The triangle fixes both.
This guide covers the geometry first, then the ratios, then the camera settings that make the arrangement repeatable. It works for portraits, headshots, self-tape auditions, interviews and talking-head video.
Table of Contents
What You Need
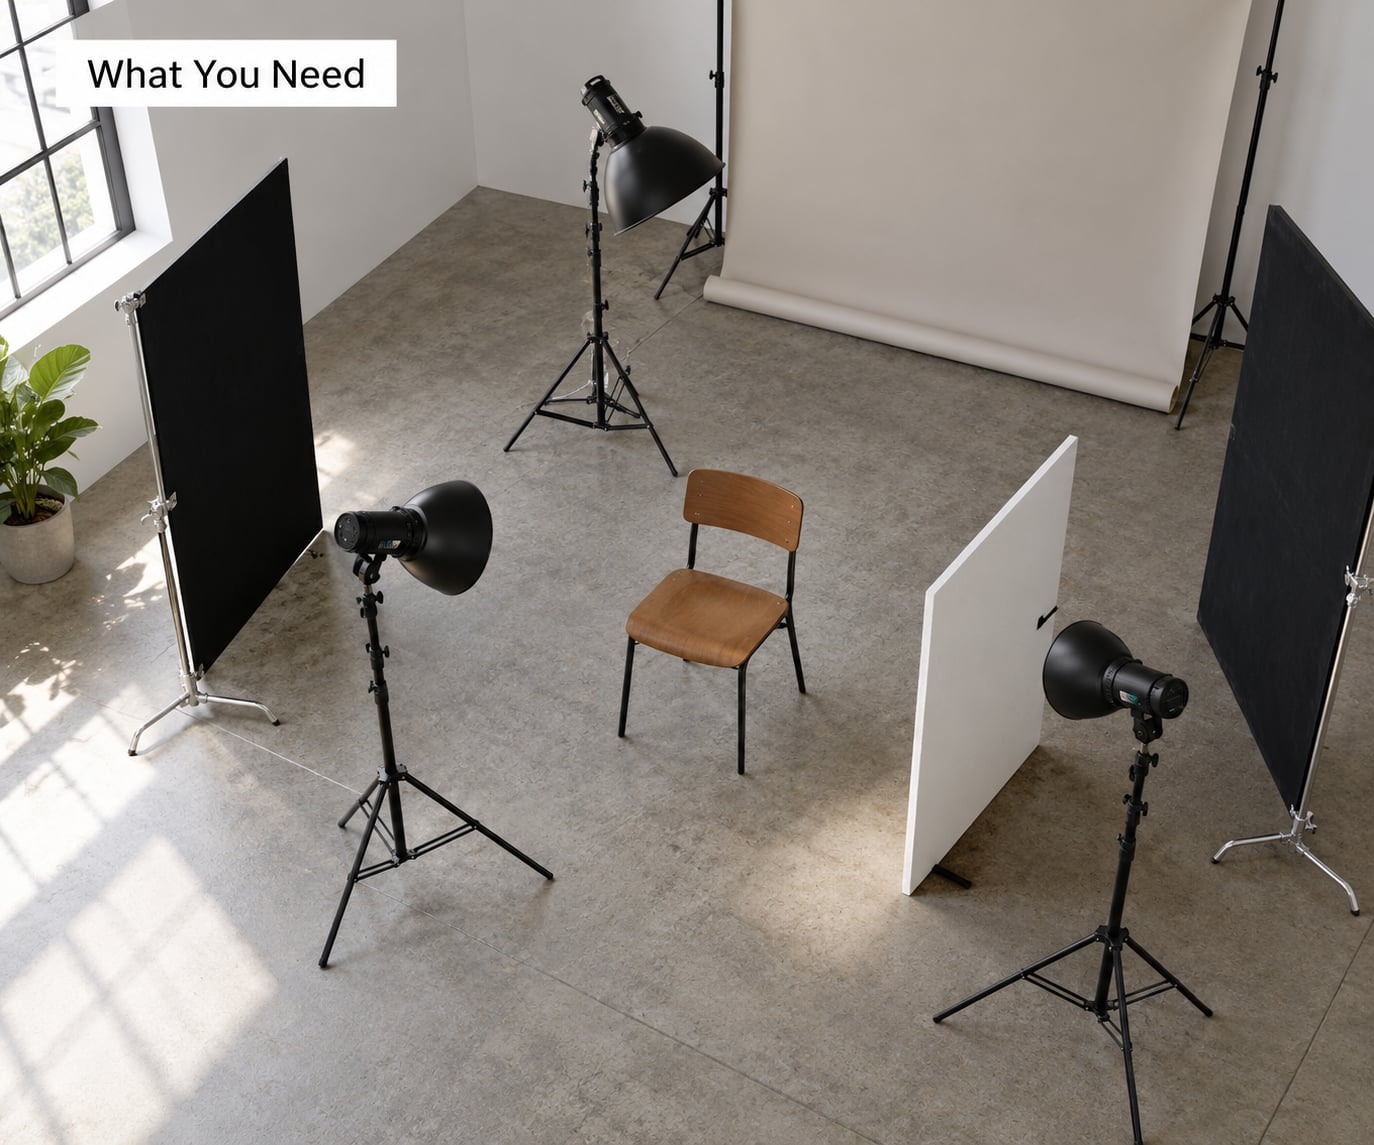
You need three light sources and something to stand them on. That is the whole requirement. Everything else on this list makes the result easier to control, not possible.
One key light. This is the brightest source and the only one that really matters at the start. A continuous LED panel works for both stills and video. A strobe with a softbox looks better for portraits but needs a trigger and only fires when you press the shutter.
One fill light or a reflector. A second panel is convenient, but a white foam board on a chair is a legitimate fill light and costs almost nothing. If your fill is a reflector, it bounces the key’s spill rather than adding a new source, which makes matching color temperature automatic.
One back light. Small and bright is what you want here. A bare panel with a grid, or a small LED with barn doors, keeps the rim tight so it does not wash the background. A boom arm is the cleanest way to get it above and behind the subject without a floor stand in the shot.
Three stands, or two stands and clamps. Key and fill on floor stands, back light on a boom. If you shoot in a small room, one C-stand clamped to a window frame or a shelf can carry the back light out of the way of everything else.
Modifiers. A softbox or umbrella on the key makes shadows soft-edged and flattering. A grid, barn doors or a black flag on the back light controls spill. Diffusion fabric clipped over a panel turns a hard source into a soft one for the price of a sheet of scrim.
A light meter, or your camera’s histogram. Meters read ratios faster than guessing. If you skip the meter entirely, the histogram and the blinkies on a modern camera will get you close enough to fine-tune by eye.
Flags and boards. Black foam core makes negative fill, which is how you get contrast without another light. White foam core does the opposite. If your subject has a dark wall behind them, one black panel on the fill side will do more for the image than a second lamp.
A background and a subject position. Decide where the subject sits relative to the wall before you turn anything on. A subject two feet in front of a backdrop behaves nothing like one standing against it, and moving them later means re-tuning all three lights.
Step-by-Step
1. Define the Look and Choose the Light Ratios
A lighting ratio is the brightness difference between the key side of the face and the fill side, expressed as a ratio. 2:1 means the shadow side is half as bright as the lit side. 8:1 means it is one eighth as bright. Most portraits sit at 2:1 or 3:1.
Decide the ratio before you move a stand, because it tells you how hard the fill has to work. Put the subject in the most flattering ratio first and adjust the look later, rather than dialing in brightness by moving the key around.
| Ratio | Key to fill | Resulting look | Where it works |
|---|---|---|---|
| 1:1 | Equal brightness | Flat, almost shadowless | Passport photos, e-commerce, group shots |
| 2:1 | Fill at half | Soft, natural, friendly | Portraits, interviews, corporate headshots |
| 3:1 | Fill at a third | Defined shadows with detail | Beauty work, video podcasts, most talking heads |
| 4:1 | Fill at a quarter | Clearly sculpted | Stylized portraits, moody product work |
| 8:1 | Fill at an eighth | Low-key, half the face in shadow | Dramatic and noir looks |
The 60/30/10 rule is a different idea from the lighting ratio and people mix them up. That rule is about how much of your frame each zone occupies: 60 percent background and surroundings, 30 percent secondary detail, 10 percent the thing you actually want looked at. You can build a full three point setup and still get the hierarchy wrong if the background is louder than the face.
2. Position the Key Light
Start the key at 45 degrees off the camera axis and about 30 to 45 degrees above eye level. That position throws the nose shadow down and across the face, away from the camera, which is what makes a portrait look like a portrait instead of a passport photo.
Think of the setup from above like a clock face with the subject at the centre and the camera at 12. Put the key at about 4 o’clock, the fill at 8 o’clock, and the back light at 10 or 11 o’clock, high enough to clear the subject’s head. Swap left and right if you like, but keep the key and fill on opposite sides.
How high you put the key changes the shadow pattern, and this is where the terms come from. Straight down the nose from the front gives you butterfly lighting, which flatters heart-shaped faces and leaves a small shadow under the nose. The 45-degree start gives you loop lighting, where the nose shadow loops gently down and to the side, and it suits almost everyone. Push the key further to the side and above, past 45 degrees toward 70, and the shadow moves off the cheek onto the face as a wide pool, which is called rim or split lighting and works well for dramatic portraits.
Height also controls how far the key sits above the subject, and that changes the softness of the light through the inverse square law. Doubling the distance quarters the light. If you move the key up and back, the shadows soften and you need more power to hold the same exposure.
If you are outdoors, the sun or a large window is the key and you build the other two around it. Face the subject toward the open shade, turn them 45 degrees away from the sun, and put the fill on the shadow side. If the sun is behind them at golden hour, it becomes the back light and you need a reflector or panel as the key.
3. Add the Fill Light or Reflector
The fill light does one job: it controls how dark the shadows are. When the key is too strong and the shadows on the subject look too deep, the fill is the light you raise. That is why it sits on the side opposite the key, roughly at the same distance, usually a little lower, and usually at roughly half the brightness.
Measure it rather than guess. Meter the subject’s cheek on the key side, then meter the cheek on the fill side. The difference between the two readings in stops is the ratio: one stop apart is 2:1, about 1.6 stops is 3:1.
If a reflector is your fill, put it on the fill side where the light would go, angled so it bounces the key’s spill back toward the subject. Silver reflects harder and brighter, white bounces softer and more neutral, gold adds warmth. A white wall on the shadow side works exactly the same way, which is why window-lit setups in bright rooms need almost no fill at all.
Be careful not to overfill. A fill placed close to the axis of the lens removes every shadow and leaves a face that looks like a sticker. If the portrait reads as flat, move the fill further out toward 8 o’clock, drop its power, or take a black panel and let it subtract light instead. Negative fill on the shadow side increases apparent contrast without adding a fourth source.
For video, the same rule applies but the meter matters less than consistency. Lock your settings and do not touch the fill during a take unless the ratio is meant to change.
4. Place the Back or Hair Light
The third light goes behind the subject, aimed down at the top of the head or shoulders. Its job is separation: a bright edge that says the subject is in front of the background rather than painted onto it. Without it, dark hair against a dark wall disappears no matter how good the front lighting is.
Terms get tangled here, so keep them straight. A hair light comes from directly above and behind, showing the texture of the hair. A rim light comes from behind and to one side, drawing a line down the shoulder and arm. A kicker is a back light placed almost to the side, hitting the shadow side of the face and adding a hard edge that increases the sense of depth. Same light, different position.
Aim the back light above head height, a little behind and slightly to one side of the camera. If you place it too low it lights the back of the neck and the background instead of the edges of the head. If it is too high and too far back you get a halo, which looks like a mistake unless you want it.
Spill is the common failure. Point the light away from the lens, fit a grid or barn doors, and keep the beam narrower than the subject’s shoulders. Then check the background: if the wall behind the subject is lifting, the back light is too wide or too far to the side.
The back light also decides the exposure. It is the brightest thing in most three point setups, so set your shutter speed or your aperture against it, or check that its highlight does not clip on the histogram. In video this is why you usually shoot the back light first and add a flag around it.
5. Dial In Camera Settings and Meter the Scene
Meter for the brightest part of the subject that must hold detail, which is usually the lit side of the face, and let everything else fall where it falls. If the meter reads a middle grey that produces a dull face, add a third of a stop to two thirds of a stop.
Set white balance to a fixed Kelvin value matching your lights rather than auto, because auto will shift mid-shoot when the meter changes. Matching sources matter too: daylight-balanced fixtures around 5200K and tungsten-balanced ones around 3200K in the same frame will give you a face that turns warm on one side and blue on the other. Either gel to match or turn on one light’s colour adjustment.
| Situation | Aperture | Shutter | ISO | Notes |
|---|---|---|---|---|
| Portrait, continuous LED | f/4 to f/5.6 | 1/125 s | 100 to 400 | Meter on the key-side cheek |
| Portrait, strobe | f/5.6 to f/8 | 1/160 s | 100 | Sync speed caps you; check your flash duration |
| Group of three or more | f/5.6 | 1/160 s | 200 to 400 | Move the key back rather than stopping down further |
| Talking-head video, 25 fps | f/2.8 to f/4 | 1/50 s | as needed | 180-degree rule: shutter is double the frame rate |
| Talking-head video, 24 fps | f/2.8 to f/4 | 1/48 s | as needed | Lock exposure, leave ISO on auto or fixed |
On the histogram, the key-side highlight should sit just under the clipping point and the shadows should not touch the left wall unless you are going for a low-key look. Check that the back light’s rim is not blowing out: if it clips, it becomes a white line rather than a highlight.
6. Fine-Tune the Setup by Moving, Not Multiplying
Almost every lighting problem is solved by moving something. Turn the key a few degrees and the nose shadow swings across the face. Step the fill back and its effect weakens by roughly two stops for every doubling of distance. Raise the key and the shadows move down the cheek; lower it and they climb toward the eye.
Reach for modifier size next. Shadow hardness comes from how large the source is relative to the subject, not from power. A two-foot softbox two feet from a face gives hard shadows no matter how much light is on it. Move that same small source eight feet back and the shadows soften noticeably while the brightness drops, so compensate with power.
Negative fill is the move people skip. A black panel on the fill side, close to the subject and just outside the frame, darkens that side of the background and face without touching the key. It is how you get a low-key look out of lights that only dim to a certain point.
If two lights would do the job, use two lights. Set the key and a reflector, put the third stand back in the corner. A single light plus reflector near a window gives a complete two point look, and a window plus a bounce card gives you the softest front light you can get without buying anything.
7. Test the Setup in Black-and-White and Color
Shoot one frame in monochrome before you commit. With the colour channels removed, all you see is tone: how bright the lit side is, how dark the shadow side falls, whether the subject separates from the background, and whether the catchlights sit where you want them. Problems that hide in colour are obvious in black and white.
Check the catchlights first. A large rectangular catchlight from a softbox reads as professional and open. A small hard source gives a pinpoint that can look dated on close portraits. If yours is a harsh dot, raise a diffusion panel or move the key slightly so the reflection lands higher in the eye.
In colour, look at skin tone consistency across the face. If the key is warm and the fill is cool, the cheek nearest the fill shifts pink. Matching Kelvin values or using a single bounced source fixes it faster than any amount of post-processing.
Finally, check the background at the final crop. A rim light that looks great in a wide frame can bleed into the edge of a portrait crop. Zoom in on the shot and look at the corners before you call the setup done.
Common Mistakes
Almost every bad three point setup is one of the eight problems in this table. Work down the list in order and fix the first one before touching the next, because each one changes how the others read.
| Mistake | What it looks like | Fix |
|---|---|---|
| Key light too high | Eye sockets go dark, shadows sit under the brow | Lower the key to 30 to 45 degrees above eye level |
| Fill too strong | Flat face, no shadow anywhere, skin looks grey | Drop the fill to roughly half the key, or swap it for a reflector |
| Back light pointing into the lens | Flare, washed blacks, hazy corners | Turn the light 10 to 15 degrees away and add a grid or barn doors |
| Mixed colour temperatures | One cheek warm, one cheek cool | Match Kelvin values or gel the odd one out |
| Judging from behind the camera | Looks fine live, falls apart in the frame | Check the shot on the screen, especially the corners |
| Back light too wide | Background lifts and goes grey | Flag the spill or aim the beam only at the shoulders |
| Overpowered light in a small room | Harsh shadows you cannot soften enough | Move the light further back and raise power, or switch to a dimmable panel |
| Modifier that does not fit | Light leaks past the softbox, uneven falloff | Check the modifier fits the fixture and the grid matches the reflector |
Two more habits worth building. Turn every light off and take one ambient frame before you start, so you know exactly what the room is adding. And shoot a test frame each time you touch a stand, because a single frame beats walking over to the back of the camera every time.
Frequently Asked Questions
Do I actually need three lights for three point lighting?
No. Three lights are the method, not the requirement. A window as key with a white reflector on the shadow side gives you a clean two point look. Two panels plus a mirror or piece of white foam board cover nearly every portrait and interview need. Add the third light later if you want rim separation or a tighter background.
Which light should be the brightest?
The key light. It sets the overall exposure and the mood, and the fill and back light are both measured relative to it. In practice the back light can look brightest in the frame because it hits a small area of the subject, but it contributes far less to the overall level. Meter for the key-side cheek and work outward from there.
Do continuous LED lights work for three point lighting?
Yes, and for video they are the default choice because they let you see what you are getting before you record. For still portraits they work fine, provided you are comfortable raising ISO rather than stopping down. Strobe lights give more power and a faster flash duration, but they need triggers and you lose live feedback.
How do I set up three point lighting outdoors?
Treat the sun as your key. Have the subject face open shade or turn 45 degrees away from the sun so the face is evenly lit. Put a reflector or dimmable panel on the shadow side as the fill, and when the sun is low and behind them it becomes the back light, with the reflector acting as your key. Watch for flare and for white balance shifting as the sun moves.
Can I do three point lighting in a small room?
You can, but you have less room to move lights apart, so falloff and spill become harder to control. Push the key as far back as the room allows and dim or increase its distance rather than overpowering the subject from close up. Black flags on stands earn their keep here, and a clamp on the window frame often frees up the space a boom needs.
What is a good key to fill ratio for portraits?
Two to one is the safest starting point: fill the shadow side to about half the brightness of the lit side. Three to one gives more shape and suits beauty work and video. Go to four to one or eight to one only when you want visible shadow on the face, and meter both cheeks to check the ratio instead of estimating it by eye.
Set up the key light first and get it right before you touch anything else. The other two lights only have one job each, and both of them are measured against the key. Once the key sits at 45 degrees and about 35 degrees above eye level, the fill and back light take about two minutes each.
Related reading on this site: how to photograph black objects, how to shoot flat lay photos, and how to photograph food for Instagram.