
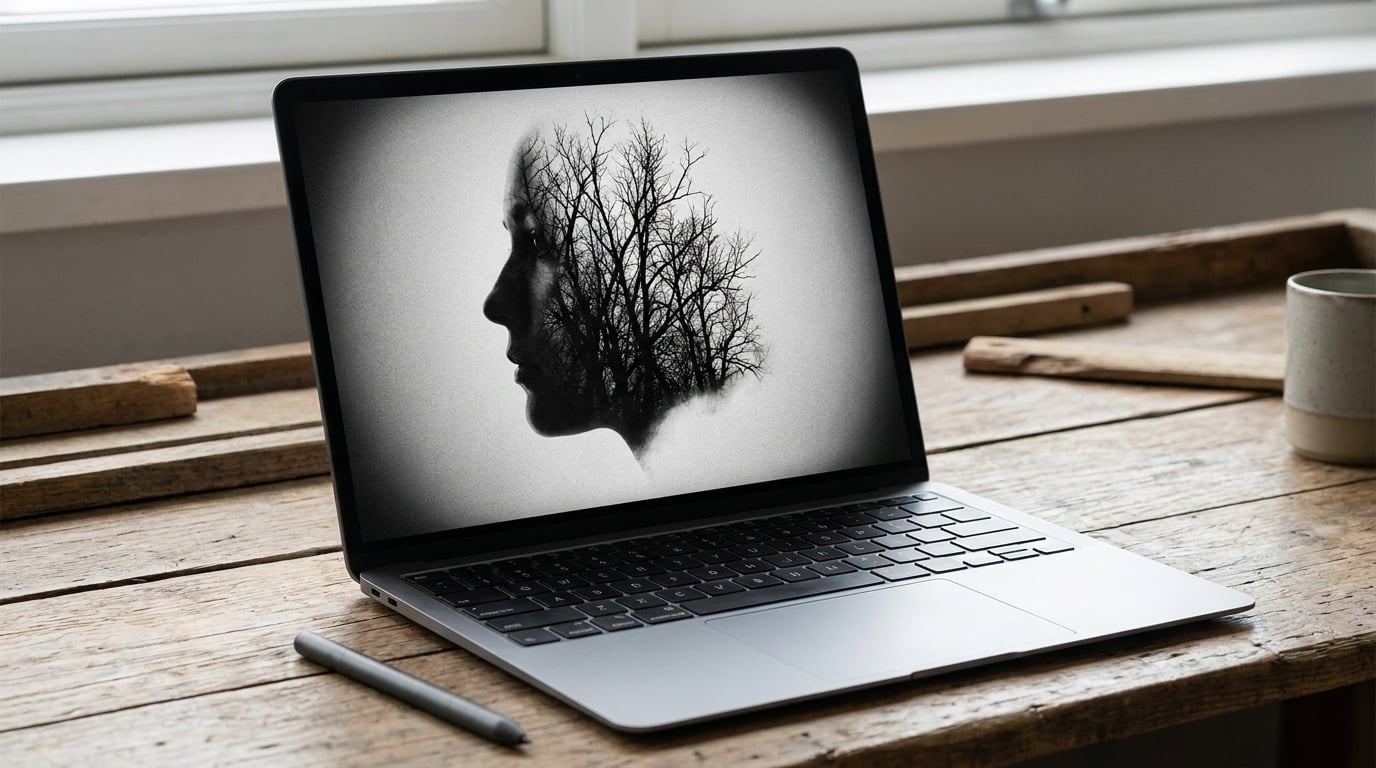
A double exposure is one image built from two photographs stacked as layers, blended with Screen or Lighten, and masked so the top image shows through only inside your subject. If you have never tried how to make a double exposure in Photoshop, the direct answer is this: open the portrait, place the second photo as a layer, set the blend mode, drop the opacity, add a layer mask, and paint with a soft brush. It takes about 15 minutes once you have the images.
The reason this works is a little technical but worth knowing. Screen never darkens a pixel, so the black background of a silhouette simply disappears and the texture underneath shows clean. Get that one idea right and the rest is adjustment.
Here is the short version before the detail:
- Choose two images with complementary subjects and matched brightness.
- Open the base photo and place the second one as a layer.
- Set the top layer to Screen or Lighten and lower its opacity.
- Select the subject and add a Hide All layer mask.
- Paint white on the mask to reveal the blend inside the subject.
- Match tone with Curves, Levels, or a Black and White adjustment layer.
- Feather the mask edge with a soft brush, then add light texture.
- Save a layered working file and export a flattened copy.
That is the whole method. Everything after this is judgment about which of those steps needs adjusting for your particular pair of photos.
Table of Contents
What You Need
You need two photographs and Photoshop. That is the short list, but the details matter more than usual here.
For the base image, pick a high-contrast portrait with a clean, uncluttered background, or a subject you can turn into a silhouette. A side-lit face against a dark wall gives you the most room to work. For the second image, choose a texture with visible structure at small scale: a cityscape at dusk, a stand of bare trees, rippled water, cracked paint, rusted metal.
On the software side, any recent desktop release of Photoshop runs this workflow. The one version note worth knowing: the Object Selection Tool and the Select Subject button need Photoshop 2020 or later. Older releases have the Magic Wand and Quick Selection Tool instead, and the results take longer to clean up.
Two things make the work easier. A pressure-sensitive tablet pays for itself in the masking step, because a soft brush is the tool you live in for ten minutes. And keep your working file as a PSD with layers intact rather than flattening as you go, so every change stays reversible.
One shortcut difference to note up front, since it trips people up constantly: every command I give uses the Windows key. On a Mac, swap Ctrl for Cmd. The bracketed keys in the Layers panel are the exception, and those stay the same on both.
How to Make a Double Exposure in Photoshop: Step-by-Step
This section walks the full workflow in order. The goal is a composite that reads as one photograph with a second world living inside it, not a top image sitting on top of a bottom one. You will place the second photo, blend it, mask it, match the tone, and finish.
1. Prepare and choose your two photographs
Open your portrait with File > Open. As soon as it loads, right-click the layer in the Layers panel and choose Convert to Smart Object. A Smart Object keeps the full resolution data, so you can scale the layer later without quality loss, and it lets you go back and re-place it if the alignment is wrong.
Duplicate that layer with Ctrl+J (Cmd+J). Keep the duplicate as a flattened backup somewhere at the end of the stack. I have thrown away more work by saving over a base layer than by anything else.
Look at both images side by side before you go further. If the portrait is bright and the texture is bright, the blend will wash out, because Screen keeps the lighter of the two values everywhere. Darken the texture, or brighten the portrait, until their midtones sit in a similar range. This one judgment call prevents most of the disappointment people report later.
Resize your second photo to roughly the same pixel dimensions as the base before you place it. Go to Image > Image Size, tick Constrain Proportions, and match the longest edge. Working at a mismatched scale makes the texture grain sit at a strange size relative to the face.
2. Place the second photograph and choose the blending mode in Photoshop
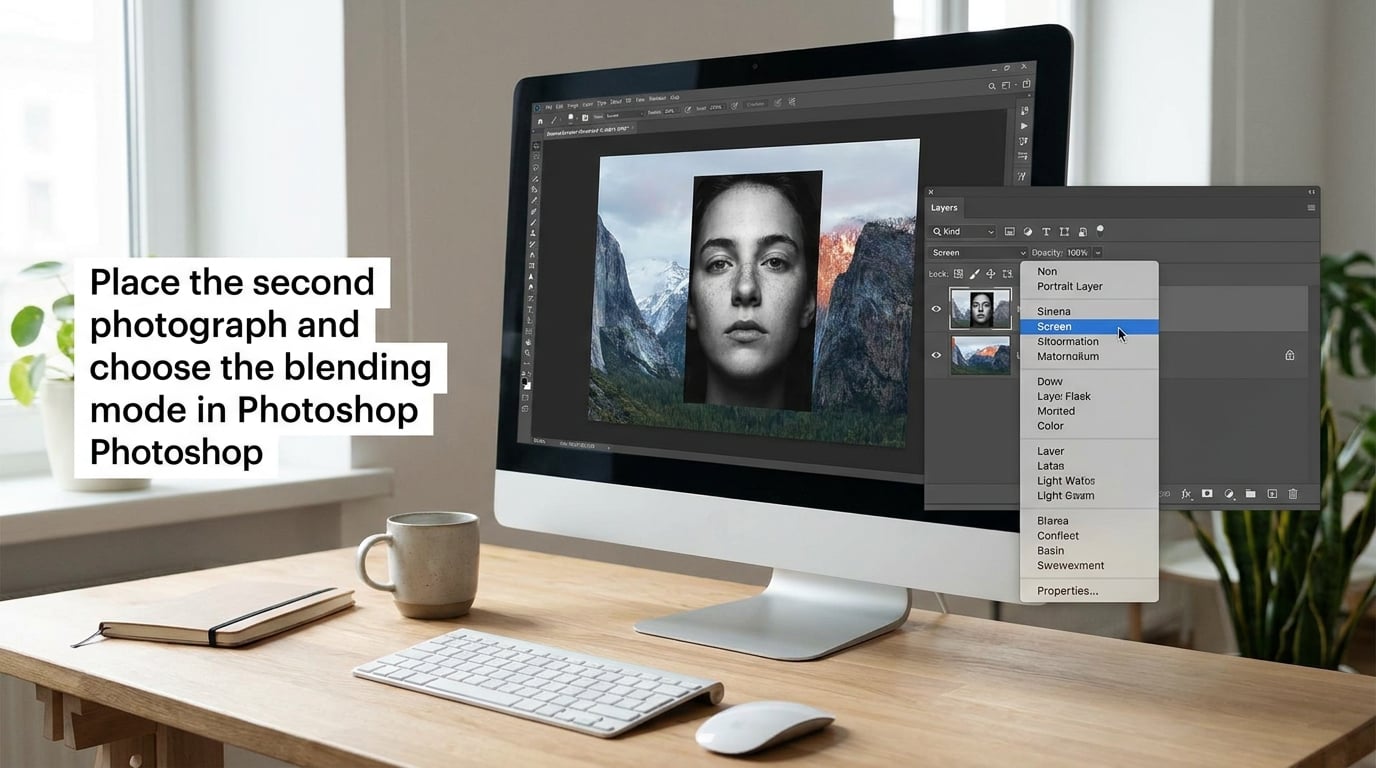
With the portrait layer selected, go to File > Place Embedded and pick your texture. It arrives as a new smart object layer, usually larger than the canvas. Press Ctrl+T (Cmd+T) to open Free Transform, and tick the chain link icon next to the W and H boxes so the aspect ratio stays locked as you drag the corner handle inward. Match the width to the canvas width, then press Enter to commit.
Now the important part. In the Layers panel, click the blend mode dropdown at the top of the stack, which reads Normal by default, and choose Screen. Within a second the texture lightens into the shadows of your portrait. The name sounds dramatic; what it actually does is the opposite. Screen always returns the lighter pixel, so blacks vanish and midtones stack.
Drop the layer opacity to somewhere between 60 and 80 percent with the Opacity slider just below the blend mode dropdown. You want both images readable, with the portrait still recognizable as a portrait. If the face disappears, you have gone too far.
Here is how the modes you are likely to try compare in practice:
| Blend mode | What it does to the pixels | Best for |
|---|---|---|
| Screen | Keeps the lighter of the two values, so blacks vanish | The standard recipe for portraits and silhouettes |
| Lighten | Also keeps the lighter value, but picks per pixel rather than blending smoothly | High-contrast textures where you want the brightest detail to punch through |
| Overlay | Darkens dark areas and lightens light areas, boosting contrast hard | Two images of similar midtone weight, used sparingly |
| Soft Light | Gentler version of Overlay, adding texture without crushing shadows | Subtle film-grain texture on an already finished portrait |
| Multiply | Keeps the darker value, so whites vanish instead | Dark textures like branches or a night scene over a bright subject |
If the portrait has a light background and you want the subject only, there is a cleaner route. Duplicate the portrait, use Select Subject, fill the background with black on a layer below, then set the texture to Screen. The black drops out completely and leaves a crisp silhouette with no masking at all. Masking beats selection for speed when the edges are messy; black plus Screen beats both when the edges are clean.
3. Mask the blend for a natural transition
A layer mask is a greyscale sheet attached to a layer. Black hides, white shows, and anything in between is translucent. You never delete pixels, which is why the technique is non-destructive.
Go to Select > Select Subject. Photoshop finds the person and puts a marching-ants selection in place. If it misses a shoulder or grabs the background, switch to the Object Selection Tool, draw a rough rectangle around the missed area, and let it fill that region on its own. It is remarkably good at hair once you nudge the mode between Object and Layer in the pop-up bar.
With the subject selected, choose Select > Inverse so the selection is the background instead. Now add the mask: hold Alt (Option on Mac) and click the rectangle at the bottom of the Layers panel, or use the Add Layer Mask button and then fill the mask with black using Select > Inverse and Edit > Fill. Layer > Layer Mask > Hide All does the same thing in one step. You are aiming for a layer where the texture is fully hidden.
Now reveal it. Set your foreground swatch to pure white, press B for the brush, and paint over the subject. White on the mask shows the texture; black hides it. Watch the thumbnail, not the canvas, while you get used to it.
Two techniques make the difference between a pasted-on look and a real one. First, drop the brush hardness to 0 percent and raise the flow to roughly 50 percent, so each pass builds density instead of stamping it on. Second, hold Alt (Option) while painting to pull the mask back toward black in one stroke, which lets you carve the face back out of a texture that has swallowed it. That is how you protect the eyes and mouth: paint the blend over the whole head, then subtract around the features with a soft brush.
If your texture is overpowering even after masking, hold Alt (Option) and drag the mask thumbnail onto the portrait layer below. That creates a clipping mask, which confines the texture entirely to the pixels of the layer beneath it. The texture can no longer spill past the subject no matter what the mask looks like.
4. Adjust exposure, contrast, and color
Two photographs shot in different places rarely share a tonal range, and that mismatch is what makes a blend look pasted together. If you have watched how to make a double exposure in Photoshop tutorials, this is the step they rush past, and it is the one that decides whether the result holds together. Add a Curves adjustment layer above everything (Layer > New Adjustment Layer > Curves) and match the black and white points of the composite to your intended output.
If the portrait still carries distracting color, drop a Black and White adjustment layer above the stack, set its blend mode to Normal, and pull saturation to zero. Use the tint sliders toward a cool blue in the shadows and a warm yellow in the highlights for a split-tone that matches the texture.
To unify color, add a Hue and Saturation adjustment layer and shift the whole composite toward a single hue family, or use a Gradient Fill adjustment layer set to Overlay for a mood wash. Adjust the angle in the Gradient Editor so the color falls off where your subject’s face is, otherwise the tint lands on the eyes and flattens them.
The check that tells you the tone is right: squint at the composite until detail blurs, then look at the blurred shapes. If one image still reads as a separate object sitting on top, its brightness is off. Fix that before anything else.
5. Add depth, texture, and finishing details
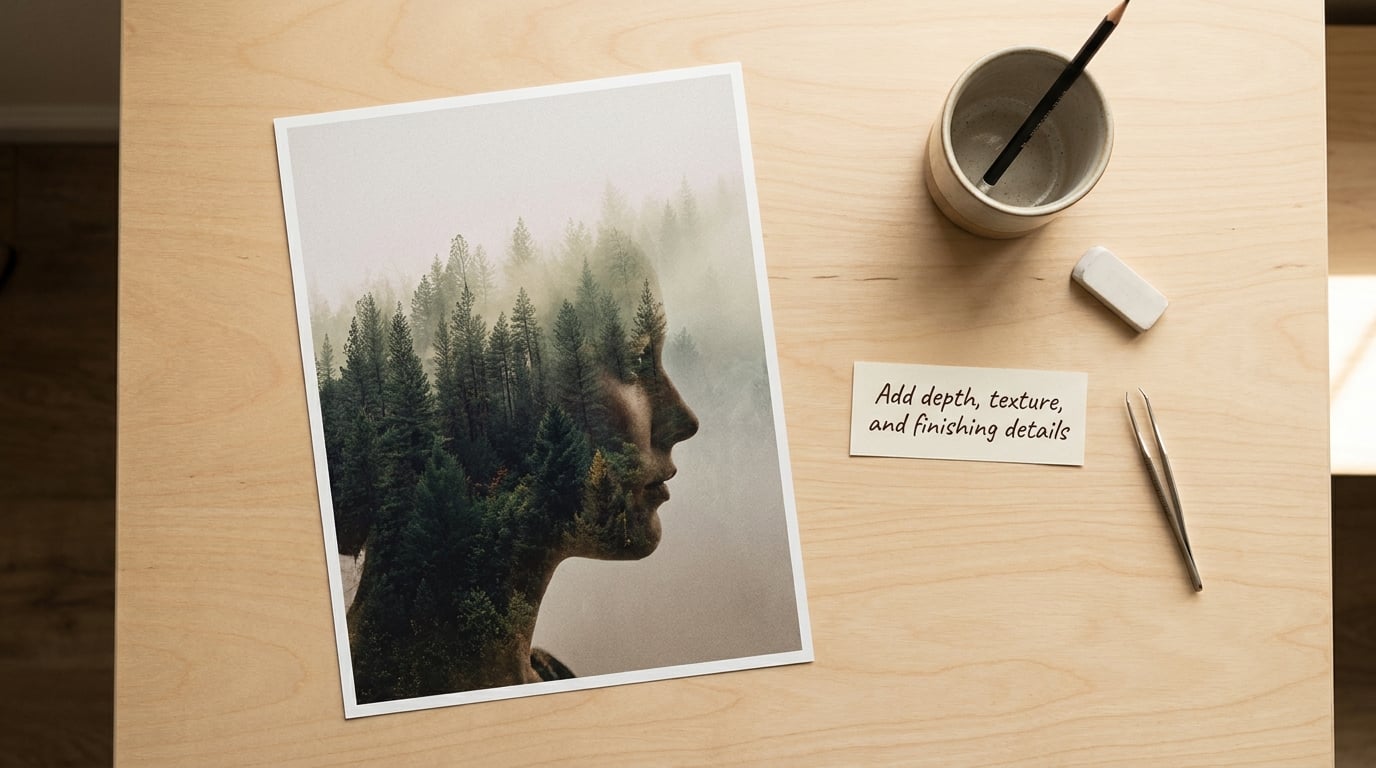
Dodge and burn do more for depth than sharpening does. Add two new blank layers above the composite, name them Dodge and Burn, and press Ctrl+Alt+Shift+E (Cmd+Option+Shift+E) to group them as a clipping mask. Set Dodge to Screen and Burn to Multiply, then use a very soft brush with low flow to lift the areas that should feel closer and drop the ones that should recede. A blurred dodge and burn layer is a well-known way to soften transitions, and it works here because the whole point is a soft transition.
Sharpen last and barely. Use the Camera Raw Filter as a smart filter on a merged copy, or apply Sharpen with a high amount and a very high radius so only broad edges tighten. Detail-level sharpening on a composite like this turns the texture into crunch. A 60 percent amount at 2.0 pixel radius is plenty.
For a film look, add grain on its own layer set to Overlay, keep the amount under 15 percent, and raise the size so the grain is coarse rather than digital-fine. A soft black vignette on a separate layer, made with a large soft brush at low opacity, pushes the eye toward the face and hides any remaining edge trouble at the corners.
Resist going further. The most common way a double exposure ends up looking amateur is not a technical error, it is ten finishing effects applied to a blend that was already working three steps ago.
6. Export and save your final artwork
Save the layered working file first, as a PSD. It costs nothing and it is the only version where you can undo a grading decision six weeks later.
Then make a flattened copy: Layer > Flatten Image on a duplicate, or Image > Apply Image before exporting. For web, use File > Export > Export As, choose JPEG, quality around 80, and confirm the sRGB profile. For print or anything you might resize, save a TIFF at 300 pixels per inch at your intended output size.
Look at the flattened result at two sizes: full screen, and thumbnail size. Fine texture that reads beautifully large often turns into mud at 200 pixels wide, and a vignette that frames well on a monitor can crush a small image entirely. If it falls apart small, simplify the texture and rebuild rather than sharpening harder.
Common Mistakes
Almost every complaint I have seen about this effect comes down to one of eight things, each with a fix that takes under a minute.
The result looks grey and washed out. Both images are too bright, or the opacity is still at 100 percent. Drop the texture layer to 60 to 80 percent, and darken the texture with a Levels adjustment until its midtones sit below the portrait’s.
The texture covers the face completely. You masked the whole head and stopped. Hold Alt (Option) and paint with a soft black brush to subtract texture from the eyes, nose, and mouth, or create a clipping mask so the texture is confined by the subject layer.
Mask edges look hard and jagged. Brush hardness is above zero. Drop it to 0 percent, set flow to 50 percent, and zoom in to at least 200 percent while you paint along the boundary. Hair is the hard part; mask generously around it and let the vignette and grain hide the rest.
You painted the mask in the wrong color. White shows, black hides. If the wrong areas vanished, hold Ctrl (Cmd) and click the mask thumbnail to load black into your swatch, then paint back over the subject.
A bright halo rings the subject. The texture is lighter than the portrait along the edge and Screen is exposing it. Pull that edge back with a soft black brush on the mask, or add a subtle dark vignette layer over the perimeter.
The two images do not line up. You scaled non-uniformly, or the texture’s scale is simply wrong for the face. Undo the Free Transform, relock the chain link, and scale from a corner handle only. Patching a misaligned composite is far harder than rescaling it.
It looks like an in-body overlay effect, not fine art. Too much sharpening, too much grain, too much contrast. Remove the sharpening first. Fine art double exposures sit in a narrow tonal range and let the viewer look twice.
The Magic Wand selection never behaved. Tolerance and the Contiguous option are the culprits. Lower the tolerance to around 20, tick Contiguous so it does not grab scattered background pixels, and add a 1 pixel feather in Select > Modify > Feather before you convert the selection to a mask.
One last distinction worth having straight, because it comes up in almost every comment thread: this is not exposure stacking. Stacking merges several exposures of the same scene to extend dynamic range, and every frame contributes equally. A double exposure is a creative composite of two different images, and the balance between them is entirely an artistic choice.
Frequently Asked Questions
What is the best Photoshop blending mode for a double exposure?
Screen is the standard choice for most double exposures. It never darkens a pixel, so the black background of a silhouette disappears completely and the texture shows cleanly inside the subject. Lighten behaves similarly but takes the lighter value per pixel, which suits very high-contrast textures. Overlay and Soft Light are for adding texture to an already finished image, and Multiply is the option for dark textures like branches over a bright subject.
Can I make a double exposure with only one photograph?
Yes. Put the same image on two layers and offset one copy with Free Transform using the move tool and arrow keys. A portrait doubled over itself at slight scale differences gives you an abstract echo effect rather than a classic double exposure, which is a legitimate look for album covers and posters. You still need the layer mask step to keep the offset copy from showing across the whole frame.
How do I make the two images blend naturally in Photoshop?
Match their tonal ranges first, because blending mode cannot fix a brightness mismatch. Lower the texture layer opacity to 60 to 80 percent, set it to Screen, and add a Hide All layer mask that you paint white over the subject with a soft brush at zero hardness. Keep highlights bright and shadows dark in both sources, and hold a soft vignette over the edges to settle the transition.
Should a double exposure be sharpened or textured?
Sharpen, but very lightly, and do it last. Use a high radius and a low amount so only broad edges tighten, because detail-level sharpening turns the overlaid texture into visible crunch. For surface texture, a grain layer set to Overlay at under 15 percent with a coarse size gives a film look without muddying the blend. Overworking the texture is the most common reason a finished composite looks artificial.
What file format should I export a double exposure from Photoshop?
Keep a layered PSD as your working file so every adjustment stays reversible. Export a flattened JPEG in sRGB at quality 80 for web use, and save a TIFF at 300 pixels per inch at your intended print size for anything going to paper. Check the flattened result at thumbnail size as well as full size, since fine texture that looks good large often turns muddy when scaled down.
Conclusion
The method is short: stack two layers, set the top one to Screen, drop the opacity, mask it to the subject with a soft white brush on a Hide All layer mask, then match the tone with Curves and finish with restrained grain and a vignette.
Start with the selection of the two photographs, since that decision constrains everything after it. A high-contrast portrait and a dark, structured texture will give you a workable blend on your first attempt.