
Conceptual photography ideas to try at home do not need a studio, a budget, or a second person. Twelve of them are below, each with the plainest way to stage it, the visual idea it is built on, and how hard it is. Most cost nothing but an hour and a bit of rearranging.
Conceptual photography just means every element in the frame is doing a job for one idea. The idea can be small. A chair, a shadow, a window, a smear of water on glass. What makes it conceptual is that you chose the arrangement on purpose, instead of shooting whatever happened to be in the room.
That makes it well suited to an apartment, a dorm, or a house with one decent window. It also suits a phone. On r/photography the most repeated piece of advice is blunt: the equipment is not the important part, and beginners agonise over camera bodies instead of committing to an idea. Take a lot of frames, then look at them.
This list is current for 2026 and works with whatever camera you already own, including a phone on a stack of books.
Table of Contents
- 12 Conceptual Photography Ideas to Try at Home at a Glance
- 1. Create a Surreal Self-Portrait With Scale Illusions
- 2. Photograph Your Shadow as a Separate Character
- 3. Turn Ordinary Objects Into a Narrative
- 4. Use a Window to Create a Divided Reality
- 5. Photograph One Person With Two Identities
- 6. Make Color Tell a Story
- 7. Stage a Frozen Moment That Should Be Moving
- 8. Use Reflection to Reveal an Alternate World
- 9. Photograph the Emotional Life of a Room
- 10. Combine a Human Subject With Nature
- 11. Build a Conceptual Scene With Forced Perspective
- 12. Create a Photographic Allegory
- Frequently Asked Questions
- What are some good concept ideas for conceptual photography?
- Do I need an expensive camera for conceptual photography?
- How do I take a self portrait by myself at home?
- How do I come up with a concept for a photo?
- What is the difference between conceptual and fine art photography?
- How do I know when a conceptual photograph is finished?
- Conclusion
12 Conceptual Photography Ideas to Try at Home at a Glance
Every idea below is tagged with difficulty, so you can start at the level that matches your patience today. Beginner means one object, one light, under half an hour. Intermediate means careful alignment or two exposures. Advanced means compositing in an editor.
| Concept | Simplest way to stage it | Main visual idea | Difficulty |
|---|---|---|---|
| Scale-illusion self-portrait | Stand on a chair beside a tiny model chair | You appear tiny next to everyday things | Intermediate |
| Shadow character | One hard lamp on a blank wall | Your shadow becomes a second figure | Beginner |
| Object with a hidden life | One object, staged like evidence | The object implies a story before or after | Beginner |
| Window split | Shoot through glass at dusk | Two realities in one frame | Beginner |
| Two identities | Wardrobe swap plus a mirror edge | One person, two selves | Intermediate |
| Colour as argument | Two props, one warm, one cool | Palette carries the meaning | Beginner |
| Frozen movement | Slow shutter with a swinging curtain | Something active looks stopped | Intermediate |
| Reflection world | Any mirror, window or wet surface | A second version of the scene | Beginner |
| Emotion of a room | One chair, chosen negative space | Furniture stands in for a feeling | Beginner |
| Figure and nature | Houseplant leaves, tap water, smoke | Natural element transforms the person | Beginner |
| Forced perspective scene | Align body with a distant object | You seem to hold something impossible | Intermediate |
| Single-symbol allegory | One broken or empty object, centred | One image stands for a bigger idea | Beginner |
1. Create a Surreal Self-Portrait With Scale Illusions
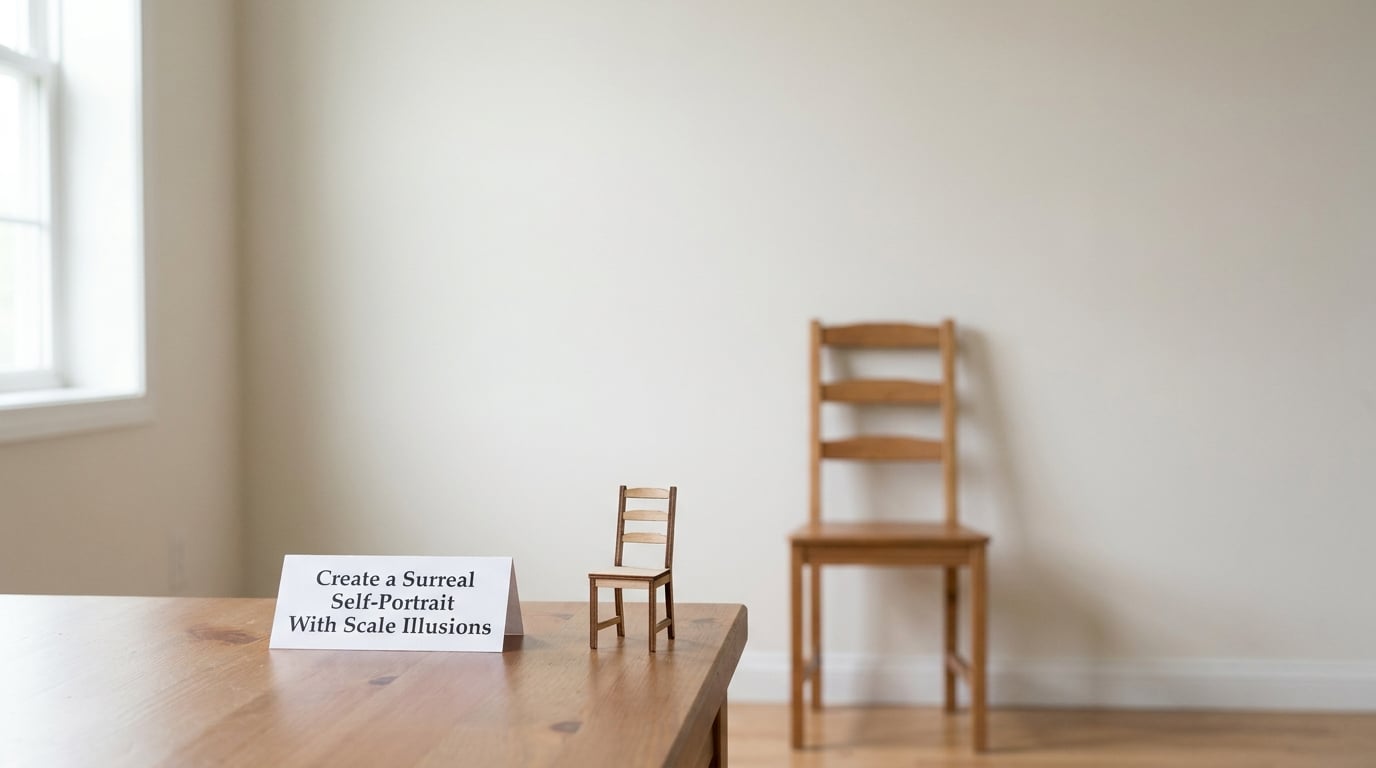
How to make yourself look tiny without a second photographer
Force perspective is the oldest trick in the book and the easiest to fake convincingly at home. You place a small object close to the camera and yourself further away, and the depth between you collapses until the small object reads as huge.
The version that works in an ordinary room: put a toy chair or a model car on a table near the lens, then sit or stand a couple of metres back holding it at chest height. From the camera’s position it looks like you are holding something life-size. Shoot from low, at the height of the object, so the floor lines converge behind you.
For the opposite effect, a tall person standing with their feet on a chair reads as a giant in a small room. Getting the scale to survive inspection takes two things most people miss: shoot slightly under the object so the eye reads distance, and keep the near object in sharp focus, because a blurry near object instantly gives the trick away.
If you have an editor, shoot two frames from the same locked position, one with you, one without, and blend them with a layer mask. A month of these makes a series where scale is the running idea.
2. Photograph Your Shadow as a Separate Character
A hard light source close to you throws a sharp-edged shadow onto a wall. That shadow has its own personality, and once you treat it as a character the whole shot changes.
The trick is to forget that the shadow is you. Place the lamp low and near the wall so the shadow is oversized, then pose your body into a shape that suggests someone else entirely. Arms raised like someone surrendering, one hand raised like a greeting, a hunch that reads as fear. Shoot the shadow, not yourself. Use your body as a puppet for a character you are not playing.
Beginners often ruin this with a light too far away. A single lamp a metre or two from the wall, held slightly below chest height, gives you a large, defined silhouette. A second lamp or a sheet of white card opposite bounces enough light back that the wall reads clean rather than muddy.
Do a series instead: the same shadow performing three actions tells a small story with no faces and no props.
3. Turn Ordinary Objects Into a Narrative
Pick one object you already own and treat it as a character with a past. A half-drunk glass, a folded letter, a shoe by the door, a bowl with one spoon in it. The object itself is nothing special. What makes the photograph conceptual is the context you build around it.
Stage it as evidence. Put the glass on a table with a ring of water around the base and a chair pushed back at an angle, then shoot slightly from above as if you just walked into the room. The frame implies somebody was here a moment ago. Negative space around the object does a lot of that work, because the empty part of the table carries as much meaning as the object.
Push it further by making three frames from the same object set: before, during, after. A single glass photographed three ways with the light shifted each time becomes a narrative, and the sequence is what separates this from a still life.
4. Use a Window to Create a Divided Reality
A window is the best piece of equipment in a home for conceptual work, and the split it can create is genuinely useful. Shoot toward glass at a time when the interior is darker than outside, or vice versa, and the pane holds both at once.
Stand your subject just behind the glass and light the room from inside. The reflection then sits on top of the figure like a second scene. Curtains, blinds, a streetlamp outside and a face inside occupy the same square of image without any compositing.
One idea I like: a person on one side of the curtain, their reflection appearing to be on the other side of the room. Shoot wide, keep the window frame inside the picture so the viewer understands the glass is there, and leave the reflection slightly dimmer than the subject so the two worlds read at different depths.
People on r/photography mention window light constantly, and the standing advice is specific: put the subject close to the window, just out of direct sun, and let the wall behind fall into shadow. That is the setup for this idea and half the list.
5. Photograph One Person With Two Identities
Two identities in one frame can be done with wardrobe, posture and framing, no edit required. Shoot the same person twice from the same spot: once in warm, structured clothes, standing square to camera; once in loose, pale clothes, turned away. Print the two frames side by side or blend them so the seam runs down the middle of the body.
The mirror trick is even cheaper. Put a mirror so its edge cuts the frame vertically, and place your subject on the seam. One half of the face is lit, the other falls into shadow, and the division is created by your own room rather than by software.
Colour grading helps enormously here. Give one identity warm shadows and the other cool ones in the same frame, and the split stops being a costume change and starts being a psychological one. Beginners spend a lot of effort on the wardrobe and almost none on the light, and the light is doing more of the work.
6. Make Color Tell a Story
Assign a limited palette to your concept before you pick anything up. Warm red, amber and ochre can carry safety, memory and comfort. Cool blue, green and grey can carry isolation, coldness, distance. Whatever you decide, the palette has to be visible in the wardrobe, the props and the lighting, or the idea never lands.
A practical version: two chairs in the same room, one dressed in warm tones, one in cool, with a single figure standing in the gap between them and no other furniture visible. Everything else in the room gets pushed out of frame or switched off.
Editing is the last step, not the first. Shoot it straight, then push the colour grading in one direction with a split-tone or a simple preset, and check that the image still reads at thumbnail size. If the emotion only shows up when you zoom in, the colour is too subtle.
7. Stage a Frozen Moment That Should Be Moving
Movement is the honest state of most things, and stopping it changes what a photograph means. A curtain caught mid-sweep, water mid-pour, hair mid-turn, a coat sleeve swinging, all of it reads as arrested rather than at rest.
You have three ways to do it. Freeze it with a fast shutter, which is straightforward: a curtain pulled across the frame at around a fiftieth of a second gives you a sharp, windblown shape. Blur it with a slow shutter and a flash, which gives you a sharp subject trailing into a soft ghost. Or stack several frames in an editor to show the same movement in three places at once, which reads as time folding.
The third option is the more conceptual one. Two seconds of a swinging light and a single final frame of the person standing still makes a small argument about momentum and decision. Slow shutter work needs a stable camera, so this is the one idea here that genuinely wants a tripod, or a stack of books and a ten-second timer.
8. Use Reflection to Reveal an Alternate World
Any reflective surface gives you a second scene for free, and some of them behave better than a mirror. A window at night, a polished table, a puddle, a laptop screen, a glass door, a wet bathroom mirror, water in a sink.
Reflective surfaces invert and soften what they show, which is the useful part. A reflected face comes out slightly darker, slightly out of order, as though it belongs to a different room. Put your subject beside the surface but not touching it, so the reflection reads as a separate presence rather than a duplicate.
To keep the reflection dominant, make the direct view dim. Turn off the room light, leave a lamp low, and let the reflected image be the brightest thing in the frame. Shoot with a longer shutter if the surface is moving, and watch for fingerprints on glass, because a single handprint at the edge of a reflection reads as a person who was there.
9. Photograph the Emotional Life of a Room
You can stage an emotion with furniture. Choose one feeling, then decide where the person would stand if they were feeling it, and where they would not stand. Loneliness is a chair at the far end of a long table with one glass on it. Anticipation is a door half open with light in the gap. Comfort is a low chair, a folded blanket, and everything within arm’s reach.
Negative space carries most of the weight. Empty floor, bare wall, a gap between two objects. Beginners fill the frame because it feels wasteful not to, and the result reads as a snapshot. Take the same scene and back up until a third of the frame is nothing at all.
Shot from a low angle with one light source, a room can hold an emotion in about ten minutes of work. Shoot three versions of the same feeling, and the third is usually the first one that works, because you have stopped trying to fill the room and started noticing what is already in it.
10. Combine a Human Subject With Nature
Nature elements in a home are easy to find: houseplant leaves, a bunch of cut stems, tap water, smoke from a candle, soil, seed heads, a branch brought in from outside. Put one of them in contact with a person and let it do symbolic work.
Leaves held in front of a face suggest hiding, illness, becoming someone else, or a decision not yet made. Water running over hands reads as cleansing or loss, and it is genuinely hard to shoot, so it is a good one to attempt on a wet afternoon. Smoke drifting across a portrait is the easiest to light and the most overlooked.
Framing matters more than you would expect. Natural elements work best at the edges of a face, in soft focus behind a head, or as a texture that covers part of the subject. Placed dead centre, they look like a costume. Push them slightly out of focus, and the element becomes weather rather than object.
11. Build a Conceptual Scene With Forced Perspective
Forced perspective turns a normal room into an impossible one when you align a person with something distant. Crouch down low with your fingers pinching the top of a distant lamp, and it looks like you are holding it. Stand behind a chair so only the back is visible and your hands appear to grow out of its arms.
Two decisions separate a good frame from an obvious fake. The first is distance between the near hand and the far object, and it should be several feet, not a few inches, because the brain reads separation as scale. The second is light: both need to be lit from the same direction and roughly the same brightness, or the composite falls apart instantly.
Shoot at a low camera height, close to the alignment line, and check the frame at thumbnail size. If the scale reads instantly at small size, the alignment is working. If you need to zoom in to understand it, the angle needs another half step.
12. Create a Photographic Allegory
An allegory compresses a big idea into one object. The empty chair, the blocked doorway, the single cup on a bare table, a broken handle, a path that goes nowhere. Readers understand the idea immediately because they bring their own story to the symbol.
Pick the symbol first, then build the frame around it. Centre the object, leave generous space on one side, and shoot straight on. Frontality makes it read like evidence or a document, which is a strong register for allegory. One hard shadow across a bare floor gives you the shape of something that is not in the picture.
Do four of these in a row, each one a different everyday object treated the same way, and you have a small body of work that needs no explanation. That is the practical test of an idea: could you post four frames side by side and get all of them from the same shoot, in the same room, on the same afternoon?
Frequently Asked Questions
What are some good concept ideas for conceptual photography?
Start with a single object and a single feeling. Empty chairs, a half-drunk glass, a doorway nobody uses, a plant that has outgrown its pot. Write one sentence describing what the image is about before you arrange anything. If you cannot write that sentence, the idea is not ready and you will spend an afternoon photographing props instead of an idea.
Do I need an expensive camera for conceptual photography?
No. Most of the ideas on this page were designed around a phone and a blank wall. A camera with manual exposure helps with long shutter work and low light, but it changes nothing about the concept itself. The thing that most improves the photographs is choosing one idea and shooting twenty variations of it instead of changing idea every ten minutes.
How do I take a self portrait by myself at home?
Stack books to camera height, lean the phone or camera against them, and use the ten-second self-timer. Most phones and cameras have burst mode, which fires several frames during the countdown and lets you pick the moment your hands settled. Where a second person is genuinely needed, you can shoot the empty frame and composite yourself in later with a layer mask.
How do I come up with a concept for a photo?
Borrow the idea, then make it yours. Write down the concept in one sentence, then find three versions of it in your own home rather than copying someone else’s styling. The one-sentence caption test is the quickest filter: if you cannot describe what the photograph is about in a single clear sentence, the concept is not sharp enough to shoot yet.
What is the difference between conceptual and fine art photography?
They overlap more than people admit, but the starting point differs. Conceptual work begins with an idea and then builds the image to express it, so the idea has to be clear before the shutter is pressed. Fine art photography often begins with what the camera finds and develops meaning through the series. In practice, a conceptual image that fails to say anything usually needed a better sentence.
How do I know when a conceptual photograph is finished?
You usually know within about three shots, and the remaining temptation to keep shooting is a sign to stop. Put the frame away for two days and look at it cold. If you cannot describe its meaning in one sentence, the fix is almost never another shoot. It is usually a tighter crop, one prop removed, or a decision about what the empty half of the frame is for.
Conclusion
Start smaller than feels satisfying. Take one ordinary object, choose one visual strategy, and decide on a single emotion before you touch the camera. The twelve ideas above all work because the arrangement is doing the talking, not the gear.
Pick the shadow one, because it needs nothing. Then come back for the scale illusion when you want something harder.