
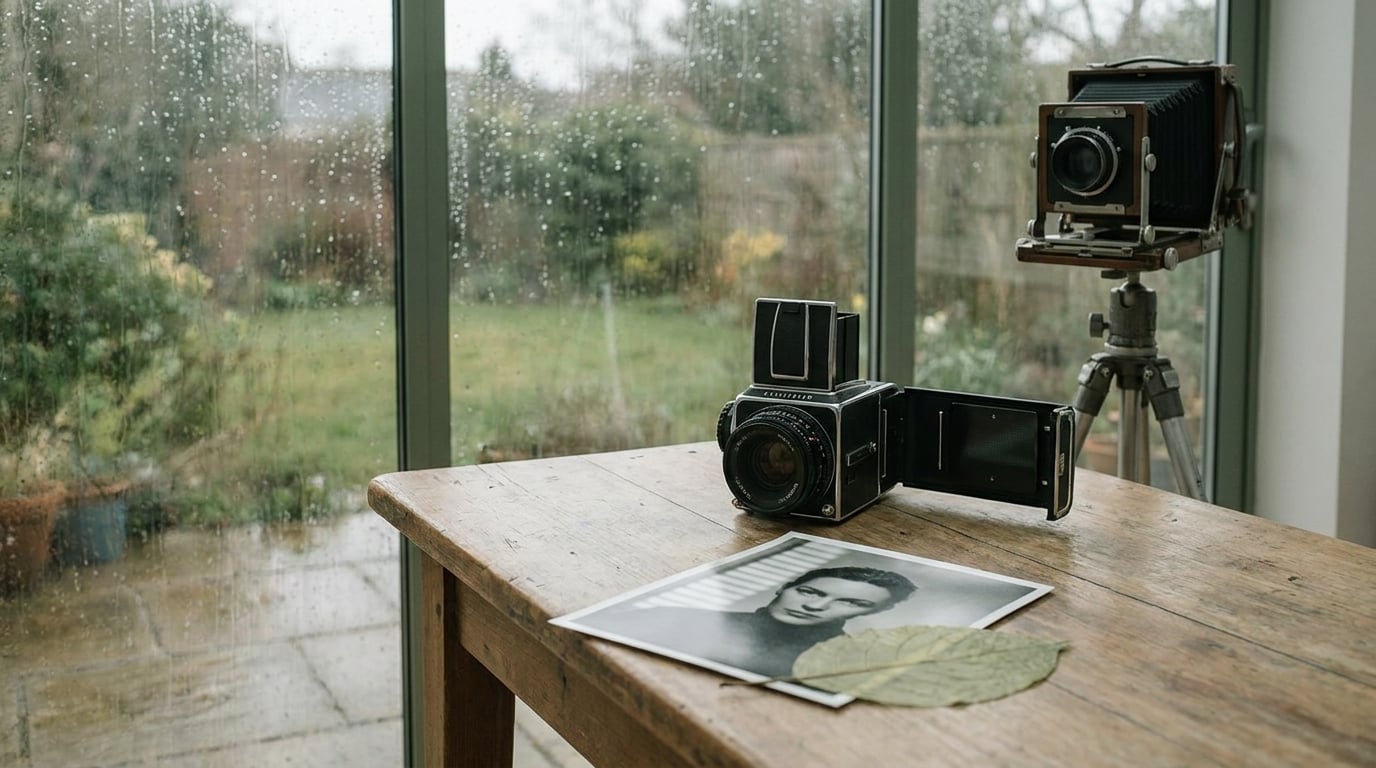
Double exposure photography layers two separate images into a single frame, letting the bright areas of one frame show through the shadows of another. The ten double exposure photography ideas below are built around that simple rule, and each one comes with the base frame to shoot, the overlay to place on top, and the exposure numbers that keep the result readable instead of milky.
The technique is older than digital cameras. Photographers discovered it by accident, pulling film before the frame was finished, and the accidental softness of the result is a large part of why the look still pulls people in. Today you can do it in the camera with a multiple exposure mode, or shoot two clean frames and blend them in Photoshop or Affinity Photo.
Whichever route you take, the deciding factor is not technical novelty. If a viewer cannot tell there is a person or a shape in the frame, the blend has failed. Shoot a lot, keep the edges locked, and adjust contrast and opacity deliberately rather than leaning on the effect to do the work.
Table of Contents
- Double Exposure Photography Ideas at a Glance
- 1. Dreamlike Portrait with Foliage
- 2. City Lights and Human Silhouettes
- 3. Forest Landscapes with Reflected Bodies
- 4. Water, Reflection, and Portraiture
- 5. Textures from Walls, Paper, and Concrete
- 6. Double Portraits and Identity
- 7. Moon, Sky, and Mythic Scenes
- 8. Botanical Details with Abstract Shapes
- 9. Light Trails and Long-Exposure Motion
- 10. Black-and-Window Light Portraits
- Frequently Asked Questions
- How do I make a good double exposure photo?
- What are the rules for double exposure photography?
- How do I create a double exposure photo in the camera?
- How do I edit photos into a double exposure in Photoshop?
- Why does my double exposure look muddy or washed out?
- Which camera is best for double exposure photography?
- Conclusion
Double Exposure Photography Ideas at a Glance
These ten concepts cover different subject families, so pick the one that matches what you already shoot. Each row lists the base frame that carries the composition, the overlay that supplies the texture, the mood you get, and a sensible place to start.
| Idea | Base frame | Overlay | Mood | Start with |
|---|---|---|---|---|
| 1. Foliage portrait | Head and shoulders against a plain wall | Backlit leaves and thin branches | Quiet, dreamlike | Overlay at Screen, drop opacity to 60 percent |
| 2. City lights and silhouette | Night street with window light and reflections | One or two human silhouettes | Urban, anonymous | Shoot the street first, add the figure on a separate tripod spot |
| 3. Forest and reflected body | Misty woodland with strong tonal separation | Outline of a body, dark against light | Surreal, organic | Underexpose the body 2 stops against bright fog |
| 4. Water and portraiture | Still water, glass, or a rain puddle | A portrait lit softly from one side | Calm, reflective | Keep the reflection under half the tonal weight of the face |
| 5. Walls, paper, concrete | No subject at all, just a textured surface | A small secondary shape or a silhouette | Painterly, tactile | Shoot the surface in flat light to keep texture even |
| 6. Double portrait and identity | A portrait facing forward | The same face, or its cast shadow | Psychological, tense | Match the angle of the second face to the first |
| 7. Moon, sky, and mythic scenes | Twilight sky with clouds | A small silhouetted figure or tree | Symbolic, story-driven | Place the figure small so the scale contrast carries the image |
| 8. Botanical details and abstract shapes | Flowers, seed heads, curved stems | A geometric or hand-drawn form | Graphic, printable | Frame the shape so the stems cross it cleanly |
| 9. Light trails and motion | A 10 to 30 second exposure of moving light | A stationary subject plus a second exposure | Energetic, rhythmic | Burn the trails 1 stop brighter than the subject |
| 10. Window light portrait | A face crossed by hard blind shadows | A soft botanical or architectural shape | High contrast, graphic | Blend in black and white first, add colour after |
How to choose between these double exposure photography ideas
Choose based on the strongest material you already have. A park, a rainy street, or a wall with peeling paint is worth more than an expensive studio, because the overlay only works when it has real texture and shape.
Whichever idea you pick, follow the same four-part order: shoot the base frame, shoot the overlay as a separate clean file, blend them, then finish the whole image to one look with curves and grain. Skipping the last step is what makes a blend look pasted together.
The three rules behind every idea on this list
- Underexpose each frame by 1 to 2 stops. Two exposures add light twice, so a correctly metered pair goes milky. On film, a well-known community starting point is a very weak first exposure of about -3 stops, shot at dusk when there is still just enough light. People shooting film also report that slightly underexposing both frames is what keeps the final subject recognizable.
- Keep the base frame high in contrast. The overlay shows up in the dark areas, so a flat grey base frame swallows it. Look for a frame with real blacks and real whites before you press the shutter.
- Keep the subject readable. The second frame should sit behind or inside the first, not compete with it. If the eyes or the outline disappear, drop the overlay opacity rather than re-shooting.
1. Dreamlike Portrait with Foliage
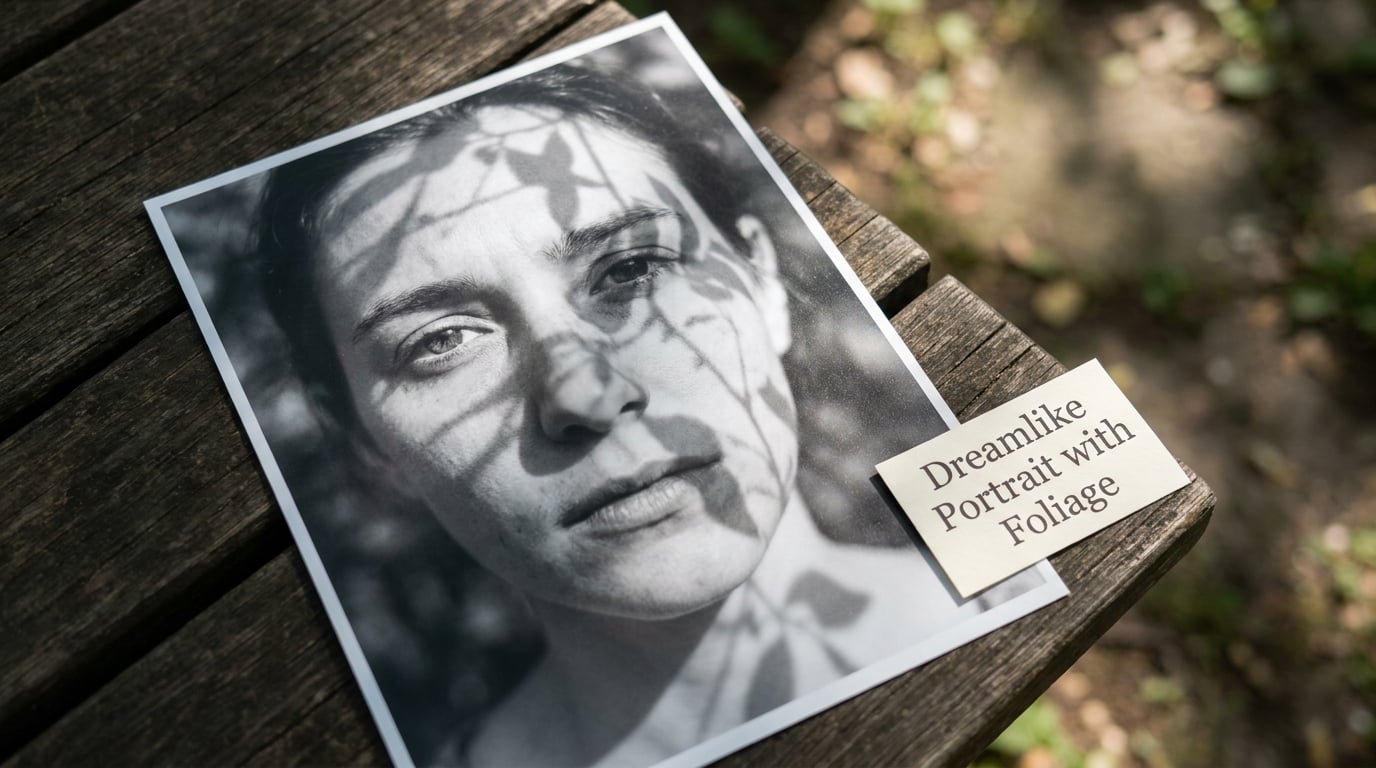
Placing a portrait inside backlit leaves produces the quietest, most classic double exposure image. The reason it works is that leaves are high-contrast shapes with transparent gaps between them, so they read as texture rather than as a second picture.
Put your subject against a plain wall and ask them to stand with their face to a window. Shoot them in black and white first so skin tones stop competing with green, then bring in a frame of sunlit foliage shot against a dark background. Overlap the eyes and the edges of the jaw with leaf clusters, and let the leaves cross the cheeks rather than sitting entirely on top.
Most first attempts look muddy because both frames are shot at the same brightness. Underexpose the portrait by a stop, underexpose the foliage by two, and the face stays clear while the leaves still carry detail. In Photoshop, Screen at 60 percent opacity usually gets you there faster than fiddling with curves afterwards.
2. City Lights and Human Silhouettes
Night city scenes are mostly dark with scattered bright points, which is exactly the tonal shape a double exposure wants. The overlay lands in the shadows between windows and signs instead of fighting them.
Shoot a street corner where wet pavement throws reflections of shop signs and passing headlights. Then return with a subject standing several meters away, rendered as a black silhouette against a dimly lit background. Blend the figure into the reflections so their legs appear to break across the road surface.
Keep the figure small in the frame. A full-height person filling half the picture turns the image into a poster, while a figure at one third the height of the buildings gives you the anonymity the concept is after. If the street lights blow out, drop the city frame 1 stop and keep the silhouette fully black.
3. Forest Landscapes with Reflected Bodies
Misty woodland is the easiest forest to work with because the fog creates a wide tonal range without detail competing. A dark body outline dropped into that range reads as something remembered rather than something present.
Shoot a stand of trees in flat morning light, ideally with fog between the trunks. Place your model in dark clothing, back them with a bright section of fog, and expose for the bright background so the figure goes to near-black. Blend the body across the tree line, letting trunks run through the figure rather than covering it.
The contrast between the busy organic texture and the smooth human outline is the whole point, so resist tidying it up. Leave one branch crossing the torso. That single interruption is what makes the image feel like one photograph instead of two pictures stacked on top of each other.
4. Water, Reflection, and Portraiture
Water gives you a ready-made second image inside the first. A puddle, a still canal, or a rain-covered window already contains a distorted copy of the scene, and blending a portrait into that distortion produces a clean, quiet fine art image.
Find an overcast day and shoot your subject beside shallow water with a dark background. Photograph the reflection separately, with the camera almost touching the surface, then blend it so the face appears both above the waterline and inverted inside it. Shooting on an overcast day means the face holds detail without a hard shadow to fight.
Tonal balance is the whole technique here. The reflection should carry roughly half the weight of the face, or less. Too much and the face dissolves; too little and you have just a normal portrait with a puddle in it. Most of the time a single Curves adjustment on the reflection layer is enough to fix it.
5. Textures from Walls, Paper, and Concrete
Not every double exposure needs a person. Painted brick, torn paper, and rough concrete make strong abstract base frames because the texture itself is the subject, and a small second shape gives the eye somewhere to land.
Shoot the surface in flat, even light so the texture does not fall into shadow. Then add one simple element, such as a silhouetted head, a hand, or a hard-edged architectural shape, and blend it into the lighter parts of the surface. A multiply blend darkens the texture where the shape sits, which reads more like paint on plaster than like a cut-out.
These images work well in monochrome, and the muted colour versions suit wall prints and editorial headers. My preference is to desaturate fully, lift the shadows a little, and add a small amount of grain so both frames share the same surface.
6. Double Portraits and Identity
Two portraits in one frame explore identity, memory, and transformation better than any other concept on this list. The tension comes from the two faces not quite matching, so the pairing needs to feel deliberate rather than accidental.
Shoot one portrait facing camera, then a second of the same person in a slightly different position or expression. Match the angle as closely as you can and let the two faces sit apart in the frame rather than exactly on top of each other. A soft-edged shape between them, such as a veil or a column of window light, keeps the two from reading as a single distorted face.
There is another version worth trying: one portrait plus its own cast shadow, shot in hard light. The shadow becomes the second exposure, and the gap between the face and its shadow says more than any amount of blending technique. Push both frames toward black and white, because skin tones make the two halves compete.
7. Moon, Sky, and Mythic Scenes
A twilight sky with layered cloud is the base frame for a story-driven image, and a single small silhouette gives the viewer a scale reference that turns an abstract blend into a scene. The figure matters less than its size relative to the sky.
Shoot the sky just after sunset, when the clouds still hold light and the upper frame goes deep blue. Then shoot a lone tree, a standing figure, or a rock formation as a hard black silhouette. Place the silhouette low in the frame so most of the image is sky, and let the brightest cloud pass behind the subject’s head.
If you want a moon in the image, expose for the sky and let the moon blow out slightly. A soft-edged moon with a halo around it looks like a mistake; a crisp disc with the cloud texture crossing it looks deliberate. This concept scales well to large prints because the negative space does the work.
8. Botanical Details with Abstract Shapes
Flowers, seed heads, and curved stems produce graphic compositions rather than dreamlike ones, which makes them the most useful of these double exposure photography ideas for print work and layouts. The shapes are clean, so the blend stays readable at poster size.
Shoot a single bloom or a seed head against a plain background, then add a geometric form, a circle, or a hand-drawn line as your second frame. Position the shape so the stem crosses it and disappears behind the petal edge. That crossing is what convinces the viewer the two images occupy the same space.
Try a soft screen blend first, then push the harder geometric versions toward multiply so the flower darkens the shape instead of glowing through it. Muted backgrounds and one accent colour work better here than the full spectrum, and a square crop usually suits these compositions better than a wide frame.
9. Light Trails and Long-Exposure Motion
Light trails are already double exposures in spirit, because a long exposure records light moving through time. Combine that with a stationary subject and you get a frame that reads as speed and rhythm rather than stillness.
Set a 10 to 30 second shutter and have someone walk a handheld light source behind your stationary subject, or place the subject at the edge of a road and let headlights streak past. Shoot the trails as one file, then shoot your subject separately against a dark background at a normal shutter speed.
Burn the trails about 1 stop brighter than the subject so the movement is the loudest thing in the image. Watch your highlights, because a full frame of overlapping light will clip to white and no amount of editing brings the texture back. Two trails crossing at a shallow angle look intentional; trails in every direction look like a mistake.
10. Black-and-Window Light Portraits
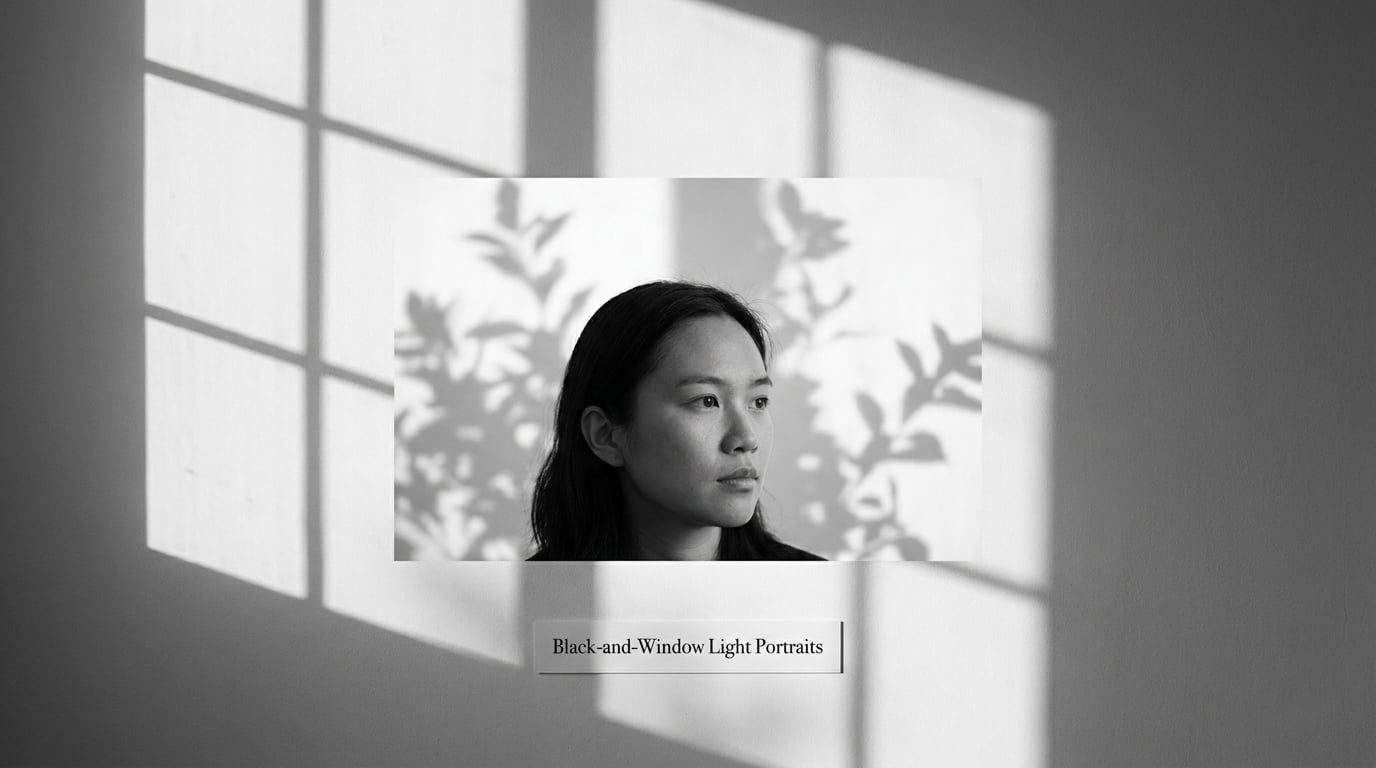
Hard window light gives you shapes that are already graphic, and combining them with a second exposure produces a portrait that reads as a designed image rather than a trick. This is the most controllable idea on the list because the light does the work for you.
Set up a subject beside a window with blinds or a frame casting rectangles across their face and the wall. Expose for the shadow side so the lit strips are bright but not clipped, and the shadow shapes stay dense. Then add a second exposure, either a soft botanical form or a piece of architecture, and blend it into the shadow areas where it will stay subtle.
Convert the whole frame to black and white before you judge it. Colour makes the two exposures argue, monochrome makes them one photograph. If the face goes too dark, lift it with a local adjustment rather than raising the second frame, and you keep the contrast that makes the image work.
Frequently Asked Questions
How do I make a good double exposure photo?
Start with a high-contrast base frame, underexpose each exposure by 1 to 2 stops, and keep the main subject readable in the finished blend. The second frame should sit inside the dark areas of the first, not compete with it. If the subject disappears, lower the overlay opacity rather than re-shooting. Finish the image last, with matching contrast, colour, and grain across both frames.
What are the rules for double exposure photography?
Three rules do most of the work. Underexpose each frame by 1 to 2 stops because two exposures add light twice. Shoot a base frame with real blacks and real whites so the overlay has somewhere to land. And keep the subject recognizable, since the quality bar is whether a viewer can tell a person or shape is in the frame, not how clever the blend is.
How do I create a double exposure photo in the camera?
Use your camera’s multiple exposure mode, mount it on a tripod, and lock manual focus and manual exposure. Shoot the first frame, then underexpose the second by 1 to 2 stops using exposure compensation before firing again. Keep the camera perfectly still between the two frames, or the registration drifts and the result looks accidental. On a phone, the same process works with a stacked-frame app and a tripod or stable surface.
How do I edit photos into a double exposure in Photoshop?
Open both files as layers and place the overlay on top. Set it to Screen for a light, dreamlike result or Multiply for a darker, painted one, then reduce opacity until the base frame reads clearly. Use a black brush on a layer mask to hide unwanted areas, and match the two frames with Curves and a colour adjustment before adding grain so both share one look.
Why does my double exposure look muddy or washed out?
Almost always the cause is over-lighting. Two correctly metered exposures add light twice, and the result goes milky with no blacks. Underexpose each frame by 1 to 2 stops, or start the first frame about -3 stops under on film shot at dusk. If the blend is still flat, add a Curves adjustment to pull the shadows back down after the fact.
Which camera is best for double exposure photography?
Any camera with manual exposure and a multiple exposure mode will do, but shooting two separate frames and blending them in post gives far more control and costs nothing extra. Manual focus and exposure lock matter more than resolution. A tripod with a hook for a sandbag is worth having, because the camera must not shift at all between frames, and that is the single most common cause of a failed blend.
Conclusion
All ten of these double exposure photography ideas run on the same principle: one frame carries the composition, the other carries the texture, and the blend only works when both stay readable. Pick the simplest pairing for your first attempt, such as a portrait and backlit foliage, and get the exposure right before you add anything clever.
Underexpose, keep contrast in the base frame, and adjust opacity until the subject is still clearly there. When that frame finally looks right, refine the concept, match colour and grain across both exposures, and send it to a print.