
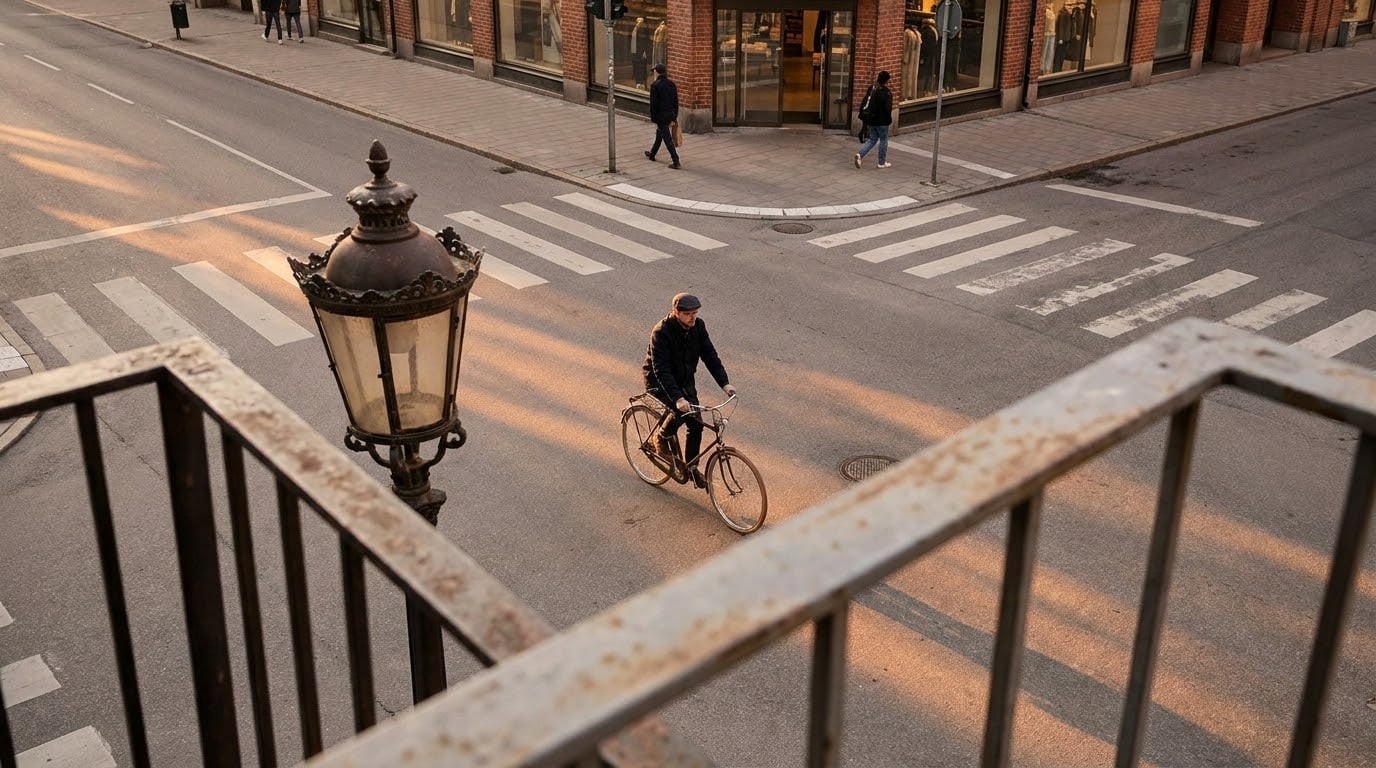
Composition in street photography means arranging the fixed parts of a place — architecture, kerbs, signs, shadows, light — together with people who will not hold still, so the frame gives the eye one clear place to land. These street photography composition tips are about doing that quickly, on a crowded pavement, with a subject who is already walking away from you.
I shoot this on a 35mm prime, mostly standing still, mostly failing to get what I saw. The list below is the short version of what has actually improved my frames, and every item works with a phone if you are shooting on one.
One warning before we start. There is a thread on dpreview’s forums where the advice that survived longest was roughly: lower the camera, look bored, walk on. Composition is a tool, not a test. Nobody hands out marks on a pavement.
Table of Contents
- Street Photography Composition Tips at a Glance
- 1. Use the Rule of Thirds to Place Visual Interest
- 2. Create Depth with Foreground, Subject, and Background
- 3. Look for Leading Lines
- 4. Frame the Subject with Environmental Elements
- 5. Use Repetition and Patterns Effectively
- 6. Balance Weights Instead of Centering Everything
- 7. Leave Negative Space Around the Subject
- 8. Capture Gestures and Relationships
- 9. Make Shapes and Geometry Part of the Frame
- 10. Use Contrast to Control Attention
- 11. Choose a Clear Visual Anchor
- 12. Work the Edges and Scan for Decisive Moments
- Frequently Asked Questions
- Does the rule of thirds work in street photography?
- What focal length should I use for street photography?
- How do I stop my street photos looking cluttered?
- Should I shoot a street scene vertically or horizontally?
- Should I ask permission before photographing strangers?
- How do I find a background and wait for the right person?
- Conclusion
Street Photography Composition Tips at a Glance
Here is the whole list in one place. Read the middle column first — that is usually the reason your frame feels wrong.
| Technique | Problem it solves | Where it pays off most |
|---|---|---|
| Rule of thirds | A dead-centre subject with no energy | Single person walking through open space |
| Layered depth | A flat, snapshot-looking street | Bustling markets, crossings, wide 28mm frames |
| Leading lines | No path for the viewer’s eye | Kerbs, railings, shop fronts, track lines |
| Environmental framing | A subject lost in clutter | Doorways, arches, gaps between railings |
| Repetition | Boredom in an ordinary street | Window rows, bike stands, shadow patterns |
| Balanced weight | One big subject fighting a small one | Crowds, crosswalks, groups leaving frame |
| Negative space | A cramped, fussy picture | Empty sky, plain wall, wide wet pavement |
| Gesture and relationship | A technically tidy but lifeless frame | Two people, a parent and child, a queue |
| Geometry | Interesting subject, boring frame | Stairs, overhead wires, glass facades |
| Contrast | Nothing drawing the eye | Bright coat against a grey wall, hard shadows |
| Visual anchor | Too many subjects competing | Any crowded frame, especially at wide angles |
| Edge control | Half a person, a stray sign, a blown highlight | Every frame, checked before the shutter |
1. Use the Rule of Thirds to Place Visual Interest
Put the person near a third intersection rather than in the middle. A figure set on one third, looking into the open two-thirds of the frame, reads as a photograph; the same figure dead centre usually reads as a snapshot.
The quick test: turn on your camera’s grid, hold the frame, and check where the subject’s face or the strongest gesture falls. If it lands on a line, nudge the camera a step sideways rather than zooming. Moving beats cropping.
Where it fails is worth knowing too. Symmetrical architecture — a station facade, an underpass — often wants dead centre, because the symmetry is the subject. Use thirds when the person is the point; use centre when the building is.
2. Create Depth with Foreground, Subject, and Background
Layering is the technique that separates street work from snapshots, and it is the one most beginners skip. You want three planes occupied at once: something close to the lens, the person who matters, and a background with content.
The working settings are unglamorous and they are what make it possible. Prefocus to roughly five metres, shoot at f/8, and line up a static anchor in the middle distance before you wait. Then the foreground is a shop sign edge, a rail, a puddle — anything within a metre or two of the lens.
A frame with a bollard at one edge, a man on a bicycle in the middle distance and a lit bus shelter behind him has depth. The same man alone in the middle of a car park does not.
Zone focusing is the reason this works before the moment arrives. Set a distance, learn the depth either side of it that stays sharp, and stop thinking about focus entirely. Your attention goes back to composition, which is where you need it.
3. Look for Leading Lines
A pavement edge, a line of bollards, a railing, a drainage channel, a set of tram tracks — anything running through the scene can carry the eye toward your subject, or away from it if you flip the position.
Stand on the line, not beside it. Shoot down the kerb rather than across it and the frame gains depth for free, because the line recedes toward the person. Lines that converge in the distance also tell you where to look before you have decided anything.
4. Frame the Subject with Environmental Elements
Doorways, arches, stair rails, window frames, branches, a gap between two parked cars. When the surroundings close in around the subject, the eye has nowhere to wander even if the street behind is a mess.
This is the fastest fix for clutter. If a scene is fighting you, do not try to simplify it by moving closer. Step back until an existing edge in the scene crops the junk away, then shoot through that edge. The frame within a frame is doing the work for you.
5. Use Repetition and Patterns Effectively
Four identical shop windows, a row of bollards, a fence of the same shape repeated until it blurs — repetition makes an ordinary street worth stopping for. Count the pieces before you shoot. Three is usually enough; ten is where the pattern becomes the picture.
Then break it once. A single person in a red coat walking through a row of identical grey bollards is worth more than the pattern alone, because the break tells you where to look and why. A repetition shot without a break is a record of a fence.
6. Balance Weights Instead of Centering Everything
Sometimes one thing in the frame is simply bigger and louder than everything else. You cannot shrink it, so counterweight it: a smaller figure, a bright patch of light, a gesture, a patch of sky, anything that pulls the other way.
A man filling one third of a frame wants a small distant pedestrian opposite him on the other third, not a tighter crop. Two weights of different sizes, placed off-centre, hold attention longer than one weight parked in the middle. The eye reads size, brightness and contrast as mass.
7. Leave Negative Space Around the Subject
Empty sky over a single figure, a plain wall behind a person mid-stride, wet pavement with nothing on it. That emptiness is not wasted frame; it is what gives a small moment room to feel deliberate.
Street work tends to overfill frames, because there is always another person entering. Fight it. A subject with clean space on the side they are moving into looks like intent. The same subject hemmed in on both sides looks trapped.
8. Capture Gestures and Relationships
Past a certain point this stops being about placement. Where two people are standing, where they are looking, how far apart they are, who is reaching for what — that is the photograph, and no amount of thirds will rescue a frame with a stiff, empty pose.
Position yourself in front of the action rather than beside or behind it, as people on r/streetphotography keep pointing out. Shooting from the side gives you a body at an awkward angle and no expression. Slightly ahead of someone walking toward you gives you a face, a direction and a background to place it against.
Distance between people is the cheapest storytelling device you have. Two people a metre apart are strangers. The same two a hand’s width apart in the middle of a crossing are having a conversation, and the frame says so without a word.
9. Make Shapes and Geometry Part of the Frame
Staircases, overhead wires, glass facades, wet crossings, a spiral of railings. Geometry is free structure, and it costs you nothing but attention.
Tilt the camera and the verticals become diagonals, which add speed to a static frame. Reflections double your options: shoot a puddle the moment the rain stops and you have two frames stacked into one, with the shapes of the buildings meeting themselves. Just check that the reflected version of your subject is not busier than the real one.
10. Use Contrast to Control Attention
Bright coat against a grey wall. Hard sun cutting a shadow across a face. Warm shop light against cool blue evening air. Sharp detail in one corner and motion blur in another. Contrast is a spotlight, and you decide where it points.
The most useful version of this for beginners is the simplest: look for the brightest thing in the frame, and make sure it is the thing you are actually about to photograph. If it is a fluorescent sign behind your subject’s head, you have a decision to make — move, or accept that the picture is about the sign.
11. Choose a Clear Visual Anchor
In a crowded frame, decide who the picture is about before the shutter. One person. The anchor can be a stranger, a shadow, a reflection, a bicycle nobody is holding, a dog, whatever is strongest. Then check that nothing else is competing.
Wide angles make this harder, because they collect more scene. A 28mm frame in a busy street can hold five people and a tree and a sign, and the viewer will find none of them. If you cannot say in one short sentence who the picture is about, take a step closer or change your angle.
12. Work the Edges and Scan for Decisive Moments
Check all four edges before you press anything. The problems that ruin street frames are almost always at the borders: half a stranger, a cropped head, a bright sign, a pole growing out of someone’s shoulder. These are edge problems, and they cannot be fixed later.
A partial figure can be deliberate, too. A hand on a door handle, a leg stepping off the kerb, half a face turning out of frame. The line between a mistake and a choice is whether it was planned, so decide before you shoot rather than deciding in the edit.
How to review your street photography composition tips in practice
The diagnostic that helps most: pull your card onto a screen and ask three questions in order. Is it sharp? Is it exposed the way I meant? Only then — does the frame have one place for the eye to land? Most disappointing street photographs fail at the first two, and beginners spend all their energy on the third.
Now the argument that runs through every street photography forum. The decisive moment camp says the picture is made in a fraction of a second, and if you were not ready you missed it. The working-the-scene camp says you build the frame first, then wait for the right person to walk into it. The second argument is the stronger one compositionally, because the frame exists before the subject does.
Both are true, and the reconciliation is timing. If you cannot predict where the action will be, work the scene. If you can — a crossing, a bus stop, a doorway people queue at — you are hunting a decisive moment instead. Mixing the two approaches is the mistake. Chasing a moment with no frame ready gives you one lucky picture in fifty and a card full of near misses.
On r/streetphotography the most repeated practical advice is also the least technical: walk slower than usual and let your eyes find the scene first. Half the work happens before the camera comes up.
Frequently Asked Questions
Does the rule of thirds work in street photography?
Yes, though less often than indoors. It works well when one person is walking through open space and you want the frame to imply where they are going. It fails against symmetrical architecture, where a facade or underpass is the real subject and dead-centre placement is correct. Use the grid as a starting position, then move the camera a step rather than zooming.
What focal length should I use for street photography?
A 35mm equivalent is the most useful compromise: wide enough to layer foreground, middle ground and background in a crowded street, tight enough that people are not distorted at the edge. A 28mm gives you more room to work in tight scenes and demands a clearer anchor. An 85mm lets you isolate people from across the road, but you lose the layers entirely. One lens is plenty to begin with.
How do I stop my street photos looking cluttered?
Simplify by position, not by zooming. Move until an existing edge in the scene crops away what is distracting, then shoot through that edge. Reduce your focal length if the background is too close behind your subject, choose a background before you raise the camera, and check all four edges for half-people and stray signs. Converting to black and white also rescues frames where a single bright colour is pulling the eye away from your subject.
Should I shoot a street scene vertically or horizontally?
Horizontal gives you room for layers and leading lines, so it suits busy scenes and environmental work. Vertical suits a single person against height, a doorway, or a reflection, because it isolates the figure cleanly. Work out which one you want before the moment happens, and hold the camera in that orientation rather than rotating at the last second.
Should I ask permission before photographing strangers?
It depends where you are and how close you are. In public, candid frames of people passing usually carry no obligation, but the rules differ by country and a recognisable face or a private interior is a different case. Where you stand also changes the frame you can get, so asking often costs you a minute and hands you a posed portrait instead of a candid one. If you need releases for commercial use, find out before you shoot.
How do I find a background and wait for the right person?
Pick the background first and check it for distractions. Set your frame, lock focus with zone focusing at roughly five metres, and set your exposure off the pavement. Then wait, holding the camera low so people do not pose for it. This is often called fishing, and it works best where people are obliged to pass through your frame, such as a crossing or a doorway.
Conclusion
Pick one technique for the next walk, not twelve. The easiest starting point is to choose a single subject, walk to a position where the background is clean and the edges are quiet, and check all four edges before the shutter. Composition is a tool, not a rule set, and your frames will improve fastest when you spend your attention on one thing at a time.