
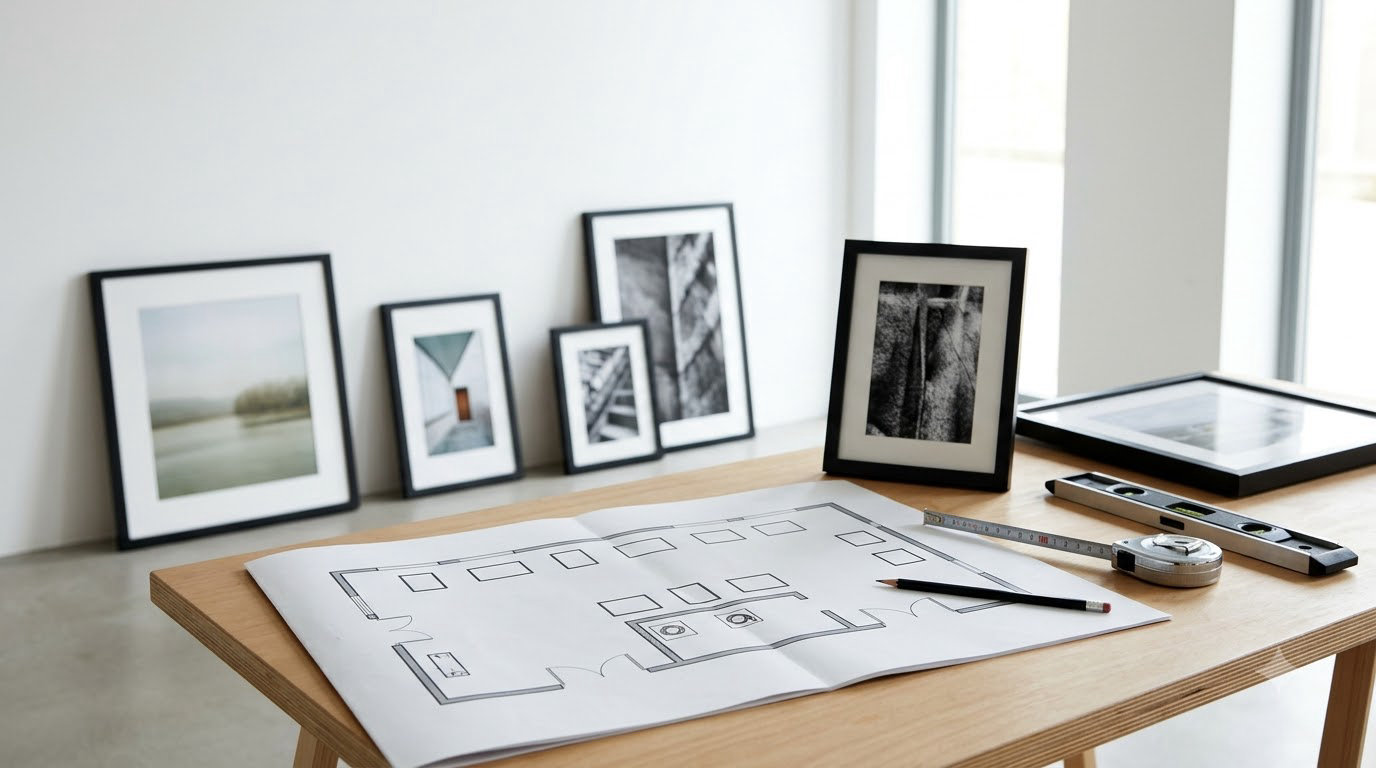
If you have never hung your own photographs on a wall, the idea of a solo show feels far bigger than it actually is. The honest answer to how to plan a solo photography exhibition is that it is a sequence of small, dated decisions: a concept, a body of work, a confirmed venue, a budget, a curation, a set of finished prints, a hang, and a promotion plan that starts months before anyone walks through the door. Get those in that order and the show runs itself.
The questions that come up most often in photography forums are the same ones every time. How big should the prints be? How should they be priced? How do I get into a gallery? How long does the whole thing take? None of them have a single right answer, but all of them have workable ones.
A solo exhibition is a show in which one photographer presents a single, unified body of work, as distinct from a group show where several photographers share the same walls. It can be held in a commercial gallery or in an alternative space such as a cafe, a bookstore, a shared studio or an office lobby, and it counts just the same.
Plan for three to nine months, with print production and lead times setting the floor. Most of the work is quiet and desk-based. The genuinely stressful part is installation day, and even that shrinks once you have templated the wall in tape before anything gets drilled.
Table of Contents
- What You Need
- Step-by-Step
- 1. Define the Exhibition Concept
- 2. Choose a Venue and Confirm Requirements
- 3. Set the Budget and Exhibition Timeline
- 4. Curate and Prepare the Photographs
- 5. Design the Exhibition Flow and Wall Plan
- 6. Produce and Transport the Work
- 7. Promote the Exhibition
- 8. Install the Exhibition and Prepare to Open
- 9. Run the Exhibition and Follow Up
- Common Mistakes
- Frequently Asked Questions
- How long does it take to plan a solo photography exhibition?
- How much does a solo photography exhibition cost?
- How big should the prints be for a first solo exhibition?
- How should I price my photographs?
- Do I need a gallery to put on a solo show?
- What should I put on gallery wall labels?
- What happens after a solo show opens?
- Conclusion
What You Need
Before you contact a single venue, gather these seven things. Missing any one of them is the reason most first shows stall halfway.
- A clear artistic concept. One sentence describing the body of work, the question it asks, and who it is for. If you cannot write that sentence, the curation step will fall apart later.
- A suitable venue. Confirmed in writing, with the hang dates, the fee or consignment terms, the wall dimensions, the lighting, and the opening hours.
- Finalized prints. Sized, edited to a single consistent look, and produced well ahead of install day so a damaged or mislabelled print can be replaced.
- Installation equipment. Two-point hanging hardware, coated wire, a stud finder, drywall anchors rated above the weight of each piece, a level, a tape measure, painter’s tape, and step stools.
- Insurance and permissions details. The venue’s requirements for wall liability and artwork coverage, your own policy details, and written permission for any commercial or public-space location.
- Promotion material. A short artist statement, a one-paragraph release, three or four exhibition images, a price list, an inventory list, and label printing.
- A realistic budget. Built from real line items, with a contingency and a clear view of how much of it you personally absorb.
That last one is where first-timers get caught. A solo show is not free and it is not free in vague ways, it is free in specific ones.
Step-by-Step
Here is the order that works. Nine steps, each one finished before the next begins, with the hang dates as the fixed point everything else works backwards from.
1. Define the Exhibition Concept
Start with a one-sentence concept, because a clear concept is the filter that makes every later decision faster. A good version names the body of work, the tension it explores, and the viewer. For example: a set of large-format coastal photographs made over three winters, looking at how erosion rewrites a familiar shoreline.
Then name your audience. Are you showing to peers and curators who already know your work, to collectors, or to a general public walking past a cafe? The answer changes the print sizes, the wall text, and how much promotion you need to do.
Write down what success looks like in numbers you can check afterwards: how many people you want through the door, how many contacts you want on the list, how many print inquiries, how many sales conversations. A show with no metric is hard to judge and easy to walk away from without learning anything.
If the concept leans toward a formal, restrained treatment, it helps to study how images are made in that mode. How to shoot minimalist photography is a good short reference for building a body of work where every frame has to earn its wall space.
You know this step worked when you can describe the show to a stranger in under thirty seconds and they can repeat the premise back to you accurately.
2. Choose a Venue and Confirm Requirements
Choose the venue based on three things in this order: wall size and light, footfall, and cost. A beautiful room with twelve passing people a day is worse than a plain room on a busy street, and a gallery fee you cannot carry is worse than both.
Write down every space you can imagine showing in, then prioritise. Cafes, bookstores, florists, co-working lobbies, community centres, libraries and small museums all appear in the thread histories of photographers who landed first shows this way, and all of them are respectable places to start.
Before you commit, ask the venue about specific requirements:
- Fee, or consignment percentage, and whether any wall or insurance charge is added on top.
- Exact hang and de-install dates, and whether access is granted the day before the opening.
- Wall dimensions, wall colour, and how many electrical sockets and track lights you get.
- Accessibility, including step-free entry and where a visitor signs a book or collects a print.
- Photography policy, catering rules, and whether the venue needs approval for lighting or drilling.
- What happens to unsold work, and who packs it up.
For a first show, a six to eight week run is the norm. Long enough to build word of mouth, short enough to keep momentum and avoid a venue that has lost interest before your opening night.
You know this step worked when you have a signed agreement with dates, fees and wall measurements in writing, not a friendly email.
3. Set the Budget and Exhibition Timeline
Set the budget by listing every line item before you commit to anything, then add a contingency of ten to fifteen percent. The line items below are the ones that surprise people.
| Line item | What it covers | Typical share of the total |
|---|---|---|
| Print production | Pigment prints or darkroom prints, plus any proofing | 30 to 40 percent |
| Framing or mounting | Frames, float mounts, backing boards, glazing | 15 to 25 percent |
| Venue cost | Fee, commission, or both; sometimes a wall charge | 10 to 30 percent |
| Installation | Hardware, wire, anchors, tools, travel, hire of an installer for a large wall | 5 to 10 percent |
| Promotion | Printing, postcards, a catalogue, a small paid boost, a mailing tool | 5 to 15 percent |
| Opening night | Drinks, food, a small print run of the invitation design | 5 to 10 percent |
| Insurance and shipping | Transit cover, fine art cover, crate hire, couriers | 5 to 10 percent |
Prints are the biggest line and the one you can control by curating harder. Cutting four prints from a twelve-print show is the cheapest reduction available to you.
Now build the timeline backwards from the opening date. Work in these markers rather than a vague “make a timeline” instruction, because the reverse calculation is what keeps the show calm:
- Six to nine months out: concept locked, shortlist of venues, and a start on the final edit.
- Four to six months out: venue confirmed, curation roughly decided, budget approved.
- Three to four months out: prints ordered, labels and statement written, first press mentions and posts going out.
- Six to eight weeks out: invitations sent, price list and inventory final, hardware and hardware ratings checked against frame weights.
- Install week: wall templated in tape, hang, lighting adjusted, condition report photographed, one full walk-through before the doors open.
You know this step worked when every task has a date and an owner, and the print order was placed at least eight weeks before install.
4. Curate and Prepare the Photographs
Curate by subtraction, not by addition. The instinct to show everything is the single most common first-show error, and the community consensus in photography forums is blunt: either the images go together, or they contrast deliberately, and a portfolio dump is neither.
Pick a number first, not last. A first solo show usually works with roughly 15 to 30 photographs, with a few large anchor pieces and a run of smaller supporting frames. A wall of 60 small prints reads as a book launch, not an exhibition. Twenty prints you can defend individually is a stronger show than fifty you cannot.
Then apply a consistent edit across the whole set. One Lightroom or Capture One preset for tone and colour, one crop discipline, one contrast treatment. Inconsistency is what makes a body of work look like an archive instead of a show. If your series is monochrome, our black and white photography guide for beginners covers tonal decisions that matter at print size.
Sequence the images as a reading order, and print that order as a contact sheet. Look at it on a table before you print it at scale. The third or fourth frame is usually where the show either gains a pulse or loses one.
You also need, for every frame, a file record: final dimensions, print size, edition number, print date, price, and whether it is available. That record becomes your inventory list and price list later, and building it now saves an evening of guessing on opening night.
You know this step worked when the contact sheet on the table reads left to right as a sequence with a beginning, a middle and an ending.
5. Design the Exhibition Flow and Wall Plan
Design the flow as an arc, not a grid of equal frames. Visitors should meet a large piece first, move through medium frames with more breathing room, and land on a quieter single image near the exit.
Give the wall negative space. As a rule of thumb, roughly 70 percent of the wall should be artwork and 30 percent empty wall. That empty space is not wasted, it is what lets each photograph register. A separate common guideline says a picture should span about 60 to 75 percent of the width of the furniture beneath it, which is a different measurement about a different relationship, and the two are easy to confuse.
Use painter’s tape to template the whole layout before drilling anything. Cut templates to the exact size of each frame, tape them to the wall, step back, adjust, and only then mark your drill points. This one habit prevents the majority of bad hangs, and it is free.
| Element | Guideline |
|---|---|
| Centre height | 57 to 60 inches from the floor to the centre of the work |
| Clearance above furniture | 6 to 10 inches |
| Spacing within a grouping | 2 to 3 inches between frames |
| Light angle | About 30 degrees from vertical to kill glare |
| Glazing | UV-filtering, on anything that will sit in daylight |
| Hardware rating | Anchor and bracket rated above the frame weight, with margin |
| Hanging method | Two points, D-rings and coated wire rather than a single eye screw |
Two points matters. A single screw lets a heavy frame pivot and rotate on the wall over time, which looks careless within a month.
As for current taste, salon-style hangs with generous negative space are the dominant look in exhibition practice in 2026, while the formal grid wall persists in commercial and decorative interiors. Neither is wrong. Choose deliberately, and make the spacing consistent.
You know this step worked when the taped layout looked right from the doorway before a single hole was drilled.
6. Produce and Transport the Work
Produce to a specification, and write it down per frame. Standard archival pigment prints on a matte fibre or fine art paper surface work for most photographic subjects, and the paper choice should follow the image rather than fashion: glossy surfaces for anything with deep blacks and high contrast, matte surfaces for portraits, misty scenes and anything with subtle gradation.
On sizing, match the print to the wall and to the viewing distance, and mix a few large pieces with a majority of medium ones. A wall seen from two metres reads fine with smaller work. A wall seen from across a lobby does not, and that is where the anchor pieces earn their keep. If you want more on formats and crops before you order, conceptual photography ideas to try at home is a useful way to test treatments cheaply before committing to a full run.
Decide on editions now. An edition of five to fifteen is a normal range for fine art prints, numbered and signed on the back, with two or three retained as your own archive copies. Mark the edition number and the size on the back of every piece, and attach a duplicate of the wall label so the physical work and the printed label can never be mismatched on the wall.
Transport is where good shows get damaged. Wrap each frame in glassine and bubble wrap, corner-protect the frame, use a rigid flat carrier for anything larger than about 60 cm on its longest side, and never stack work on a floor, never lean it against a wall, and never let anyone lay anything flat on top of it. Photograph every piece’s condition before it leaves your studio, and again on arrival. Insure in transit and check your policy covers fine art prints specifically, since household contents cover often excludes them.
You know this step worked when every piece arrived, was checked against the inventory, and has a signed condition photograph on file.
7. Promote the Exhibition
Promote in a slow ramp, starting three months out, because a solo show is a one-night event and the audience has to be built before the night, not on it. Set out your artist statement, three to four exhibition images at good resolution, a short press release, a price list, and a single page with the address, dates, hours and accessibility details.
Then work through the channels in this order:
- Your own list first. Everyone who has ever printed with you, taught with you, or shown with you. Tell them personally, not by mass post.
- Local art press and blogs. Small publications want new names and specific local stories. A first solo show in a town of 40,000 people is a story precisely because it is local.
- Instagram and the platforms where your work already lives. Post the concept early, the prints mid-way, the hang the day after install, and the opening the following week.
- Partnerships. A cafe show pairs naturally with the cafe’s food, a bookstore show with a reading, a co-working space with a lunchtime walk-through.
- Invitations, sent four to six weeks out. One page, one image, dates and hours. The list should include press, potential collectors, other artists, and the people who gave you feedback that shaped the work.
Expect most of your visitors to come from roughly 150 km, and plan for a small, warm crowd. That is normal. A show of forty people who care is worth more than a hundred who wandered in.
You know this step worked when the post announcing the opening has already been shared by other people, unprompted.
8. Install the Exhibition and Prepare to Open
Install in one focused day with at least one other person, and book the venue access for the day before the opening if you can. Bring the work in one piece at a time rather than laying everything out on the floor, because a floor full of framed work gets stepped on and the tape templates lose their meaning.
Work through the install in this order: walk the wall and mark the centre line at 57 to 60 inches, check the light for glare and hot spots before anything is hung, place the tape templates, re-check the layout from the doorway and from the far corner, mark drill points, locate studs, fit anchors rated above each weight, hang, level, and adjust the lighting angle last.
On opening night, have a small run sheet ready: arrival time for you and your helper, door opening time, drinks, a five-minute note of welcome, quiet hours, and a time to stop. Put the wall text or a short statement on the wall, put the labels at a consistent height and a consistent distance from each frame, and leave a sign-in book or a QR code for the price list and contact details. If you are selling, use a printed price list and a simple payment method, and log every inquiry with a name and a way to follow up.
Check accessibility before you open: step-free route, a readable label height, and clear circulation space in front of each work. Then leave the room empty for an hour and come back and look at it as a visitor, not as the person who made it.
You know this step worked when the room passes the doorway test and nothing needs fixing the next morning.
9. Run the Exhibition and Follow Up
During the run, be present when the venue is open if you can. Be there for the first week, when the majority of your visitors arrive, and let the space settle after that. Keep a visitor book, count roughly how many people came each week, and note every question you are asked, because the questions tell you what your statement failed to explain.
Handle sales and inquiries simply and in writing. Confirm availability, edition number, size, print date, signature, framing, delivery terms and payment in a single message so the collector never has to ask twice. If a work is spoken for, mark it immediately in the inventory; an unmarked reserved print is the most common way a show creates its own disappointment.
After the show, follow up within a week while the memory is warm. Send every visitor who left an email address a thank-you note with one image from the show. Send each collector or interested buyer a personal note, a link to the full series, and a specific next step such as a studio visit, a smaller print, or an invitation to the next show. Photograph the hung show properly while it is still up, since you need those images for your portfolio, your press archive and your next proposal.
Then de-install carefully with the same care you installed, and write a two-page debrief: what worked, what did not, what you learned about your audience, and what you would change. That debrief is the reason a second show is better than the first.
You know this step worked when you have a documented list of names, notes and follow-up actions dated for the week after de-install.
Common Mistakes
Nearly every first-show problem is one of eight, and every one of them has a straightforward fix.
1. Showing too many photographs. The fix is a hard number before you print. Choose 15 to 30 for a first show, and refuse additions once the count is set.
2. Underestimating print and framing costs. Multiply your print count by four before you look at the wall. Most first shows cost roughly three to five times what their owners expected, almost always because of framing and the second set of corrections.
3. Sequencing the images as an archive. The fix is the table contact sheet. Print your sequence, lay it out in order, and cut anything that does not earn its place between two frames that do.
4. Starting promotion too late. The fix is to start three months out, with a slow ramp. Nobody decides to see a show on the night it opens unless they heard about it twice before.
5. Vague or missing labels. A wonky label that looks like an afterthought can undercut an otherwise strong hang. The fix is a template: title, year, medium, dimensions, edition, price or “not for sale”, and a consistent position beside every frame.
6. Under-insuring, or insuring nothing. Fine art prints are frequently excluded from household contents policies. The fix is a written check of your cover before transit, with photographs of every piece’s condition as proof of value and state.
7. Hanging without templating the wall. The fix is painter’s tape, full size, before the first drill hole. It costs an hour and it prevents the most regretted part of the whole process.
8. Planning opening night as a party with no purpose. The fix is a run sheet and a five-minute welcome. Tell the room what the work is about, then let them look. A short, calm opening beats a long speech every time.
A few professional habits worth adopting early: photograph the empty room before the hang, because it is the only honest record of what you were working with; keep an active and sold inventory spreadsheet rather than a note on your phone; and ask a working photographer or installer to spend a couple of hours with you before the hang rather than after the damage is done.
Frequently Asked Questions
How long does it take to plan a solo photography exhibition?
Three to nine months is realistic. Six months is the comfortable middle if your body of work already exists. Print production and framing lead times set the floor, not the planning, so confirm those first. If your curation is already tight, a compressed six-week run is possible, but that is the version that produces a rushed hang and a stressed artist.
How much does a solo photography exhibition cost?
It depends almost entirely on print count, framing and venue. Expect printing and framing to be roughly half the total, venue fees to range from nothing to a meaningful share, and promotion and opening night to be modest. Add a contingency of ten to fifteen percent, and reduce cost by cutting prints rather than by hanging badly.
How big should the prints be for a first solo exhibition?
Match size to viewing distance. A wall viewed from about two metres works with medium prints and a few large anchor pieces, while a lobby or street-facing window needs much larger work. Most first shows sit between 15 and 30 prints, mixing a handful of large pieces with a majority of medium frames. Print the whole set at test size before committing.
How should I price my photographs?
Start from your own costs and multiply. A common approach is a sale price of roughly two to three times the print and framing cost, adjusted for size, edition scarcity and what the venue charges. Underpricing is a real risk because it devalues the work for everyone selling in the same room. Match your price point to the venue you are in.
Do I need a gallery to put on a solo show?
No. Cafes, bookstores, co-working spaces, florists, libraries and small museums are all legitimate first venues, and many working photographers land their first solo show that way. A gallery usually wants representation, a track record, and prints already produced, which is precisely what a first show is meant to create. Start where you can be seen, then approach galleries with the show documented.
What should I put on gallery wall labels?
Five things: title, year, medium and paper, dimensions, and edition or availability, with a price if the work is for sale. Keep the position consistent beside every frame and the wording consistent across all of them. A label that looks like an afterthought can undercut an otherwise strong installation, so print them together and use the same template.
What happens after a solo show opens?
You photograph the hung show, thank everyone who signed the visitor book, and follow up with every name within a week. Handle inquiries and sales in writing, marking reserved work immediately so nothing gets promised twice. Then de-install, store the work flat and protected, and write a short debrief before you start planning the next show.
Conclusion
A solo show is less complicated than the version in your head. It is a concept, a body of work, a confirmed room, a budget, a curated set, a finished print run, a taped wall, a slow promotion ramp, and a thank-you list afterwards. Every photographer who has done it once will tell you the hard part is the curating, not the hanging.
If you want to start this week, do three things. Write the one-sentence concept and read it aloud to someone who will not be polite about it. List ten venues you could realistically exhibit in, with the wall dimensions and the fee of each. Then pull your last two years of work into one folder and mark the twenty frames you would defend out loud. That is enough to start, and the rest is dates.