
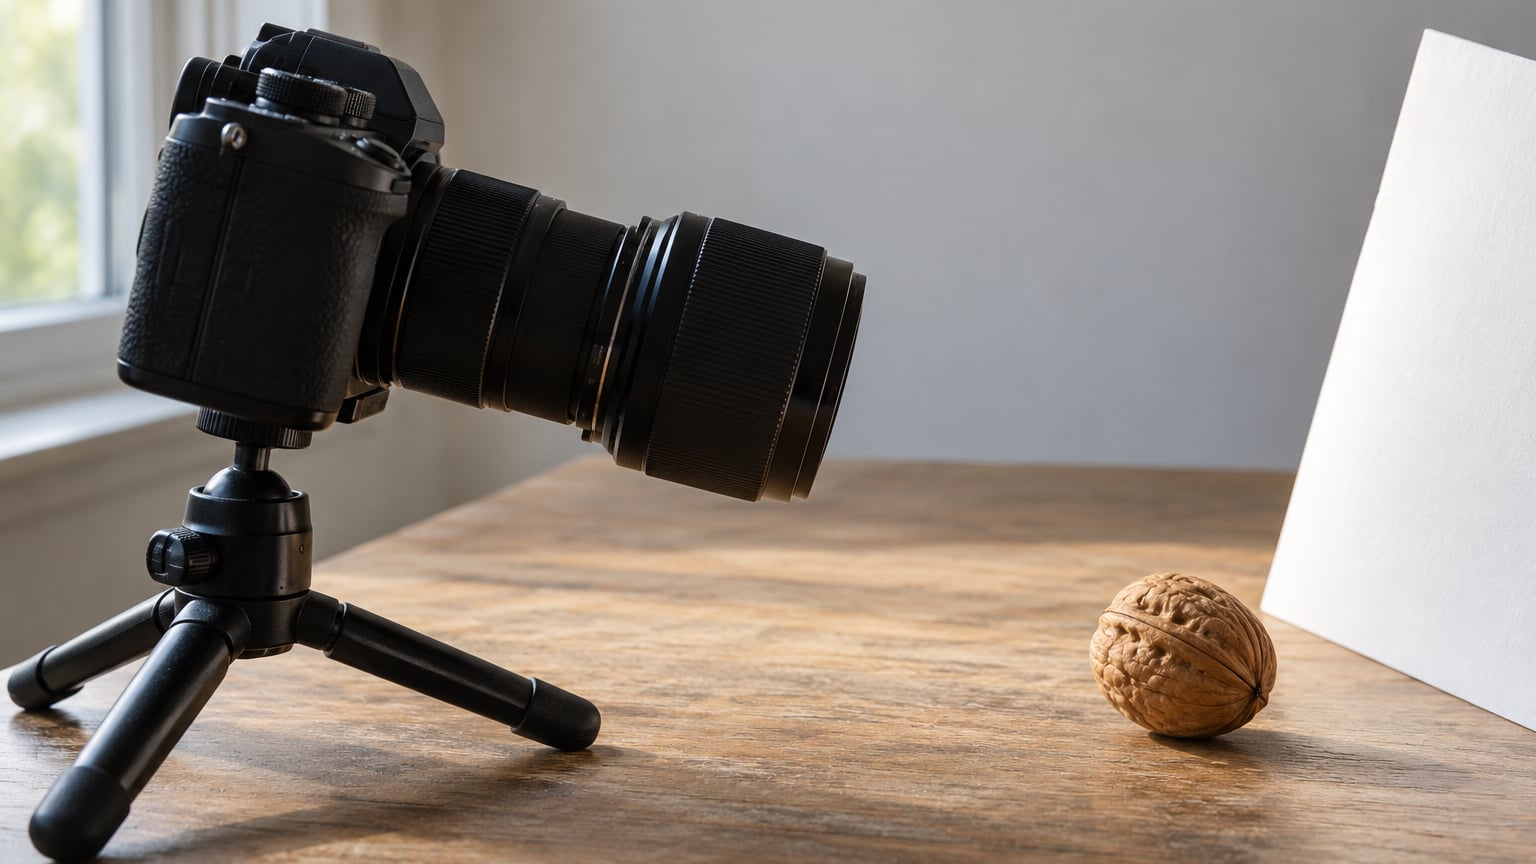
Extension tubes are hollow rings that fit between your camera body and lens, reducing the lens’s minimum focus distance so it can focus much closer and produce a bigger image of a small subject on the sensor. Mounting one takes about five minutes, and the whole setup costs less than a single dedicated macro lens. Learning how to use extension tubes for macro photography is mostly about three things: attaching the tube in the right order, focusing by moving the camera instead of the focus ring, and adding light that a lens pushed this close can no longer gather on its own.
The catch is that almost every guide online stops before the actual setup. Forum threads are full of people asking why their aperture is stuck wide open, why their frames came back dark, and why nothing focuses once they stack a second tube. Those are solvable problems, and they are the reason this guide walks through the whole chain rather than just showing you a stack of rings.
Table of Contents
- What You Need
- Step-by-Step
- How to use extension tubes for macro without losing sharpness
- Step 1: Choose a compatible lens and extension tube
- Step 2: Mount the lens, adapter, and extension tube
- Step 3: Set shutter speed, aperture, and ISO
- Step 4: Focus precisely at macro magnification
- Step 5: Stabilize the camera and light the subject
- Step 6: Capture a test shot and refine the image
- Common Mistakes
- Black or underexposed frames
- Aperture stuck wide open
- Missed focus even though everything looks right
- Soft frames from vibration
- Subject creeping or moving
- Black corners or heavy vignetting
- Adapter fits loosely or nothing focuses at all
- Autofocus hunting or failing to lock
- Losing infinity focus
- Stacking two tubes and hitting a ceiling
- Stacking tubes for depth of field
- Setup and focus tips for cleaner macro results
- Frequently Asked Questions
- Conclusion: Start with a small test setup
What You Need
A working macro setup on a budget comes down to seven things, and only the first three are specific to close-up work.
- A camera body. Any DSLR or mirrorless body works. There is nothing about the tube that requires a specific body, as long as your lens mount matches the tube’s rear mount.
- A manual-focus or electronically coupled lens. A prime between about 35mm and 100mm is the safest first choice. Zoom lenses work, but they add focus shift when they breathe.
- An extension tube. Start with a 12mm or 20mm tube. Longer tubes reach more magnification but leave you less room to work and less light.
- A step-up or step-down adapter if your tube’s rear mount does not match your body exactly.
- A sturdy tripod, plus a remote release or the camera’s self-timer.
- A diffused light source such as a flash bounced off a card, a small LED panel, or window light through a sheet of white paper.
- A small solid subject on a stable surface, and a white card or foil sheet to bounce light into shadow areas.
Matching mounts without guessing
Every lens mount has a different bayonet diameter: Canon EF, Canon RF, Nikon F, Nikon Z, Sony E, Fujifilm X and Micro Four Thirds all use different ones. A tube made for one will not screw onto another, and forcing it can damage the mount. The tube’s rear must match your camera body, and the lens mount on the front of the tube must match your lens.
If you own more than one system, an adapter between the tube and the lens is fine. Adapters also solve an awkward detail of cheap tubes: many manual tubes are threaded on the front, which leaves your lens sitting rotated in an awkward angle instead of upright.
Which lens actually magnifies best
Shorter focal lengths gain more from the same tube. That sounds backwards until you work through the math: the magnification a tube adds is roughly the tube’s length divided by the lens’s focal length. A 20mm tube on a 35mm lens adds around 0.57 of a magnification ratio, on a 50mm lens around 0.40, and on a 100mm lens only about 0.20.
This is why a 45mm lens can out-magnify a 100mm macro lens with the same tube attached, even though the macro lens starts at life size.
Step-by-Step
The workflow below follows the order that saves the most frustration: settle compatibility and exposure before you start chasing focus.
How to use extension tubes for macro without losing sharpness
Sharpness drops when light thins out, when the camera moves, and when you try to stack more extension than the light budget allows. Add extension in small increments rather than grabbing the longest tube in the bag, support the camera so nothing shifts between adjustments, focus manually rather than trusting autofocus at these distances, and confirm sharpness on a test frame before you refine anything.
Each step below includes a simple way to tell whether it worked, so you are not shooting blind for an hour.
Step 1: Choose a compatible lens and extension tube
Confirm that the tube’s rear mount matches your body and its front mount matches your lens before anything else. Then pick a modest tube length: 12mm or 20mm gives you room to compose, and you can always add more later.
Preferring a manual-focus lens removes the single most common source of frustration, because autofocus has almost nothing to detect at macro distances. How it worked out: mount the lens on the body, point it at the furthest subject in the room, and focus to infinity. If the lens stops well short of the end of its travel, that extra room is exactly the headroom a tube will use.
Step 2: Mount the lens, adapter, and extension tube
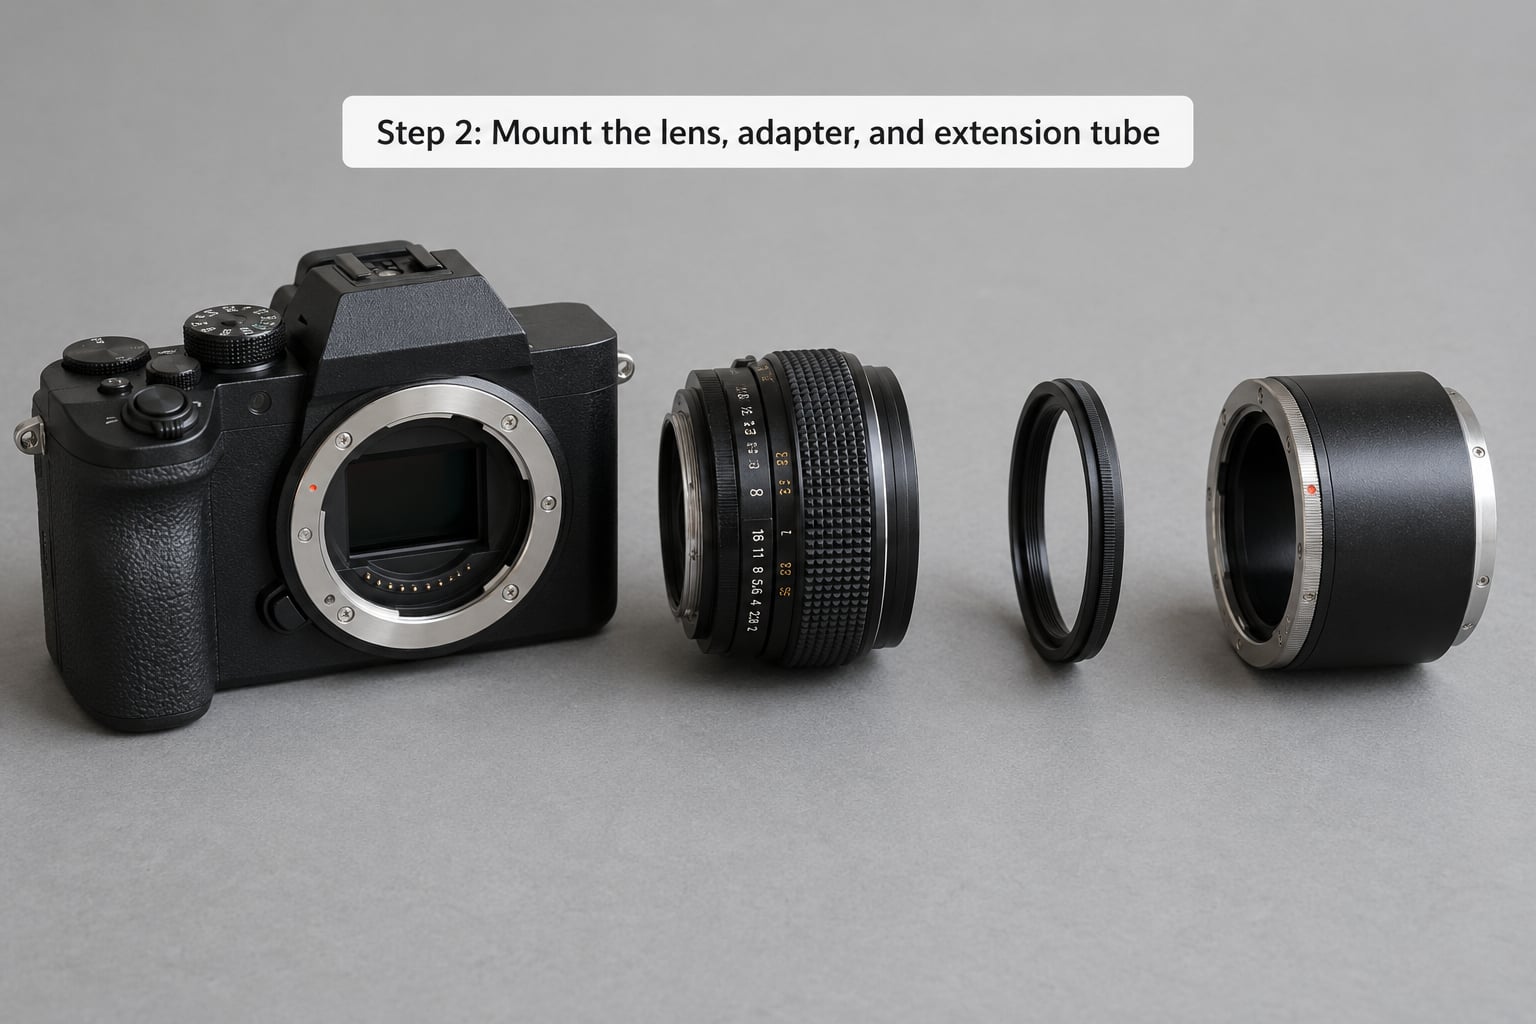
Mounting order matters: body, then tube, then lens.
- Switch off the camera, press the lens release button, and remove the lens. Cover the open mount so dust does not fall in.
- Match the white alignment dot on the tube to the dot on the camera body, then twist until it locks.
- If you are using an adapter, screw or click it onto the front of the tube first.
- Attach the lens to the front of the tube, matching its red or white index mark to the one on the tube.
- Turn the whole assembly to confirm both mounts are locked, then power on and check the exposure readout.
Electronic lenses carry contacts that pass aperture and stabilisation data through the mount. A passive tube has no contacts, so the camera sees no aperture information and the lens may sit at its widest opening no matter what you dial in. If your aperture display reads wide open and will not change, that is the cause, not a fault in your camera.
Step 3: Set shutter speed, aperture, and ISO
Switch to manual exposure and start at f/8 to f/11 with the lowest ISO the light allows, on a tripod. Note that the camera’s meter will read the frame as underexposed, because the lens now sits further from the sensor and loses light. Compensate with a slower shutter speed, a higher ISO, or simply more light.
A worked check: before mounting the tube, meter a mid-grey card at f/8 and note the shutter speed. After mounting, if the camera wants roughly two stops more exposure, that matches the light loss people commonly report with these tubes. If the result still looks dark, raise ISO rather than opening the aperture past f/8, because wide apertures leave a sliver of focus.
Step 4: Focus precisely at macro magnification
At these distances the focus ring travels very little, so the trick is to move the camera rather than the lens. Switch on live view, magnify to 100% or more, and nudge the camera forward or back in small steps until the texture snaps into focus. Turn on focus peaking if your camera has it, and the in-focus areas light up as you go.
Because you are moving the whole camera, your tripod needs to hold still for a second and a half if you are shooting at f/8. If it drifts, shoot at a higher shutter speed with more light rather than tightening the tripod until it strains.
Step 5: Stabilize the camera and light the subject
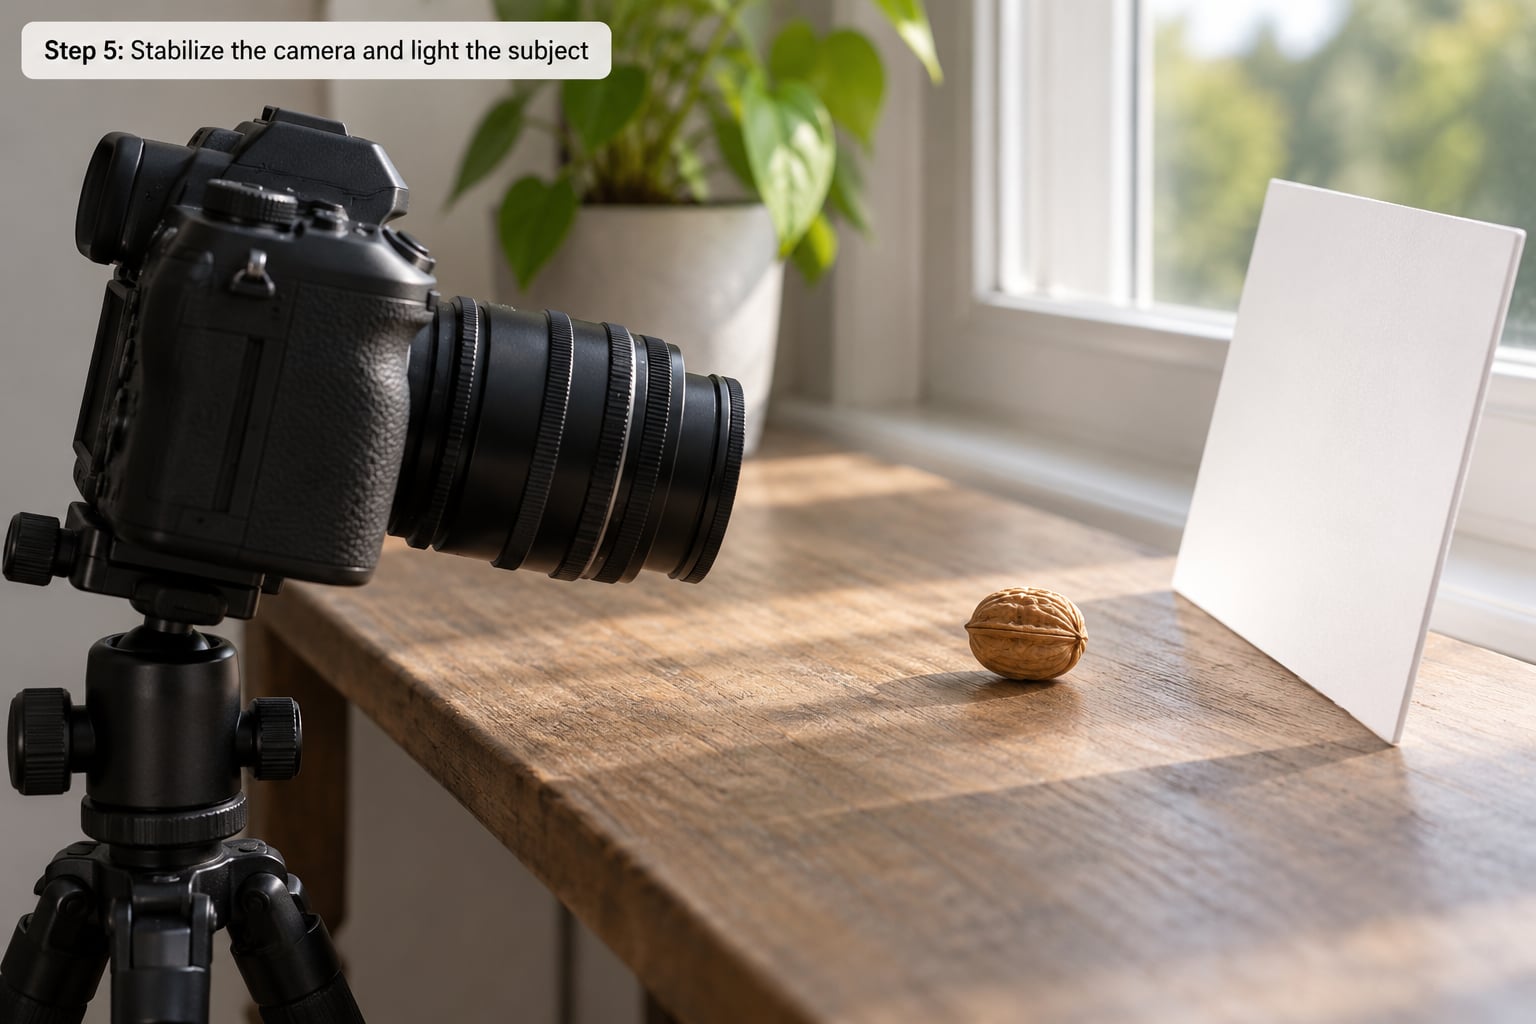
Mount the camera on the tripod, attach the remote or set the self-timer, and place the subject on something solid so it cannot creep a fraction of a millimetre mid-frame. Lighting matters more here than usual because a close subject receives light at a very oblique angle.
The most reliable beginner setup is a window with soft light, plus a white card opposite it to fill shadows. Outdoors or at night, bounce a flash off the ceiling or a sheet of paper. Keep the light at an angle to the sensor plane rather than straight on, since straight-on light flattens texture and shows you almost nothing of the surface relief.
Step 6: Capture a test shot and refine the image
Take one frame, open it at 100% magnification, and check three things in order: is the subject sharp, is it bright enough, and is the framing right. Fix them one at a time, and change only one variable per frame.
A successful macro frame has crisp texture right across the subject, smooth background falloff, and no black corners. If sharpness is inconsistent from the front of the subject to the back, you are seeing the thin depth of field that comes with this magnification rather than a focusing error. The next step is focus stacking, covered below.
Common Mistakes
Black or underexposed frames
Cause: the tube increased the lens-to-sensor distance, so less light reaches the sensor than the meter expects. Fix it by adding exposure in this order: more light first, a slower shutter speed second, higher ISO last. Opening the aperture beyond f/8 costs more depth of field than it gains in brightness.
Aperture stuck wide open
Cause: a passive tube with no electronic contacts on a modern lens that reports its aperture through the contacts. The fix is to accept manual control: set the lens to the aperture you want with its own ring, then re-meter in manual mode and adjust shutter speed and ISO. If you want automated aperture control, you need an electronic tube with contacts that match your mount.
Missed focus even though everything looks right
Cause: the focus ring barely moves, so most people turn it the whole way and stop at the wrong distance. Fix it by ignoring the ring almost entirely. Frame the subject in live view at high magnification and slide the camera on the tripod head until it is sharp, then shoot.
Soft frames from vibration
Cause: shallow depth of field magnifies every wobble into visible blur. Fix it with a tripod, a remote release or timer, and a shutter speed fast enough for the magnification you are using.
Subject creeping or moving
Cause: breath, a warm window ledge, or a card leaning against something. Fix it by resting the subject on a solid surface, holding it with a small clamp, or pinning a leaf specimen flat between two pieces of glass.
Black corners or heavy vignetting
Cause: long lenses plus deep extension shade the corners, and a tube physically moves the lens further from the sensor. Fix it by stopping down one or two stops, switching off any electronic vignetting correction so you see the real corners, and cropping slightly in editing. Using a shorter focal length fixes it at the source.
Adapter fits loosely or nothing focuses at all
Cause: a mount mismatch, usually an adapter of the wrong step-up or step-down size. Fix it by checking the mount name printed on the tube against your body. If the adapter rocks at all, take it off and get the correct one rather than tightening it and hoping.
Autofocus hunting or failing to lock
Cause: at macro distances the subject fills a sliver of the frame and contrast detection has almost nothing to work with. Fix it by switching to manual focus with live view, which is where nearly every macro shot gets made anyway.
Losing infinity focus
Cause: with the tube mounted, the lens cannot reach a focus position far enough away for distant subjects. Fix it by removing the tube for landscapes. There is nothing wrong with the lens, and nothing worth fixing.
Stacking two tubes and hitting a ceiling
Cause: enough extension pushes the focal point inside the lens, and no subject position can bring it back. Fix it by adding the second tube only when the first is already at its limit with the lens fully extended, and if the viewfinder goes black as you close in, remove the extra tube rather than hunting for focus.
Stacking tubes for depth of field
When a single frame cannot hold the whole subject sharp, shoot a bracket instead: keep the camera and light locked off, move the focus in small steps, and take a frame at each position. Blend the frames in editing or stack them with software designed for it. Manual focus, a solid tripod and a locked-off subject make this practical on any camera.
Setup and focus tips for cleaner macro results
Clean the front element before every session, since the lens now sits close enough to the subject that a single fingerprint smears the whole frame. Keep the subject parallel to the sensor plane; tilting it by a few degrees throws one side out of focus and none of it can be fixed in editing. Shoot RAW so a slightly dark frame is recoverable. And make small changes: move the subject a millimetre, add a quarter stop, then shoot again.
Frequently Asked Questions
Do extension tubes make macro photos blurry?
No, the tube itself adds no glass and does not soften the image. Blur comes from camera shake, a subject that moved, or focus landing just in front of or behind the plane you wanted. A tripod, a remote release or timer, and manual focus with live view magnification solve all three. Add light rather than stopping down further if frames come back too dark to judge.
How much magnification can an extension tube provide?
A rough guide is that a tube adds magnification equal to its length divided by the lens focal length. A 20mm tube on a 35mm lens adds about 0.57, on a 50mm lens about 0.40, and on a 100mm lens about 0.20. A short prime is therefore the cheapest route to strong magnification, and stacking a second tube can push a 1:1 macro lens well past life size.
Can I use an extension tube with a mirrorless camera?
Yes, and mirrorless bodies are easier to work with because live view magnification and focus peaking are available on nearly all of them. The only real requirement is mount compatibility: you need a tube whose rear bayonet matches your body, whether that is Canon RF, Nikon Z, Sony E, Fujifilm X or Micro Four Thirds. An adapter works when no direct match exists.
Do extension tubes work with autofocus lenses?
They do, but only with electronic tubes that carry contacts matching your mount, and even then autofocus rarely locks at macro distances because the subject fills too little of the frame to give the system a pattern to follow. Expect to switch to manual focus with live view regardless of which tube you use. A passive tube with an electronic lens also loses aperture control, leaving the lens at its widest opening.
Can I use the same lens with different extension tube lengths?
Yes, and it is the simplest way to control how much magnification and light you take on. The lens mount stays the same, so you just swap tubes, though any adapter in the stack has to be removed first. Working from short to long lets you confirm the setup at low magnification before you climb into the thin light and razor-thin depth of field of a long tube.
Conclusion: Start with a small test setup
Pick a manual-focus prime you already own, mount a 12mm or 20mm tube that matches your camera’s mount, and take a single test frame on a tripod at f/8 with extra light. Check the focus at full magnification before you change anything, then decide whether you need more magnification or more light. That single frame tells you which problem you actually have.
Once the setup works, the same workflow carries over to focus stacking, off-camera flash, and pushing past life size. Get the basics sharp first; everything else builds on that.