
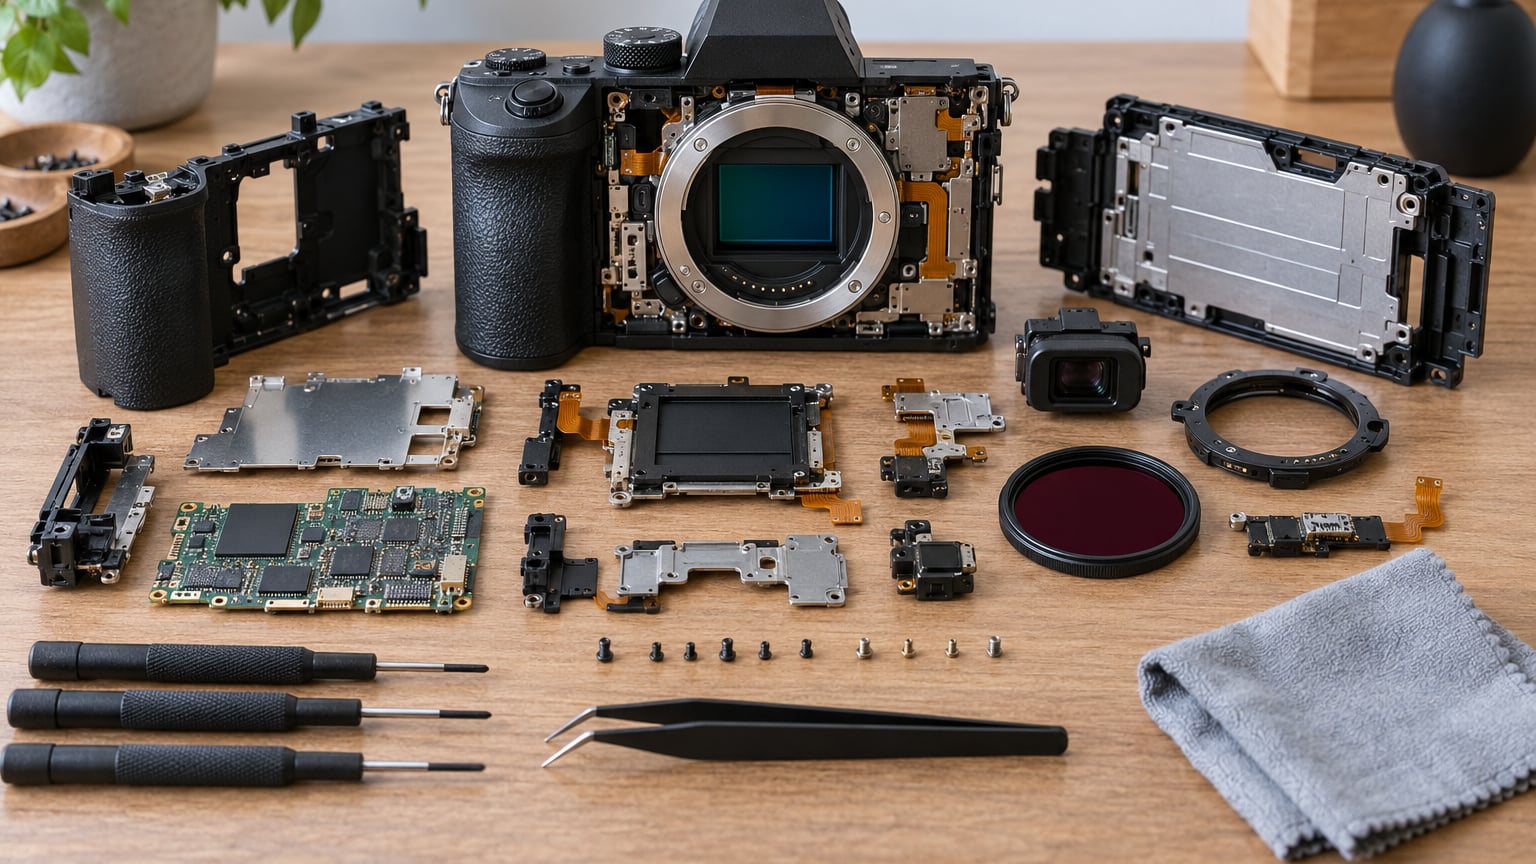
An infrared conversion removes the IR-cut filter sitting in front of the sensor and replaces it with an IR-pass filter, so the camera records near-infrared light (roughly 700 to 1000 nanometres) instead of blocking it. If you want to know how to convert a camera for infrared, the honest answer is that the physical work takes an afternoon, but the focus calibration afterwards takes as long as it takes to get every lens sharp.
The modification is permanent. It voids the factory warranty, it can permanently change autofocus behaviour, and it can cost you a body if static discharge reaches the electronics. That is why most photographers do it to a spare or older body rather than the camera they earn a living with.
What follows is the full process, from checking compatibility to the first test shots, including how to verify each step actually worked.
Table of Contents
- What You Need
- Step-by-Step: How to Convert a Camera for Infrared
- 1. Confirm That Your Camera Can Be Converted
- 2. Remove the Camera’s Internal IR/UV Cut Filter
- 3. Clean and Inspect the Sensor
- 4. Install the Infrared Filter or Light-Sealed Filter Holder
- 5. Reassemble and Test for Light Leaks
- 6. Recalibrate Focus for Infrared Light
- 7. Make Test Shots and Set a Starting Exposure
- Common Mistakes
- Frequently Asked Questions
- Can any camera be converted for infrared photography?
- Can I still use a converted camera for normal visible-light photography?
- Do I need to recalibrate lenses after an infrared conversion?
- Which infrared filter wavelength should I choose?
- Should I convert a camera myself or pay a specialist?
- Do converted cameras keep their weather sealing?
- Conclusion
What You Need
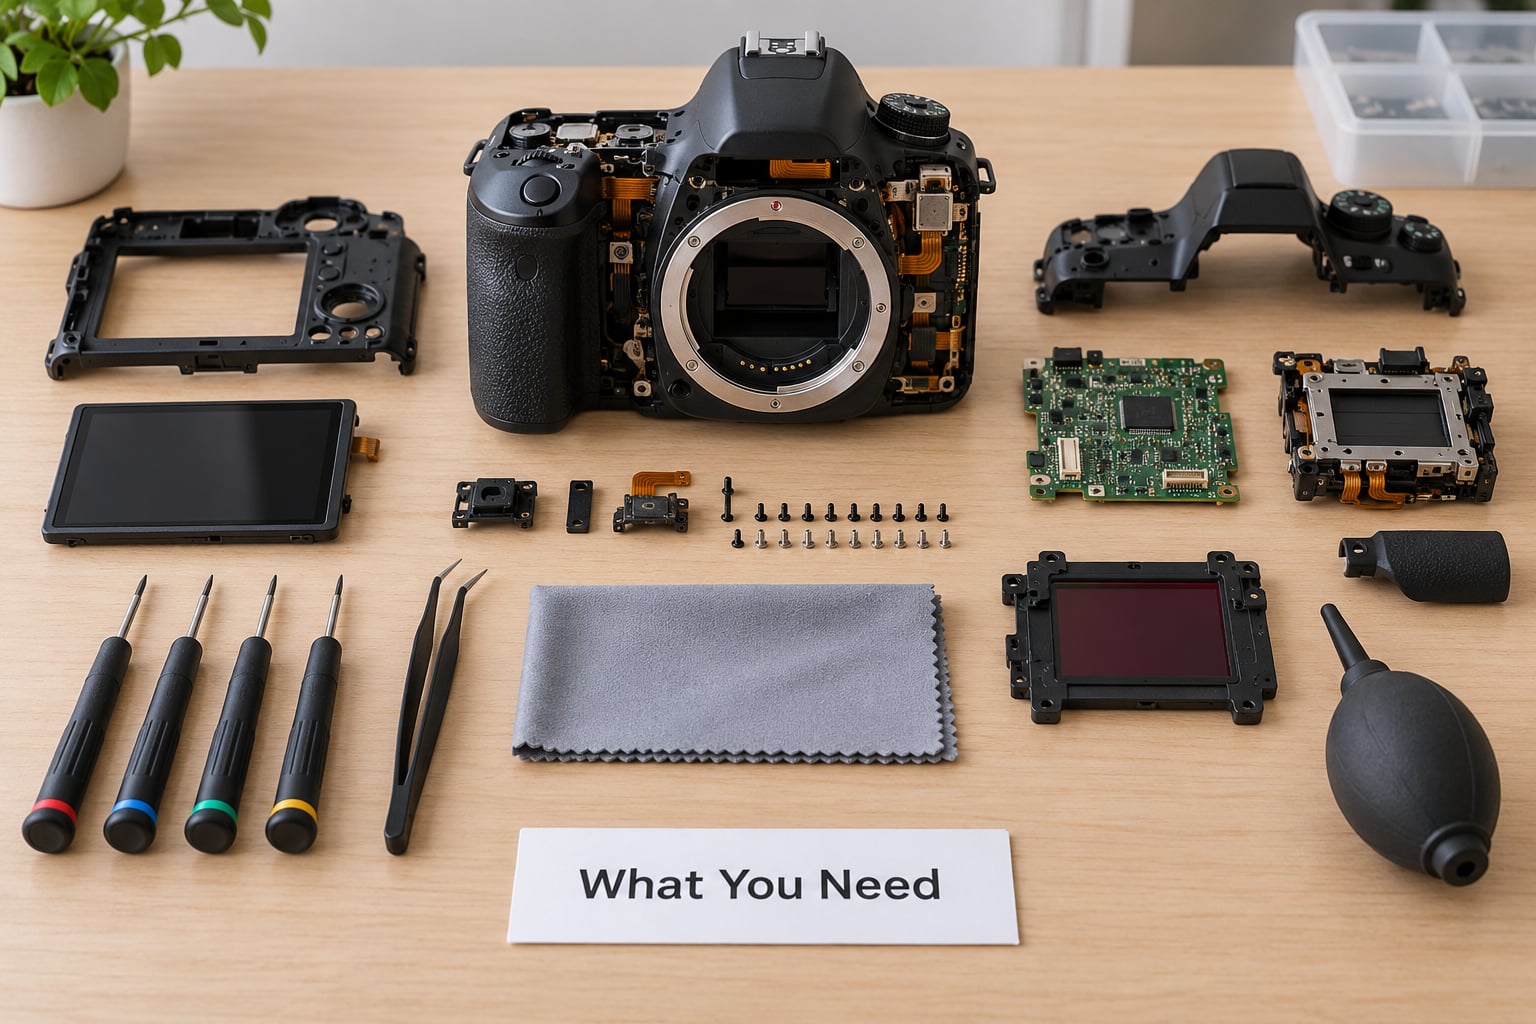
A conversion needs four things: a camera that can be converted, the replacement filter chosen for the look you want, the right tools, and a clean way to test the result. Missing any one of those is how people end up with a body that leaks light or never quite focuses.
The camera body
Mirrorless bodies are the easiest starting point. They have fewer moving parts, an electronic viewfinder that keeps working with an IR-pass filter in front of the sensor, and autofocus that mostly relies on contrast detection through live view. A DSLR with an optical viewfinder will still work, but the viewfinder and its internal filters may also block infrared, which confuses manual focusing.
Some bodies are poor candidates. Any camera with a permanently sealed sensor assembly, a fixed filter you cannot reach without cutting the body, or a filter stack bonded in place should be left alone. Compact cameras and bridge cameras with fixed lenses are usually a bad first project, because the lens and sensor are one sealed module.
The replacement filter
This is the single decision that shapes the finished image, so it is worth thinking through before buying anything else. You want a filter with a cut-off wavelength that blocks visible light and passes the infrared you intend to record.
- 590nm blocks almost all visible light and gives a strongly coloured or dreamlike result.
- 665nm keeps a touch more colour, which some shooters prefer in overcast light.
- 720nm is the most common starting point for near-monochrome landscapes with white foliage.
- 830nm and 850nm are essentially black and white, with the highest contrast between leaves and sky.
- Full spectrum replaces the cut-off filter with clear glass so you can choose your result at the lens with external filters.
Full spectrum gives you flexibility and lets you try an IR-pass filter on a body you have not converted, but the opaque external filters eat a huge amount of light. A photographer in a forum thread reports shooting 180-second exposures with a Hoya R72 on an unmodified body, which shows how much light a filter like that removes.
Tools and supplies
- Precision screwdrivers that fit the body screws exactly
- Tweezers, ideally rubber-tipped
- A grounding strap, plus a clear working surface with a grounded point
- Canned air or a manual air blower
- Sensor cleaning swabs and sensor cleaning fluid suitable for the coating
- Desoldering wick and a soldering iron, if the filter is fixed with a wire or adhesive
- A light-tight body cap or, ideally, the replacement filter itself fitted before you reassemble
- The camera manual plus model-specific service or disassembly information
A test setup
Before the camera is open, put the tripod, a test chart and a display on the same bench. You want to check for glow and haze in a darkened room before you reassemble anything, and you want to compare visible-light and infrared frames of the same scene from the same spot. Setting that up afterwards means taking the camera apart twice.
Step-by-Step: How to Convert a Camera for Infrared
The sequence below runs from compatibility checks through to a first exposure. Each step includes how to confirm it worked, because most conversion mistakes are silent — the body still powers on and still takes pictures, just wrong ones.
1. Confirm That Your Camera Can Be Converted
Read the model number off the base of the body and check it against conversion service compatibility lists or model-specific disassembly information before you touch a screwdriver. If the model is not listed, treat that as a no until a specialist confirms it in writing.
You are looking for three things: access to the filter in front of the sensor, a filter that can be removed without damaging the sensor stack or its adhesives, and a camera whose autofocus you can live without permanently damaging. Verify it by having the answer confirmed for the exact model, not for a similar body in the same series.
2. Remove the Camera’s Internal IR/UV Cut Filter
Start with the camera switched off, battery removed and lens detached. Release the retaining ring or screws that hold the filter stack, working slowly and evenly so the ring does not gouge the metal seat, then lift the filter free with tweezers. Never lever against the glass or push on the sensor stack behind it.
If the filter is bonded or wired in place, you are now at the point where this stops being a beginner job. Clear the solder with desoldering wick rather than pulling on the wire, and if adhesive is involved, follow model-specific instructions rather than improvising with solvents. Force is the failure mode here: it bends mounts, cracks the optical low pass filter and can mark the sensor. You know the removal worked when the sensor sits fully exposed with no glass above it and no visible haze.
3. Clean and Inspect the Sensor
With the filter off, use a blower to lift loose dust, then clean swab the surface with fluid approved for the sensor coating, working gently in one direction and never pressing hard. Compressed gas alone can drive particles into crevices, and a dry swab rubs grit into the coating.
Then inspect under a loupe with light angled across the glass. Look for dust motes, scratches, a fogged or streaked coating, and any moisture haze. Dust in the sensor stack is effectively permanent and shows up as fixed spots that no amount of cleaning will remove. If you find a scratch or a coating mark, stop and photograph it before going further, because it will still be there after reassembly and you will want to know it was not the conversion.
4. Install the Infrared Filter or Light-Sealed Filter Holder
Fit the replacement filter or the light-sealed filter holder over the sensor, keeping its intended orientation — coatings on IR-pass glass have a front and a back, and mounting it backwards can soften the image or defeat the coating. Seat the retainer evenly, tightening in a cross pattern rather than one side at a time, until it is snug and no longer than hand tight.
The seal matters as much as the seating. If the replacement filter leaves a gap around the sensor stack, near-infrared light from outside the filter can reach the sensor from the side and produce a permanent glow that no exposure setting removes. A filter held with a light-blocking foam gasket, or one that covers the whole opening, is what solves this. A full-spectrum or 720nm filter fitted directly over the stack also acts as the dust protection filter, so you do not need an extra one.
5. Reassemble and Test for Light Leaks
Put the body back together in the reverse order, tightening screws evenly and refitting the lens and battery. Before mounting the external infrared filter or anything else on the front, take the camera into a dark room, remove the lens cap, and take a frame at a high ISO and a slow shutter speed.
Any glow, corner haze or uneven illumination means light is entering around the filter seal. To confirm the diagnosis, hold an opaque cloth over the front of the lens while shooting: if the glow disappears, the leak is at the front of the system, and if it stays, the leak is inside the filter stack. Fix it before shooting anything else, because a glow that reaches the sensor is baked into every frame at every exposure.
6. Recalibrate Focus for Infrared Light
Infrared light focuses at a different distance than visible light. The practical result is that a lens set to infinity actually lands slightly near, so distant subjects look soft and subjects a little nearer than infinity can look sharp. This is the step that determines whether you enjoy the converted camera or quietly shelve it.
Use live view or the magnified display rather than the viewfinder, put a high-contrast infrared target in the scene, and focus manually until the target is as sharp as you can make it. Do the same at a few distances: near, middle and far. Then check a real subject at infinity, because test charts and foliage do not always agree. Photographers running converted bodies report that wide-angle and older specialty lenses are the usual culprits, with hotspots and soft corners rather than a total failure to focus.
If the camera offers a custom white balance, set it from green foliage, since leaves are the brightest infrared reflector you will point it at. Do not loosen internal mechanisms or attempt to adjust a lens’s own helicoid to chase focus; those adjustments are per lens, and many people end up needing one lens focused close and another at a different distance.
7. Make Test Shots and Set a Starting Exposure
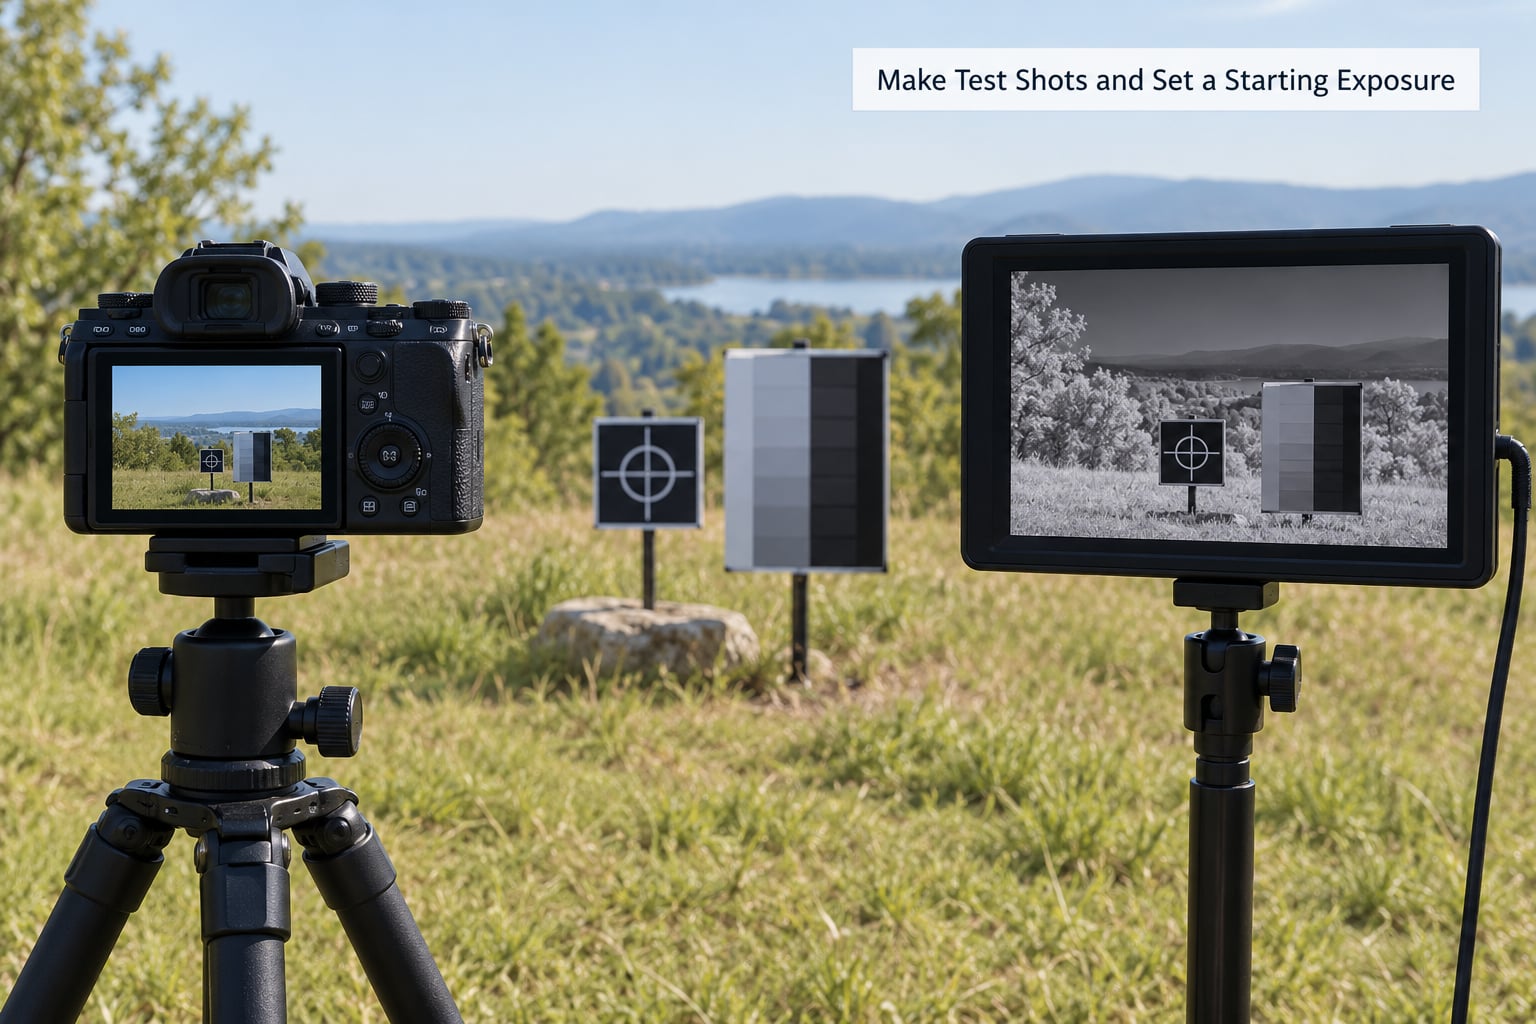
Start in full daylight with the camera on manual, shooting RAW. Focus manually, set a mid aperture, and start the ISO low, then walk the shutter speed until the histogram sits where you want it. After a conversion you will often need faster shutter speeds than you are used to, because many replacement filters sit in front of the sensor like a strong neutral density filter, though the amount varies a lot by wavelength.
Then repeat in shade and at low light, because the dynamic range between sunlit leaves and shadow will not match what you see in the viewfinder. Check every frame for three specific failures: focus that falls apart at the edges of the frame (a hotspot), a colour cast that looks like the sensor is fine but the white balance is not, and reflections of the filter or your own body in the front element at wide apertures.
Toward the end, ask what you will do with the files. Most people convert to monochrome in post, and a channel swap in the raw converter — treating the infrared channel as one colour channel and a visible channel as another — is how false colour infrared images are made. Once you know your intended finish, apply the conversion consistently across a whole set using a simple batch editing workflow rather than adjusting each file by hand.
Common Mistakes
Almost every failed conversion I can trace comes down to one of the same handful of errors.
Forcing the filter out. The retaining ring is meant to unthread smoothly. If it will not move, you are against adhesive, thread damage or a hidden clip. Back off, find the model-specific instructions, and stop pushing, because a cracked filter can mean cracked sensor stack mounts behind it.
Opening a camera that should not be opened. Bodies with sealed sensor stacks, fixed lenses or glued filter stacks are not conversion candidates, however tempting they look. A conversion service will tell you in a sentence; a stripped screw head will tell you after an hour.
Not checking for light leaks before shooting. A filter that does not block light at its edges produces a permanent haze across the frame. The test takes one minute in a dark room with the lens cap off, and skipping it can ruin an entire afternoon of shooting.
Fitting an incompatible filter. Cut-off wavelengths are not interchangeable, and a filter designed for a different mount or sensor size will not seat correctly. Check the diameter and the physical thickness, not just the wavelength on the packaging.
Forgetting that focus changes. Nothing is wrong with the camera if infinity is soft. Shoot the same scene with a known target and adjust the focus ring rather than assuming the conversion failed. If several lenses are all soft in the corners, treat it as a hotspot problem and look for a lens with a good infrared reputation.
Working without a light-tight body cap. Every minute the sensor is exposed to open air is an opportunity for dust and moisture. Keeping the replacement filter fitted before reassembly, or a proper body cap on, closes that window.
Judging the result from one test shot. A single frame proves nothing about a modification whose whole point is a different response to light. Take a set: sunny scene, shade, a distant subject and a nearby one, all at the same settings if you can, so you can see where the camera struggles.
Forgetting that an infrared camera is not a thermal camera. Thermal imaging measures heat emitted in long wavelengths and needs a different sensor entirely, and security cameras have their own infrared illuminators. Neither is what you are building here.
Two habits keep a converted body healthy. Clean the outside of the new filter with a blower before every session, since a hotspot or a smudge on a filter is far more visible in infrared than in visible light. And shoot a visible-light frame occasionally to confirm the seal is still holding.
Frequently Asked Questions
Can any camera be converted for infrared photography?
No. The body needs an accessible filter in front of the sensor that can be removed and replaced without damaging the sensor stack. Mirrorless bodies with electronic viewfinders are the easiest, while sealed sensor assemblies, fixed-lens compacts and bridges are usually unsuitable. Confirm the exact model number before opening anything.
Can I still use a converted camera for normal visible-light photography?
Somewhat. A converted body produces heavy colour casts, unusual exposure and a strong brightness change, so it is not a pleasant everyday camera. Many photographers keep it as a dedicated second body. If you need one camera for both, buy external filters for an unmodified body instead and accept much longer exposures.
Do I need to recalibrate lenses after an infrared conversion?
Expect to adjust focus, because infrared light focuses at a different distance than visible light. Use live view magnification and an infrared target to focus manually, then check at infinity on a real subject. Recalibrating the camera itself is not something to attempt at home, and focus calibration is a separate service worth budgeting for.
Which infrared filter wavelength should I choose?
Around 665nm or 720nm is the usual starting point for a first converted camera. Go to 850nm if you want near-monochrome with maximum leaf contrast, and choose full spectrum only if you already own several external IR-pass filters. Check the wavelength options with a conversion service before ordering any glass.
Should I convert a camera myself or pay a specialist?
Pay a specialist unless you have already disassembled a camera before. The disassembly is manageable, but filter bonding, static risk, sensor stack handling and post-conversion focus calibration are where self-conversions go wrong. A service also handles warranty questions and can usually calibrate a set of lenses for infrared.
Do converted cameras keep their weather sealing?
Rarely, and treat the answer as no. Opening the body breaks factory seals, and a replacement filter is not always equivalent to the original stack in thickness or sealing. If you shoot in rain or heavy dust, keep the converted body in a bag between shots or plan to use it in fair weather only.
Conclusion
The safest first action is to verify the exact model compatibility before opening anything, then have the conversion and the focus calibration done properly and validated with a set of controlled test shots. If you would rather keep the camera you already own, put how to shoot black and white photos with a digital camera into practice first — many of the tonal problems people hope to solve with infrared are solved by monochrome shooting, and picture styles and monochrome mode will teach you the same conversion workflow you will use on infrared files later.