
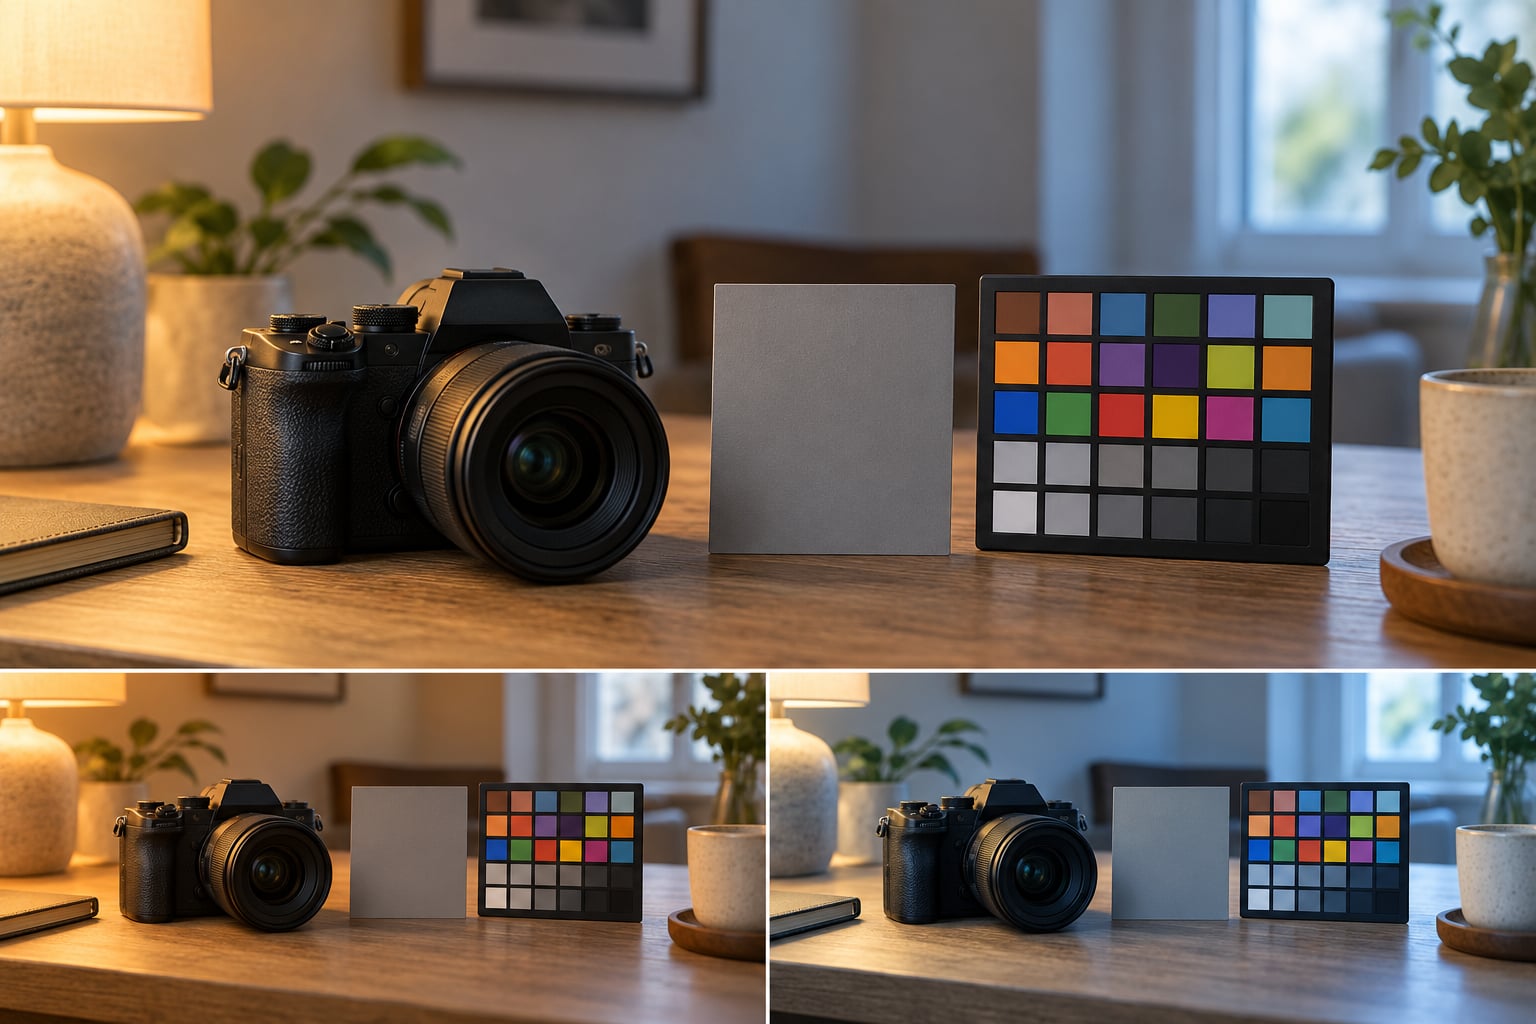
To set white balance manually, you have two real options: type in a color temperature value in Kelvin (K) that matches your light, or photograph a neutral reference such as an 18% gray card and let the camera calculate the correction from that frame. Switch off Auto White Balance first, because auto re-guesses the light on every shot. The whole process takes about two minutes once you know where the control lives on your body.
I set white balance by hand on nearly every job I shoot, even when the files go through post. It takes ten seconds, it stops the camera from inventing a different color every third frame, and it gives me a fallback if the JPEG straight out of camera has to look decent for a client.
The rest of this guide is the workflow I actually use: pick a mode, find a neutral reference, dial in Kelvin, correct any green or magenta bias, verify, then record the setting so you can reuse it. It works on a DSLR, a mirrorless body, and a phone camera, because the math is the same even when the menu names differ.
Table of Contents
What You Need
You need five things, and one of them is optional. If you have the first four, you can set white balance manually right now.
- A camera or phone with manual white balance control. Every DSLR and mirrorless body has it. Phone cameras get it through a pro or manual mode, usually by way of a locked white balance or a Kelvin slider.
- A neutral reference surface. An 18% gray card is the classic choice. A white card works too, as does a sheet of clean office paper or an evenly lit plain wall. The color checker chart is the best of the three because you also get swatches you can check skin tones against.
- Access to RAW capture. Not mandatory, but it turns white balance from a decision you have to get right in the moment into a decision you can revisit later.
- A way to write the numbers down. Your camera’s notes field, your phone’s voice memo, a scrap of paper. You want the Kelvin and tint pair recorded the moment they are right.
- Optional: a color temperature meter or an ExpoDisc-style tool. Useful when you move between locations, since it reads the light instead of making you guess from a card.
One honest warning before you start. Photographers on photography forums repeatedly describe the same frustration: they cannot trust their own eyes when judging color on screen, because of color constancy. Your brain discounts the color of the light around an object, so a warm-lit wall looks white to you even when the camera records it orange. That is why the reference card matters more than your opinion of the image.
Step-by-Step: How to Set White Balance Manually on Any Camera
Step 1: Choose the Right White Balance Mode
Set the white balance mode away from Auto (AWB) and onto a fixed setting. On most bodies the choices live in one row of icons or a short list: Daylight, Shade, Cloudy, Tungsten, Fluorescent, Flash, Custom, and Kelvin (shown as K on Canon, Nikon and Fujifilm bodies).
Reach for a preset when the light source is honest about what it is. Midday sun, open shade, or a single flash head do not need measuring. Switch to Kelvin when the light is a mixture, the time of day is shifting, or you have a known value from a meter. Switch to a custom slot when you have a reference card in front of you.
Success check: take two frames in a row with the same subject and lighting and compare them. If the color changed between the two frames, auto is still in charge and needs to come off. On Canon this toggle is usually one press of the WB button followed by the drive or dial; on Nikon it sits under the white balance entry in the photo menu, and on Sony and Fujifilm you assign it to a function button ahead of time.
If you want the exact button sequences for the most common bodies, it is worth mapping out where the menu lives before a session rather than hunting through it in front of a subject.
Step 2: Find a Trustworthy Neutral Reference
Put the reference in the same light as your subject, not in the shade and not under a different lamp. Fill the frame with it so the camera has nothing but neutral surface to measure.
A gray card reads the average light in the scene and gives you a true neutral. A white card tends to be more sensitive to the brightest part of the frame, which is useful when you are metering for highlights. A plain sheet of office paper is the budget option and works acceptably as long as it is unprinted, uncreased and lit evenly.
Success check: the reference should read as a flat, single tone in your live preview with no hint of orange, blue, or green across it. If one side of the card looks different from the other, the light is directional and you need to either move to a position where the light falls evenly or accept that the scene has two color temperatures in it.
That last case is the one that trips people up most often. A room with house lights plus a window is genuinely mixed, and no single Kelvin value makes the whole frame neutral. Pick the value that matches your subject, accept a cast on the background, or correct the two separately in post from a RAW file.
Step 3: Set White Balance Manually by Kelvin
Kelvin measures how warm or cool a light source looks to the human eye. Lower numbers look warmer and more orange; higher numbers look cooler and more blue. Setting the Kelvin value tells the camera the color of the light you are standing in so it can neutralize it.
Here are the starting values for the light sources you will actually meet:
| Light source | Typical Kelvin | Notes |
|---|---|---|
| Candle or firelight | 1800K to 2000K | Very warm, deep orange |
| Sunrise or sunset | 2000K to 3000K | Strong amber, changes fast |
| Household bulb, tungsten | 2800K to 3200K | The old incandescent look |
| Fluorescent, office ceiling | 4000K to 4500K | Often green, needs tint correction |
| Direct midday sun | 5200K to 5400K | The Daylight preset baseline |
| Overcast sky | 6000K to 6500K | The Cloudy preset baseline |
| Open shade | 7000K to 8000K | Blue from sky light only |
| Flash or strobe | 5200K to 5500K | Check your strobe manual |
To use the table, enter the Kelvin value directly into the camera. On Canon and Nikon, turn the dial while watching the live preview until the gray card looks neutral. On Sony and Fujifilm the same value goes into the color temperature slider.
Success check: the gray card should sit at a true middle gray with no warmth or coolness left in it. Too orange means the light is cooler than the number you entered, so raise the Kelvin value. Too blue means the opposite, so lower it. Move in small increments of 100 to 200K; bigger jumps overshoot and waste time.
If you also shoot monochrome, remember that white balance changes the tonal balance of a frame, not just its color. Our guide to what camera settings for black and white photography covers where that sits in the wider picture.
Step 4: Fine-Tune Tint or Green-Magenta Bias
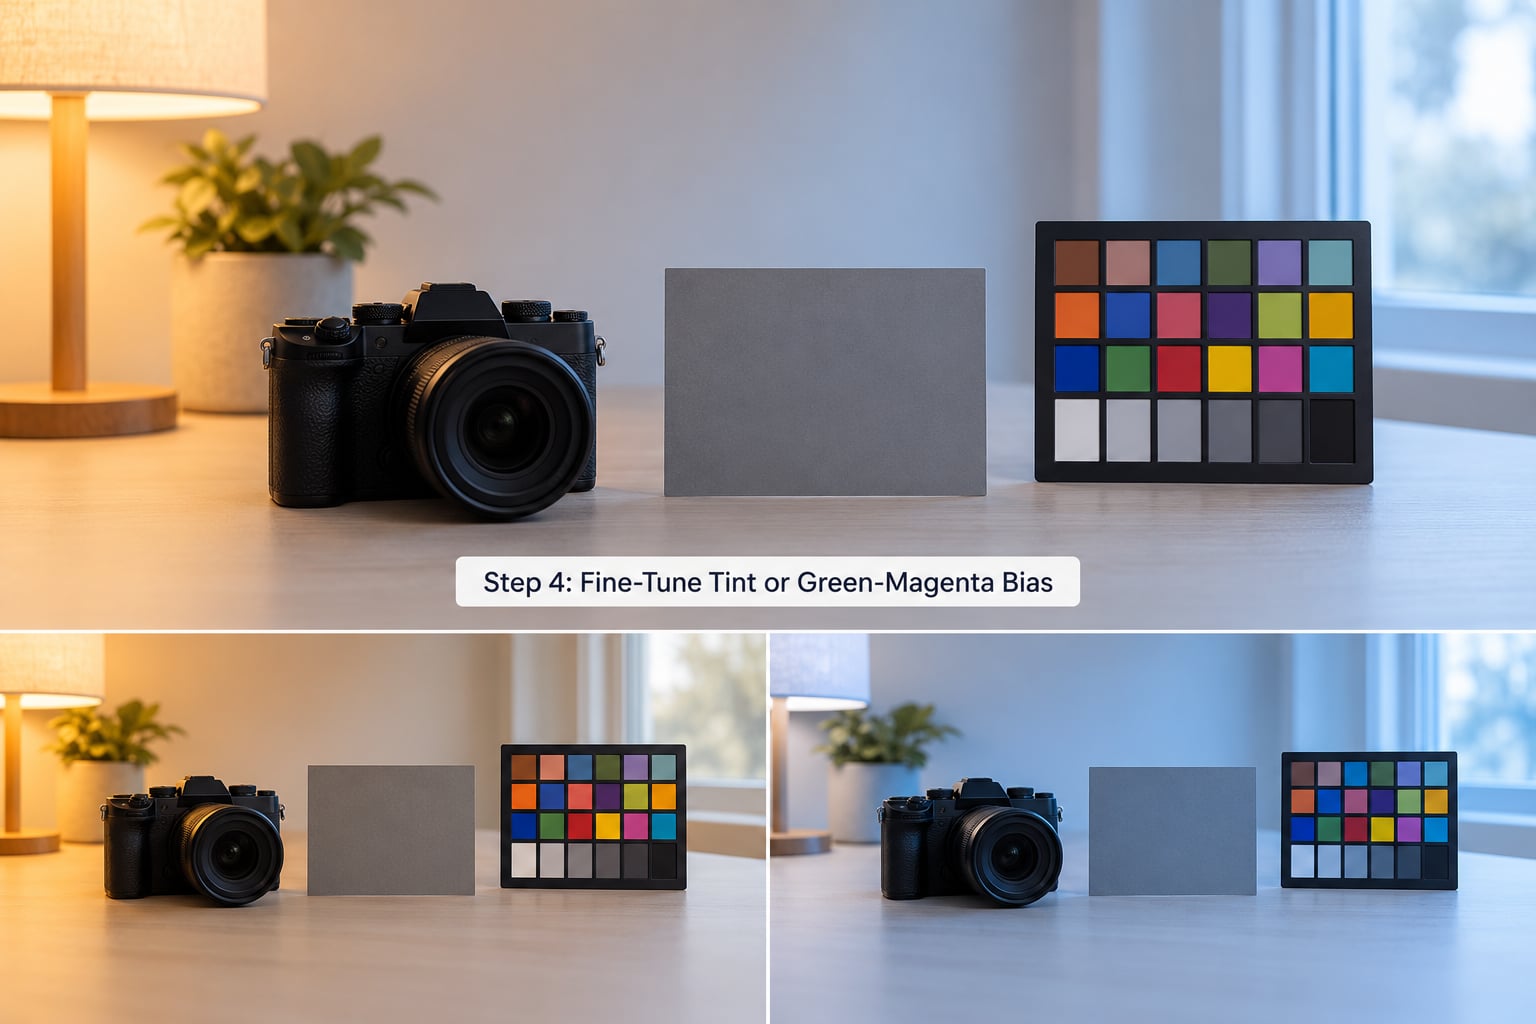
Kelvin only controls the blue-to-amber axis. The second axis is green to magenta, and most cameras expose it as tint, fine-tune, or a green-magenta slider.
The symptom is easy to recognize. Fluorescent and cheap LED lighting push greens; a green reflection off foliage or a mixed interior with cool fluorescents and warm tungsten does it too. Magenta shows up under warm indoor bulbs that are weak in blue, and in some cheap LED fixtures that sit between white and blue.
Nudge tint toward magenta if things look green, and toward green if it looks pink. Work in steps of two or three on the scale and check the card after each one. One stray slider position is usually all it takes.
If your camera has no tint control, you have two options. Shoot RAW and fix the axis in post, where the tint slider sits right next to temperature. Or split the difference by hand: reframe so the reference is the brightest thing in the frame, or move to light that is more neutral. Do not try to solve a magenta cast with Kelvin alone; it will not go there.
Success check: the card is flat gray, and skin tones in the frame look like skin rather than green or tomato red.
Step 5: Check Neutrality Before the Final Shot
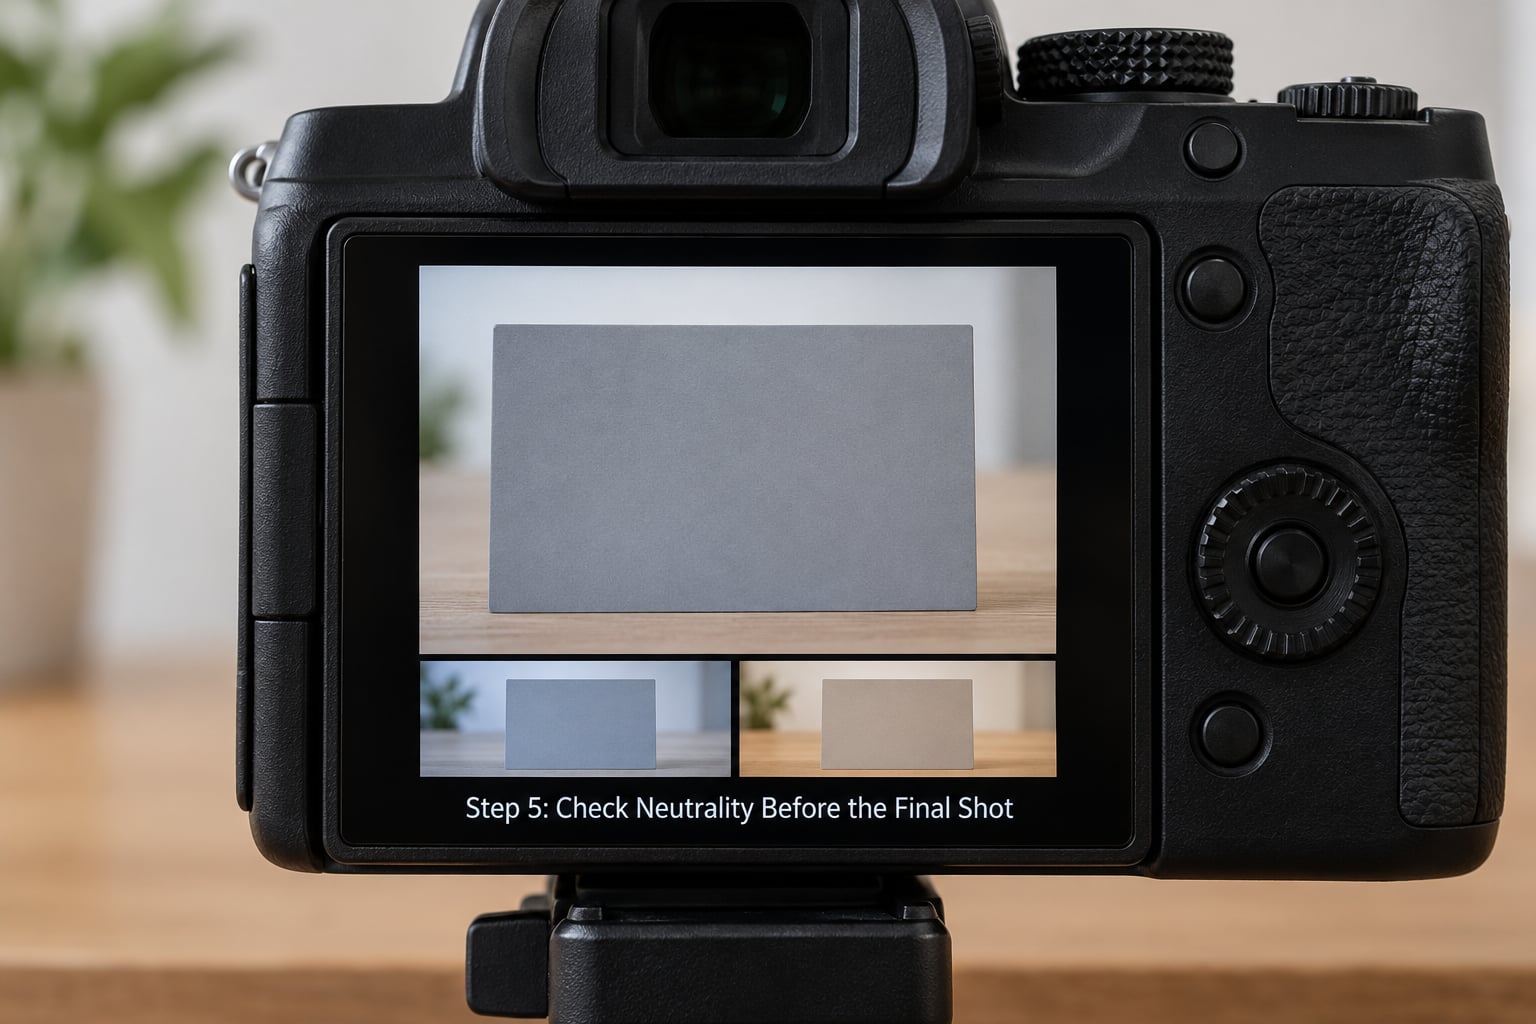
Do not skip the verification step. Take a test frame of the reference, then take a second one with a noticeably different Kelvin value, and compare them at a small size. Whichever version of the gray reads more convincingly as neutral gray is closer.
Small is the operative word. Viewed at full size on a bright screen, the eye over-corrects. Thumbnail size or the live preview at arm’s length gives a steadier read, and it is the method experienced color-critical shooters describe in forum threads about judging color.
Then check that you have not broken anything while fixing color. Look at the histogram: neutral gray belongs near the middle of the range, and if the whole distribution is jammed against one edge you have an exposure problem, not a white balance problem. Bright white patches with no detail in them are clipping, and no amount of color correction brings that back.
One more habit worth having: after the reference reads neutral, glance at something in the frame that should not be neutral. White shirts, a white painted wall, snow, paper. If those read neutral too, the setting is good. Skin should still look warm relative to the neutral, never flat.
Once color is right, the file is easier to work with afterward, including when you decide to convert it. How to shoot black and white photos with a digital camera picks up from there.
Step 6: Lock, Save, and Reuse the Setting
Set it once and stop touching it. Many cameras offer a lock that holds the current white balance even when the mode is AWB, which is the best of both worlds: a manual value that the camera will not silently reset.
Save the value to a custom slot. On Canon this is the custom white balance option, set from a frame you just shot. On Fujifilm the same idea is one of the WB slots. On Sony and Nikon you can register a custom value in the same menu where you entered the Kelvin number.
Write the pair down: the Kelvin number and the tint number, plus the light condition in a few words. Tungsten living room, 3050K, plus 4 tint. You will not remember 3050K and plus 4 in eight months, and the note takes four seconds.
Reuse it as the light shifts. When the sun moves and the scene warms noticeably, add 300K to 500K rather than starting over. When a cloud covers the sun, raise the value by 400K or so. Small adjustments from a known good baseline beat guessing from zero each time.
Common White Balance Mistakes and How to Fix Them
Using a reference that is not really neutral
A card with a fingerprint, a piece of paper with a printed logo, or a beige wall is not neutral. Clean the card, use an unprinted surface, and replace cards that have yellowed with age. Verification: compare the card against the screen of a device you trust, or look at it under a second light.
Judging color on a display you have not calibrated
Most laptop and monitor panels ship somewhere between too warm and too blue. Until you calibrate it, every color decision you make on it carries a built-in error. A hardware calibrator is the fix. Failing that, view images in a neutral-gray application background, at a moderate brightness, in a room with ambient light similar to your screen. The deeper workflow is covered in guides on whether to shoot RAW or JPEG, since the file format changes how much correction you can still apply.
Changing light and forgetting to change the setting
This is the most common failure in real sessions. You set white balance for the window light, then move into the hallway and the whole sequence goes green. The fix is a re-check habit: after any move that changes the light, take one reference frame before continuing. It costs two seconds and saves the set.
Confusing white balance with exposure
They look similar in a preview and behave completely differently. White balance shifts hue along the warm-cool axis; exposure shifts overall brightness. A frame that is too dark and slightly blue is an exposure problem plus a color problem, in that order. Fix brightness first, then color, because judging color on an underexposed frame leads you to overcorrect the tint.
Pushing Kelvin to extreme values
Some shooters set 9000K under a household bulb because the preview looked more vivid. You are not adding truth, you are adding a cast. The camera compensates against the value you declare, so an honest number produces an honest frame. Verification: if the neutral reference needs a wildly unrealistic Kelvin to look right, your starting assumption about the light was wrong.
Forgetting to shoot RAW
JPEG bakes the white balance decision into the file at the moment of capture. Get it wrong and the cast is permanent, sometimes beyond what the editing sliders can pull back. RAW keeps the color channels separate, so you can set Kelvin approximately in camera and finish properly later. Even when in-camera accuracy matters because you only deliver a small fraction of the frames you shoot, the safety net is worth having.
Trusting a preset you have never checked
The Cloudy preset is tuned for a specific kind of overcast sky, and the Fluorescent preset assumes a specific tube type. Cheaper tubes drift over their life and never quite match. Verify each preset against a card once, note the correction, and you will know which presets to trust on your usual locations.
Frequently Asked Questions
What Kelvin value should I use for white balance?
Use the Kelvin value that matches your actual light source. Midday sun is roughly 5200K to 5400K, overcast sky about 6000K to 6500K, open shade 7000K to 8000K, and household bulbs around 2800K to 3200K. Enter that number, then watch a gray card and adjust up or down until it reads neutral. Treat these as starting points, not gospel.
Is 5500K always the correct white-balance setting?
No. 5500K suits direct daylight and most studio strobes, which is why it is a useful baseline. It is wrong under tungsten bulbs, most indoor fluorescents, open shade, and evening light. If you are indoors with mixed lighting, a single Kelvin value will never make the whole frame neutral. Pick the value that matches your subject and accept a cast on the background.
Should I use manual white balance or shoot in RAW?
Do both when you can. Manual white balance gets the JPEGs right from the start, which matters when you only keep a small fraction of the frames you shoot. RAW gives you the freedom to change your mind later, because color channels stay separate. Setting white balance manually on a RAW file takes seconds, and the RAW file is your insurance policy.
Why does my camera keep changing white balance?
Auto White Balance analyzes each frame and picks a new correction every time, so the same subject can shift from warm to cool across a sequence. It is designed for handheld mixed situations, not consistency. Switch the mode away from AWB to a preset, Kelvin, or custom slot. If you want to keep the convenience of auto, use the lock option that holds the current white balance between shots.
Can I set white balance manually on a smartphone?
Yes, in the manual or pro mode most phone camera apps now offer. Look for a color temperature slider, a locked white balance option, or an AWB lock icon. Some apps let you set a custom white balance by pointing at a gray card. The capability varies by phone, so check your specific camera app before a session you cannot afford to redo.
How do I correct a green or magenta color cast?
Use the tint, green-magenta, or fine-tune control that sits next to the Kelvin control. Push toward magenta if the image looks green, and toward green if it looks pink, in small steps of two or three on the scale. Fluorescent tubes and mixed interiors usually cause green casts. If your camera has no tint control, fix it in post from a RAW file using the tint slider.
Conclusion
Do this first, before anything else on this page: put your neutral reference in the actual light you are shooting, switch out of Auto White Balance, enter a starting Kelvin value, and nudge it until the card reads as true neutral gray. Then correct tint, check that you have not clipped the highlights, and write the Kelvin and tint numbers down with a note about the light. That single habit removes almost every color problem you would otherwise meet in editing, and it takes about two minutes.