
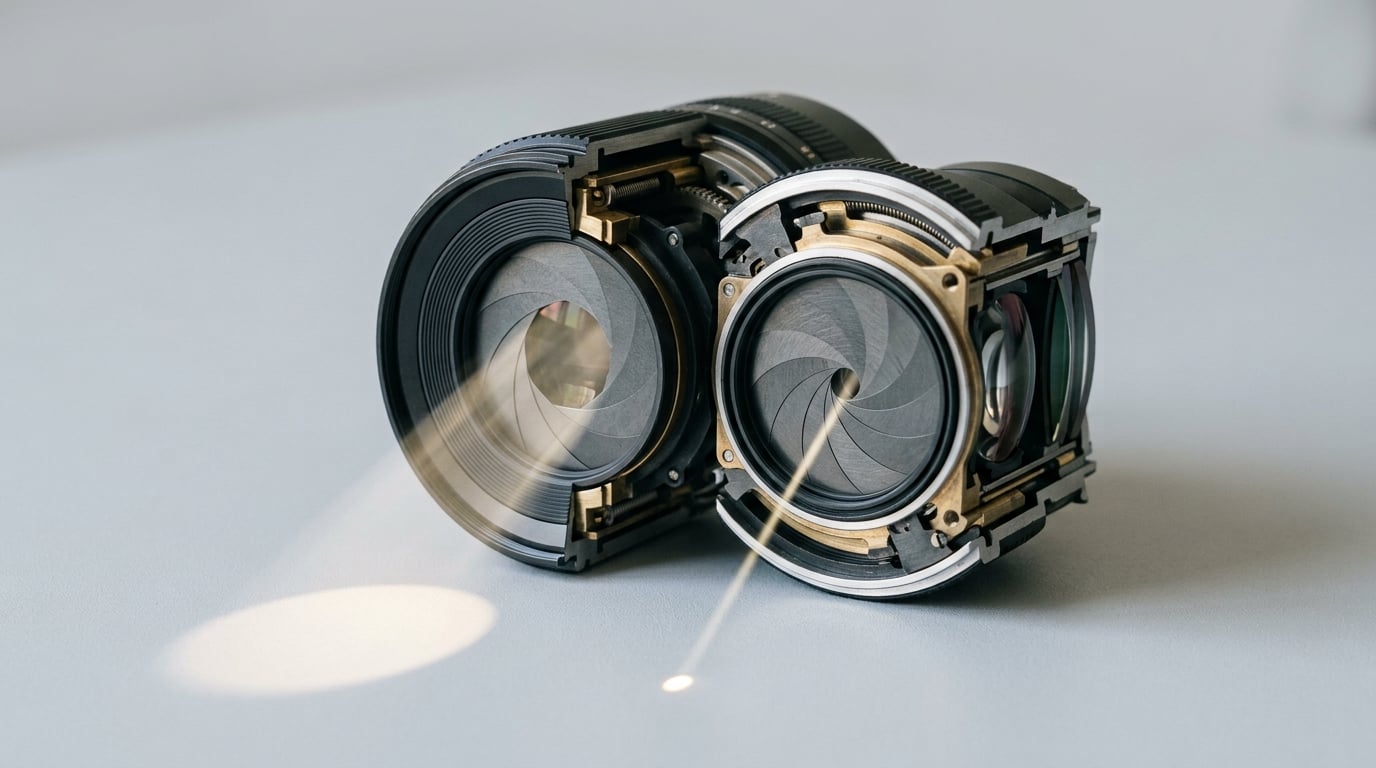
Aperture is the adjustable opening inside your camera lens that controls how much light reaches the sensor, and how much of the scene stays sharp. It is written as an f-number such as f/1.8 or f/8, and the scale runs backwards: a small number means a wide opening. That one oddity is where most beginners get stuck, so let us untangle it. If aperture explained for beginners sounds like dry theory, it is not. The whole idea fits in a paragraph, and everything after that just adds detail to it.
Think about your eye in a bright room versus a dim one. Your pupil physically grows and shrinks to let in the right amount of light, and it also decides what you can focus on. Aperture is that same mechanism, built in metal inside your lens.
Table of Contents
- Aperture Explained for Beginners: What It Is
- What Does an f-Stop Number Mean?
- How Does Aperture Change Light and Depth of Field?
- Wide Aperture vs. Narrow Aperture: What Changes in the Photo?
- Aperture Explained for Beginners: Choosing Your Starting f-Stop
- How Do You Change Aperture on Your Camera?
- Why Does My Background Look Blurred?
- Does a Smaller Aperture Always Produce Better Photos?
- Common Aperture Mistakes and How to Avoid Them
- A Simple Way to Practice Aperture
- Frequently Asked Questions
- Conclusion
Aperture Explained for Beginners: What It Is
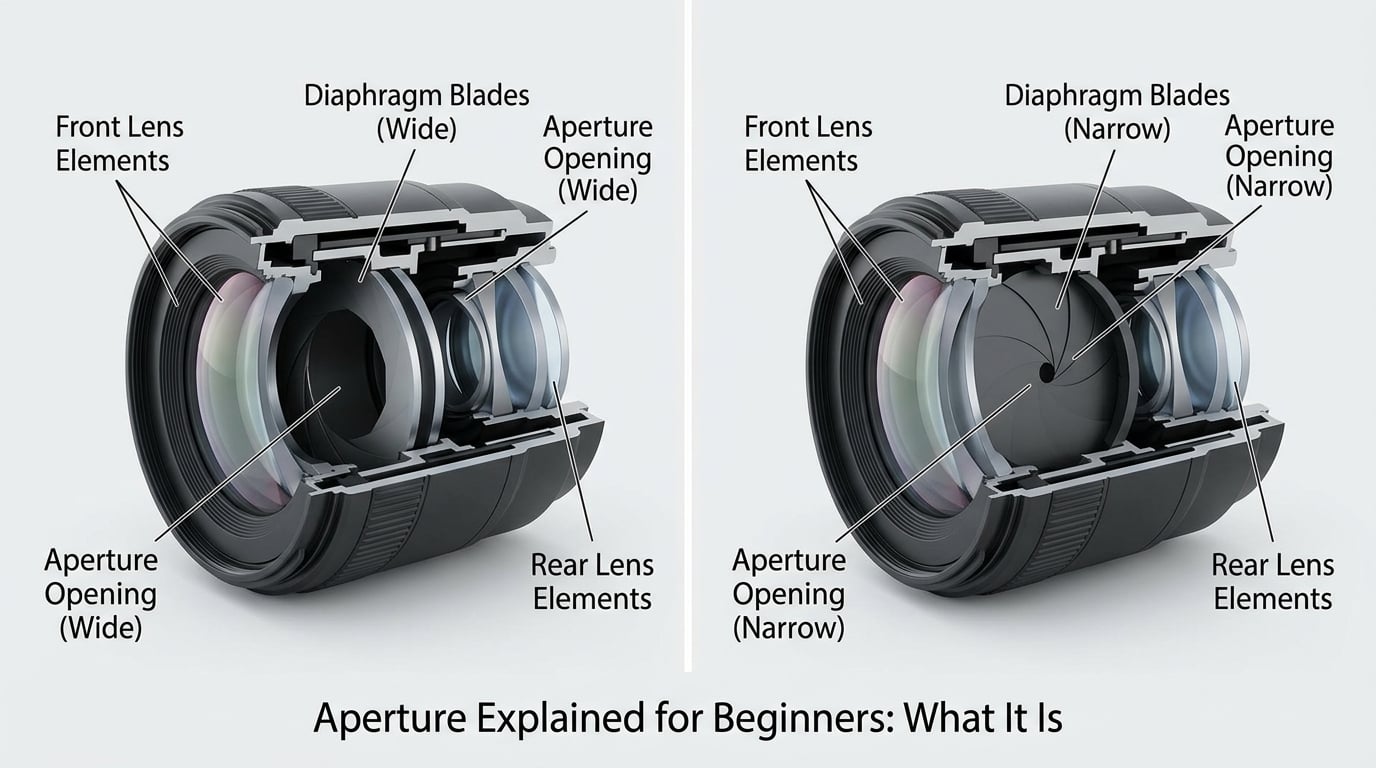
Inside every lens sits a diaphragm, usually a ring of overlapping metal blades that swing open and closed. Wide open, the blades pull back and let a large circle of light through. Stopped down, they close in toward the centre and shrink it.
Aperture controls two things at once, and that is what makes it the most useful setting to learn first:
- How bright the photo is. A wider opening passes more light per second.
- How much is in focus. A wider opening gives a thinner slice of focus, so backgrounds blur out. A narrower opening keeps more of the scene sharp from front to back.
Here is how it differs from the other two settings you will meet. Shutter speed controls how long the sensor is exposed, which decides whether movement freezes or blurs. ISO controls how the camera amplifies the signal, which decides how grainy the shadows look. Aperture controls the size of the hole itself, which decides brightness and focus depth. Aperture is the only one of the three that changes two things at the same time.
What Does an f-Stop Number Mean?
The f-number is a fraction: focal length divided by the diameter of the opening. On a 50mm lens, f/2 means a 25mm-wide opening, f/4 means 12.5mm, f/8 means 6.25mm. Halve the number, double the opening, take in twice the light. That is the whole logic behind the confusing scale.
So when you move from f/2.8 to f/4, the number went up and the hole got smaller. Nobody named it that way on purpose, but you are used to it everywhere else. A lower gear number on a bicycle means more speed, a lower setting on a stove means less heat. Photography is the exception.
Aperture values come in a fixed ladder. Each full stop halves the light and halves the opening area compared with the one before it.
| Full stops | Third stops | Light vs. one stop wider | Where you meet it |
|---|---|---|---|
| f/1.4 | f/1.4, f/2, f/2.8 | 8x more light | Fast prime portraits, low light |
| f/2.8 | f/2.8, f/4, f/5.6 | 4x more light | Standard zoom, street, travel |
| f/4 | f/4, f/5.6, f/8 | 2x more light | Kit zooms, general use |
| f/5.6 | f/5.6, f/8, f/11 | Half as much light | Groups, landscapes in daylight |
| f/8 | f/8, f/11, f/16 | Quarter as much light | Deep focus, starbursts |
| f/11 | f/11, f/16, f/22 | Eighth as much light | Tripod work, macro |
Most cameras show third stops, and kit lenses often click at each one, so f/5.6 sits between f/4 and f/8 on the scale rather than matching either. Once you know the ladder, any f-number you meet on a dial makes sense without a lookup.
How Does Aperture Change Light and Depth of Field?
Start with a portrait of one person against a wall. Shoot at f/1.8 and you get a bright frame, sharp eyes, and a wall that dissolves into soft blur. Shoot at f/8 and the light drops, so the camera has to slow the shutter or raise ISO, but now the person and the wallpaper are both sharp.
Now consider a wide vista from a clifftop. At f/1.8 only a thin band near your feet is sharp and the hills behind it go soft, which looks like a mistake in a landscape. At f/11, the foreground rocks, the middle trees and the far ridge all hold detail, and point lights behind you turn into neat star shapes because the narrow opening breaks each one into a small set of rays.
Low light is where the same setting works in reverse. Indoors at f/1.8 you gather four times the light you would at f/4, which lets the camera keep a shutter speed fast enough to hold the camera still. Narrow down to f/8 in the same room and the shutter drags out, and you get either hand shake or subject movement instead of a usable photo.
These three settings, aperture, shutter speed and ISO, are the exposure triangle. Change one and something else has to give, or the image changes brightness. Aperture is where most people choose to make that trade because it is the one that also shapes the look of the picture.
Wide Aperture vs. Narrow Aperture: What Changes in the Photo?
| f-number | Light | Background | Depth of field | Trade-off |
|---|---|---|---|---|
| f/1.8 | Bright | Very soft, creamy | Thin, often only the eyes | Needs a steady hand or a fast shutter; edges soften at very close focus |
| f/4 | Moderate | Soft | Subject plus a little context | A safe, flexible middle setting |
| f/8 | Dim | Mostly defined | Front to back for a few metres | Shutter slows down; noise appears if you push ISO |
| f/16 | Dark | Sharp | Very deep, needs a tripod at close focus | Diffraction softens fine detail, and blown highlights get harder to control |
Two side effects are worth knowing before you reach for the narrow end. Diffraction is the bending of light around the aperture edges, and it starts eating fine detail somewhere around f/11 on many lenses, becoming obvious by f/22. Sharpness usually peaks earlier than people expect. The wide end has its own issue: shoot a fast prime at f/1.2 and corners and edges can go noticeably soft, which is normal and not a fault.
None of this is a verdict on which aperture is best. A kit zoom at f/8 and a fast prime at f/1.8 are answering different questions, and a good zoom stopped down to f/8 can beat the same zoom wide open at f/1.8 by a wide margin.
Aperture Explained for Beginners: Choosing Your Starting f-Stop
The honest answer to how do I know what to set my aperture to is: decide how much of the scene should be sharp, then pick the widest f-stop that still gives you that, and let the camera solve the rest. Depth of field is the decision, not the number.
| Situation | Start here | Why | Watch out for |
|---|---|---|---|
| Single portrait, blurred background | f/1.8 to f/2.8 | Blurs distractions, keeps focus on the face | Focus on the nearer eye |
| Group of three or four people | f/4 to f/5.6 | Keeps every face sharp at a workable distance | Step back rather than stopping down further |
| Landscape | f/8 to f/11 | Front-to-back detail | Bring a tripod past f/8 if the light drops |
| Street and travel | f/5.6 | Enough focus for a moving subject, still fast enough in shade | Zone focusing at f/8 on a 35mm lens makes street shooting easier |
| Close-up and food | f/5.6 to f/8 | Enough depth for a small object without stacking | Diffraction shows up earlier on smaller sensors |
| Available light indoors or at night | The widest your lens has | Keeps shutter speed high enough to avoid shake | Add a slower shutter on a tripod rather than a narrow aperture |
| Astrophotography | f/2.8 or wider | Collects photons across long exposures | Fast focal ratio increases star trailing at long focal lengths |
Notice how few situations need f/16. Stepping back and using f/5.6 usually keeps more people sharp and avoids the tripod altogether, which is why so many working photographers stop there.
How Do You Change Aperture on Your Camera?
On most cameras the same four steps apply, and the letters on the mode dial are the part people get wrong. Nikons call it A, Canon and most others call it Av, Sony and Fujifilm often use A, Panasonic uses A, and some compacts put aperture control on a ring or a touchscreen instead.
- Turn the mode dial to A or Av. The camera sets shutter speed; you set the aperture.
- Turn the command wheel, dial or lens ring until the f-number changes on the top or rear display. Which control moves it depends on your body: many cameras use the main dial or the rear command wheel, lenses with an aperture ring let you turn the ring directly, and touchscreens let you drag a slider.
- Set ISO on a dial or in the quick menu, rather than letting it float.
- Half-press the shutter and read the shutter speed the camera chose. If it drops below about 1/60th for a handheld shot, add exposure compensation or raise ISO before narrowing further.
In manual mode the order flips: you set both the f-number and the shutter speed, then adjust ISO until the meter reads zero. That is the mode to use when you are working with flash, doing a bracket, or deliberately accepting a long exposure on a tripod.
One practical warning from beginners on photography forums: a variable-zoom lens does not hold a fixed f-number as you zoom. Many kit zooms show f/3.5 at the wide end and slip to f/5.6 or f/6.3 at the long end, so your picture darkens when you zoom in unless you compensate. Constant f/2.8 lenses are built specifically to avoid that.
Why Does My Background Look Blurred?
Background blur, or bokeh, comes from how far out of focus things are, not from the f-number alone. Six things move it, and the big one is often not the aperture at all.
- Distance between the subject and the background. A portrait taken two metres from a wall keeps a flatter background. Take the same portrait ten metres out and the wall dissolves.
- Aperture. Wider gives more blur.
- Focal length. A 200mm lens blurs far more than a 35mm at the same f-number and the same framing.
- Sensor size. A larger sensor produces a shallower-looking field at equivalent settings. This is why phone cameras with a small sensor and a fixed opening struggle to get that look.
- The lens itself. The shape of the out-of-focus highlights, or bokeh, depends on the lens design and the number and shape of the aperture blades. Round blades make round highlights; straight blades make polygonal ones.
So a low f-number on a wide-angle lens at close range can look flat, and a slow lens at 200mm can look dramatic. Blur is a relationship between the lens, the sensor, your distance and the setting.
Does a Smaller Aperture Always Produce Better Photos?
No. A narrower aperture buys depth of field, and it always charges you for it in light. Close down two stops and the camera either needs a shutter twice as slow, an ISO twice as high, or a flash, or the frame gets darker. Slower shutter means shake or motion blur, higher ISO means visible noise, flash means harder, flatter light.
The popular shortcut is f/5.6 to f/11 as the sharpness range. That is a good starting point, not a law. Every lens has its own sweet spot, and you can find yours in about ten minutes: shoot a flat, evenly lit subject such as a printed chart on a wall at f/2, f/2.8, f/4, f/5.6, f/8, f/11 and f/16 with ISO at its base value and a tripod or fast shutter, then compare the same crop at 100 percent. Look at the centre and the corners separately. On many kit zooms the best result sits around f/8, on fast primes a stop or two wider, and by f/16 most lenses have lost more to diffraction than they gained.
What counts as sharp also depends on how you view the file and how large you print. A frame that looks soft on a bright monitor can look clean in a small print, and the centre of a frame is almost always sharper than the edges.
Common Aperture Mistakes and How to Avoid Them
- Stopping down to f/16 because it should be sharper. Past about f/11, diffraction softens fine detail more than the extra depth of field helps. Step back instead of stopping down, or shoot at f/8 and focus carefully.
- Choosing a narrow aperture in dim light. The camera slows the shutter to compensate and you get a blurred frame. Widen first, then raise ISO. Reversing the two is the single most common cause of unusable night photos.
- Confusing A or Av with manual mode. In aperture priority the camera picks the shutter speed and you may need exposure compensation. In M you own both. Starting in A or Av and watching the shutter speed is the fastest way to learn the trade-off.
- Ignoring the limits of your lens. A 50mm f/1.8 cannot reach f/1.4, and many kit zooms top out at f/5.6 at the long end. A fast prime that stays at f/1.8 across the whole zoom range is a real advantage, and that is what the constant-aperture designation means.
- Checking sharpness only in the centre. Corners and edges are softer on almost every lens wide open and usually sharpen up when you stop down. Judge the whole frame.
A Simple Way to Practice Aperture
Ten minutes, one subject, three settings. Put a mug or a small plant on a table near a window with a textured wall or some clutter behind it. Shoot it at f/2.8, f/5.6 and f/11 without moving anything else, using a tripod or a window ledge to rest on so shutter speed is not the variable.
Then put the three frames side by side at the same size and look for five things: how bright each one is, how much of the background stays legible, how much of the subject is sharp from front to back, what the shutter speed did, and whether noise appeared. At f/2.8 the wall is a soft wash and the light is generous. At f/5.6 the balance is usually the most natural. At f/11 the whole wall snaps into focus and the frame is darker, and if you zoom in on the mug you will usually see the softness diffraction brings.
Repeat the exercise outdoors and again at night. The exposure cost of each stop becomes obvious fast, and after a couple of rounds you will be choosing the f-stop because of the picture you want rather than because it was the first number on the dial.
Frequently Asked Questions
Is focal length the same as aperture?
No. Focal length is how wide or long the lens sees, written in millimetres like 35mm or 200mm. Aperture is the size of the opening inside that lens, written as an f-number like f/2.8. A 200mm lens at f/2.8 gives a much narrower view and far more background blur than a 35mm lens at f/2.8, which is why telephoto lenses are popular for portraits.
What is the best aperture for portraits?
For a single person with a blurred background, start around f/1.8 to f/2.8 on a short telephoto such as an 85mm. Focus on the nearer eye, and check the shutter speed stays fast enough to avoid shake. For a group, move up to f/4 or f/5.6 so every face holds detail, and step back rather than stopping down if the back row is soft.
Does using a smaller f-number make an image sharper?
A smaller f-number means a wider opening and more light, not automatically more sharpness. Very wide openings often soften the corners of the frame, while stopping down past about f/11 adds diffraction softness. Most lenses are sharpest somewhere around f/5.6 to f/8, and each lens has its own sweet spot that takes a few minutes of testing to find.
What happens if my lens cannot reach the selected aperture?
The camera simply uses the closest value the lens can reach. If you select f/1.4 on a 50mm f/1.8 lens, the aperture opens as far as f/1.8 and the frame comes out about one stop darker than you asked for. In aperture priority the camera compensates by raising the shutter speed or ISO. The same happens in reverse when a variable-zoom lens cannot stay at its widest f-number as you zoom in.
Is a full-frame camera better for background blur?
A larger sensor gives a shallower-looking field at equivalent settings, so full-frame blurs backgrounds more at the same framing, focal length and f-number. A Micro Four Thirds camera has to reach roughly f/1.4 to match the look of full-frame at f/2. Sharpness and noise handling differ too. Neither is better in general: the smaller system is easier to carry, and blur is only one of many things a photo needs.
Conclusion
Aperture is the opening inside your lens, and it is the setting that changes brightness and depth of field together. Start in A or Av, pick the f-stop that gives you the amount of focus you want, and let the camera handle the rest.
One assignment before anything else: photograph the same subject at f/2.8, f/5.6 and f/11, then compare the light, the background and how much stays sharp. Ten minutes of that beats a dozen tutorials, because you will see the f-stop ladder do its work instead of taking it on trust.