

Depth of field is the amount of distance in front of and behind your focus point that still looks acceptably sharp in the final photo. Open the aperture wide and that sharp zone collapses to a couple of centimetres; stop down and it stretches across an entire valley. Once you can predict which way each control moves the zone, choosing settings stops being guesswork.
Most people learn depth of field as a list of rules and still cannot predict what happens when they press the shutter. This guide takes the three variables that actually move the zone of sharpness and pairs each one with a photograph you could shoot this weekend.
Every example below uses the same scene, the same light and the same focus point, changing only one thing at a time. That is the whole trick. If you hold everything else steady, the difference you see is caused by the variable you moved, not by luck or by a different day.
Table of Contents
- Depth of Field Explained with Examples at a Glance
- What Is Depth of Field in Photography?
- How Do Aperture, Focal Length, and Focus Distance Change It?
- Depth of Field Examples in Real Photography
- How to Control Depth of Field in Your Camera
- How to See the Area of Sharpness Before Shooting
- Depth of Field and Bokeh: What Is the Difference?
- Common Depth of Field Mistakes and Quick Fixes
- Frequently Asked Questions
- Is a smaller f-number always better?
- Does a wider lens always produce more depth of field?
- Why does my camera show a smaller focus area than the photograph’s actual depth of field?
- What aperture should I use for a landscape with a very near foreground?
- Can depth of field be increased in editing?
- How many photos are usually needed for a focus stack?
- Conclusion
Depth of Field Explained with Examples at a Glance
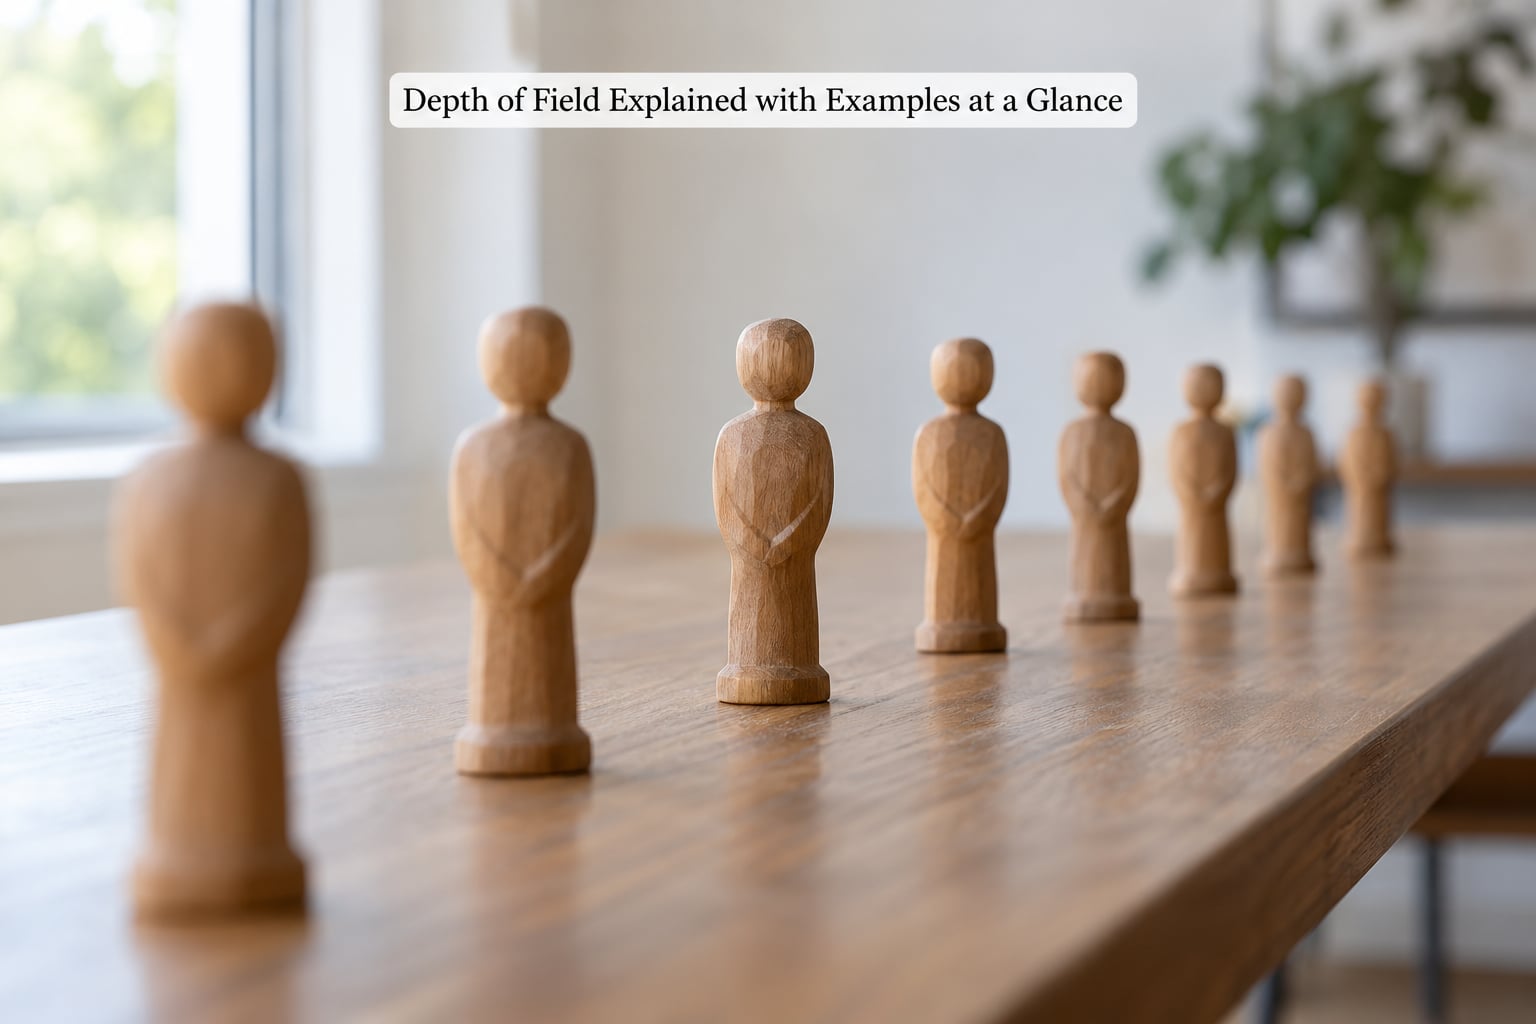
Depth of field is a physical zone, not a single plane. Your lens focuses at one distance, and everything inside a range around that distance projects onto the sensor as a small enough blur that your eye still reads it as sharp. Here is the short version of what changes that range.
| Variable | Move it this way | Area of sharpness does this | What it looks like |
|---|---|---|---|
| Aperture | Wider (f/1.8) | Shrinks sharply | Blurred background, creamy out-of-focus highlights |
| Aperture | Narrower (f/11) | Grows steadily | Foreground grass to distant hills all readable |
| Focal length | Longer at the same position | Shrinks slightly | Background looks bigger and nearer, blur grows |
| Focal length | Shorter at the same position | Grows slightly | More of the scene fits in the frame, everything smaller |
| Focus distance | Move closer to the subject | Shrinks sharply | Only a thin slice of the subject stays sharp |
| Focus distance | Step back from the subject | Grows sharply | Whole subject sharp, background often still soft |
| Subject-to-background gap | Move the subject away from the wall | Sharp zone same, blur grows | Background melts away even at f/8 |
Notice the last row. Depth of field describes the zone of sharpness, not the amount of background blur, and the two come apart as soon as you have space behind your subject.
What Is Depth of Field in Photography?
Depth of field is the range of distance from the nearest point to the farthest point that appears acceptably sharp in an image. Sharp is a human judgement, not a switch. Somewhere past the far edge of the zone, detail starts to soften; somewhere before the near edge, it does the same. The zone is drawn where the softening is still too small to notice at normal viewing size.
That word acceptably matters more than beginners expect. A print viewed at arm’s length on a desk and the same file printed two metres wide on a wall have different sharpness standards, so the same photograph has two different depths of field depending on how you look at it. Cameras calculate the zone against a fixed standard, usually a blur of about 0.03 mm on the sensor, which is why an on-screen depth of field readout is a useful guide and never the final word.
Depth of field is also not the same as the depth of the scene. A person standing two metres in front of a mountain wall has a mountain wall that is very deep and a depth of field that might be a few centimetres. The scene stretches into the distance; the sharp zone does not.
One more wrinkle: a subject can stay visibly sharp slightly outside the calculated zone. The calculation is built around worst-case conditions and a strict blur threshold, while your eye is drawn to contrast, edges and colour, not uniform blur. Fine detail at the edge of the zone often looks fine in a real frame, especially when you are not enlarging it. Photographers who trust the readout to the centimetre usually end up stopping down more than the picture needs.
How Do Aperture, Focal Length, and Focus Distance Change It?
Three variables move the zone of sharpness: aperture, focal length, and how far away you are when you focus. They interact, and only one of them behaves the way most people expect.
Sensor format gets mentioned constantly in this conversation and it changes almost nothing on its own. A 50 mm lens at f/2.8 produces the same depth of field on a full frame body and on an APS-C body if you stand in the same place. What changes is your field of view, and therefore how far back you need to stand to frame the same head and shoulders, which is a different question entirely.
How Does a Wider Aperture Change Depth of Field?
A wider aperture makes the depth of field smaller, and it does it faster than most people expect. Shoot one static subject at f/1.8, then f/2.8, then f/4, then f/5.6, then f/8 with everything else locked, and the sharp zone at f/1.8 may be barely a centimetre or two deep. By f/8 it has grown many times over.
The reason is physical rather than mystical. A wide aperture lets light arrive from a wide cone of angles, so the circle of confusion produced by an object slightly in front of or behind the focus point spreads out quickly as you move away from that point. Stop the aperture down and the cone narrows, so the circles stay small over a much longer stretch.
Here is the practical example. Put a row of three identical objects on a table, 5 cm apart, and focus on the middle one. At f/1.8 the front and back objects may be unreadably soft. At f/4 they start to hold their edges. At f/8 the whole row is usable. At f/16 the table edge behind them also starts to look sharp, which is exactly the point at which a portrait background stops doing its job.
If you have not worked through f-stops on their own yet, my aperture explained for beginners guide covers the light side of the same dial, which is worth reading alongside this one.
How Does Focal Length Affect Depth of Field?
At the same camera position and the same subject distance, a longer focal length gives a slightly shallower depth of field than a shorter one. The effect is real but modest, and it is almost never the reason your portrait background looks the way it does.
Switch from 35 mm to 85 mm while standing exactly where you were. The zone of sharpness tightens a little. What changes much more is the framing: at 85 mm your subject fills the frame and the background appears larger, closer and more compressed. Blur you were barely aware of at 35 mm now fills the frame behind the head. Same aperture, same position, a very different picture.
This is where the common rule about telephoto lenses having shallow depth of field goes wrong. Step back and use the 35 mm at the distance needed to get the same head-and-shoulders framing the 85 mm gave you from closer in. The depth of field is now deeper, and the compression effect is gone too, so the two shots look entirely different.
The honest summary is that focal length is the weakest of the three levers when you are standing still, and a strong one when it changes where you stand. Choose focal length for framing and perspective, then manage sharpness with aperture and distance.
How Does Focus Distance Affect Depth of Field?
Focusing closer makes the depth of field smaller. Focusing further away makes it larger, and it does so at roughly twice the rate of the other two variables, which makes it the most powerful control you have.
Two steps forward at a portrait distance can halve the sharp zone. Two steps back can double it. This is why a portrait taken at f/2.8 with the camera three metres away often looks sharper on the face than the same portrait taken at f/2.8 from two metres, even though most of the extra sharpness sits on the back of the head and the shoulders rather than on the eyes.
It also means the depth of field readout on an older camera or a manual lens is a genuinely useful tool rather than a decoration. Set the distance ring to 1.5 metres, read the far edge of the zone, set it to 6 metres, read again. That single comparison teaches the relationship faster than any table of numbers.
Watch for the effect when you zoom. A zoom lens changes focal length, but it does not change the focal length index, and it is often a little closer than you think at the long end. Many zooms lose a little sharpness and gain a little blur creep at full extension because their minimum focus distance is nearer than the lens mark suggests.
Depth of Field Examples in Real Photography
Four situations cover almost everything you will shoot. Each has a different answer, and each answer is a creative choice rather than a technical limit.
Landscape Example: Keeping the Scene Sharp
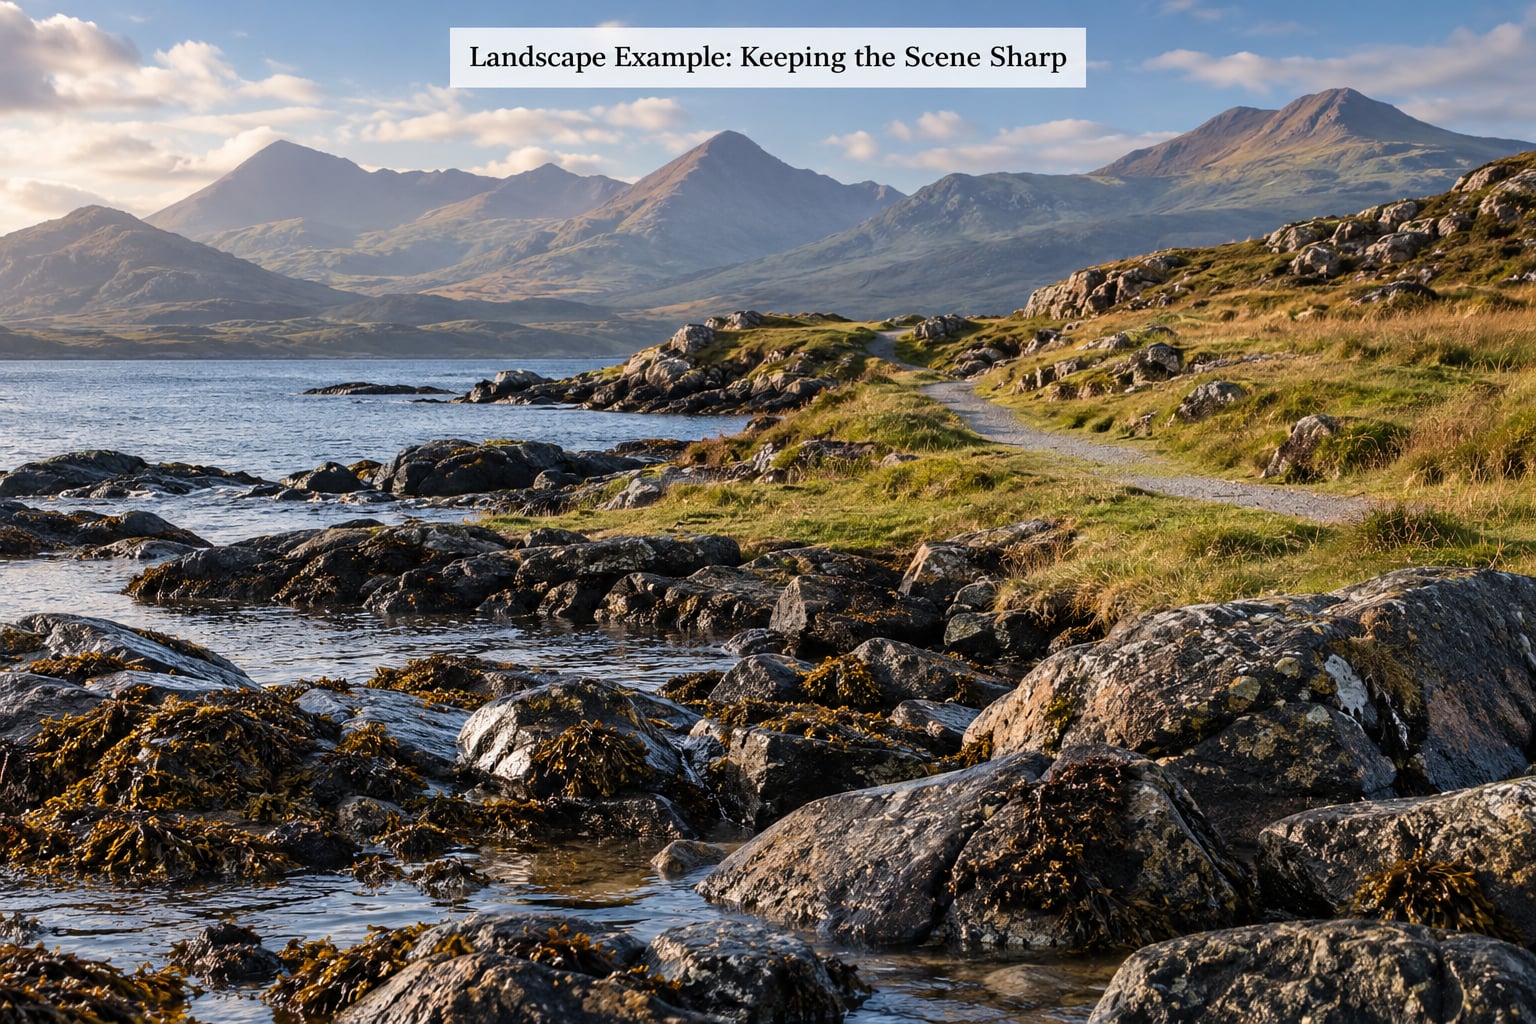
Front-to-back sharpness in a wide scenic scene is the classic case for stopping down and focusing carefully, because you are usually trying to hold a near object and a distant one in the same frame. Start at f/8 or f/11, focus roughly a third of the way into the scene, and check the near foreground in the magnified viewfinder before you commit.
Focusing a third of the way in is a rule of thumb, not a law. It works because it throws the near limit behind your foreground object and the far limit in front of your horizon, so both sit inside the zone. Move closer to the foreground and the near limit can creep in front of it, which is the most common reason a wide scene has a soft front edge nobody planned.
If your foreground element is only a few metres away and your horizon is a few kilometres away, no single focus distance with a normal lens covers both. That is where focus bracketing earns its place: shoot three or five frames from near focus to far focus with everything else identical, then blend them. You are photographing the same static scene, so nothing moves between frames except the focus point.
Portrait Example: Separating Subject from Background
A portrait usually wants the eyes and the face sharp, the hair edge readable, and everything behind the subject dissolved. Aperture and subject-to-background distance do most of that work. A portrait lens wide open at f/1.8 with the subject two metres from a wall still gives you a recognisable wall behind the head, because the wall is only two metres further away.
Walk the subject five metres further from the wall and the background moves far enough out of the zone to soften properly, while the face stays sharp because it is the focus plane. If you own a light or two, my guide to shooting portraits with one light covers keeping the face properly exposed while you work this out.
Watch the near edge. At f/1.8 with the face as the focus point, eyelashes and the tip of the nose can fall outside the zone, and nose-forward faces suffer most. If a face keeps coming out with a soft nose, close the aperture by a stop or step back rather than hunting for a different focus point.
Product Example: Isolating a Single Detail
Product work is where depth of field explained with examples becomes easiest to see, because the subject is rigid and the camera does not move. A watch face fills the frame, focus sits on the crystal, and you decide how much of the case and strap survives.
Use a longer focal length than feels necessary. Because the camera sits further back, the compression keeps the shape honest, and the depth of field at the same framing ends up more forgiving than a close wide-angle setup would be. A macro lens gives real magnification but a punishingly thin zone, so it is usually the wrong tool for a product frame that needs an entire object sharp.
Tilt-shift lenses solve a different problem here. They keep the plane of focus parallel to the sensor, which lets you photograph a tall bottle at f/8 with the top and the base equally sharp when a conventional lens at that angle would only ever manage the middle.
Macro Example: Extending Focus with Focus Stacking
Close-up photography breaks the normal rules because magnification itself shrinks the depth of field. At high magnification a razor-thin zone of a few millimetres covers the whole frame, and no aperture setting fixes that. Focus stacking is the answer, and the steps are simple.
- Mount the camera on a tripod and switch off every form of image stabilisation, including the in-lens and in-body systems.
- Set focus to manual and turn autofocus off completely.
- Fix the aperture and expose manually, including ISO, so exposure does not shift between frames.
- Focus on the nearest part of the subject and take the first frame.
- Move the focus by a small, overlapping step and shoot again, repeating until you have passed the far edge of the subject.
- Align and blend the frames in your software, then crop and clean up any edge artefacts.
Overlap is the step people skip and the one that causes the gaps. If each frame’s sharp zone only touches the edge of the next, alignment shifts during blending and you get soft seams through the middle of the subject. Many mirrorless bodies have a focus bracketing mode that shoots the sequence for you, which removes the fiddly part.
How to Control Depth of Field in Your Camera
Here is the workflow I use when depth of field matters to the shot rather than being an afterthought.
- Decide the sharpness story first. Isolate the subject with a thin zone, or hold a range of distances crisp?
- Choose the aperture that serves that decision, and set it before anything else. It is the control you will not want to change.
- Choose a focus point that puts the subject where you want it, using a single-point or spot autofocus area rather than a wide one.
- Meter from that point with spot or centre-weighted metering so a bright background does not trick the exposure into stopping down.
- Focus, then check the magnified view at the near and far edges of what you care about before shooting the real frame.
- Adjust distance next, not focal length, if the zone is still too tight or too loose.
Aperture priority, marked A or Av on most dials, is the mode to learn first. You pick the aperture and the exposure system handles shutter speed and ISO, which keeps your attention on the variable that actually shapes the picture. Manual mode matters more once you start focus bracketing or stacking, because consistent exposure between frames is the whole job.
The trade-off with a narrow aperture is that it costs light, which costs shutter speed or ISO. Once the shutter speed starts dragging you into needing a tripod, or ISO starts climbing far enough to soften fine detail, you have run out of depth of field to spend. My shutter speed guide covers that second variable in detail.
| Genre | Starting aperture | Focus placement | The reason |
|---|---|---|---|
| Scenic and wide vista | f/8 to f/11 | A third into the scene | Keeps foreground and horizon together |
| Portrait | f/1.8 to f/4 | Nearest eye | Isolates the face from the background |
| Street and candid | f/5.6 | Hyperfocal, or the second plane | Acceptable sharpness from about two metres to infinity |
| Product | f/8 to f/11 | Centre of the item | Holds the whole object while a tripod carries the light |
| Macro | f/8 to f/16, stacked | Front then step through | Magnification leaves no alternative |
| Wildlife and sports | f/5.6 to f/8 | Eye or near miss | Enough light for a fast shutter and the tracking eye |
These are starting points, not rules. Every one of them moves when the light, the sensor and the distance change.
How to See the Area of Sharpness Before Shooting
The most useful depth of field tool is free and always present: the magnified live view or viewfinder. Zoom in on the near edge of what you care about, confirm it is sharp, then zoom to the far edge and confirm again. Ten seconds of that replaces any amount of guesswork.
Beyond that, four tools are worth learning.
Focus peaking highlights in-focus areas with coloured edges in live view or during playback. It is fast and works in dim light where you would struggle to judge magnification by eye. It tells you what is sharp, not how sharp, so treat a solid, even outline as sharp and a dotted or flickering one as borderline.
Depth of field preview, on the button marked DoF or the icon with a rectangle inside a rectangle, stops the aperture down to your chosen setting so you see the real background blur before you shoot. On mirrorless cameras you get the same effect by pressing a depth of field preview touch control. It is accurate, and it is also dark, so many people use it to judge blur rather than to focus.
Focus indicators such as a green dot or a focus distance readout give a number, usually rounded to the nearest metre, which sounds precise and is not at portrait distances. Two people standing 1.8 and 2.1 metres away may show the same figure.
Hyperfocal focusing removes the readout entirely. Focus at the hyperfocal distance for your focal length, aperture and sensor and the depth of field runs from half that distance to infinity. Manual focus lenses often have a depth of field scale engraved next to the distance ring with coloured lines for common apertures; setting the matching line to the index is all it takes. The hyperfocal figure changes with aperture, which is why the lines differ from one colour to the next.
Depth of Field and Bokeh: What Is the Difference?
Depth of field controls how much of the scene looks acceptably sharp. Bokeh describes how the blurred parts look. One is a quantity and the other is a quality, and improving one does nothing for the other.
Where bokeh earns its name is the out-of-focus highlights. A distant light source, judged by the shape and brightness of the disc or polygon that records it, tells you about the lens and the aperture. Wide apertures with nine or more rounded blades render bright points as smooth circles; stopping down turns them into polygonal shapes because the aperture itself is in the image. A catadioptric-style ring or a mirror lens produces a bright ring around each highlight for a completely different optical reason.
Blur that fills the frame evenly and hides the background is not automatically flattering. Smooth, even blur with no visible hard edges reads as creamy; busy, high-contrast blur with recognisable shapes competing with the subject reads as distracting. Distance is usually a bigger lever than lens design here. Moving the subject further from the background increases blur at the same aperture and blur quality, which is why the cheapest portrait setup in the world is a wall three rooms away.
Common Depth of Field Mistakes and Quick Fixes
Blurred subject edges on a portrait. The near limit of the zone is falling behind the nose or the eyelashes. Stop down one stop, or step back a little, and check the near edge magnified before shooting.
Background still sharp in a shot meant to isolate. The subject is standing too close to what is behind them. Move the subject, not the aperture. Opening up another stop only makes the whole image darker and barely changes a background that sits inside the zone.
Focus hunting or missed focus in low light. A very wide aperture gives the autofocus system very little to work with, and it struggles when it cannot find edges to lock onto. Stopping down to around f/4 gives it more usable light and more depth of field, and adding a little light beats fighting the camera in the dark.
Everything soft at f/22. Diffraction. Past roughly f/11 on many lenses, bending light through the tiny opening softens every point of the image, so you lose more overall sharpness to diffraction than you gain in depth of field. Check the frame at f/8 and f/11 before reaching further.
Soft or misaligned focus stacks. Usually one of three things: stabilisers left on, exposure changing between frames, or too little overlap between the frames. Fix all three and the seams disappear.
Zooming in to check detail and finding it is softer than expected. Sensor shake, a slow shutter, or a high ISO. Magnified review makes all three obvious in a way the back of the camera does not.
Frames that look sharp on the camera and soft in the software. The camera applies sharpening to the preview and the JPEG. Turn off any in-camera extra sharpening when you shoot RAW and judge the files on a proper screen instead.
Frequently Asked Questions
Is a smaller f-number always better?
No. A smaller f-number gives a shallower depth of field and more background blur, which suits portraits and detail work. It also costs light, makes autofocus less reliable in dim conditions, and can leave the tip of a nose or an eyelash outside the sharp zone. Pick the aperture that serves the picture, then stop down only as far as the light and your shutter speed allow.
Does a wider lens always produce more depth of field?
At the same focus distance and the same f-number, a wide lens does give a slightly deeper zone of sharpness than a telephoto. The difference is modest, though, and it is usually outweighed by everything else that changes when you swap lenses. The bigger effect comes from moving the camera: a wide lens lets you frame close to the subject, and that closeness is what shrinks the zone.
Why does my camera show a smaller focus area than the photograph’s actual depth of field?
The readout calculates the zone against a strict standard, about 0.03 mm of blur on the sensor, and it assumes you are judging the print at a normal viewing distance. Your eye is drawn to edges and contrast rather than uniform blur, so real frames usually look acceptable a little beyond the calculated limits. Treat the number as a conservative guide and confirm with magnified live view.
What aperture should I use for a landscape with a very near foreground?
Start at f/11 and focus about a third of the way into the scene, then check the near foreground and the horizon magnified before shooting. If the near element is only a couple of metres away, no focus point may cover both, so bracket two or three frames from near focus to far focus and blend them. Watch the trade-off: at f/16 diffraction starts eating the detail you stacked for.
Can depth of field be increased in editing?
Not optically, and not convincingly. You can mask a blurred area and paste sharp detail into it, which works occasionally when the sharp region is small and clean, such as sharpening a single eye in a portrait. Anything beyond that produces halos, repeated texture and obvious cut-out edges. Changing the picture in a different frame is the only real way to get more depth of field, which is what focus stacking does.
How many photos are usually needed for a focus stack?
Three to five frames covers most macro subjects, and small insects or stacked products can take ten or more. The count depends entirely on how thin the zone is at your magnification and how long the subject runs from front to back. Watch the total depth you need, divide it by the sharp zone at your chosen aperture, and take one extra frame at each end for margin.
Conclusion
Aperture, focal length and focus distance all move the zone of sharpness, but they are not equally strong. Focus distance changes it fastest, aperture changes it predictably in clean stops, and focal length mostly changes where you end up standing. Pick the aperture first, adjust distance to fix the zone, and choose the focal length for framing.
Your first exercise takes one afternoon. Set up a static subject, lock the camera on a tripod, and shoot the same frame at f/2.8, f/4, f/5.6, f/8, f/11 and f/16 with the focus distance and framing untouched. Line the six results up on one screen and the relationships click permanently. Do it once and you will never again wonder why the background did not blur.