
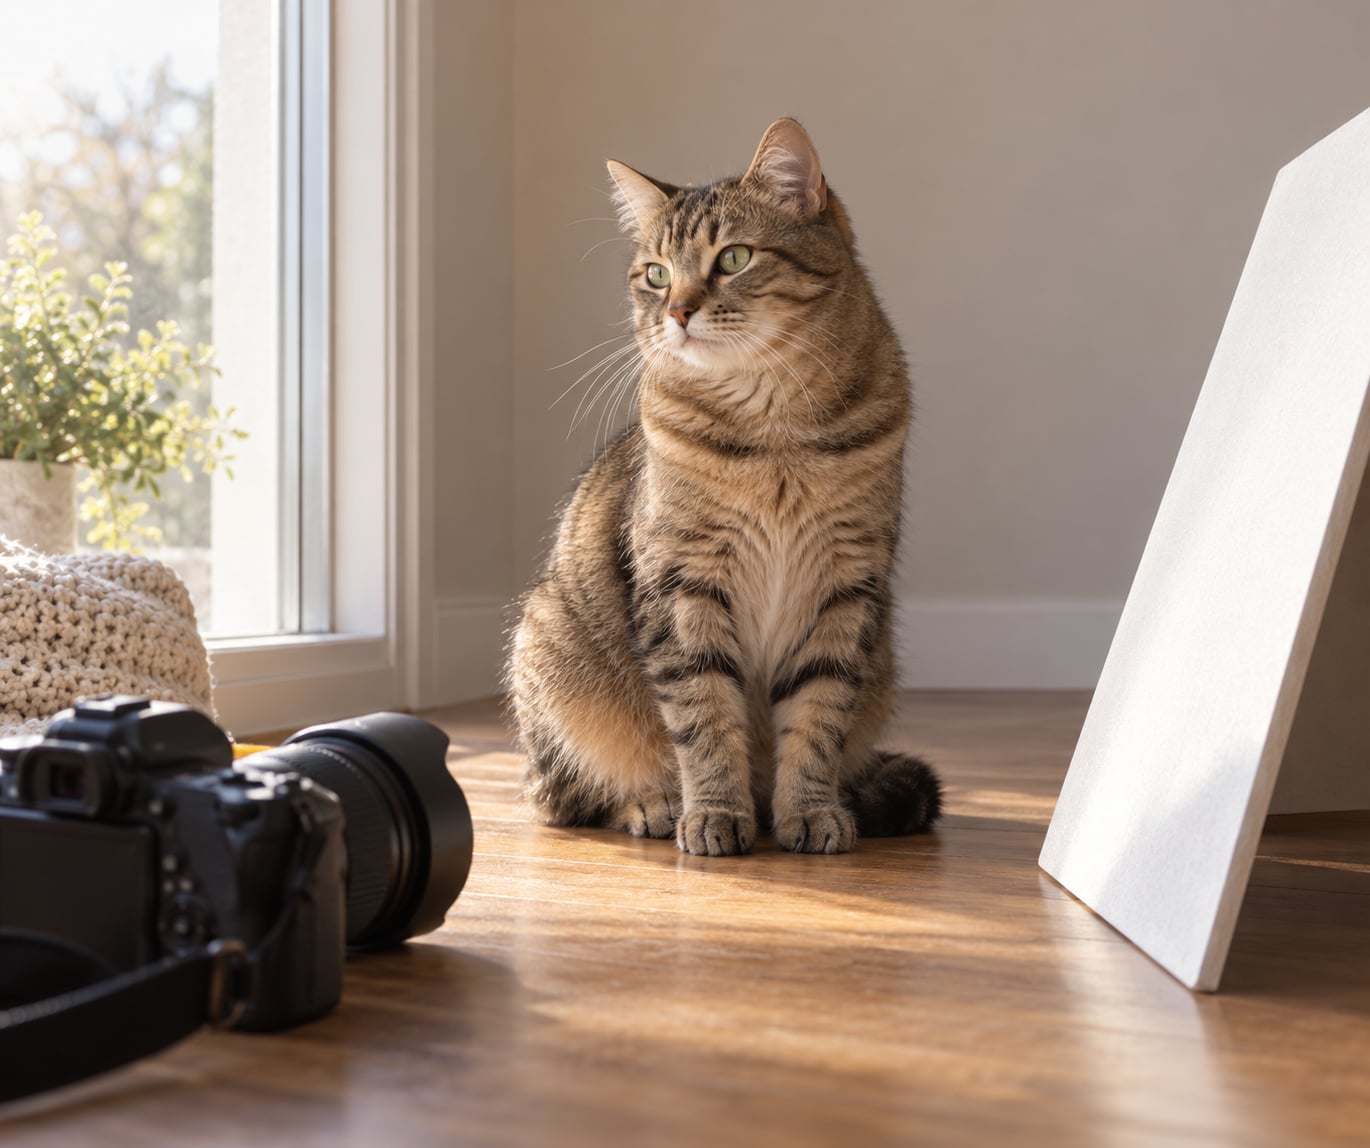
How to photograph cats comes down to five things: get down to the cat’s eye level, use a shutter speed of 1/500s or faster, focus on the nearest eye, light your cat with soft indirect daylight instead of flash, and shoot short bursts while you wait. None of that needs studio gear. A phone and a quiet room will get you most of the way.
The part nobody tells you is that cats are not subjects. They are participants. You cannot direct one, you cannot predict it, and you cannot rush it. What you can do is set up the light, get low, hold the focus point steady, and let your cat come to you. That changes everything about how the session feels — for both of you.
Before you lift the camera, run this ten-second check:
- Room quiet, doors closed, other pets out of the room
- Cat’s favourite blanket or perch already in the frame area
- Window light coming from one side, not from behind your back
- Feather toy or treats within reach of your free hand
- Camera set to burst, RAW if available, shutter at 1/500s
A full session should take ten to fifteen minutes. After that, most cats have had enough, and a tired cat is a hiding cat.
Table of Contents
- What You Need
- Step-by-Step
- 1. Prepare a Calm, Familiar Space
- 2. Let the Cat Settle Before Photographing
- 3. Use Light to Reveal Fur and Eyes
- 4. Choose the Right Camera Settings
- 5. Focus on the Nearest Eye
- 6. Compose Portraits Around the Cat’s Personality
- 7. Capture Movement: How to Photograph Cats Mid-Pounce
- 8. Check the Histogram and Protect Highlight Detail
- 9. Review, Edit and Finish the Images
- Common Mistakes
- Frequently Asked Questions
- How to Photograph Cats in Your First Ten Minutes
What You Need
The beginner kit is short. You need a camera with a manual or semi-manual mode, a window, and something your cat likes.
Camera. Any interchangeable lens camera or phone works. A phone in portrait or ProRAW mode gives you more latitude than you would think, especially in low light. What matters more than the sensor is whether you can set a shutter speed and lock focus on one spot.
Lens. A short telephoto around 85mm to 135mm gives you distance from the cat while keeping the background soft. Shooting from across the room matters with shy animals — a cat that feels cornered bolts, and you get a blurry frame of a doorway.
Light. A window is the whole lighting rig. Optional: a white reflector card or a piece of white foam board to bounce fill into the shadow side of the face.
Background. A plain sheet, a blanket, or a bare wall. Contrast matters more than colour — a white cat on a pale blanket disappears, and a black cat on a dark sofa turns into a blob.
Cat-side items. Feather wand, treats your cat actually likes, and the blanket it sleeps on. Nothing that can be knocked over, chewed or swallowed is worth the risk; skip tinsel, string and small loose props.
Advanced options are a softbox or LED panel for evening sessions, a tripod for low-light static work, and a lens hood if you shoot near windows where flare is a problem.
Step-by-Step
1. Prepare a Calm, Familiar Space
Pick the quietest room with the best light, usually the one with the biggest window. Close the door, move breakables off the floor, and clear anything the cat could knock over mid-session.
Put the cat’s own blanket or perch in the shooting spot before you start. You are working with the cat’s preferences, not against them. A familiar surface gives the session a stable starting point, and it removes the excuse to bolt.
2. Let the Cat Settle Before Photographing
Set your camera down for the first two or three minutes. Do not chase, do not call the cat’s name in a bright tone, and do not follow it around the house. Sit still and let the cat come over on its own terms.
Calm body language is the whole technique here. Slow movements, no sudden arm lifts, and a lens that stays low and pointed slightly down rather than straight at the face. Holding still at the cat’s level beats chasing it, and the frames you get while you wait are usually the better ones.
3. Use Light to Reveal Fur and Eyes
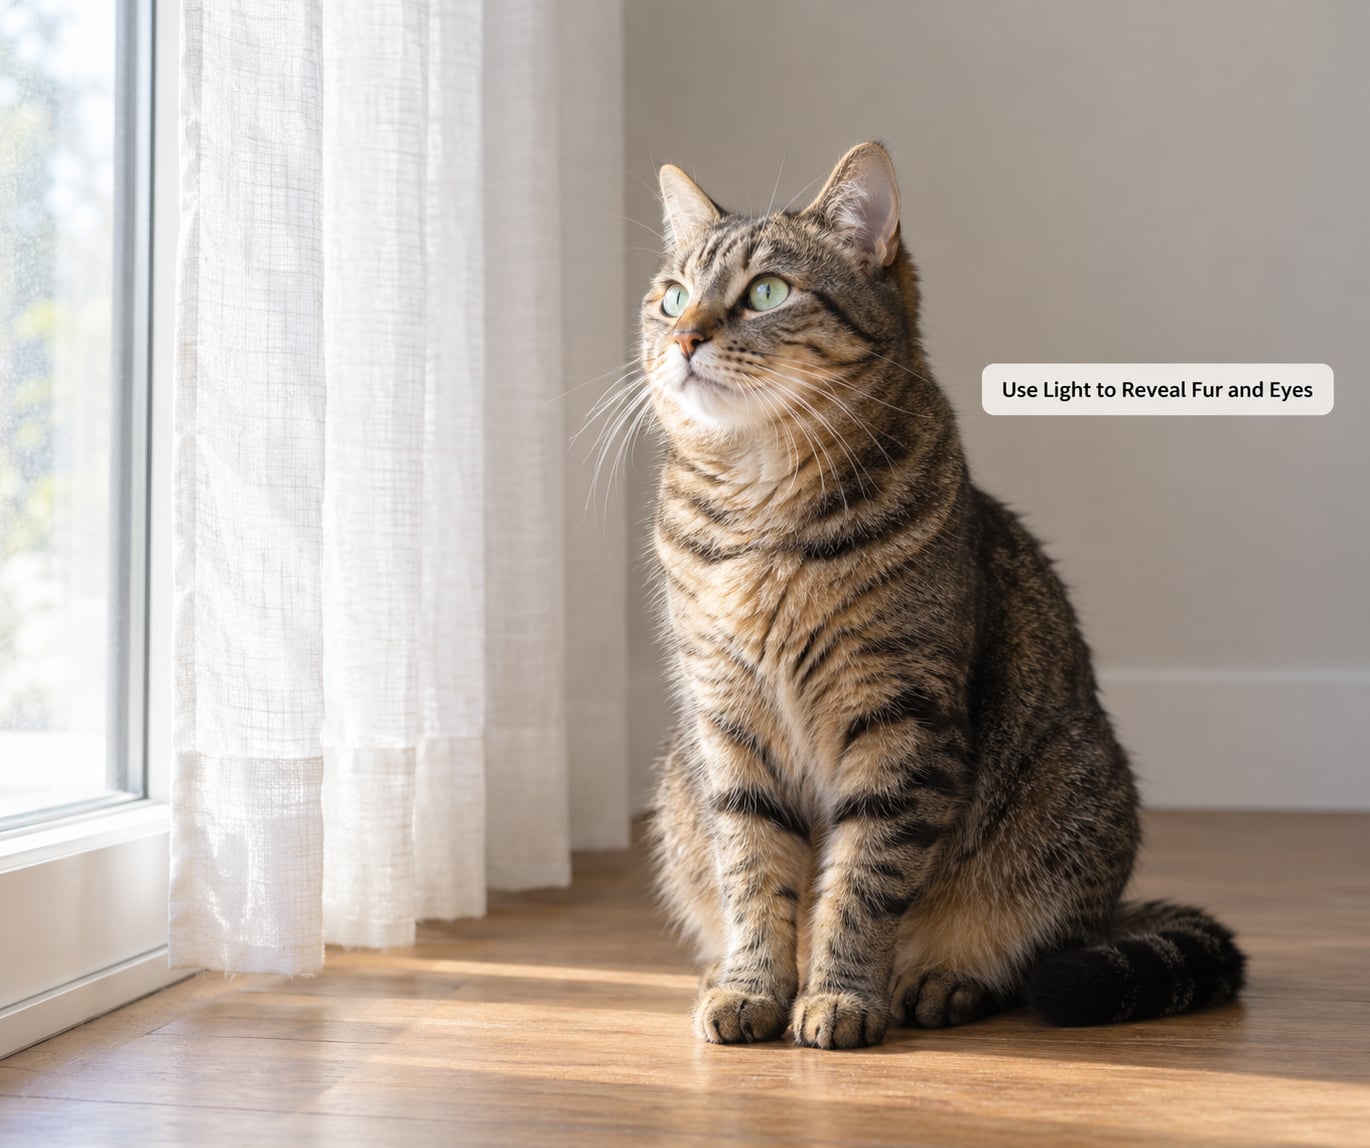
Put the cat a metre or two from a window at roughly 45 degrees, never directly in front of it and never in a hard beam of sun. Cross light gives you texture in the fur and a catchlight — the bright reflection in the eye that makes a portrait look alive.
Backlighting at a window is the classic mistake. The camera meters for the bright background, the face drops into shadow, and you raise ISO to compensate, which adds noise to the fur. Turn the cat slightly so the light falls across its face instead.
Watch the catchlights: two small bright spots in each eye usually mean your light is too small and too hard. A white card held opposite the window will fill the shadow side for a few cents.
4. Choose the Right Camera Settings
Start in Aperture Priority (A or Av) with auto ISO capped at 3200, or fully manual if you already know your camera. Shutter speed does the real work here, and the number matters.
For a sitting or slow cat, 1/250s is enough. For walking, grooming or turning heads, 1/500s. For play, pounces or a kitten in flight, 1/1000s. Blurry frames are almost always a shutter speed that was too slow for the movement, not a bad lens.
Aperture controls how much of the cat is sharp. Start at f/2.8 for a portrait where the face is sharp and the background melts away. Move to f/5.6 when you want the whole cat sharp in frame, especially for environmental portraits.
Set the drive mode to burst or high-speed continuous and shoot in RAW. You cannot time a cat, so you take ten frames and pick the one that works. Extra framing guidance is covered in how to photograph reflections if you want to push the creative side.
5. Focus on the Nearest Eye
Focus on the eye closest to the camera. If both eyes are sharp the portrait feels flat, and if neither is sharp it looks broken.
Use animal eye detection or subject detection if your camera has it — it finds the eye and holds it. Otherwise switch to single-point autofocus, move the point onto the nearest eye manually, and confirm it has locked before you shoot. Half-press to focus, check the focus indicator or the focus peaking highlights, then shoot.
Dark cats are the exception. Low-contrast fur gives autofocus little to grab onto, so focus manually or lift the shadows in RAW afterwards to recover the eye. Shallow depth of field makes this worse — f/2.8 at very close range means only a few centimetres of fur are in focus.
6. Compose Portraits Around the Cat’s Personality
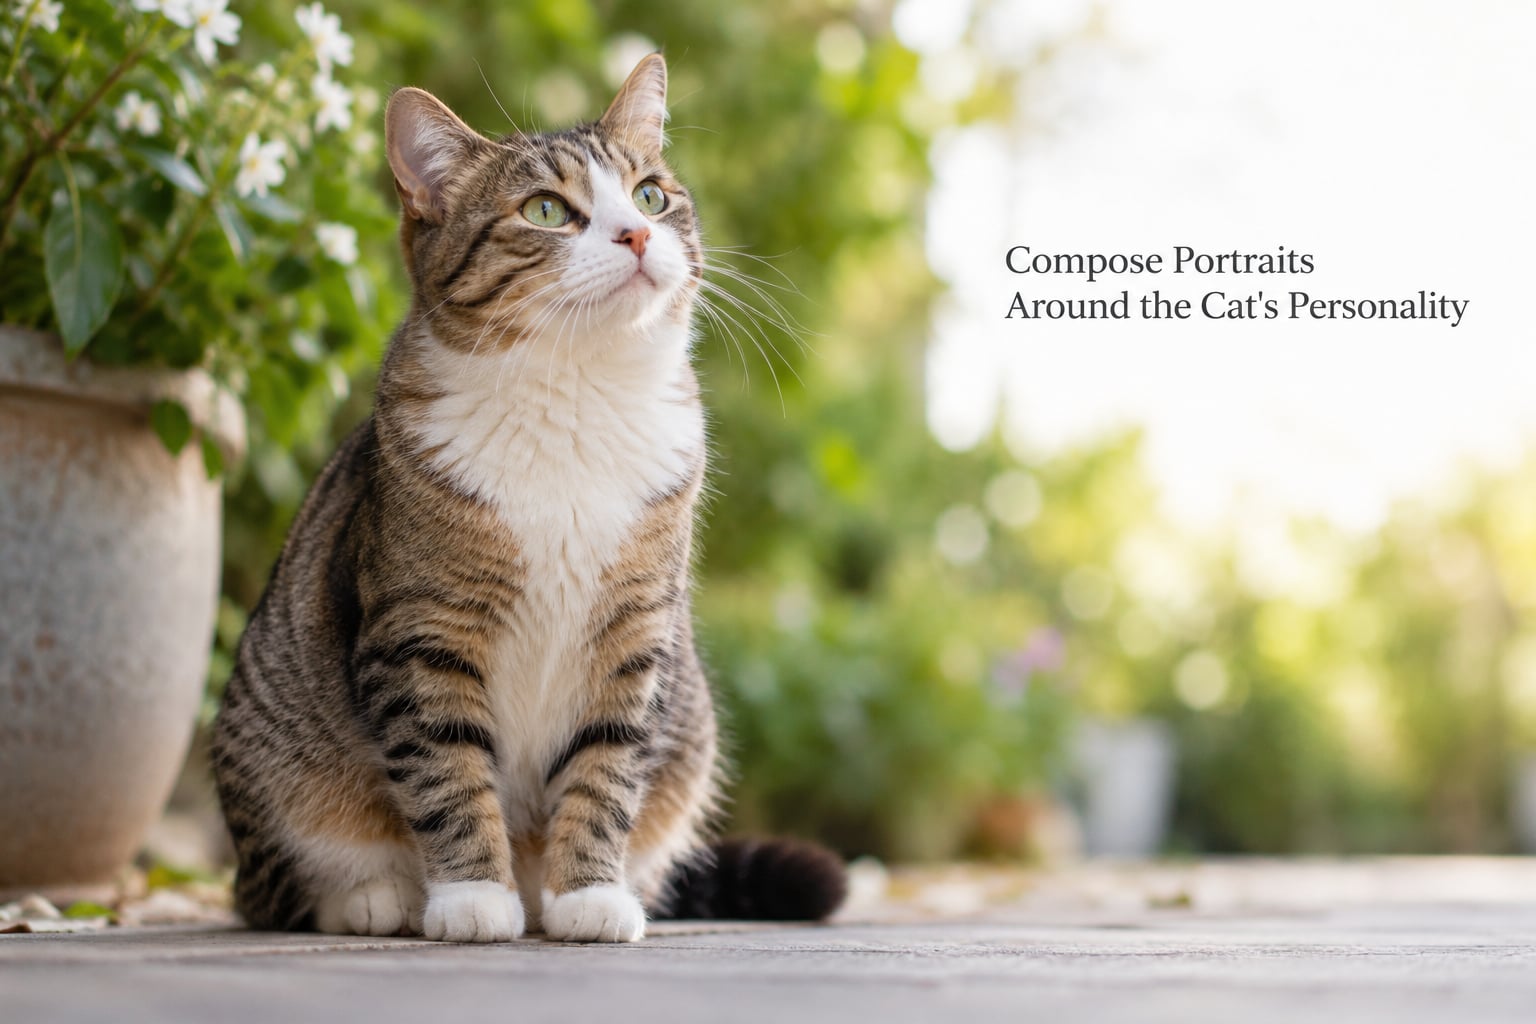
Lay on the floor or kneel so the lens sits at the cat’s eye level. Shooting down from standing height makes a cat look small and passive, and eye level gives you a face straight-on with a catchlight and both eyes visible.
Put the eyes on a third line rather than dead centre, and leave negative space on the side the cat is looking into. That is often where a trailing tail fits, and it gives the photo room to breathe.
Try portrait orientation for faces and whiskers, landscape for environmental shots that include the cat’s favourite places in your home. Look for lines in the scene — a windowsill, a stair rail, a table edge — and use them to lead toward the eyes.
7. Capture Movement: How to Photograph Cats Mid-Pounce
Action happens in bursts of two seconds followed by a lie-down. That pattern is predictable, which means you can be ready for it.
Raise the shutter to 1/1000s, widen the aperture to f/2.8 or f/4, and let ISO climb to whatever holds the exposure. Pre-focus on the spot where the toy will land, then hold the shutter down through the whole burst rather than pressing it repeatedly.
A feather toy above the lens is the most reliable trick for getting open eyes and eye contact in the same frame. Move the toy just out of frame and above the camera, and shoot at the instant the head turns up.
8. Check the Histogram and Protect Highlight Detail
Turn on the histogram and blinkies. The goal is a bright but unclipped subject with detail still present in the brightest fur.
White and cream cats blow out first. If the histogram is running into the right edge, drop exposure by two thirds of a stop, or -1.3 EV, until the white fur stops flashing. Dark cats go the other way: the meter sees a large black shape and tries to render it as middle grey, so the frame comes out too dark. Add positive exposure compensation instead, around +0.7 EV. It feels backwards the first few times, then you stop thinking about it.
Switching to spot metering on the face fixes both cases faster than nudging exposure blind.
9. Review, Edit and Finish the Images
Cull first, edit second. Delete the blinks and the frames where the cat is half out of focus before you touch any sliders.
Start with exposure and contrast, then work in this order:
- Lift shadows gently to open up dark fur, without going milky
- Add a little texture to bring back fur detail that the raw file kept but the screen hides
- Whiten the eye area selectively with a small radial mask, and drop the saturation of the iris slightly so it stops glowing green
- Crop to a clean portrait ratio and straighten the horizon if it is in frame
- Apply noise reduction to any high ISO frame before sharpening the eyes
Finally, sharpen the eyes only. Fur texture looks best slightly soft; over-sharpening it produces a crunchy halo that no camera ever saw. More on shaping light and shadow lives in how to photograph shadows.
Common Mistakes
Firing direct flash at the cat. It startles the animal, creates red-eye and hard shadows under the chin, and flattens the fur completely. Move a step back from the window or bounce a card instead.
Shooting from standing height. You get a foreshortened head and a background of ceiling and floorboards. Kneel or lie down; the perspective change is the single biggest improvement most people get in one session.
Focus landing on the nose. Single autofocus defaults to the centre of the frame, and a cat’s face rarely sits there. Move the focus point onto the nearest eye every time, or turn on animal eye detection.
Choosing a busy background. A cluttered kitchen shelf turns into a photograph of the shelf. Move the cat a step or zoom in until the background is plain and out of focus.
Using the whole treat bag. Overfeeding a cat before a session leaves it sluggish and, more often, vomiting. Use three or four small treats spread across the session.
Editing too hard. Crushed blacks, heavy clarity and aggressive saturation make fur look plastic. If a slider change makes the coat look plastic, halve it.
Shooting for forty minutes. Past about fifteen minutes, cats get restless, then evasive, then gone. Two or three short sessions beat one long one every time.
A few extras that make sessions easier. Turn on silent shutter or electronic shutter if your camera has it, so the cat never hears the mirror slap. Keep treats behind your back so the cat moves toward the lens rather than away from it. And shoot more than you think you need — the keepers in a cat session usually come from the last ten percent of frames.
Frequently Asked Questions
What is the best lens for photographing cats?
A short telephoto around 85mm to 135mm is the sweet spot. It lets you stay far enough away that the cat does not feel cornered, while keeping the background soft enough to separate your subject. A 70-200mm zoom gives you more reach for shy animals. Avoid very wide lenses at close range, because they stretch the face and force you into a position the cat finds uncomfortable.
Is it safe to use flash when photographing a cat?
Direct flash is worth avoiding. It is startling rather than painful, but most cats dislike it, and a single burst is often enough to end the session. It also produces red-eye, hard shadows and flat fur. Soft window light, a bounce card or an off-camera LED panel gives a better result and keeps your cat relaxed.
How do I get sharp focus on a cat’s eyes?
Focus on the eye nearest the camera and shoot in single autofocus, or turn on animal eye detection if your camera offers it. Half-press to confirm focus, then shoot a burst while the point stays on that eye. On dark cats, autofocus struggles with low contrast, so focus manually or lift the shadows later in RAW.
Should I use a tripod when taking cat photos?
A tripod is genuinely useful for sitting cats in low light, macro shots of paws and whiskers, and any session where you want the camera already framed and focus already set while you move. For walking and playing cats it adds nothing, because you will be moving anyway. A monopod or a beanbag on the floor works nearly as well.
How can I encourage my cat to pose without forcing it?
Do not pose a cat. Attract it instead: hold a treat or feather toy just above the lens, use a sound your cat already likes, and let the cat settle in its own space first. Take the portrait when it happens naturally. A forced pose produces a stiff body, flat eyes and a cat that ends the session early.
When should I stop a cat photography session?
Stop when you see the tail swishing hard and low, ears pinned back, pupils very wide, or the cat moving away from you or hiding. Those are early stress signals and more photographs will not improve. Most sessions should last ten to fifteen minutes anyway, with breaks, and always end on a good frame rather than pushing for one more shot.
How to Photograph Cats in Your First Ten Minutes
Here is the shortest version that still works. Find the biggest window, put the cat about a metre away at 45 degrees, kneel to its eye level, and set 1/500s, f/2.8, auto ISO. Switch to burst, focus on the near eye, hold a toy above the lens, and shoot for ten minutes. Then put the camera down and let the cat go.
Everything else on this page — the histograms, the EV compensation, the editing pass — comes after that, and only if you enjoy it. Most of how to photograph cats is patience and a quiet room, and anyone selling you a fancier lens is selling you something. If you want the wider craft once your cat portraits are solid, start with photographing strangers respectfully, which is the same skill of reading an animal’s comfort and adjusting your framing around it.