
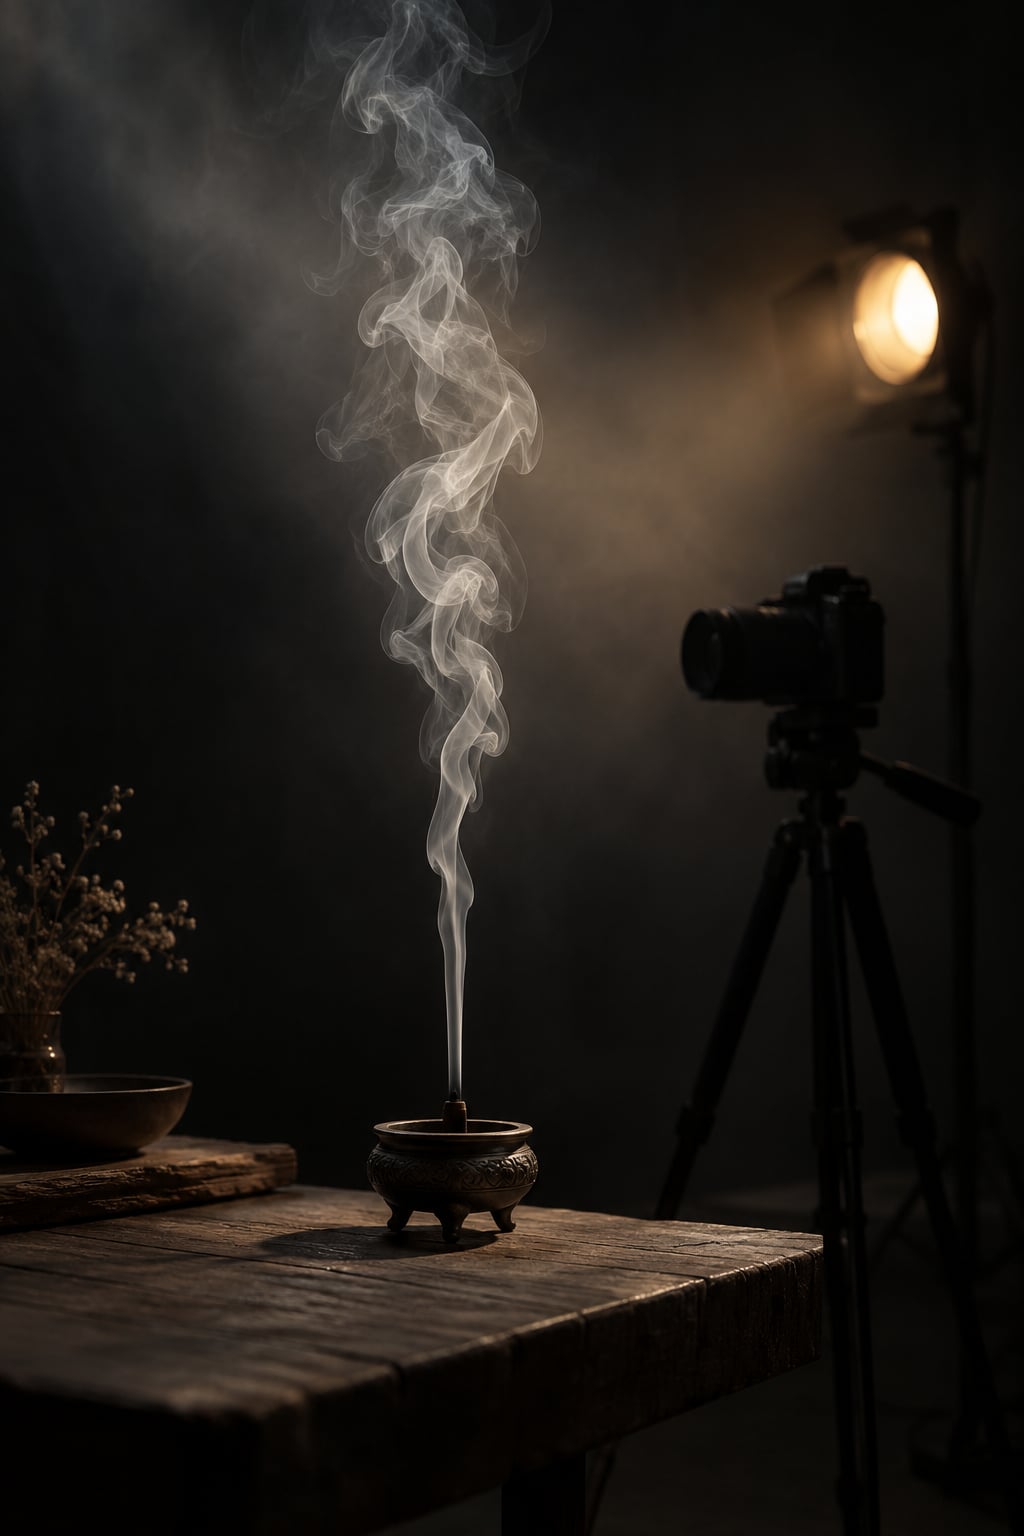
To photograph smoke, you need a dark room, a matte black backdrop, one light placed behind or beside the plume, and manual focus. Light the smoke from the side or three-quarter rear, keep the background unlit so it falls to black, then shoot wide open enough to freeze the wisps. A whole session takes about 30 minutes and costs almost nothing, and the skill is mostly patience: the plume reshapes constantly, so expect to shoot hundreds of frames for one keeper.
Smoke is not a solid object. It is a cloud of translucent particles that only becomes visible where light strikes it at an angle and scatters back toward the lens. That single fact explains almost every frustrating result: smoke vanishes when the room is lit evenly, turns to grey mush when the backdrop picks up spill, and goes soft when the shutter is too slow.
I shoot smoke indoors in a spare room with the curtains drawn. It costs nothing, needs no studio rental, and the same rig works for steam over a bowl of soup. Here is how to photograph smoke step by step, then what to fix when the result looks wrong.
Table of Contents
What You Need
- A camera with manual exposure and manual focus
- A tripod, since exposure runs long
- A matte black backdrop, card or fabric, 2 to 3 feet behind the source
- A controlled smoke source, most often incense sticks
- One light, ideally with a snoot, grid or small reflector dish
- A remote trigger or sync cable so you can shoot hands-free
- A white foam core card for subtle fill
- An open window or extractor fan for ventilation, and a small dish of water to douse spent incense
That is the whole kit. If you have no flash, a desk lamp with a shade and a phone will get you started, though the results are harder to control. Beginners searching for how to photograph shadows already have most of this equipment in the same bag.
Step-by-Step: How to Photograph Smoke
1. Prepare a Controlled Dark Environment
Close the door and window, switch off every ceiling light, and let the room settle for a couple of minutes. Cover any window with a black cloth and close off door gaps, because a thin line of daylight along a wall is enough to lift your blacks.
Place the black backdrop 2 to 3 feet behind where the smoke will rise, and put a small open flame or an incense burner roughly 12 inches in front of it. If it worked, the background reads pure black on the camera screen and the smoke is the only bright thing in the frame. Close the window last, and never leave a lit ember unattended. The same goes for candles and any open flame: clear paper and fabric from the table, and keep the dish of water next to you.
2. Choose a Light or Incense Source
Incense sticks are the default for good reason. The plume is thin, rises in a predictable column and the smell is strong but manageable. A joss stick gives a denser, faster column if you want more body in the frame, and a candle adds its own glow which is handy for warm-toned work.
Where smoke photography usually goes wrong is the source. A cigar fills a room in minutes and the smell clings to fabrics for days, and aerosol spray gives a harsh chemical cloud rather than a soft column. Pyrotechnic smoke bombs trigger alarms, stain surfaces and are not intended for indoor shooting. Whatever you pick, buy a spare pack, because you will go through them.
| Smoke source | Density and movement | Practical note |
|---|---|---|
| Incense sticks | Thin, slow, wispy | Longest-lasting smell; keep water nearby for spent ends |
| Joss sticks | Dense, fast rising | Hard edge to the flame, good for tight crops |
| Candle | Soft, lazy curls | Add a flame element or hide it below frame |
| Aerosol spray | Sudden, chemical | Useful for composite overlays, ventilate well |
| Smoke bomb | Very dense, fills the room | Outdoor use only; sets off detectors and alarms |
If you want more control over shape, a water-based smoke machine with a small nozzle gives you a jet you can direct upward, though check the fluid and ventilation guidance before using it indoors.
3. Set Up Directional Backlighting
Put the light behind and to one side of the source, aimed back past the smoke toward the camera, or set it at three-quarter rear on the same side. This raking angle is what makes the wisps visible, because light passes through more of the cloud and scatters back at the lens.
Watch for spill. If the backdrop lights up, move the light further round toward the camera and flag it with black card so the beam misses the background entirely. A snoot or grid narrows the beam and saves you a lot of card work. The result of a good frame is bright, defined edges on the smoke against a background that stays truly black.
Placing the light behind the plume and pointing it into the lens floods the whole frame and washes out the background, which is why simple backlighting so often disappoints. Side and raking placement keeps the contrast. If the smoke reads flat and lifeless, move the light a few inches closer to the source rather than raising its power. The same idea applies to lighting dark subjects, as covered in lighting tips for photographing black objects.
4. Frame the Smoke for Visual Interest
Fill the frame with the plume. Crop tight so the smoke fills two thirds of the image and your eye has nowhere else to go, and keep the source itself out of frame unless you want the flame as a subject. A tight crop also lets you use a longer lens and stay clear of the heat.
Leave negative space on one side when the column curves, so the smoke has a direction to travel into. Look for leading curves in the rising column rather than shooting the dead centre of a straight plume, and shoot from a low angle so the smoke crosses the backdrop rather than sitting in front of it.
A contrasting background works too. White or coloured paper behind pale smoke gives the opposite look, and mid-grey with a raking light shows structure that a black background hides. My default is black because contrast does most of the work for me.
5. Use Manual Camera Settings
Shoot RAW, set manual focus on the source, and start here: manual exposure, ISO 100, f/8 to f/11, shutter 1/200s. When you use a flash, the shutter cannot go past your sync speed, usually 1/200s or 1/250s, so set the aperture and ISO to compensate.
Small aperture matters because the plume has depth, and a shallow depth of field leaves the far edge soft. Manual focus matters because autofocus hunts constantly and then locks onto the backdrop, since smoke has no clear edge. Focus on the burning tip or the nozzle, then switch to manual and leave it alone. Set white balance to shade or tungsten so the file is neutral before editing.
| Light source | Aperture | Shutter | ISO | Focus |
|---|---|---|---|---|
| Off-camera flash | f/8 | 1/200s or sync speed | 100 | Manual, on the source |
| Continuous lamp | f/8 to f/11 | 1/125 to 1/200s | 100 to 200 | Manual, on the source |
| Window light at night | f/5.6 | 1/60 to 1/125s | 400 to 800 | Manual, tripod supported |
| Phone, manual or night mode | Fixed | 1/30s or auto | Auto to 1600 | Tap on the plume, tap to lock |
6. Capture the Right Moment
Use burst mode and shoot continuously while you watch the column. The visual cue for a strong frame is a moment when the plume thins near the source and a distinct wisp separates from the main body, usually a few seconds after a puff. Watch for the shape, not the smoke itself.
At 1/200s the fine detail inside the plume stays crisp. Drop to 1/15s and you get deliberate motion blur and long smoke trails, which suits abstract work and hazier, dreamlike images. Hold the shutter open for several seconds on a dark room with no ambient light and the smoke draws ribbons of light across the frame. That long-exposure look overlaps with photographing reflections, where the same control of light and shutter pays off.
Community photographers treat this as a numbers game. Shooting several hundred frames per session is normal, because the plume reshapes every second and you cannot predict where the good shapes will form.
7. Experiment With Color and Contrast
Colour gels clipped to the lamp turn a monochrome plume green, blue or amber in seconds. Keep the gel on the light only, never between the light and the camera, or it will tint the whole frame.
Change one variable at a time. Swap black for white paper, black for deep blue, then move the light from three-quarter rear to full side and compare. Colour works best when it comes from the light itself rather than from tinting the file later, because the plume keeps its natural density and only the hue shifts.
For coloured smoke rather than coloured light, the safe indoor option is a haze or theatrical fog fluid applied with a mister, kept well away from the camera and used with the window open. Outdoors, coloured smoke sticks give far stronger results, and that is where to shoot them.
8. Edit for Clean, Dramatic Smoke
Work on the RAW file with restrained adjustments. First pull the highlights down so the brightest edges of the smoke keep detail, then push the blacks slightly toward black with curves and lift overall contrast.
Clean up the surroundings on a duplicate layer. Mask the smoke, hide the source, the burner and any dust with a soft brush at low opacity, then flatten. A gradient layer on multiply blend tints the smoke without touching its density, and inverting the image gives you white smoke on a black background, or vice versa, if you want the opposite look.
Finish with a light noise reduction, since the long exposures and low ISO still pick up grain, and a modest sharpening pass on the smoke edges only. If the result still looks flat, the fix was in the room, not the sliders, so go back and flag the light harder.
Common Mistakes
Smoke is invisible or barely there. The light is on the same side as the camera, or the source is too far from the beam. Move the light behind or to the side of the plume and bring it within a foot of the source.
Background reads dark grey instead of black. Light is spilling onto the backdrop. Flag the light, move it further round toward the camera, or push the backdrop further away. My cheapest fix is two sheets of black card either side of the beam.
Wisps are soft or blurry. Shutter too slow or focus on the background. Go to 1/200s and focus manually on the burning tip. Softness that appears only at the edges of the column is usually depth of field, so close the aperture to f/11.
Smoke blows sideways or drifts. Draughts from an open window, a ceiling fan or your own movement across the room are reshaping the plume. Set up first, then light the incense last, and shoot from one fixed spot.
Too much smoke fills the frame. A dense column looks unrealistic and hides structure. Work in short bursts, wait for the room to clear, and lower the source or move it further back.
Noisy or grainy result. You pushed ISO too far or used window light at full brightness. Drop to ISO 100 for a continuous lamp, and expect grain with a phone at night settings.
Focus hunts every frame. Autofocus cannot lock onto smoke. Switch to manual focus and focus on the physical source before you start shooting.
Frequently Asked Questions
Can smoke actually be seen on camera?
Yes, but only when light scatters off the particles toward your lens. Smoke is translucent, so it stays invisible against a lit room and disappears entirely without a directional light. Put one light behind or beside the plume in a dark room, keep the background unlit, and the wisps appear clearly with defined edges. A phone will capture the same effect at night, though a camera gives you control over focus and sync speed.
What do photographers use to make smoke?
Incense sticks are the usual choice because the plume is thin, rises predictably and stays controllable. Joss sticks give a denser column, and a candle adds its own glow. Aerosol spray works for overlay effects, while pyrotechnic smoke bombs belong outdoors only since they fill the room and set off alarms. Keep a dish of water beside the burner and ventilate the space before and after.
How do you focus on smoke when autofocus keeps hunting?
Turn autofocus off and focus manually. Smoke has no clear edge, so contrast detection searches forever and then settles on the backdrop behind it. Set up your camera on the tripod, switch on a temporary lamp if you need help, focus on the burning tip or the nozzle, then switch that lamp off and leave focus alone for the whole session.
Why does my smoke photo look grey instead of black and white?
Light is reaching the background. Flag the light so the beam misses the backdrop, move the lamp further round toward the camera, or place the backdrop another foot back. If the grey is a uniform haze rather than a lit surface, check for light leaking around curtains and door edges. Raising contrast in editing helps, but the correction belongs in the room.
Do I need a flash to photograph smoke?
No. A continuous lamp works well and gives you a preview of the effect before you shoot. Flash gives you more power in a small package and freezes the plume at sync speed, usually 1/200s or 1/250s, but you must keep the ambient light low enough for the flash to dominate. Window light works at night if the room around it is completely dark.
Can I photograph smoke with my phone?
Yes. Turn on manual or night mode, shoot RAW if your phone offers it, and tap the plume to set focus then tap again to lock exposure and focus. Keep the light behind or beside the source as you would with a camera, and hold the phone on a small tripod or stack of books. Expect noise at night settings, which you can reduce later.
Start tonight rather than waiting for perfect gear. Darken the room, set one light behind the plume, focus manually on the incense tip and shoot a few hundred frames. Once the black background and the raking light behave, everything else is a matter of timing the plume.