

To remove people from photos in Lightroom, open the image in the Develop or Edit module, use Select Subject or Object Selection to isolate the person, then remove them with the Healing Brush or Clone Stamp inside a mask. You never have to open Photoshop, and every change stays reversible.
The awkward part is not the click sequence. It is deciding what to do with what is left behind: the shadow, the reflection, the stranger’s hand resting on your friend’s shoulder. Work through the six steps below and you can handle the easy cases in about five minutes a frame.
What follows covers the desktop apps, the cloud Lightroom on Mac and Windows, and the mobile app, since the button names differ between them. If your library is a mess before you start, it is worth sorting out how to organize photos in Lightroom first, because finding the right frame in a pile of near-identical shots is half the work.
Table of Contents
- What You Need: The Lightroom Tools For Removing People
- Step-by-Step: How to Remove People From Photos in Lightroom
- Step 1: Open a Copy Before You Remove People From Photos in Lightroom
- Step 2: Select the Person with Select Subject or Object Selection
- Step 3: Remove the Selection With Healing or Cloning
- Step 4: Correct Halos, Seams and Repeated Detail at High Zoom
- Step 5: Match the Background and Finish the Edit
- Step 6: Export and Compare the Result
- Common Mistakes and How to Fix Them
- Frequently Asked Questions
- Can Lightroom remove people from photos?
- Is the phone Lightroom app good enough for this?
- Do I need generative remove tools, or will healing work?
- How do I remove a reflection or a shadow left by a person?
- What do I do when a person is partly hidden behind someone else?
- Why does my removal look worse at full size than on screen?
What You Need: The Lightroom Tools For Removing People
Lightroom ships four separate apps and they do not have identical tools. Knowing which one you are in tells you which of the steps below will look familiar.
- Lightroom Classic (the standalone catalog app) has the Healing Brush and Clone Stamp under the Spot Removal panel, plus the Masking panel with Select Subject and Object Selection.
- Lightroom on desktop (the newer cloud app) has the same selection tools and a Remove panel that uses generative fill. Classic gained a matching Remove panel too, but the labels are not word-for-word identical.
- Lightroom mobile has a Remove panel with the same core options, but no Healing Brush, no Clone Stamp, and a simplified Masking panel.
- Lightroom on the web handles selection and generative removal, but not the hand-retouching tools.
Beyond the app itself you need three things: the image open at full size, a mask you are happy with, and patience at the 100% zoom level. Artifacts hide completely at fit-to-screen view.
One rule matters more than any slider: crop after you remove, never before. Generative fill works from the pixels surrounding the area you masked. Crop those pixels away first and the model has nothing to blend with, which is where the smeared, repeating textures come from.
Step-by-Step: How to Remove People From Photos in Lightroom

Here is the full sequence, from opening the file to checking the export. Follow it once and the muscle memory carries over to the next frame.
Step 1: Open a Copy Before You Remove People From Photos in Lightroom
Everything in Lightroom is non-destructive, so your original file is never overwritten. That said, working on a copy makes comparing before and after painless.
In the Develop module, press Ctrl+C then Ctrl+V (Cmd+C then Cmd+V on Mac) to make a virtual copy, or simply work on the original and toggle the before view with the Backslash key. Either way, confirm the module you are in: Classic has the Develop module, the new desktop Lightroom calls it Edit.
Now zoom to 100% and put the cursor over the person. From this point on you are judging real pixels, not a thumbnail, and every slider move will feel better too.
Step 2: Select the Person with Select Subject or Object Selection
Open the Masking panel with W in Classic or the new desktop app. Click Select Subject and Lightroom analyses the whole frame, picking out the dominant person.
That first pass is right about half the time, which is fine. Open Object Selection, click the person you want gone, and Lightroom masks just that person. Using both in sequence beats either one alone: Select Subject gives you the main subject, Object Selection isolates the bystander.
Now refine the mask rather than trusting it. Click Refine Mask and work through these controls:
- Brush paints the selection back in where it missed an arm.
- Erase takes it off the bits of background the auto-detect swallowed.
- Add and Subtract let you switch modes without leaving the mask.
- Shift Edge slides the boundary outward or inward to catch soft edges like hair.
- Feather softens the edge, and Contrast tightens it. Roughly 3 to 5 pixels of feather works on hair and clothing; push contrast higher for hard-edged objects like a railing.
Four cases cause most selection failures. Hair needs Shift Edge plus feather. A shadow needs to be inside the mask, not left next to it. A reflection in a window or puddle needs its own separate selection. And a person who overlaps your main subject needs careful hand-painting, because no automatic tool guesses that the arm in front should stay and the arm behind should go.
Step 3: Remove the Selection With Healing or Cloning
Open the Spot Removal panel (the icon looks like a bandage). Set the slider to Heal and make sure Source is set to Auto. Lightroom now samples the surrounding pixels and blends them into the masked area.
Heal is the right default because it samples the real texture around the person and matches tone and grain to it. Clone literally copies pixels from somewhere else, which is why it is the better choice for repeating patterns: paving stones, roof tiles, brick. Clone those with source sampled from the same patch and the repeat is invisible.
Choose the area to remove from deliberately. If the person stands in front of a railing, set Source so it pulls from the same railing section above or below rather than from the grass next to it. A surprising number of people get how to remove people from photos in Lightroom wrong at exactly this step, then blame the tool for a patch that never had matching pixels to work with.
If the person overlaps your subject, spot removal will happily smear the hand away too. Mask that overlap back out with Erase before you remove, remove the rest, then come back with a small brush at 30% flow to rebuild the edge.
Step 4: Correct Halos, Seams and Repeated Detail at High Zoom
Switch between the overlay on and off with the key and look at 100%. Then push to 200% and look again. This is where most of the real work happens, and it takes under a minute.
Four things go wrong predictably. A light rim around the person means the mask edge was too tight, so add a pixel or two with Shift Edge. A visible seam means the source area had a different brightness, so feather the boundary further. A smudged patch means Heal pulled from an area with too little detail, so switch that spot to Clone with a better source. And a repeating pattern means the fill copied a tile, so break it up with a few brush strokes.
Local adjustment brushes under the mask handle tone mismatches. A small negative exposure on the background beside the edit usually closes a patch that looks slightly too bright.
Step 5: Match the Background and Finish the Edit
Check the filled area against the surrounding background at normal viewing size. Generative fills sometimes arrive slightly softer or warmer than the rest of the frame, and a light Texture or Sharpness brush over the repaired zone fixes that without touching anything else. Most walkthroughs of how to remove people from photos in Lightroom stop at the removal itself, and that is where a frame quietly gives itself away.
Compare with the Before view one more time, then crop. Cropping last gives the fill its proper context and is why the sequence works better than the reverse order.
If you have removed the same type of distraction from a whole set of frames from the same camera position, copy the settings to the rest with the paintbrush settings tool. Keep in mind that the adjustment copies the sliders, not the pixel-level removal, so the masks still need painting on each image.
If the final look is moving toward monochrome, read how to edit black and white photos in Lightroom before you commit. And if you plan to push colour further once the frame is clean, the color grading in Lightroom guide picks up from the same Develop module.
Step 6: Export and Compare the Result
Export a full-size copy and open it next to the original at 100%. Photos, not memory, hide the difference.
Check three crops: the repaired area, the frame edge where the new pixels meet old ones, and the whole image as a viewer would see it on a phone. Look at it sideways too. Repetition that your eye accepts head-on often shows up as an obvious pattern when the head tilts.
One more thing before you send it anywhere. If the photo is client or event work, tell them a person was removed. It takes one sentence, and finding out later that a family member vanished from a group shot does lasting damage to the working relationship.
Common Mistakes and How to Fix Them
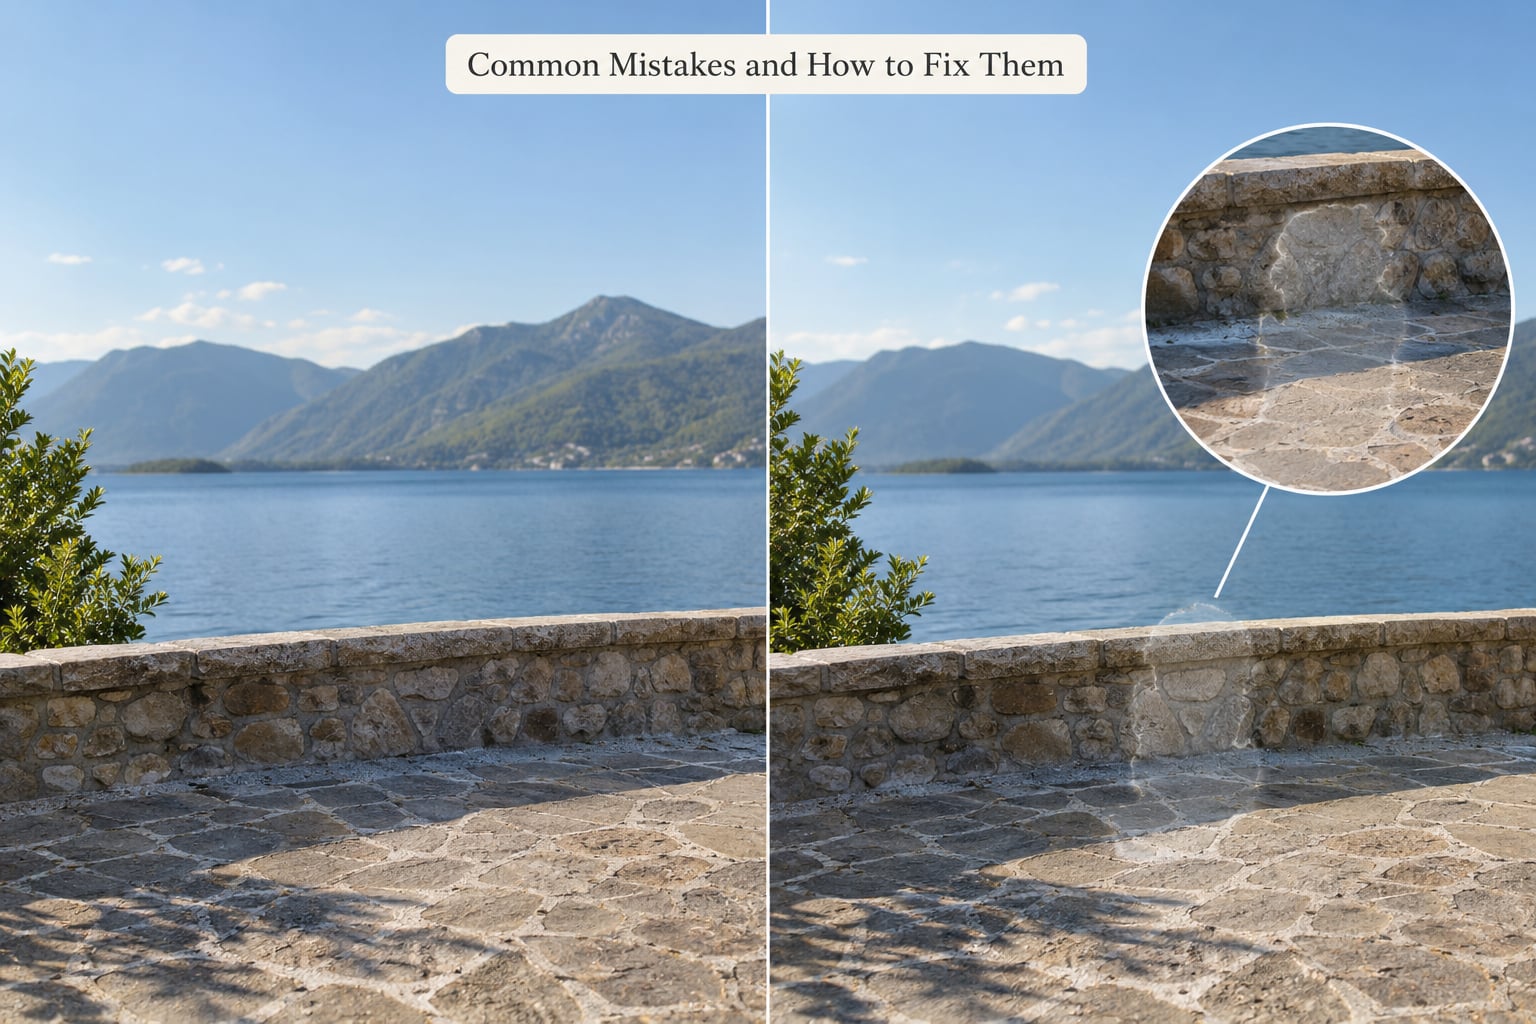
Almost every failed removal traces back to one of these eight, and each has a specific fix.
- The mask is too loose. It swallowed half the background. Erase the extra, then drop the contrast slider slightly and check the edge again.
- The mask is too tight. A bright fringe survives. Shift Edge outward by one or two pixels and add a little feather.
- The patch is blurry. Heal sampled a flat area. Switch to Clone and pick a source with real texture and detail.
- The texture repeats. Clone copied the same tile twice. Vary the source for the second half of the area, or break the pattern with short brush strokes.
- A halo remains. Mask the new pixels and brush in a subtle Exposure or Texture adjustment to match the surround.
- The shadow stayed behind. Paint the shadow into the mask and remove it in the same pass. Removing the person but keeping their shadow is the most obvious failure there is.
- The area is over-smoothed. A heavy softening pass has flattened real detail. Lower the Clarity or Texture amount on the repaired zone rather than on the whole image.
- You removed too much at once. A person spanning a third of the frame will not fill convincingly. Start with the smallest removals on the frame, confirm the tool is behaving, then work up to the large ones.
A good quality-control habit: before you close the panel, ask whether the frame still works as a photograph without the viewer ever knowing a person was there. If your eye snags on the repaired area, they will too.
Frequently Asked Questions
Can Lightroom remove people from photos?
Yes. Every current Lightroom surface has some form of removal, and the newer versions also offer generative fill that rebuilds the background with new pixels. Classic and desktop Lightroom handle it best, because they combine Select Subject with Healing and Clone for precise work. Mobile handles simple background figures well and lacks the hand tools.
Is the phone Lightroom app good enough for this?
For removing a stranger standing on an open beach or in front of a plain wall, yes. Tap Remove, choose the Remove extra people option, deselect anyone you want to keep, tap Done, then pick a variation. It handles shadows and simple backgrounds. Mobile has no Healing Brush and no Clone Stamp, so anything overlapping your main subject should go to the desktop app.
Do I need generative remove tools, or will healing work?
Healing and cloning work well and they stay entirely inside your original pixels, which matters when the result has to be defensible or the client insists nothing was invented. Generative fill is faster and handles large or busy areas that healing would smear. Many working photographers use both: fill the big areas with AI, then retouch the seams by hand.
How do I remove a reflection or a shadow left by a person?
Paint the shadow or reflection into the mask rather than trying to erase it separately afterwards. Select Subject often detects the person but leaves the shadow outside the mask, so use the Brush to extend the selection down and across. Reflections in glass or water need their own separate selection pass, since they sit on a different plane than the person casting them.
What do I do when a person is partly hidden behind someone else?
Use Object Selection and click only on the person you want removed. Then hand-paint the boundary where their arm crosses another arm, erasing the parts that belong to the person staying. Do not attempt this in one pass: remove the clearly separated body first, then rebuild the overlapping edge with a small brush at low flow. This is the case where moving to Photoshop is worth considering.
Why does my removal look worse at full size than on screen?
Because the fill was made from pixels you cropped away. Generative fill blends with the surrounding detail, so cropping first strips out the context it needed and leaves a soft, repeating patch. Undo the crop, make the removal on the full frame, then crop afterwards. If it still looks soft at 100%, drop a Texture or Sharpness brush over the repaired area.
Start with the smallest person in the frame, select them with Select Subject, and remove them with Heal. Check the result at 100% before touching anything bigger, and remember to crop only once the frame is clean. Once that sequence is second nature, how to remove people from photos in Lightroom stops being a project and turns into a two-minute correction.