
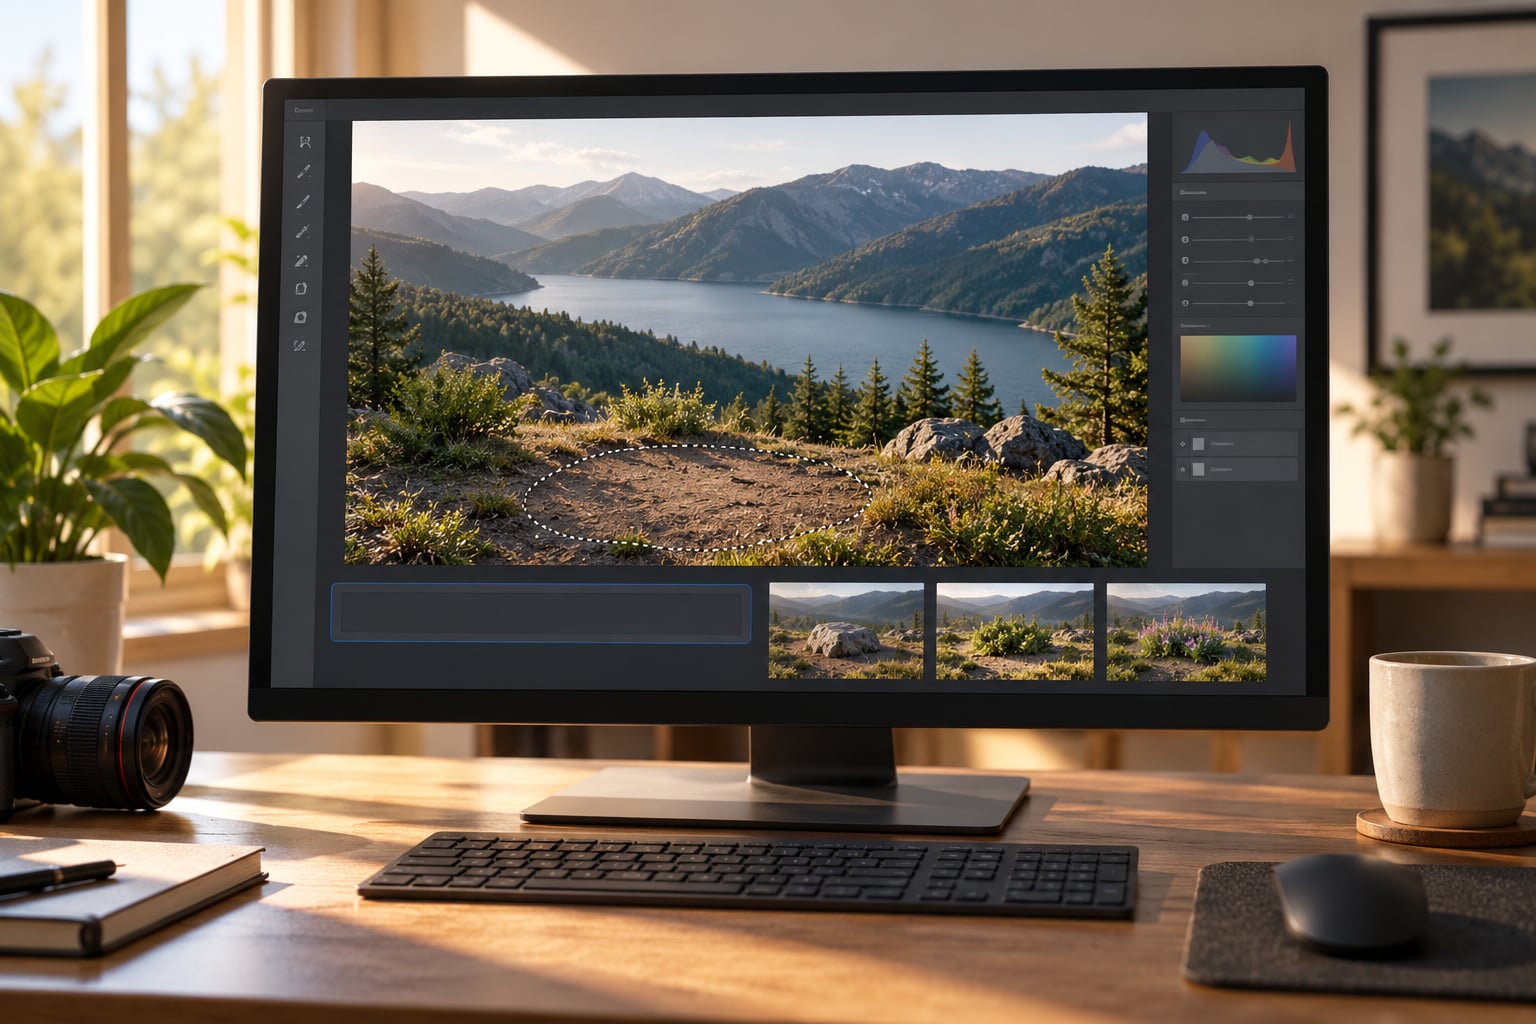
To use Generative Fill in Photoshop, select the area you want to change, choose Generative Fill from the Contextual Task Bar, type a short text prompt describing what should be there, then click Generate. Photoshop returns up to three variations on a separate generative layer, so nothing is permanently baked into your photo.
The whole job takes under a minute once the selection is right, and the selection is the hard part. Selection shape, size and feathering decide whether the result blends into your photograph or looks pasted on. Budget five minutes for the edit itself and twenty for cleaning up edges if you are new to it.
Everything below assumes the desktop version of Photoshop on Windows or Mac, not the mobile app. Menu names and panel layouts shift between releases, so I have written the paths the way they appear in current releases and noted the alternates where they matter.
Table of Contents
- What You Need Before You Start
- Step-by-Step: How to Use Generative Fill in Photoshop
- How to Use Generative Fill to Add an Object to a Photo
- How to Use Generative Fill to Replace an Object
- How to Use Generative Fill to Expand a Photo Past the Original Frame
- How to Refine and Blend a Generated Area So It Looks Real
- Generative Fill, Generative Expand or Content-Aware Fill?
- Common Mistakes and the Fix for Each
- Frequently Asked Questions
- Why is Generative Fill disabled in Photoshop?
- Do I need a Creative Cloud subscription to use Generative Fill?
- Why is Content-Aware Fill missing from my Fill menu?
- How long does Generative Fill take?
- Does Generative Fill replace the whole background?
- Is Generative Fill acceptable for commercial and client work?
- Conclusion
What You Need Before You Start
Generative Fill runs on Adobe Firefly and needs a few things in place. If any of them is missing, the button turns grey and the tool simply will not appear in your task bar.
- A current desktop Photoshop. Older releases have no generative features at all. Check Help > About Photoshop and update through the Creative Cloud desktop app if the build is more than a couple of releases behind.
- An active Adobe Creative Cloud subscription. A paid plan is what grants access to generative features. It is a hard blocker for hobbyists, which is why the free alternatives at the end come up so often in forums.
- Generative credits. Each generation draws from a monthly allowance tied to your plan, and the Properties panel shows your remaining balance. When credits run out, the Generate button stops responding.
- An internet connection. The request goes to Adobe’s servers, the image comes back finished. Losing connection mid-generation is the most common reason a generate simply fails.
- A selection tool. The Object Selection Tool, Lasso Tool, Quick Selection Tool and Brush Tool all feed Generative Fill. Which one you use depends on the shape of the area.
On the image itself, you want a reasonably sized file. Generative Fill works on an open document and also on cloud documents, and it never touches your original pixels because the result lands on its own generative layer. Flattening first is unnecessary and removes options you will want later.
Two bits of prep pay off immediately. Convert the image to sRGB if it arrived in Display P3 or Adobe RGB, because the model matches colour to the profile it sees. And if you plan to add something large, make a duplicate layer first so you have a clean comparison against the untouched original.
Step-by-Step: How to Use Generative Fill in Photoshop
The core workflow is four moves: make a selection, open Generative Fill, describe the result, generate. The skill is entirely in the first and third moves.
- Make a selection. Pick the tool that fits the shape and drag around the area. The marching ants show you exactly what Photoshop will regenerate.
- Open the workspace. Click Generative Fill in the Contextual Task Bar at the bottom of the screen. On older layouts it sits in the Properties panel or under Edit > Generative Fill.
- Write the prompt. A few plain words work better than a paragraph. Leaving the prompt blank is valid too: Photoshop fills from the surrounding pixels, which is how you erase an object.
- Click Generate. Processing takes a few seconds and produces up to three variations stacked in the Properties panel.
- Click the variation you want. It is already placed on a generative layer above your photo.
- Refine the edges. Add a layer mask on the layer below, paint the generated layer back with a soft brush, or lower opacity until the blend disappears.
That is the repeatable loop. Once you can do it without thinking, every task below is a variation on it.
How to Use Generative Fill to Add an Object to a Photo
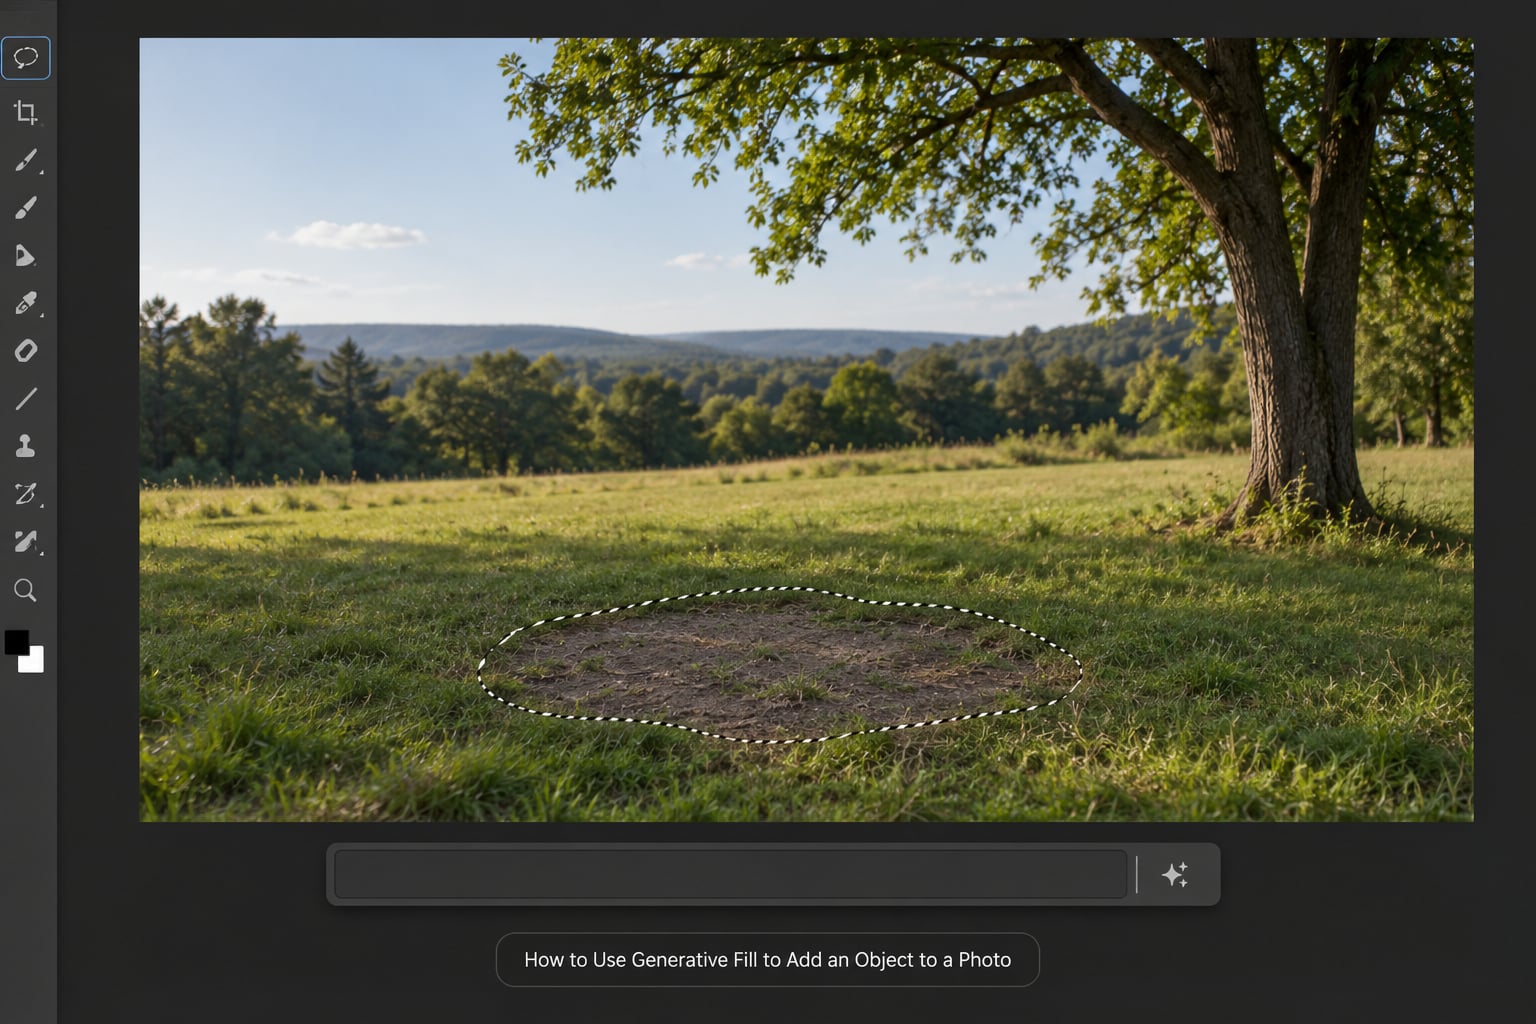
Adding an object is the easiest way to learn the tool, because you control the prompt and the model does the work. Select the empty area you want the new thing to occupy, not the area around your existing subject.
Write the prompt as a plain noun phrase. “a small ceramic vase with white flowers” gives Photoshop more to work with than “something nice for the table”. Then click Generate and compare the three variations for scale and direction.
Check three things before you commit. The object should sit on the same ground plane as everything else, its shadow should fall the same way as the existing shadows, and its apparent size should match the objects already in the frame. If the size feels off, add a size word to the prompt and generate again rather than scaling the layer after the fact.
Once the object reads correctly, combining it with a second image is a separate job. I have a walkthrough of how to make a photo composite in Photoshop that covers matching perspective and light once the generated part is in place.
How to Use Generative Fill to Replace an Object
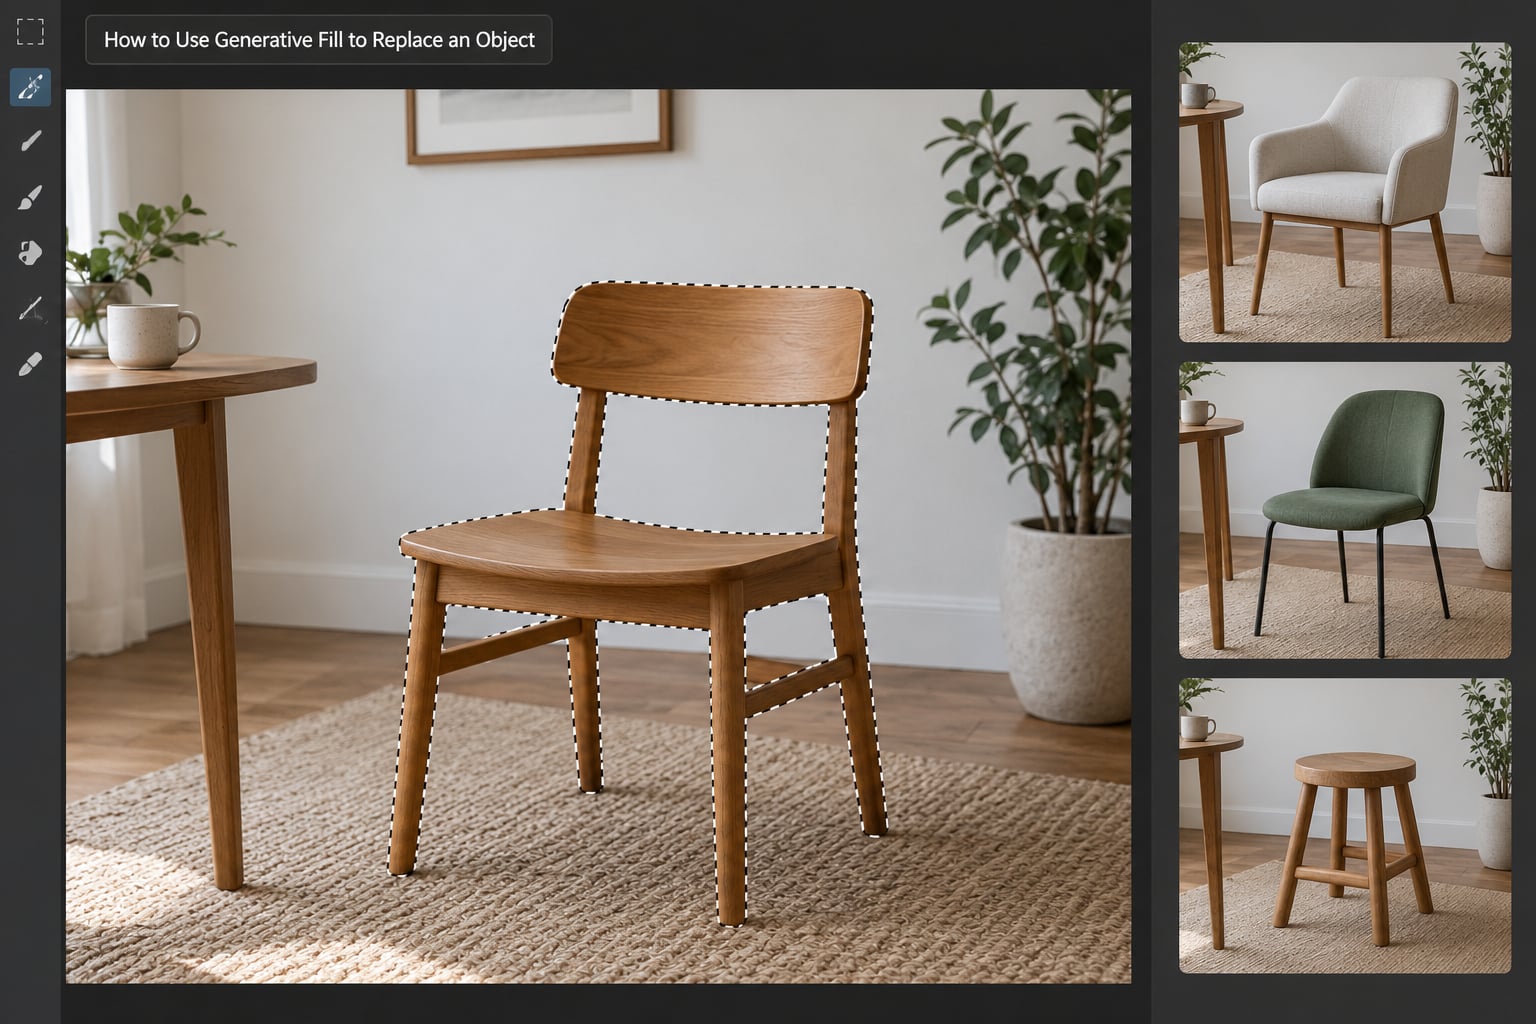
Replacing an object looks like object removal with a prompt attached, but it fails differently. The most common complaint is that Photoshop quietly changes the rest of the frame, altering perspective or swapping objects you never selected.
That happens when the selection is too generous or the surrounding context is too thin. Leave roughly a hand’s width of original pixels around the object so the model has something to work from, and describe the replacement without naming brands or people. “a plain wooden stool” stays inside what the model can render; anything specific tends to come back as a generic echo.
Generate, compare all three variations, then regenerate as many times as you like. Generations are cheap in time, and each one is a separate entry in the Properties panel until you commit one.
How to Use Generative Fill to Expand a Photo Past the Original Frame
Expanding gives you more room to crop later, which is how portrait photographers turn a waist-up frame into something that fits a wider layout. Canvas > Image Size is the older route; the current one is the Crop tool set to Generative Expand.
Drag the crop handles beyond the image edge, pick a direction from the options bar, set the fill behaviour to generative, then click Generate. You can do the same thing through the Contextual Task Bar when you already have a selection.
This is the task where texture mismatch shows most clearly. The generated strip has a different grain from the original pixels, and on older or film-scanned photographs the difference is obvious. I cover that in more depth further down, along with the blending fix.
How to Refine and Blend a Generated Area So It Looks Real
Generation gets you 80 percent of the way. The last 20 percent is ordinary Photoshop work, and it is what separates an edit that holds up at print size from one that falls apart when someone looks closely.
- Mask, do not erase. Select the layer below the generative layer, press Alt and click the subject, then click the Add Layer Mask button. Now you can paint the generated area back in with a soft black brush instead of deleting pixels.
- Watch the feathering. A hard selection edge produces a visible halo. Before generating, feather the selection by 3 to 8 pixels, or select in Quick Mask mode and paint the mask with a soft brush.
- Lower the opacity. Dropping a generative layer to 80 or 90 percent softens mismatched grain and light in one move.
- Match colour. If the generated patch reads cooler or warmer than the photo, use a Curves adjustment clipped to the layer rather than painting over it.
- Layer hygiene. Unused variations sit in the file and bloat the PSD. Delete the ones you rejected before you save.
If you want more control over how two areas of an image sit next to each other, how to use blend modes in Photoshop explains the modes that suit this kind of edge work.
Generative Fill, Generative Expand or Content-Aware Fill?
These three get confused constantly, and picking the wrong one wastes a generate. Generative Fill needs a selection or a prompt, Generative Expand needs an out-of-bounds canvas, and Content-Aware Fill is the older sampling tool that has been in Photoshop since the early 2000s.
The table below is how the other AI options fit in.
| Tool | Where it works | Best for | Watch out for |
|---|---|---|---|
| Generative Fill | Inside a selection | Adding or replacing objects, erasing distractions | Texture and lighting drift |
| Generative Expand | Beyond the canvas edge | Wider crops, aspect ratio changes | Grain mismatch on older photos |
| Remove Tool | Brush stroke over the object | Small distractions, no prompt needed | Leaves smudges on patterned areas |
| Content-Aware Fill | Inside a selection | Precise texture sampling, no cloud call | Repeats textures, works locally only |
| Generative Upscale | Whole image | Preparing small files for print | Invented detail in fine textures |
| Harmonize | Whole image | Matching light when you combine two shots | Global shift, hard to reverse |
My rule is simple. If the fix should copy the pixels that are already there, use Content-Aware Fill or the Remove Tool. If the fix should invent something new, use Generative Fill. More detail on that older tool is in how to use Content-Aware Fill in Photoshop.
Common Mistakes and the Fix for Each
The button is greyed out or missing entirely. In order of likelihood: you are on a document type the feature does not support, your plan does not include generative features, your credits are exhausted, or you have not accepted the cloud services terms in the preferences. Check your credit balance first; that one catches people most often.
The whole background changed when you meant a small area. Your selection was too large or too loosely drawn. Redraw it to hug the object with a margin, and regenerate. If it keeps happening, save the selection as a channel, select everything outside it instead, and generate from the inverse.
Proportions and scale drift outside the selection. Keep the selection tighter than feels necessary. Adding words like “same proportions, no change to surroundings” does help occasionally, but geometry the model decides to rebuild is geometry you cannot talk back. Tight selections are the actual fix.
Generated grain does not match the original. Drop the generative layer’s opacity to 85 to 90 percent, then add a light grain overlay clipped to it. On a scanned negative, adding fine monochrome noise at low opacity over the whole image usually beats fighting the seam.
Visible halo or a hard marching-ants edge. Feather the original selection, then mask the layer below the generated one and soften the mask with a 30 to 50 percent opacity soft brush.
Extra fingers or mangled anatomy on generated people. Do not fight it. Regenerate with a narrower selection that avoids hands, or generate the body and handle the hand separately. The model is good at scenes and unreliable at hands.
Results drift from what you asked for. Write shorter prompts. Three or four concrete nouns beat a paragraph, and naming a mood or an era sometimes pulls the model somewhere worse than the plain version did.
Every variation is wrong in the same way. Try a different model. The model picker in the Properties panel lists Adobe Firefly models alongside partner models such as FLUX and Gemini, and the list changes as Adobe adds and retires them. A prompt that fails on one often succeeds on another.
Frequently Asked Questions
Why is Generative Fill disabled in Photoshop?
The usual causes are an outdated build, a plan without generative features, no remaining generative credits, or an image type the tool does not support. Check the credit balance in the Properties panel first, then update Photoshop through the Creative Cloud app and confirm your cloud services terms are accepted under Preferences.
Do I need a Creative Cloud subscription to use Generative Fill?
Yes, generative features sit behind a paid Creative Cloud plan on desktop Photoshop. There is no permanent free route to the same tool inside Photoshop, though several free web-based generators handle simple object removal if you only need one clean job.
Why is Content-Aware Fill missing from my Fill menu?
Content-Aware Fill has been folded into the newer fill workflows in current Photoshop releases, so you will often reach it through the Remove Tool or the fill options in the Properties panel instead of the old Fill menu. On a locked layer it also disappears, so check that the layer is unlocked first.
How long does Generative Fill take?
A single generation usually finishes within a few seconds once the request reaches Adobe’s servers. If nothing appears after roughly a minute, the connection has probably dropped or you have run out of credits, which is when the button quietly stops responding.
Does Generative Fill replace the whole background?
Only if you select the whole background. The tool works strictly inside your selection, which is why an over-generous selection is the most common reason a whole scene gets rewritten. Keep the selection tight, save it as a channel, and select the inverse when you want to swap backgrounds around a subject.
Is Generative Fill acceptable for commercial and client work?
Adobe positions its Firefly models as trained for commercial use, and that is the safest ground to stand on for client and editorial delivery. Many photographers still disclose AI edits to clients, and attaching Content Credentials to exported files keeps that disclosure attached to the image itself.
Conclusion
Start with the selection, not the prompt. Draw a tight area with a small margin of original pixels around what you want to change, open Generative Fill from the Contextual Task Bar, write a short prompt with concrete nouns, and generate several variations before you refine anything.
Once you have the variation you want, the rest is standard editing. Mask it, feather the edge, dial back the opacity if the grain fights you, and check that scale and shadow direction match the rest of the frame. Tight selection first, blending second, and you will avoid most of the problems people describe in the forums.