
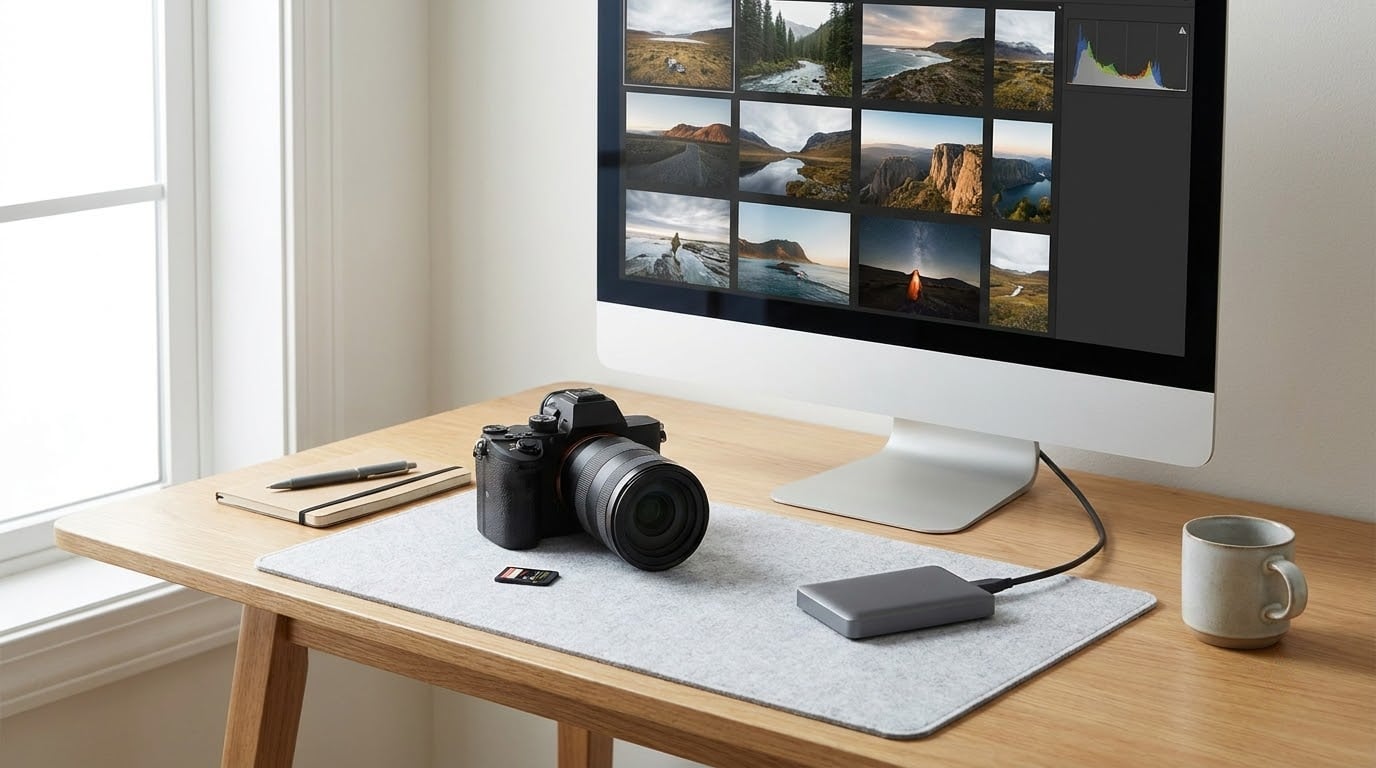
If you want the short answer: darktable is a free, open-source RAW developer and photo manager that runs on Windows, macOS and Linux. To learn how to use darktable, you import images, cull them in the lighttable, develop each one in the darkroom by switching on a handful of modules in a fixed pipeline order, then export through an export preset. Your originals are never modified.
I have watched a lot of people bounce off darktable in the first ten minutes, and it is almost always the same reason: the interface looks like it has two hundred things to learn. It does have that many modules, but most people who use darktable seriously only ever touch five or six of them. That is the part nobody tells you at the start.
This walkthrough is written for darktable 5.x on Windows, macOS and Linux. Menu labels drift a little between versions and operating systems, but the vocabulary does not change: module, pixel pipeline, lighttable, darkroom, style, sidecar file. Learn those five words and everything else in the program makes more sense.
Table of Contents
- What You Need
- Step-by-Step: How to Use Darktable From Import to Export
- 1. Install and launch darktable
- 2. How to use darktable to import images into a catalog or folder
- 3. Choose a working color profile
- 4. Set exposure, contrast, and white balance
- 5. Refine color with color balance and color zones
- 6. Apply sharpening, noise reduction, and detail
- 7. Make local adjustments when needed
- 8. Create a consistent look with styles or presets
- 9. Compare the result and refine the edit
- 10. Export or print the finished image
- Common mistakes
- Frequently Asked Questions
- Start With One Photograph
What You Need
Before you start, you need three things: a computer, a folder of images, and a spare drive. That is genuinely it. darktable itself is free and open source, so there is nothing to buy and no account to create.
On hardware, darktable is comfortable on any machine that runs a current operating system. It holds images in memory while you edit them, so more RAM means faster switching between files. A 16 GB machine handles a shoot of a few hundred RAW files without complaint. A separate colour-calibrated monitor is the one upgrade that genuinely changes your results, because every decision about exposure and colour depends on what your screen shows you.
Make sure you have free space at least twice the size of your shoot before you start. darktable writes XMP sidecar files next to your images and writes exported files wherever you tell it to. Running out of room mid-export is a bad way to learn.
Back up your camera cards before importing, and keep the original card or a second copy until you have exported and checked the results. You will never lose an original to darktable, but you can lose one to a full disk.
On compatibility, the current release line is 5.x, and menus sometimes move between minor versions. If a screenshot on the web shows a different layout than your screen, press the hamburger menu at the top right; every command in darktable is reachable from there, and it doubles as a search box when you type.
Step-by-Step: How to Use Darktable From Import to Export
1. Install and launch darktable
Go to darktable.org and download the build for your system. Windows users get an installer that handles the file associations. macOS users download a disk image and drag the app into Applications; Apple Silicon and Intel builds are listed separately. Linux users have the most choice: a Flatpak from Flathub, an AppImage that runs straight from the file, or the version in their distribution repository.
On first launch, darktable opens in the lighttable view with either a film manager on the left or an empty dark room if no folder is configured. That empty state is normal on a new install.
Two settings are worth changing straight away. Open the hamburger menu, go to preferences, and set your language and screen layout for your display. Then, while you are in there, turn on auto-apply pixel workflow defaults in the darkroom preferences so the sensible modules load with every new image.
How do you know it worked? Pick a folder of RAW files, drag them onto the lighttable, and you should see thumbnails within a few seconds.
2. How to use darktable to import images into a catalog or folder
Here is the first thing that confuses newcomers: darktable does not import your files. It references them. Your RAW files stay exactly where they are on disk, and darktable builds a record pointing at them. This is why your originals are safe and why moving a shoot to another computer is straightforward, as long as the sidecar files travel too.
You have two ways to work. In filemanager mode, you browse folders the way you would in a file browser and open images directly, with no database at all. This is a perfectly valid way to use the program and many experienced users never use anything else. In database mode, darktable tracks images, ratings, tags and metadata in a local catalogue stored in its configuration folder.
For a first session, use the folder workflow. Drag a folder onto the lighttable, press Enter to recurse into subfolders, and import the whole folder. If you would rather not build a catalogue yet, press W instead and open the single image you want to practise on.
Start small. Import twenty images, not four thousand. Learning the controls on a shoot you can finish in an evening beats a two-week backlog you never open.
Once images are in, cull them. Use the zoomable culling mode (the button at the bottom right of the lighttable) with two monitors or the 2×2 grid, right-click to set a colour label, and use the rating shortcuts in the bottom panel to flag rejects. Keep the picks, reject the rest, and you have cut a shoot of eight hundred frames down to forty without leaving darktable.
How do you know culling worked? Your rejects are visually distinct at a glance in the thumbnail grid, and the picks number is small enough that you can actually finish editing them.
3. Choose a working color profile
Darktable applies a camera profile to your RAW automatically from its own profile database, and the output profile defaults to sRGB. Leave both alone until you have a reason. Most beginners who start adjusting profiles by hand end up with colour shifts they cannot explain.
Where this matters is judging. Turn on color assessment mode from the hamburger menu or the quick access panel, and the image sits on a neutral mid-gray surround so you are no longer fooled by the monitor’s own background. If a photo looks correctly exposed there and blown out on your normal desktop, your desktop was lying to you.
Set your monitor brightness so mid gray sits comfortably below the white point, and leave the rest of the system calibration for another day. Getting this roughly right beats leaving it at factory brightness, which is almost always far too bright for judging photographs.
How do you know the profile is right? The skin in a portrait looks like skin, and the histogram in the darkroom panel shows a smooth spread rather than spikes jammed against both edges.
4. Set exposure, contrast, and white balance
This is the heart of a basic darkroom edit, and the order matters more than the sliders. Work from the left of the pixel pipeline to the right, because that is the order the data passes through the modules. Adjusting a module on the far right and then something on the far left makes the right-hand change look like it did nothing.
Start with exposure. The exposure module carries black level, exposure, highlight recovery, shadow recovery, brightness, contrast, saturation and tonality. Set the black level first by clicking the picker and choosing an area of true black in the frame. Then set exposure until the histogram sits comfortably inside the range, with a little room at the top rather than hard against it.
Watch the waveform instead of the histogram when you are close to clipping. The histogram is a summary and hides detail; the waveform shows you exactly which pixels are approaching the ceiling and which have already crossed it. Toggle between the histogram, waveform, RGB parade and vectorscope with the icons at the bottom of the module panel.
Next, white balance. The white balance module is quick when the cast is obvious: drag the temperature slider until the image looks neutral. For a stubborn cast, a heavy yellow from an indoor tungsten frame, go to the color calibration module and use its eyedropper on something you know is white or neutral grey, such as a shirt collar or a sheet of paper in the frame.
Use highlight recovery before you crush anything into white. It pulls detail back from clipped areas far more gracefully than lowering exposure alone, because it works on the highlights rather than the whole frame.
How do you know the tone is right? At 100% zoom, no area of the frame is a flat white or flat black blob, and the histogram has gaps rather than solid spikes at both ends.
5. Refine color with color balance and color zones
Once white balance is neutral, shift your attention to the picture’s mood rather than its accuracy. The color balance RGB module is the first tool to reach for: it has lift, gamma and gain controls that work on shadows, midtones and highlights separately, which makes it good for warming skin while cooling the shadows without touching the saturation slider.
For a whole-frame correction when a color cast runs through every region of the image, color zones lets you sample a handful of points and nudges the whole palette toward them. Use it sparingly. Two or three zones are usually plenty; a dozen turns into an effect rather than a correction.
The color assessment surround is the honest judge here. Turn it on, then step back, literally, from the monitor. Color that looks reasonable in a full-screen preview often reads as too warm or too green once the frame is surrounded by nothing but gray.
How do you know you have gone too far? The saturation module on the main panel will show you numbers above what a real scene plausibly contains. If faces are turning orange, step back one adjustment at a time.
6. Apply sharpening, noise reduction, and detail
Technical cleanup comes before creative sharpening, and the two live in different places. Noise reduction is part of the technical corrections that darktable applies early: denoise (profiled) builds a noise profile for the camera and ISO you actually shot, which is why it stays subtle where generic denoising smears detail. It is quieter than the equivalent in Lightroom or DxO PhotoLab and slightly more visible on screen at 100%.
Lens correction handles distortion, chromatic aberration and vignetting. With auto-apply on, these modules load with your profile and need almost no configuration, which is the point: enable them, glance at the corners, move on.
Creative sharpening happens late, with the sharpen module. The four controls you need are radius, which sets how wide the sharpening spreads, detail, which separates fine texture from noise, amount, the overall strength, and threshold, which stops flat areas from getting crunchy halos. Start around radius 1.0, detail 2.0, amount 0.3 and raise from there. Check the result at 100% zoom, because sharpening that looks right fitted to the screen often looks crunchy on a print.
How do you know it worked? Zoom to 100% on a high-contrast edge. You want a crisp line with no white fringe, not an edge that glows.
7. Make local adjustments when needed
Global adjustments treat the whole frame equally, which is wrong for most photographs. A subject that is darker than its surroundings gets a mask so you can lift it without brightening the sky.
Use the mask selector at the top of the module group in the darkroom. A drawn mask is the most predictable: click the brush, set its softness, and paint the area you want to change. Parametric masks are good for shapes, because you describe an ellipse or gradient and adjust it numerically. Gradients and radial masks cover the common cases of a bright sky and a subject in the middle of the frame.
Darktable 5.x also offers AI masking, where the software identifies subjects such as skies, foliage or buildings and builds the mask for you. It saves a lot of painting on outdoor frames. Treat it as a strong starting point rather than a finished selection, and check the edges at 100%.
Then lower the opacity of the module group. Local adjustments should be a nudge you can barely find. If someone can point at the retouched area immediately, it went too far.
8. Create a consistent look with styles or presets
These two get confused constantly, and the difference is simple. A preset applies to one module on one image. A style applies to a named group of modules across as many images as you select, which is what makes it the tool for a consistent look across a shoot.
To create a style, get an image where you are happy with the look, right-click the header of any module in the darkroom, and choose create style. Name it something descriptive. Apply it to another frame from the same shoot and see whether it still works. Styles built on colour and contrast travel well; styles built on exposure corrections do not, because every frame needs a different amount.
On the lighttable, select the images you want and choose styles from the hamburger menu or the style menu in the bottom panel. Be selective. Applying the same numerical correction to every image in a set that spans a window and a candlelit evening will produce a mess, because identical values cannot fit different lighting.
Styles and presets live as files in your darktable configuration folder, which means you can copy them to another machine to keep your setups in sync.
9. Compare the result and refine the edit
Judging an image you have been staring at for twenty minutes does not work. Your eye adapts and the edit starts to look better than it is. Get away from it for ten minutes, then come back.
Two tools help. Snapshots capture the image at its current state with a single keystroke, so you can push a correction, compare, and undo without disturbing your edit history. The history stack on the left of the darkroom shows every module change in order, and clicking any entry jumps the image back to that point.
For a series, use the lighttable. Zoom the thumbnails to a consistent size, turn on the selected overlay, and step through your edits at a glance. Anything that suddenly looks heavier than its neighbours usually has too much sharpening or a heavier curve than the rest, and the grid makes that obvious in a way a single image never will.
10. Export or print the finished image
Select your images in the lighttable and press the export button at the bottom left. You get three choices on the left side: export to a file, export to an internal gallery, or export to another storage module. For most work, export to a file and choose where the results go.
Export presets are the part worth spending five minutes on. Click manage presets and create one for each destination you actually use, because doing this by hand per shoot is how people end up with dull, misty files. A web preset writes sRGB JPEGs around 2000 pixels on the long edge at quality 85 to 90. A print preset writes a full-resolution file in the colour space your printer expects. A large-format preset writes 16-bit TIFF when you are sending images to a lab or a second-stage editor.
The four formats you will actually use, and the settings that matter for each:
- JPEG — web, social, quick proofing and email. Quality 85-90, sRGB, roughly 2000px on the long edge for screen or full resolution for print.
- PNG — screenshots and graphics with text or flat colour. Lossless, larger files, and no quality slider to fiddle with.
- TIFF — print labs, archiving and second-stage editing. 16-bit, in the colour space the destination expects.
- WebP — smaller web files. Compresses well at high quality, but check that your target site accepts it before you export a whole shoot into it.
Set the filename pattern too. darktable writes files named after the original plus a suffix such as _edited, and if that file already exists it will not overwrite it without you asking. Choose a suffix deliberately so your exports never sit next to your RAWs looking identical.
How do you know the export worked? Open one file in a browser or a normal image viewer. If it looks foggy, grey, oddly soft or unnaturally saturated, the problem is in the export settings, not in your edit. That single check saves more re-exports than anything else in this guide.
For prints, use the print module instead. It gives you a paper size, a border and a position, with the colour management handled for you. Get one image right on paper before you run a batch through it.
Common mistakes
Most beginner problems in darktable come from one of a handful of things. Each has a specific correction.
Leaving the camera profile to chance or applying one by hand. darktable applies its own profile automatically. If you also apply a camera or working profile manually, you get a double correction and colours shift in ways you cannot predict. Set it once and leave it.
Images that come out grey and foggy. This is the most common new-developer complaint and it has three usual causes: no tone mapper enabled, the wrong display module, or tone mapping applied before exposure. Confirm your exposure first, then check that a tone mapper is switched on in the pipeline. Default scene-referred setups in 5.x use AgX; if you have enabled Filmic RGB or Sigmoid, turn it off before you compare.
A heavy yellow or green cast that white balance will not remove. The temperature slider gets you close and then runs out of road. Switch to the color calibration module and use the eyedropper on a known neutral in the frame. That is what forum regulars reach for, and it works on casts that no amount of slider dragging will fix.
Blown highlights and crushed shadows. Both usually mean exposure was set by eye against a bright screen. Use the waveform, not the histogram, and use the highlight recovery control in the exposure module rather than pulling exposure down until the whole frame looks flat.
Over-sharpening. If detail at 100% has bright halos along edges, the radius or amount is too high. Reduce it, and remember that sharpening is the last step before export, not something you dial up to see progress.
Adjusting modules out of pipeline order. The darkroom module list left to right is the order the data passes through. A change you make on the right affects the output of everything before it, so corrections made on the left are the ones that get overwritten. Work left to right and re-check the left side after any change on the right.
Edits that seem to have no effect. The module is switched off, or something later in the pipeline is overriding it. Check the small enable button on the module header. A disabled module still shows all its controls and simply does nothing.
Worrying about destroying your files. You cannot, and that is worth being clear about. Every edit is stored in a sidecar XMP file next to your image, named like IMG_1234.xmp. The RAW itself is opened read-only. What does destroy your edits is deleting the sidecars or separating them from the images, so back them up with the same discipline you apply to the originals.
Applying one correction to an entire shoot. Styles are designed for consistency, not for identical numbers. Apply a style, then check each frame and undo it on the ones where it does not belong.
Foggy, washed-out or dull exports. Open the exported file outside darktable. If it looks wrong there, you exported with a low JPEG quality, the wrong colour profile, or without the sharpening module enabled. Fix the export preset, not the edit.
Fighting the interface instead of the image. The default layout shows every module in the program, which is the single biggest reason beginners quit. Turn off the modules you do not use by clicking their power buttons, keep the quick access panel for the five you do, and drag the remaining modules into a smaller group so the panel fits your screen.
Frequently Asked Questions
Is darktable suitable for beginners?
Yes, with a caveat. darktable is free, runs on all three major operating systems and never modifies your original files, so it is a safe place to learn. The interface is denser than Lightroom and the module list is long, so expect a few evenings before it feels natural. Most users settle on five or six modules and ignore the rest.
Can darktable edit RAW files non-destructively?
Completely. Your RAW file is never written to. darktable stores every adjustment in a separate XMP sidecar file next to the image, and the export process renders a new JPEG or TIFF. You can undo any change, reset an image, or move a shoot to another computer by copying the folder with its sidecars and the edits come along.
How do I set the correct color profile in darktable?
In most cases you do not need to. darktable applies a camera profile automatically from its own profile database, and the output profile defaults to sRGB. Leave both at their defaults and judge your work with color assessment mode turned on, which places the image on a neutral gray surround so your monitor background cannot distort your perception of the tones.
What is the best way to organize photos in darktable?
For learning, use the folder workflow: browse with filemanager mode and open images directly, with no database to maintain. Once your library grows, switch to the catalogue so ratings, tags and metadata are tracked for you. Use collections for the active edit, colour labels for quick grouping, and tags for anything you want to search for later.
How do I export a full-resolution image from darktable?
Select your images in the lighttable and press the export button, choose export to a file, then set the target folder. Under size, choose full resolution instead of a preset dimension. Set the format and colour profile your destination needs, sRGB for web use, and the colour space your printer expects for prints. Save these settings as an export preset.
Start With One Photograph
If you do one thing this week, open a single RAW file and take it all the way through. Set the profile and leave it, fix the black level, set exposure against the waveform, neutralise white balance, turn on a tone mapper, sharpen lightly at 100% zoom, then save that setup as a style so the next frame starts from the same place.
Compare the result with the original before you export, then export it and open that file in a plain viewer. Five minutes of that loop teaches more than an hour of watching someone else click through menus, and it is the fastest way to find out which five or six modules are the ones you will actually use.